

People & Teams
2. People & Teams
The People & Teams section allows administrators to manage workspace members and teams. Administrators can add new members by sending an invitation email or by creating a user account directly.
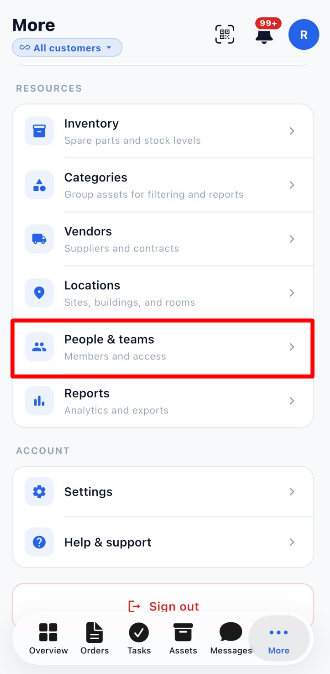
2.1 Add a Member
- Open Settings.
- Select People & Teams.
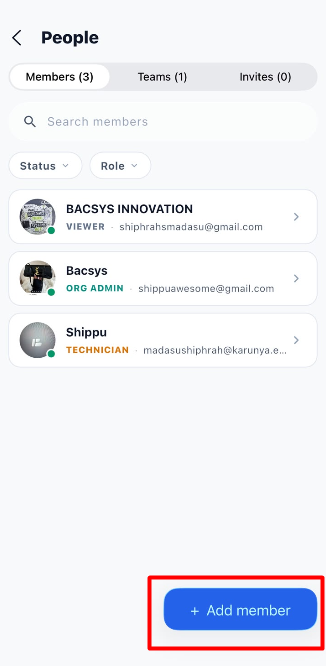
- The People page is displayed.
- Click + Add member.
- The Add a member pop-up is displayed.
The Add a member pop-up provides two options:
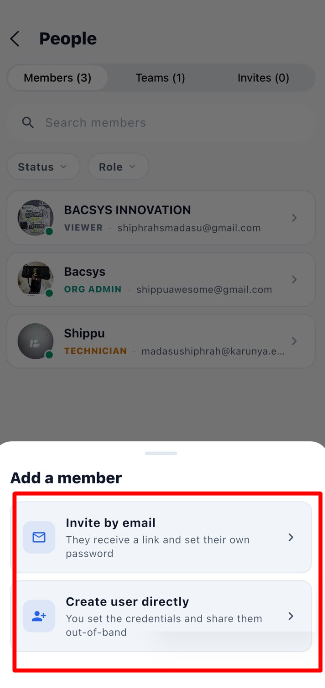
| Option | Description |
|---|---|
| Invite by email | Sends an invitation email to the user. The user receives a link to join the workspace and can set their own password. |
| Create user directly | Allows the administrator to create the user account directly by entering the user's details and credentials. |
2.2 Invite by Email
The Invite by email option allows the administrator to invite a user to join the workspace.
Steps
- Open Settings.
- Select People & Teams.
- Click + Add member.
- Select Invite by email.
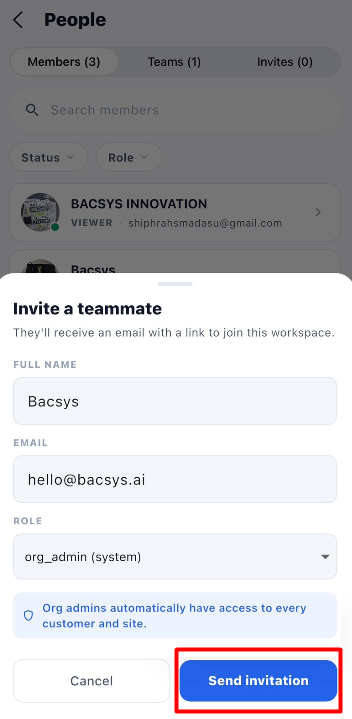
- The Invite a teammate pop-up is displayed.
- Enter the user's Full Name.
- Enter the user's Email address.
- Select the required Role.
- Click Send invitation.
- The invitation is sent to the user's email address.
- The invitation is saved under the Invites section.
- The invited user can use the invitation link to join the workspace and complete their account setup.
Invite by Email Fields
| Field / Option | Description |
|---|---|
| Full Name | Enter the full name of the user being invited. |
| Enter the user's email address. | |
| Role | Select the role to be assigned to the user. |
| Cancel | Closes the invitation pop-up without sending the invitation. |
| Send invitation | Sends the workspace invitation to the specified email address. |
2.3 User Roles
When adding a member, the administrator can select the appropriate role based on the user's responsibilities and required access.
| Role | Description |
|---|---|
| Customer Admin | Provides customer-level administrative access. |
| Org Admin | Provides organization-level administrative access. |
| Technician | Provides access required for performing maintenance activities and completing assigned work. |
| Viewer | Provides view-only access to the available information. |
2.4 Create User Directly
The Create user directly option allows an administrator to create a user account immediately without sending an invitation.
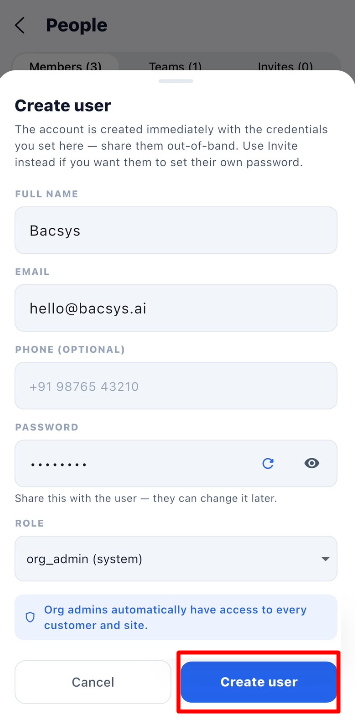
Steps
- Open Settings.
- Select People & Teams.
- Click + Add member.
- Select Create user directly.
- The Create user pop-up is displayed.
- Enter the user's Full Name.
- Enter the user's Email address.
- Enter the Phone (Optional) number, if required.
- Set a Password for the user.
- Select the required Role.
- Click Create user.
- The user account is created immediately.
- The newly created user is added to the Members list.
Create User Fields
| Field / Option | Description |
|---|---|
| Full Name | Enter the full name of the user. |
| Enter the user's email address. | |
| Phone (Optional) | Enter the user's phone number, if required. |
| Password | Set the initial password for the user account. |
| Role | Select the role to be assigned to the user. |
| Cancel | Closes the pop-up without creating the user. |
| Create user | Creates the user account and adds the user to the workspace members. |
2.5 Manage Members
The Members tab displays the users who have been added to the workspace.
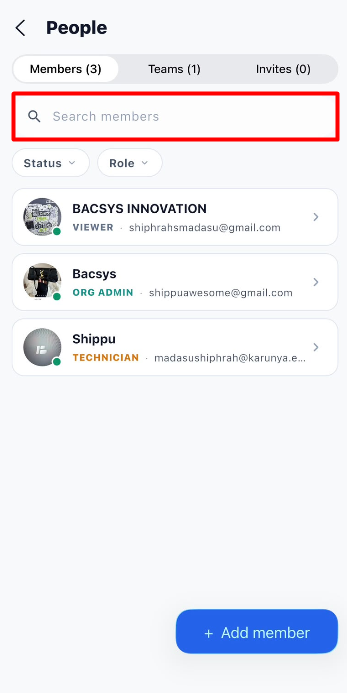
Search Members
- Open People & Teams.
- Select the Members tab.
- Click Search members.
- Enter the user's name or email address.
- The matching users are displayed.
Filter Members by Status
Click Status to filter members based on their account status.
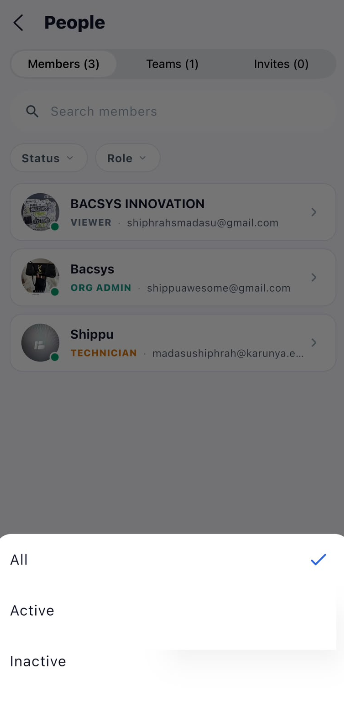
| Status | Description |
|---|---|
| All | Displays all members. |
| Active | Displays only active members. |
| Inactive | Displays only inactive members. |
Filter Members by Role
Click Role to filter members according to their assigned role.
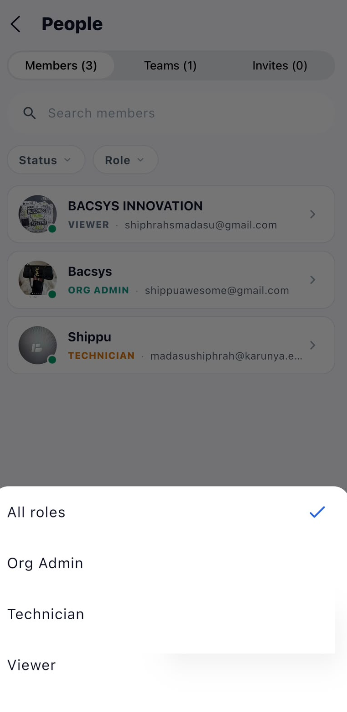
| Role Filter | Description |
|---|---|
| All roles | Displays members with all available roles. |
| Org Admin | Displays members assigned the Org Admin role. |
| Technician | Displays members assigned the Technician role. |
| Viewer | Displays members assigned the Viewer role. |
2.6 Manage Invitations
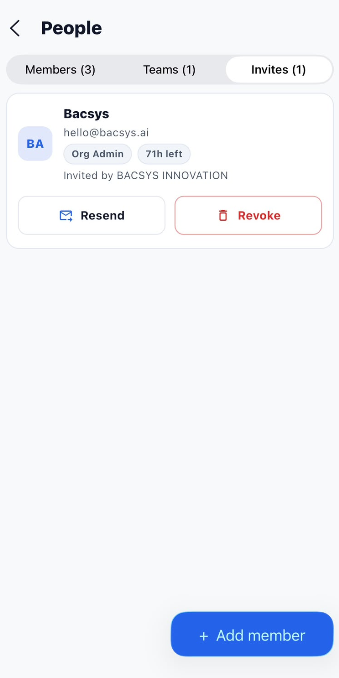
After an invitation is sent, it is available in the Invites tab until the invitation is accepted or managed by the administrator.
Resend an Invitation
If the invited user has not received or completed the invitation, the administrator can resend it.
- Open People & Teams.
- Select the Invites tab.
- Locate the required invitation.
- Click Resend.
- The invitation is sent again to the user's email address.
Resend Invitation
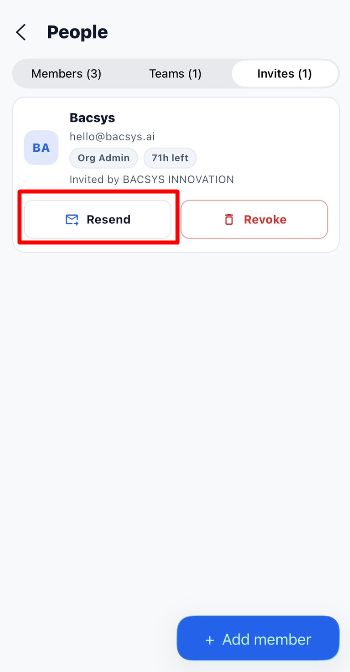
If the invitation has already been sent but the user has not received it, the administrator can use the Resend option to send the same invitation email again.
Steps
- Open Settings.
- Select People & Teams.
- Open the Invites tab.
- Locate the required invitation.
- Click Resend.
- The same invitation email is sent again to the invited user's email address.
Revoke an Invitation
If an invitation is no longer required, the administrator can revoke it.
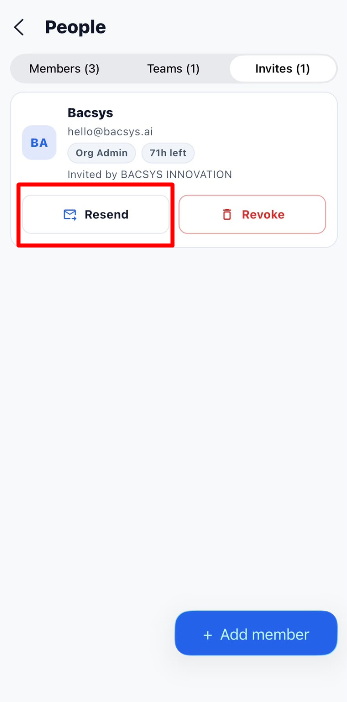
- Open People & Teams.
- Select the Invites tab.
- Locate the required invitation.
- Click Revoke.
- The invitation is cancelled.