

Task
Tasks Module
The Tasks module allows users to view and manage tasks based on the selected customer, location, and date. Users can filter the task list, view pending and completed tasks, scan a location QR code, complete the associated checklist, and submit the task.
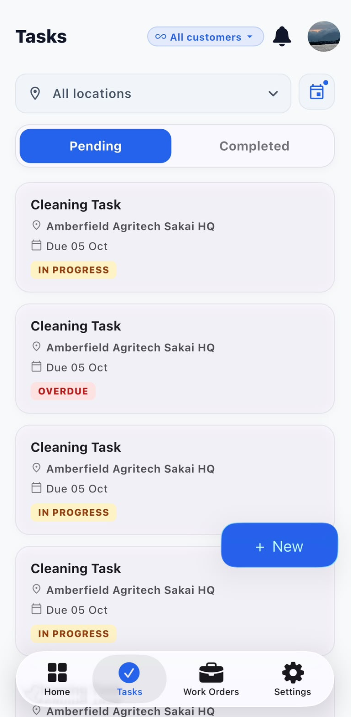
1. Select Customer
The All customers option allows users to select the customer whose tasks they want to view.
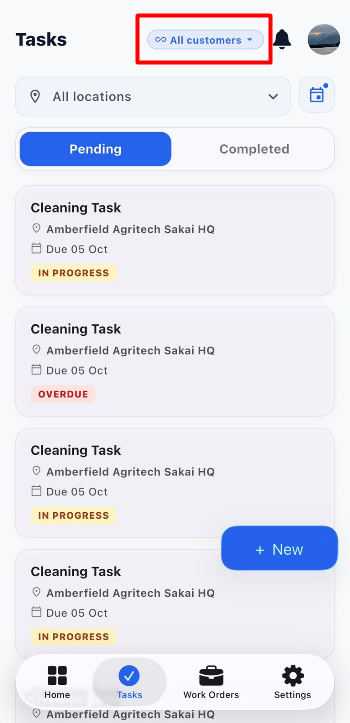
Steps
- Open the Tasks module.
- Click All customers at the top of the page.
- A customer selection pop-up is displayed.
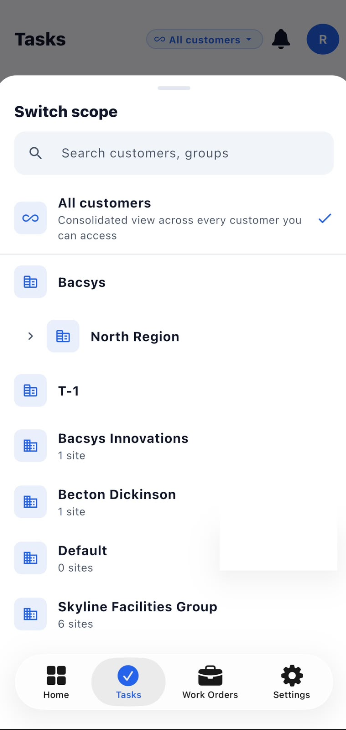
- Use the Search option to find the required customer or site.
- Select the required customer.
- The task list is updated according to the selected customer.
2. Select Location
The All locations option allows users to filter tasks based on a specific site or location.
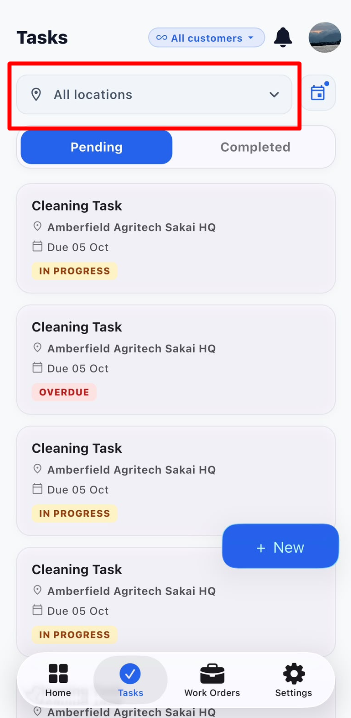
Steps
- Click All locations.
- A location selection pop-up is displayed.
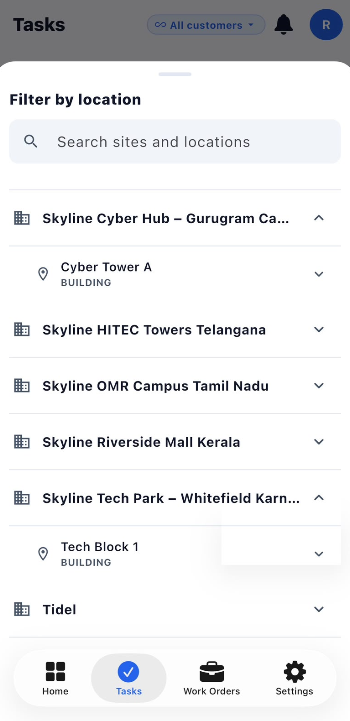
- Use the Search option to find the required site or location.
- Select the required site.
- The task list is updated according to the selected location.
3. Filter Tasks by Date
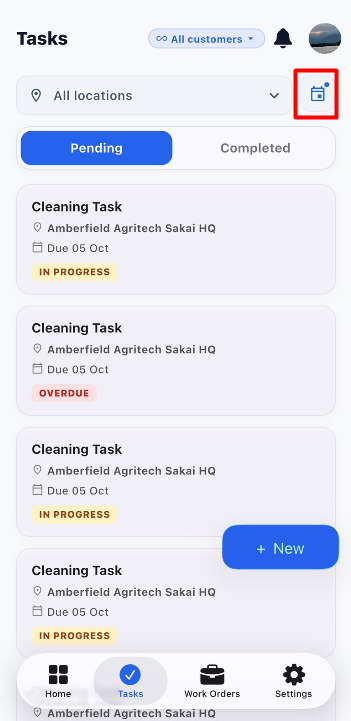
The Calendar option allows users to filter tasks based on their creation date or due/scheduled date.
Steps
- Click the Calendar icon.
- The Filter by date pop-up is displayed.
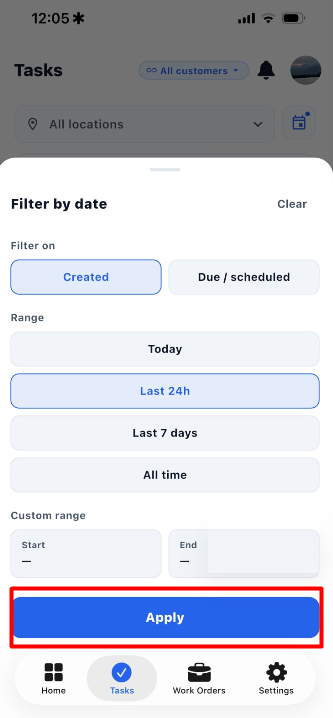
- Under Filter on, select the required option:
- Created – Filters tasks based on when they were created.
- Due / scheduled – Filters tasks based on their due or scheduled date.
- Under Range, select the required date range:
- Today
- Last 24h
- Last 7 days
- All time
- To select a specific period, use Custom range.
- Select the Start date.
- Select the End date.
- Click Apply.
- The task list is updated based on the selected customer, location, and date range.
4. View Pending and Completed Tasks
After selecting the required customer, location, and date range, the Tasks page displays the tasks matching the selected filters.
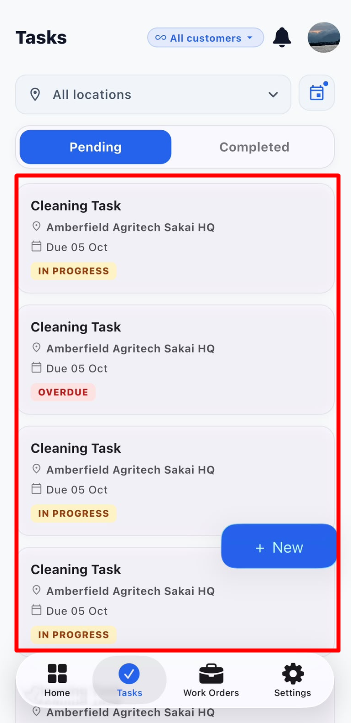
| Status / Option | Description |
|---|---|
| Pending | Displays tasks that are still pending and require action. |
| Completed | Displays tasks that have been successfully completed and submitted. |
| In Progress | Indicates that the task is currently being worked on. |
| Overdue | Indicates that the task has passed its due date. |
Steps
- Apply the required Customer filter.
- Apply the required Location filter.
- Apply the required Date filter.
- Click Pending to view pending tasks.
- Click Completed to view completed tasks.
- Select a task to open and continue working on it.
5. Scan Task QR Code
A QR code available at the required location can be used to access the associated task and checklist.
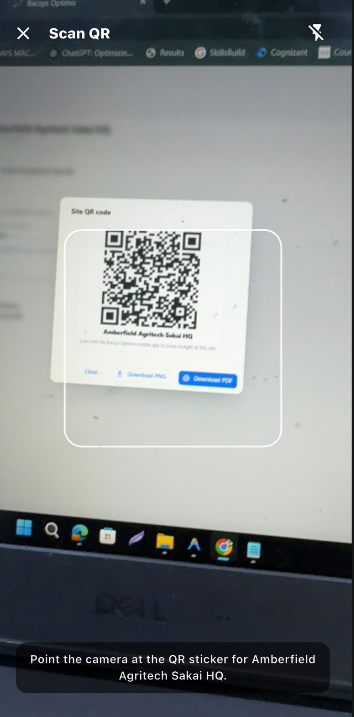
Steps
- Open the Pending tasks section.
- Go to the required site or location.
- Locate the QR code available at the location.
- Open the Scanner.
- Scan the QR code.
- The system identifies the location and the associated task.
- The associated Checklist opens.
- Complete the required checklist questions.
- Submit the checklist after completing all required questions.
6. Complete a Task Using the Checklist
After successfully scanning the QR code, the associated checklist opens. The checklist must be completed before the task can be submitted.
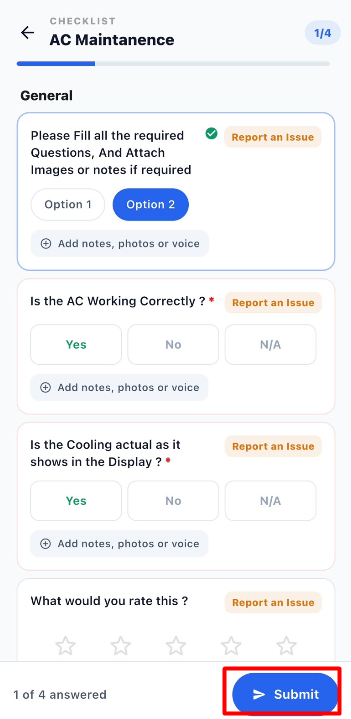
6.1 Complete the Checklist
- Scan the QR code at the required location.
- The associated Checklist opens.
- Review each checklist question.
- Answer all required questions.
- Select the appropriate answer for each question.
- If required, click Add notes, photos or voice to provide additional information.
- Use Report an Issue when an issue needs to be reported for a checklist item.
- Continue through the checklist until all required questions are answered.
6.2 Submit the Checklist
- Review the completed checklist.
- Click Submit.
- The system checks whether all required questions have been answered.
- If all required questions are completed, the checklist is submitted successfully.
- The task is moved from the Pending list to the Completed task list.
7. Required Questions Validation
All required questions must be answered before the checklist can be submitted.
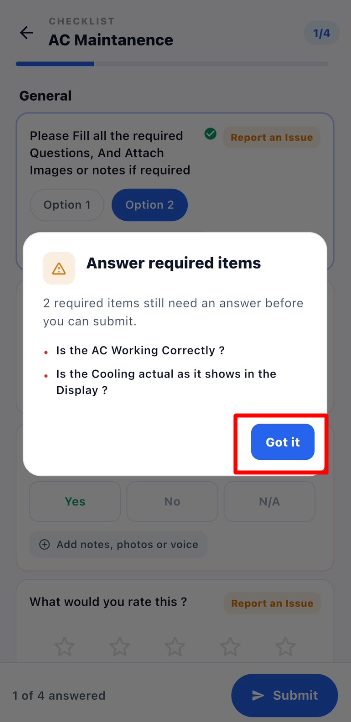
If required questions are unanswered, the system displays an Answer required items notification.
Steps
- Click Submit without completing all required questions.
- The Answer required items notification is displayed.
- The notification lists the required questions that still need an answer.
- Review the questions shown in the notification.
- Click Got it to close the notification.
- Return to the checklist.
- Answer all the remaining required questions.
- Click Submit again.
- Once all required questions are completed, the checklist is submitted.
- The task is moved to the Completed task list.
8. Completed Tasks
After a task is successfully submitted, it is moved from the Pending list to the Completed list.
Completed tasks remain available in the Completed section along with their corresponding completion date.
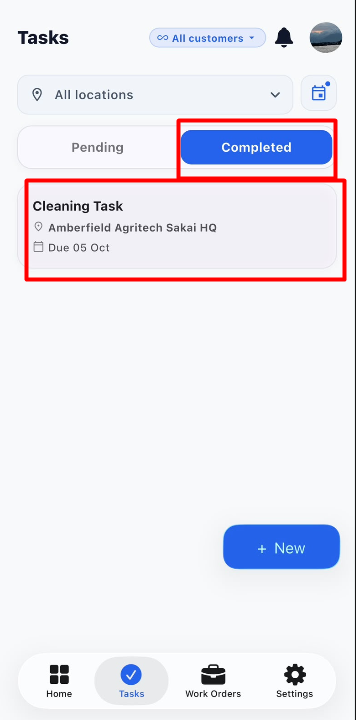
Steps
- Complete all required checklist questions.
- Click Submit.
- The task is successfully submitted.
- The task is removed from the Pending list.
- The task is added to the Completed list.
- The Completed list displays the completed tasks along with their respective dates.
- Users can select a completed task to view its details when required.
9. Create a New Task
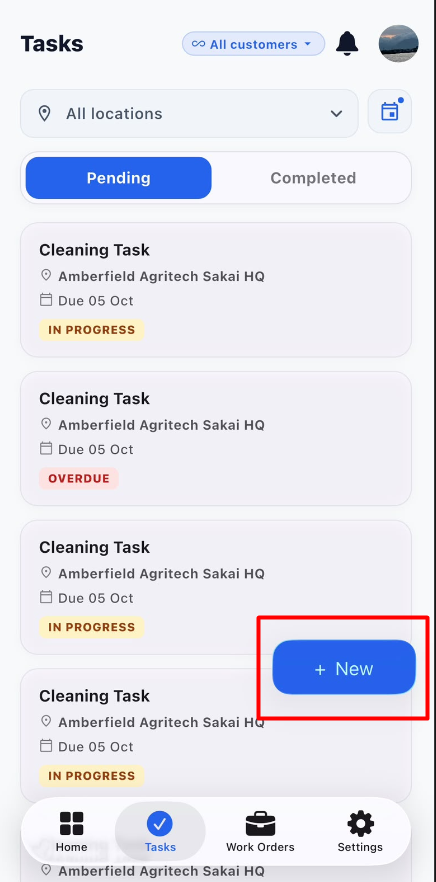
The Tasks module allows users to create a new task directly from the mobile application. A new task can be created by selecting the required Site and Checklist.
Steps to Create a New Task
- Open the Tasks module.
- Click the + New button.
- The New task pop-up is displayed.
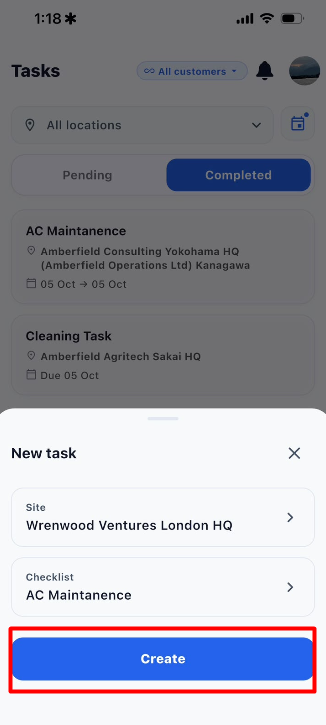
- Select the required Site.
- Select the required Checklist.
- Review the selected site and checklist.
- Click Create.
- The task is created and added to the task list.
- The newly created task will be processed according to its task status.
- After the task is completed successfully, it will be available in the Completed task list.
New Task Options
| Field / Option | Description |
|---|---|
| Site | Select the site where the task needs to be performed. |
| Checklist | Select the checklist that needs to be completed for the task. |
| Create | Creates the task using the selected site and checklist. |
| Close (X) | Closes the New task pop-up without creating the task. |
10. Overall Tasks Module Workflow
Open Tasks Module
      ↓
Select Customer
      ↓
Select Location
      ↓
Apply Date Filter
      ↓
View Pending / Completed Tasks
      ↓
Select or Create Task
      ↓
Complete Required Checklist
      ↓
Click Submit
      ↓
Validate Required Questions
      ↓
Task Completed
      ↓
Task Moved to Completed List
      ↓
Completion Date Displayed