

Control Studio
Control Studio
A modern software suite for configuring, programming, and managing IO Controllers with ease.
Pre-Requisites
Before installing Control Studio, ensure the following:
- Windows 10 or higher
- CH340 Drivers installed — required for RS485 communication
- RS485 to USB Converter — used for connecting IO Controllers
Installation Guide
- Download the Control Studio installer from the official link.
- The package includes all required files — no separate components needed.
- Right-click → Run as Administrator → Complete the setup.
- After installation:
- A desktop shortcut will be available, or
- Launch it from Windows Start Menu.
Launching Control Studio
- Open Windows Search and type Control Studio.
- Right-click the app.
- Select Run as Administrator.
Control Studio – Quick Start Guide
1. License Activation
- On first launch, the License Screen appears with your Host ID.
- Copy the Host ID → send to hello@bacsys.ai.
- You will receive a License Key → paste it into the license field.
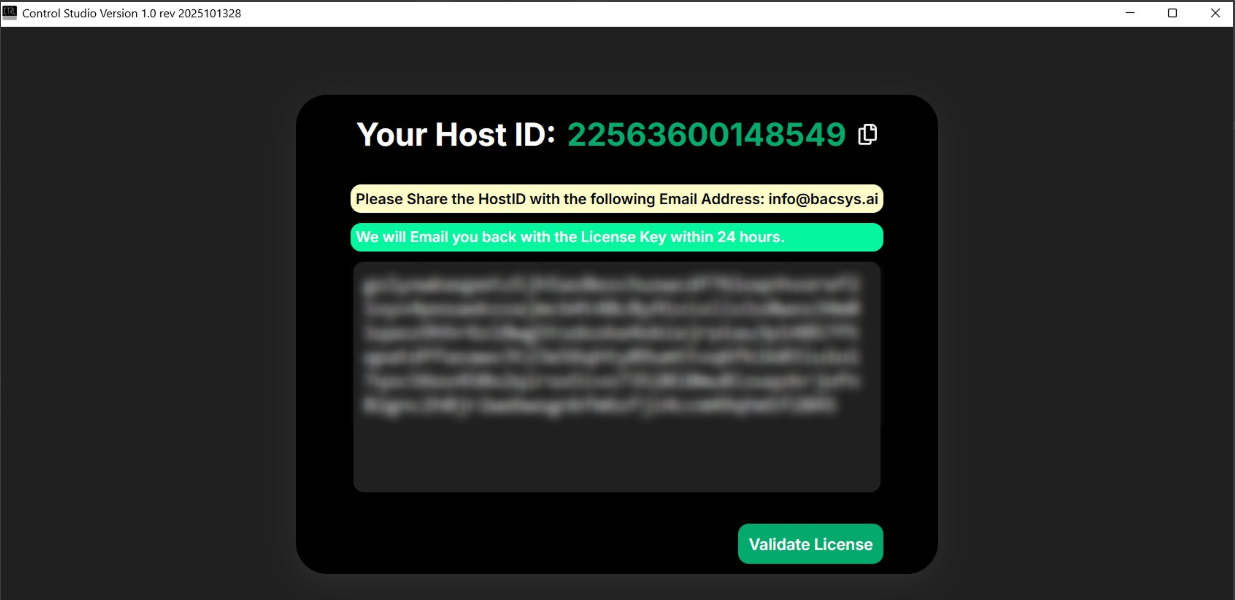
- Click Validate to activate the license.
2. Create a New Project
-
Click Create New Project.
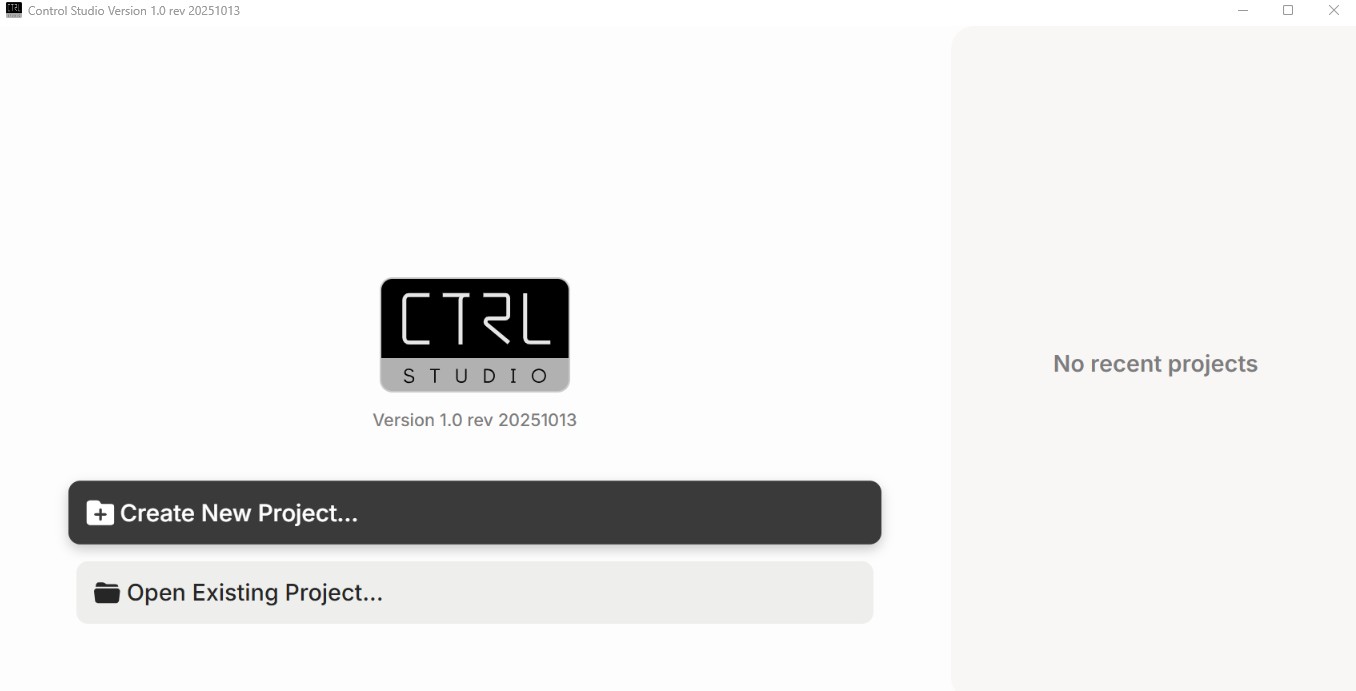
-
Select the project location.
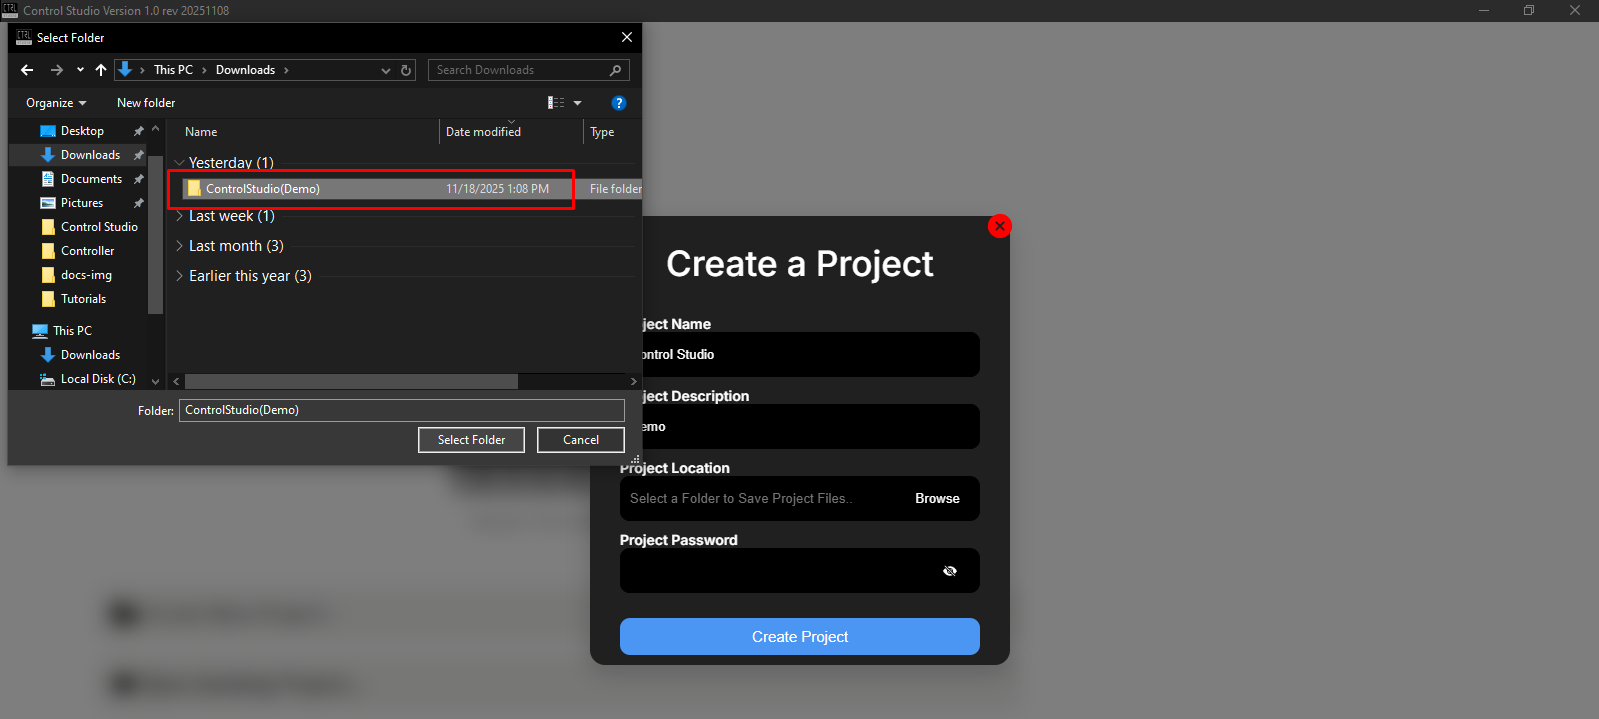
-
Click on Create Project to finalize.
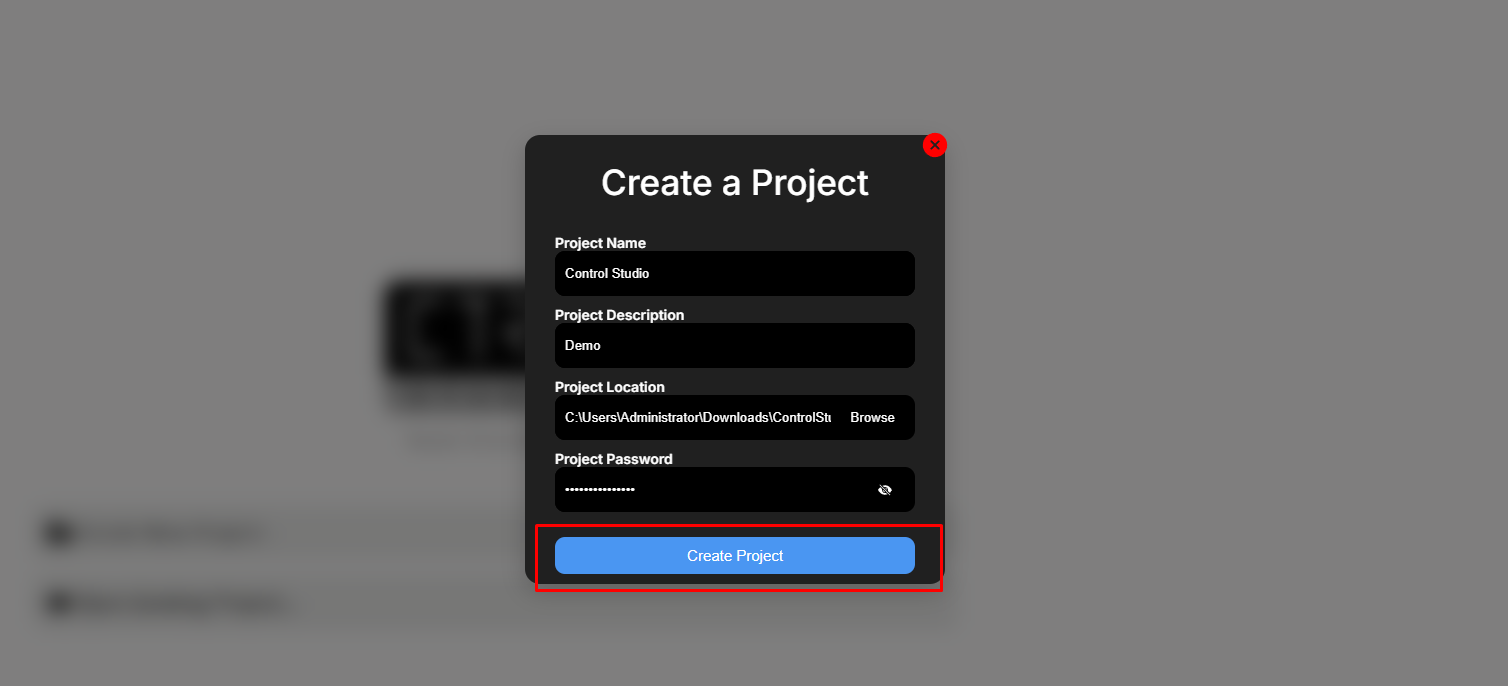
Project Details
| Field | Description |
|---|---|
| Project Name | Enter the name of your project. |
| Project Description | Add a short description of the project. |
| Project Location | Choose the folder/location where the project will be saved. |
| Project Password | Set a password to protect your project. |
- After filling in all details, click Create Project to complete the setup.
3. Create a Network
- Click Create Network.
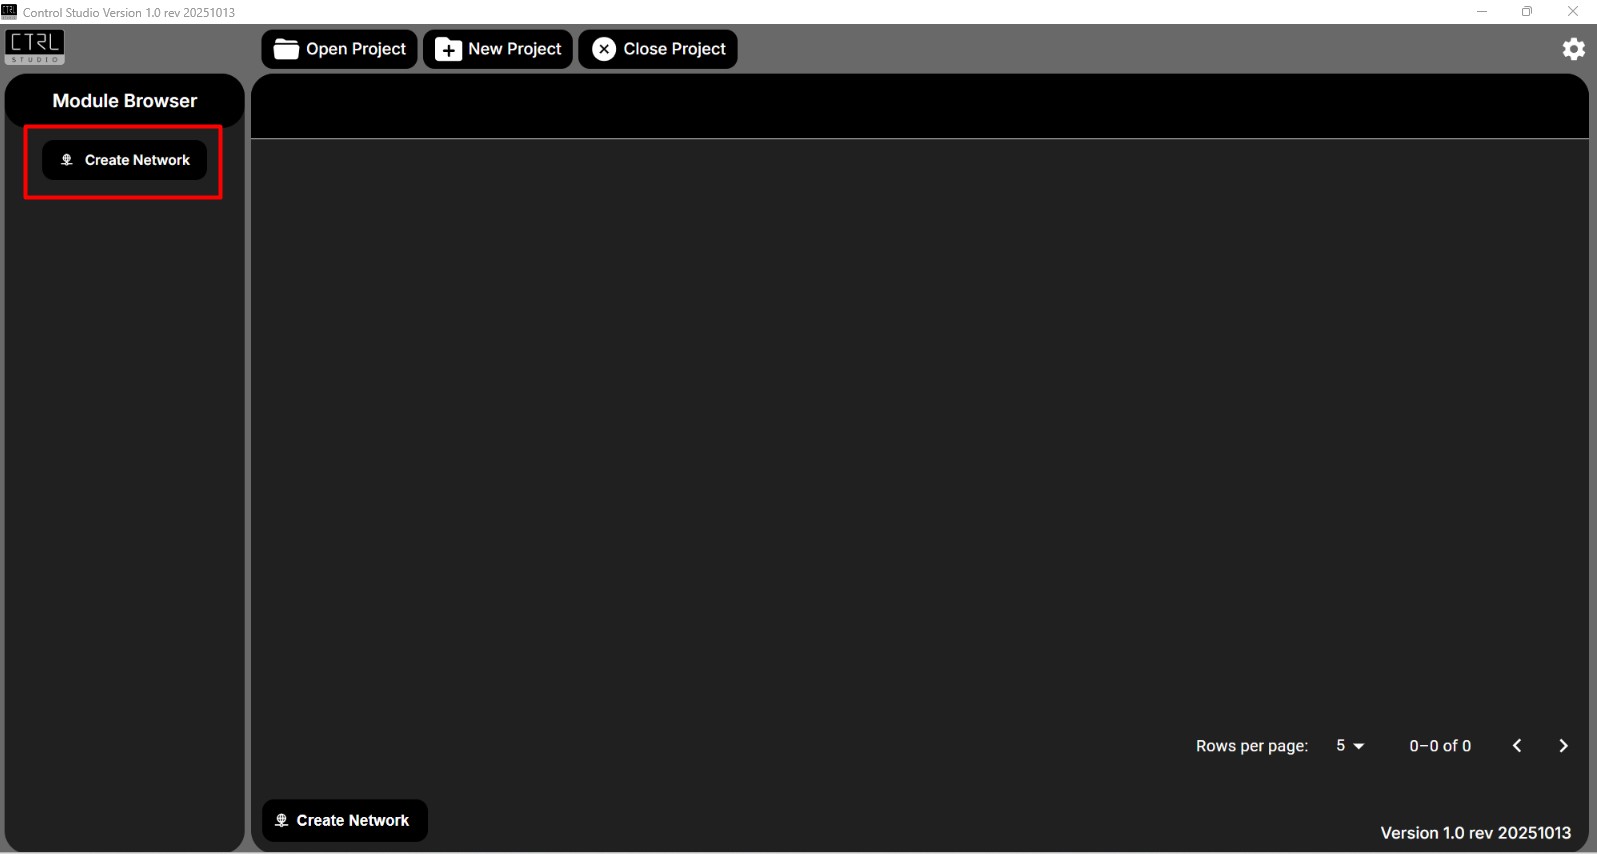
- A popup window will appear. Fill in all required details.
- Available COM ports will be detected automatically — select the appropriate COM port.
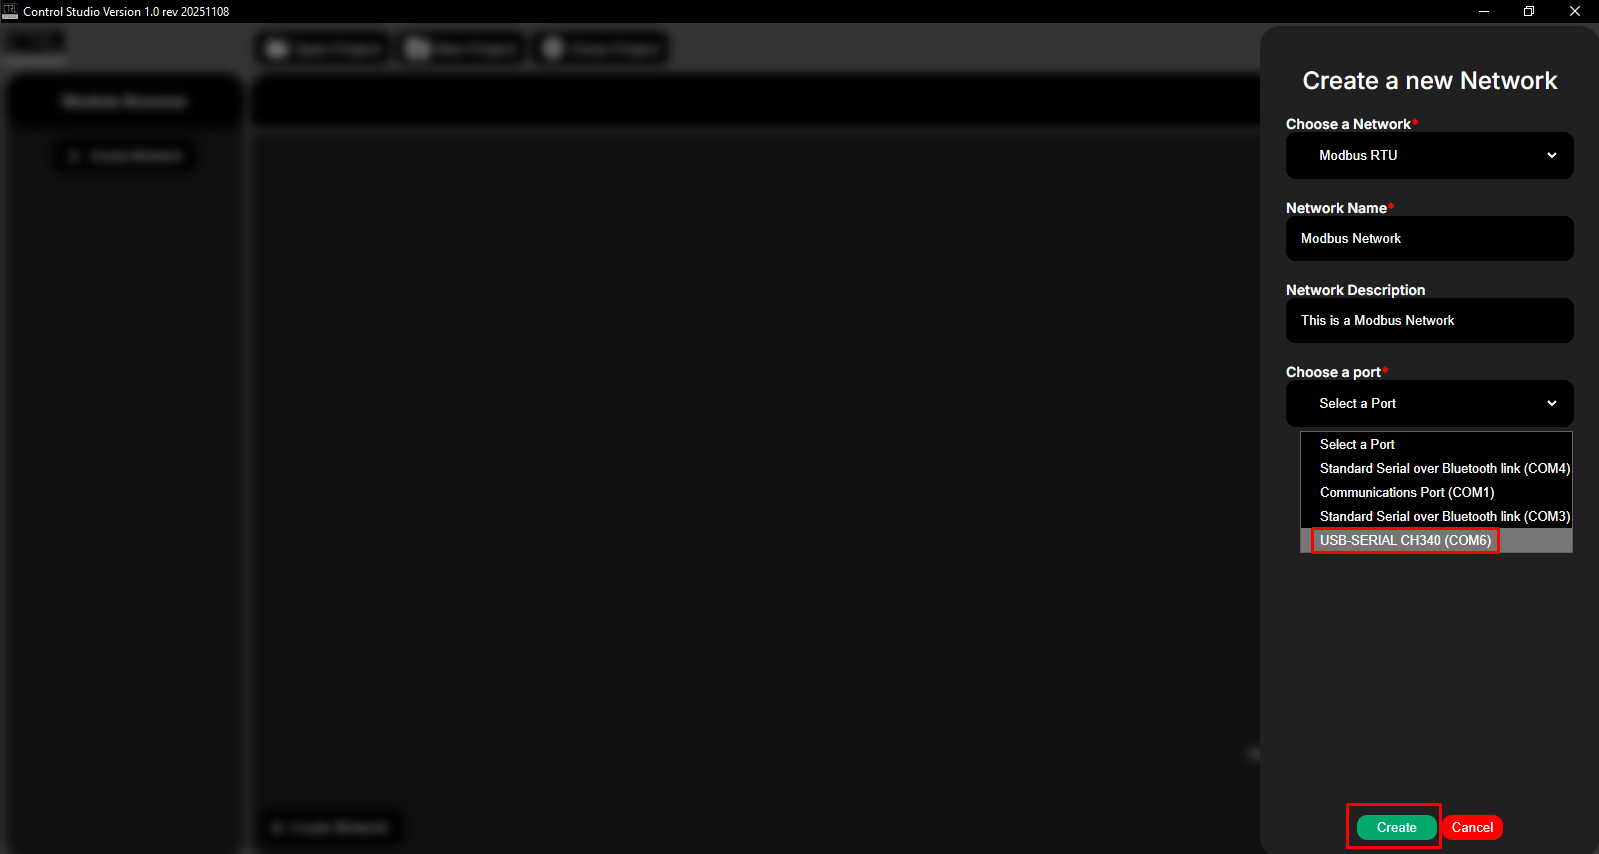
- If the COM port does not appear:
- Connect the RS485 to USB converter.
- Open Device Manager → Ports (COM & LPT). You should see USB-Serial Device listed.
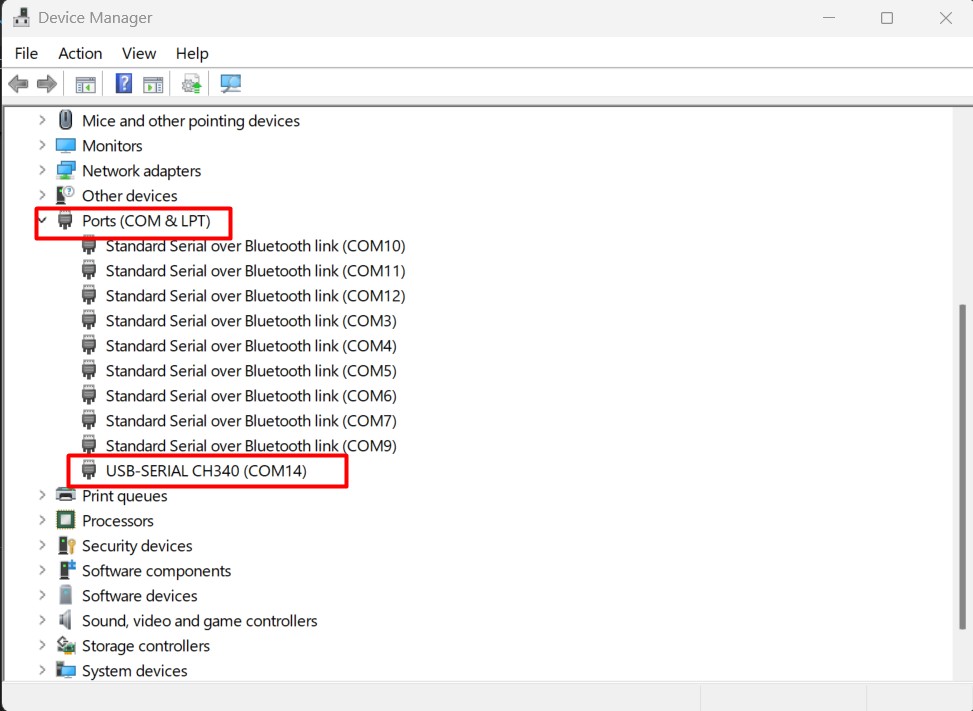
- Return to Control Studio and complete all fields.
- Configure baud rate, stop bit, parity, byte size, and network timeout as needed.
- Click Create after verification.
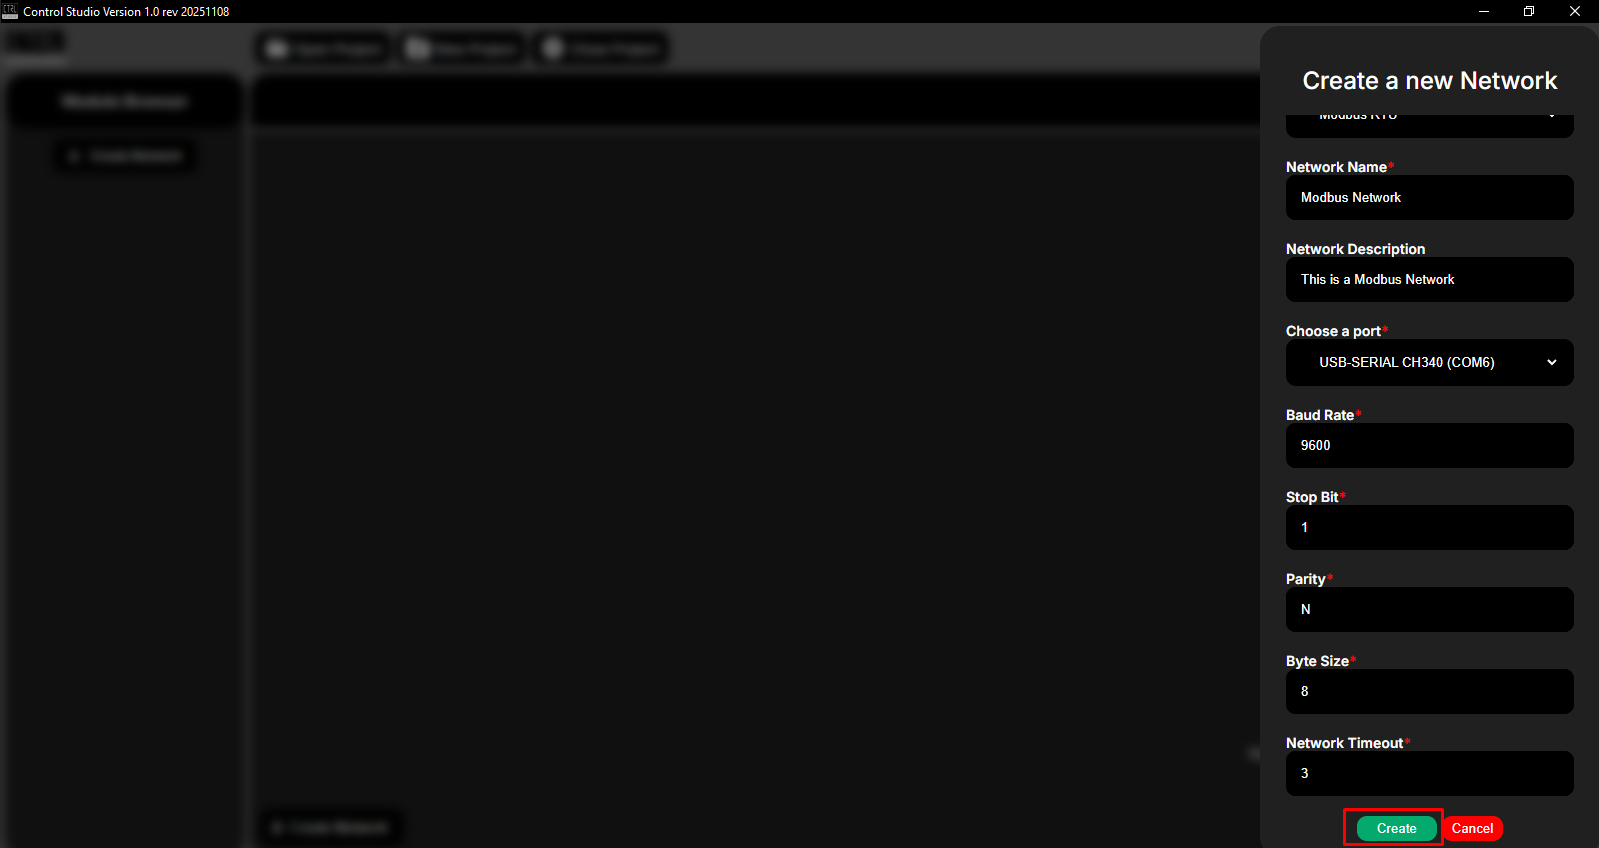
- Once completed, the newly created network will appear:
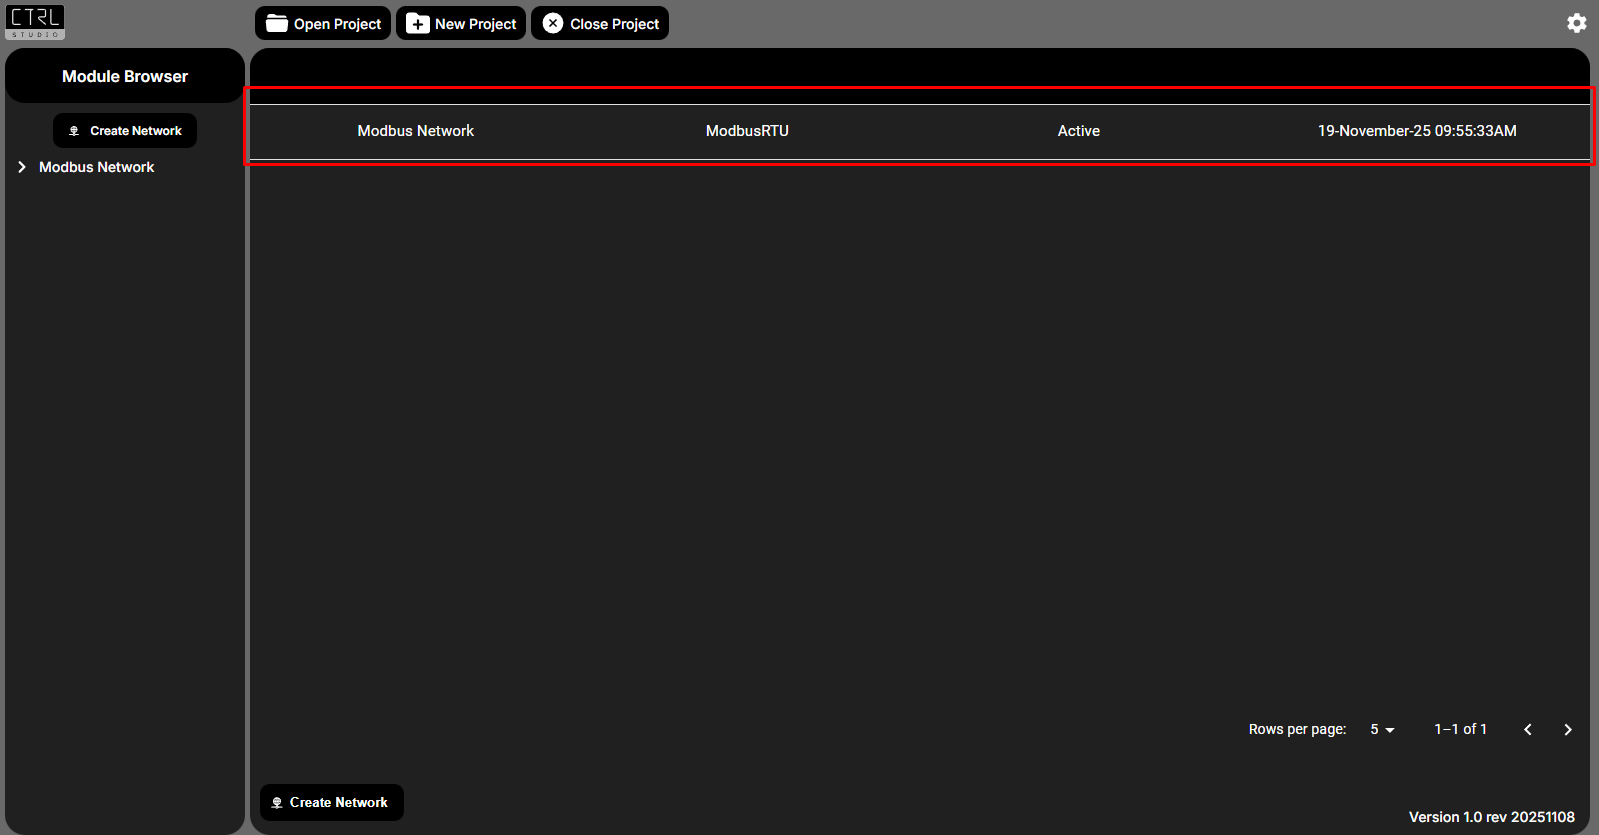
- Click on the newly added network to open its configuration.
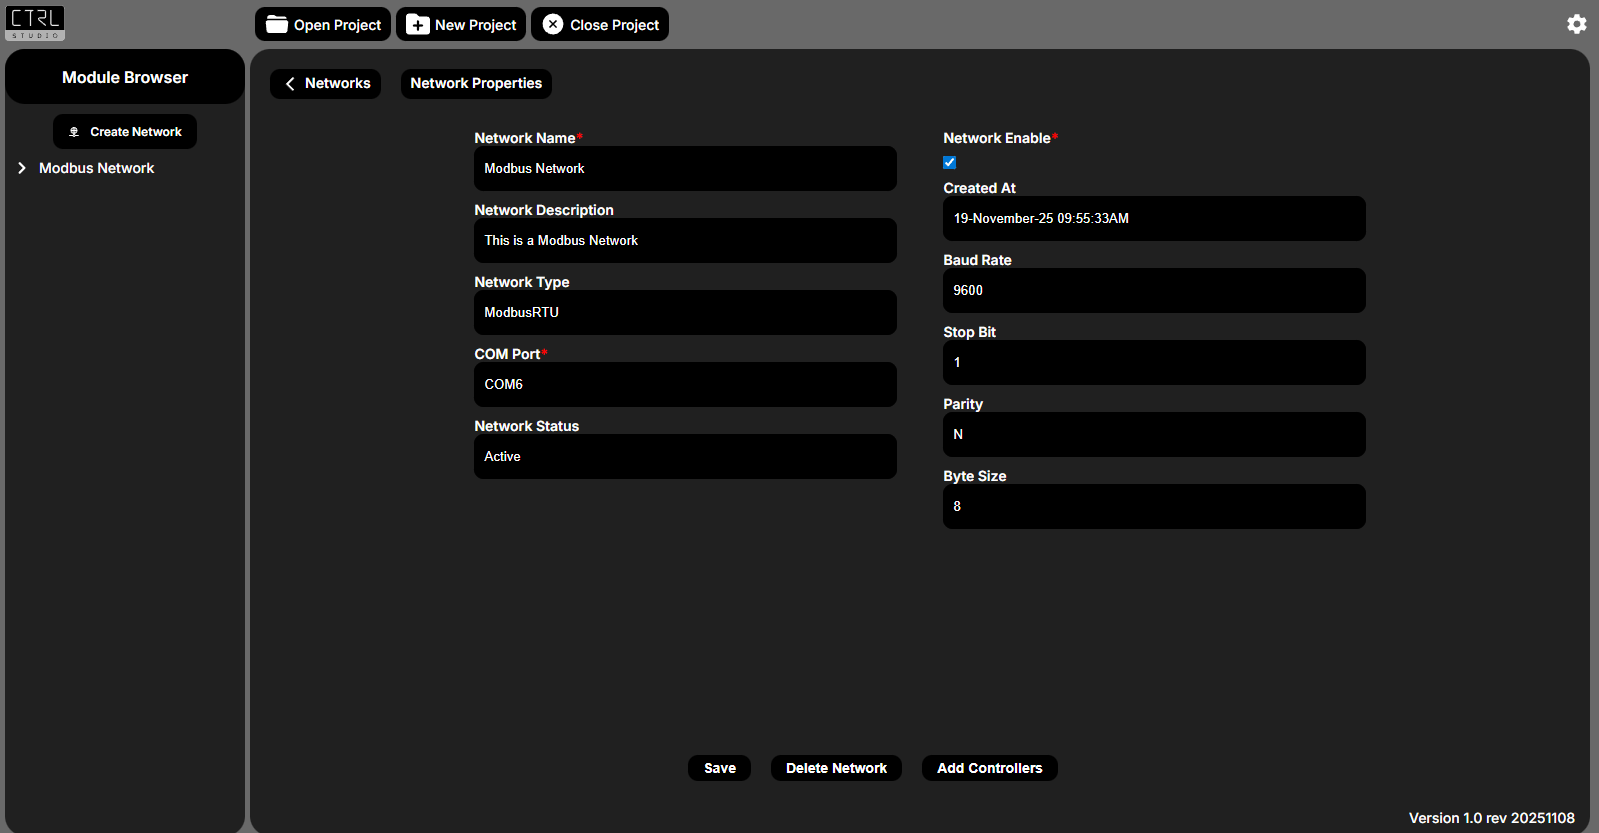
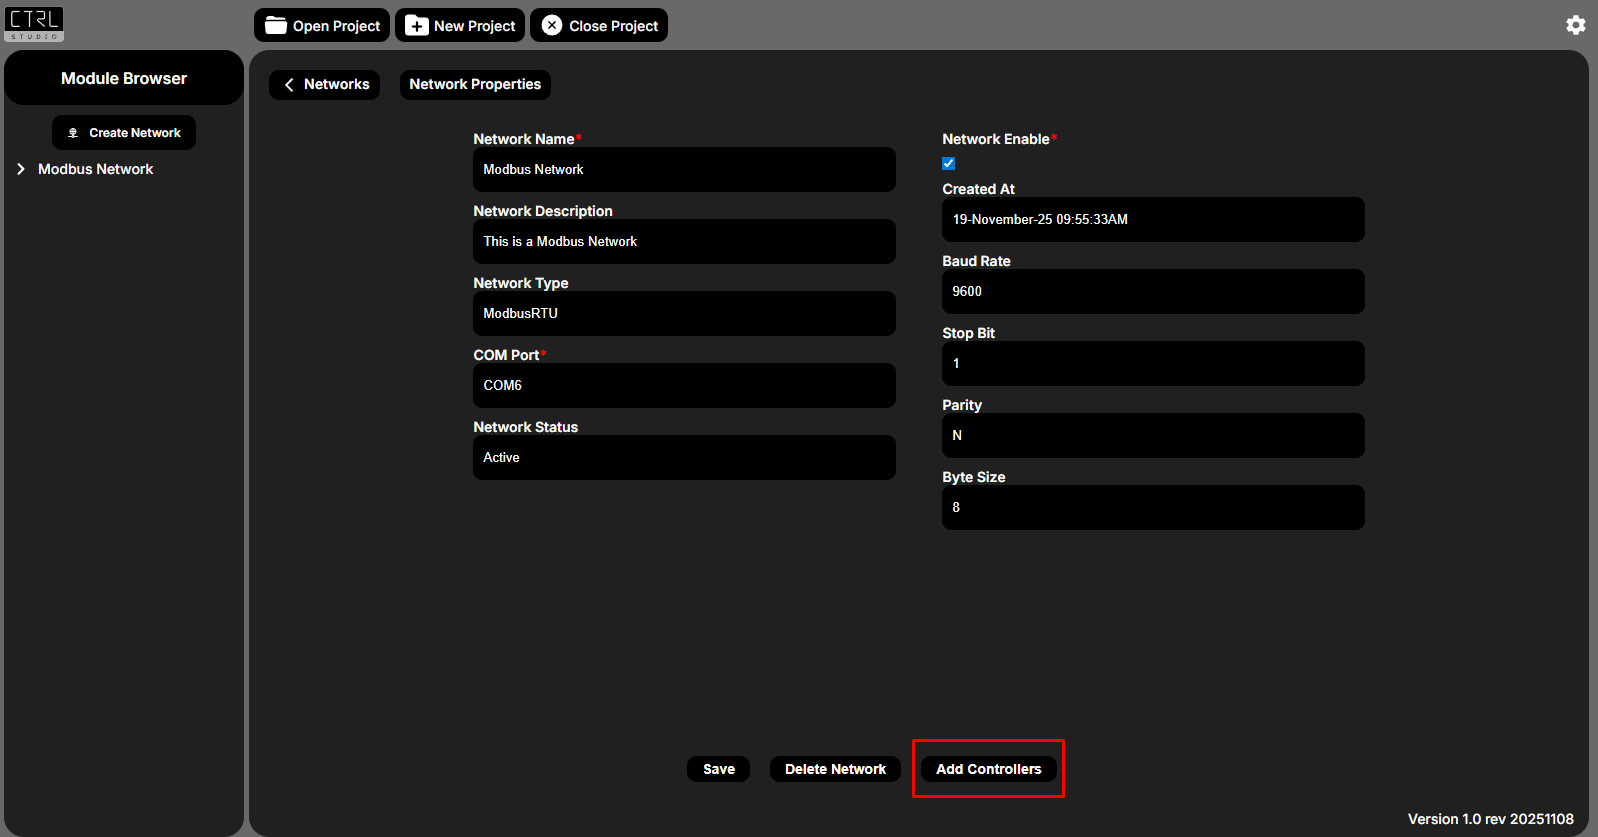
- Click Add Controller Network to begin adding a controller.
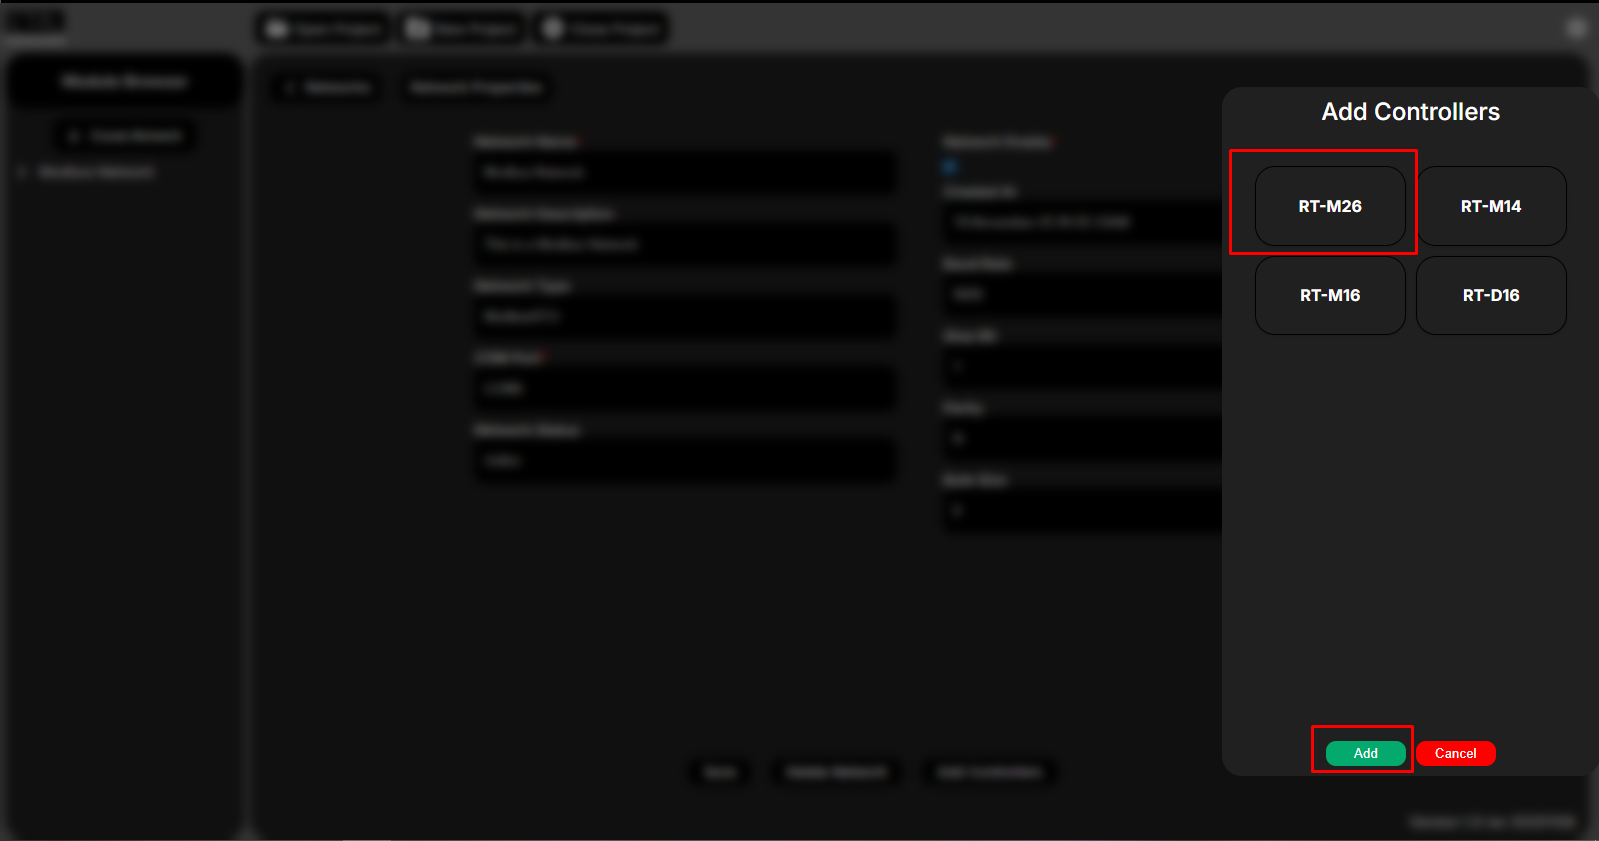
- Select the Desired Controller then click Add.
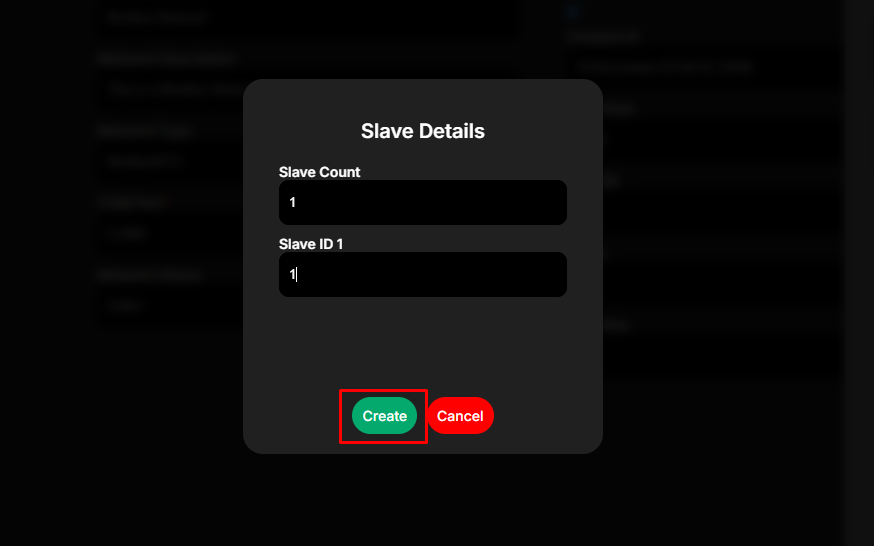
- A popup will display available Slave IDs.
- Type the No.of Slaves you wantded to import and it's respective Slave IDs then click on Create — all selected points will be added automatically.
4. View Added Controllers
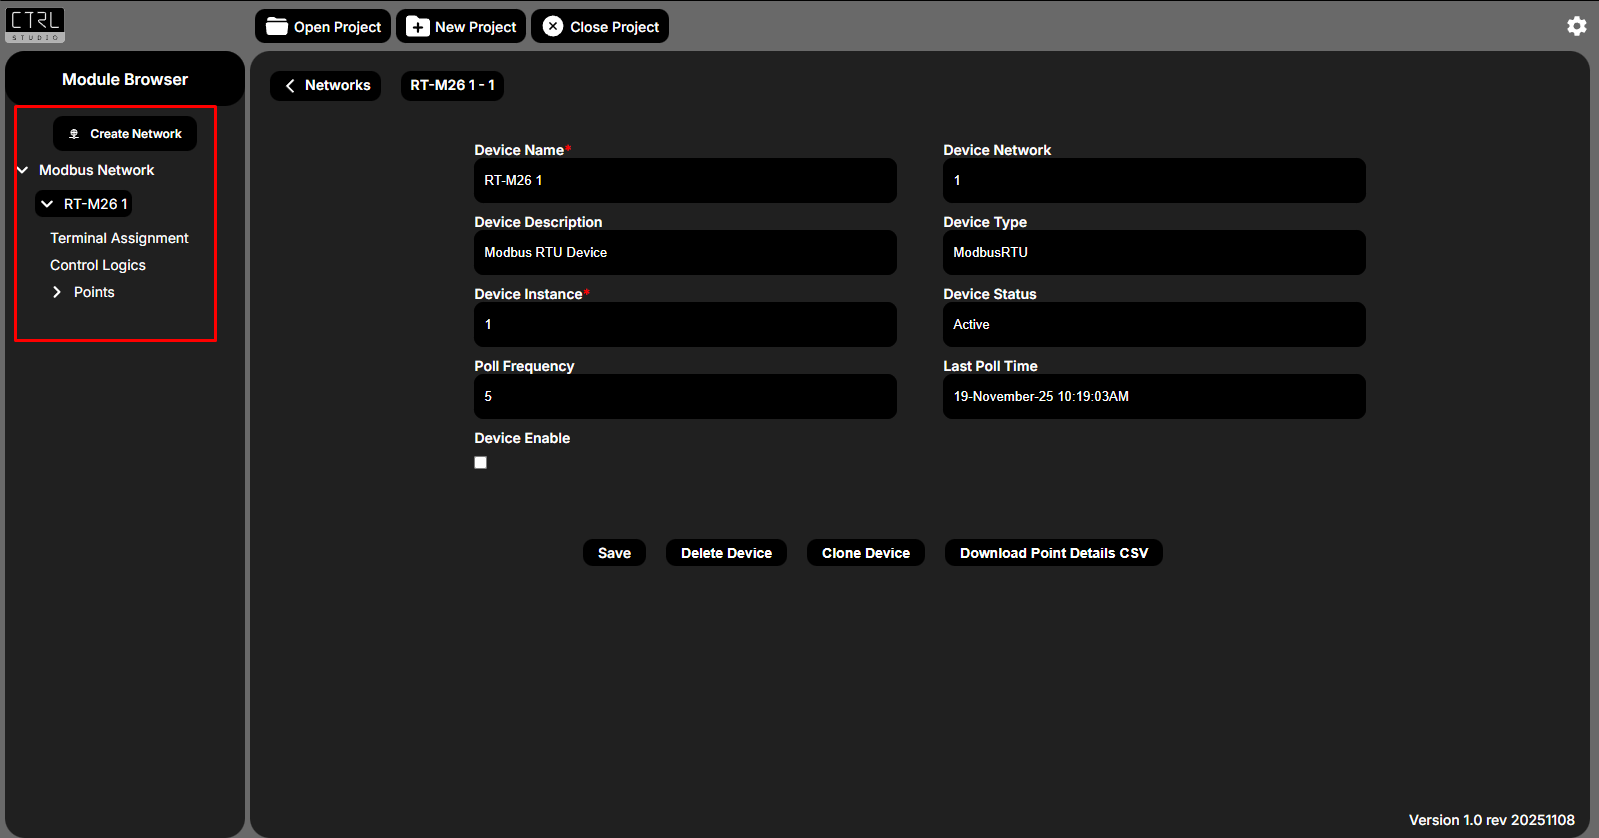
- Controllers appear under Module Browser.
- Expand to view Terminal Assignment, Control logic, and Points.
Available Options
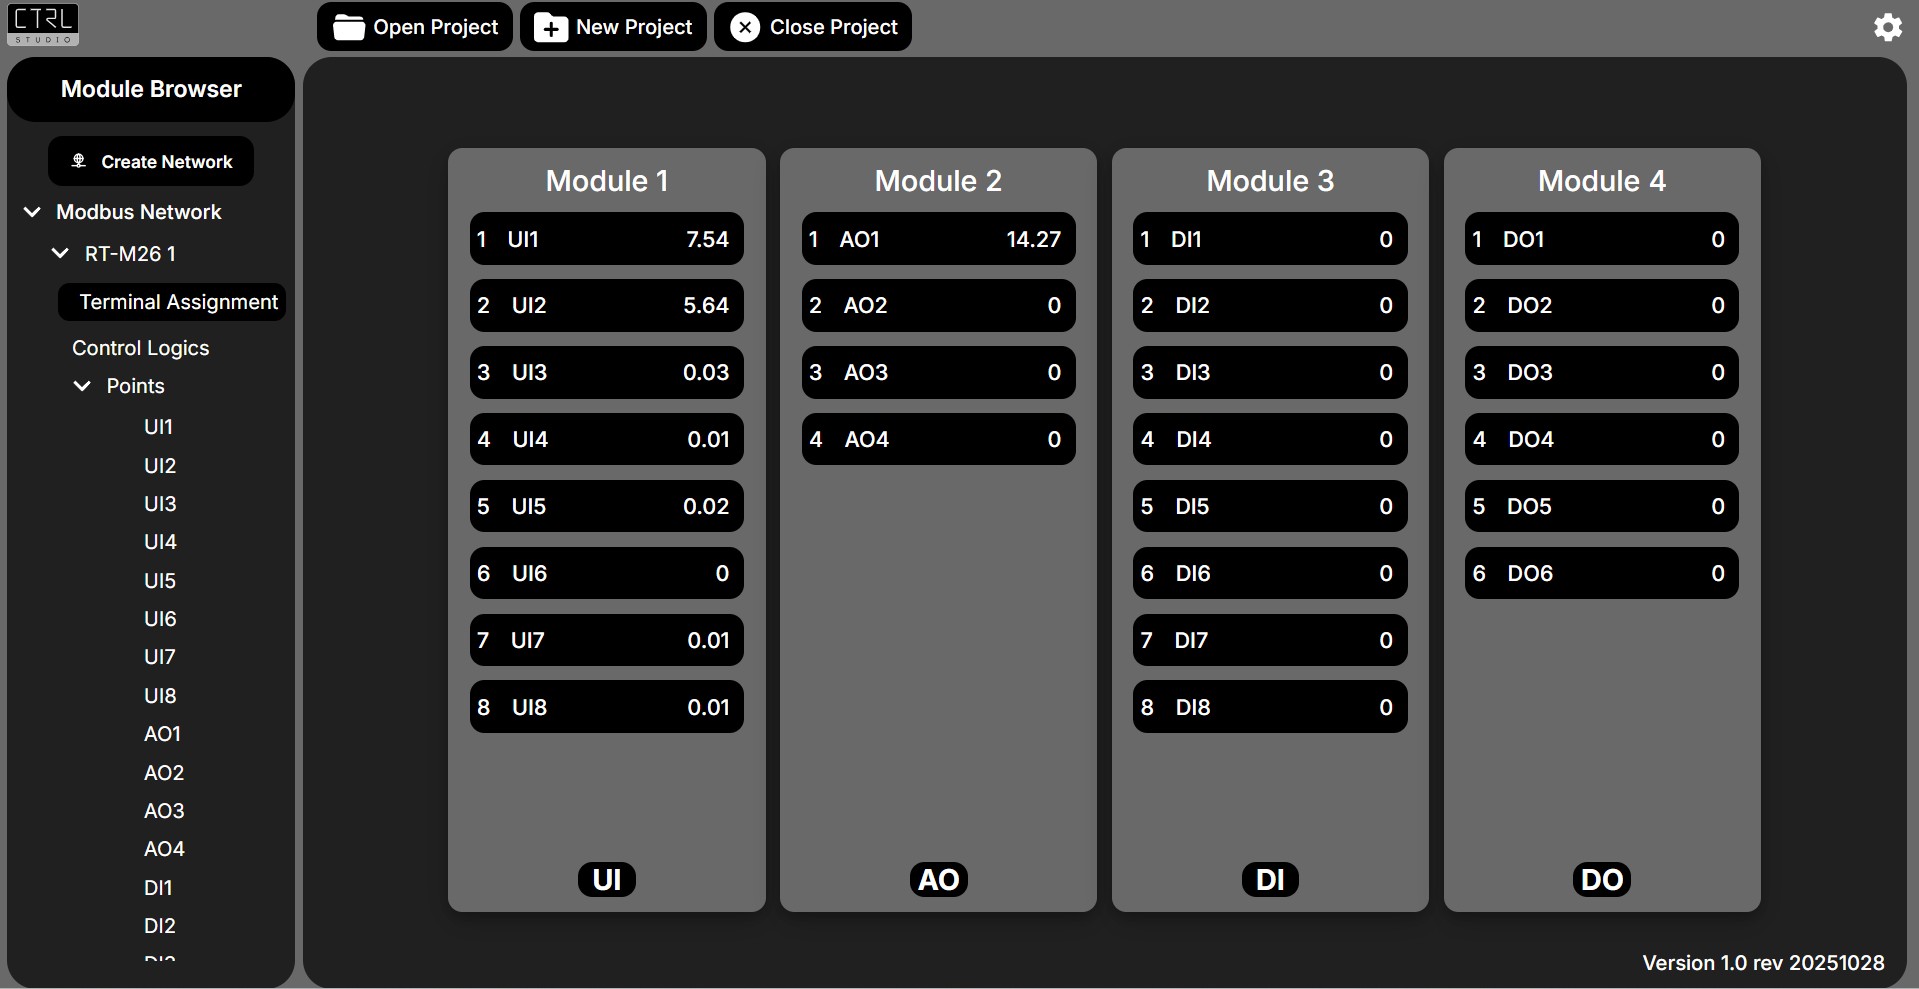
Terminal Assignment
- Shows I/O mapping for the module.
- Displays the IO assignment along with it's assigned name and live value.
Control Logics
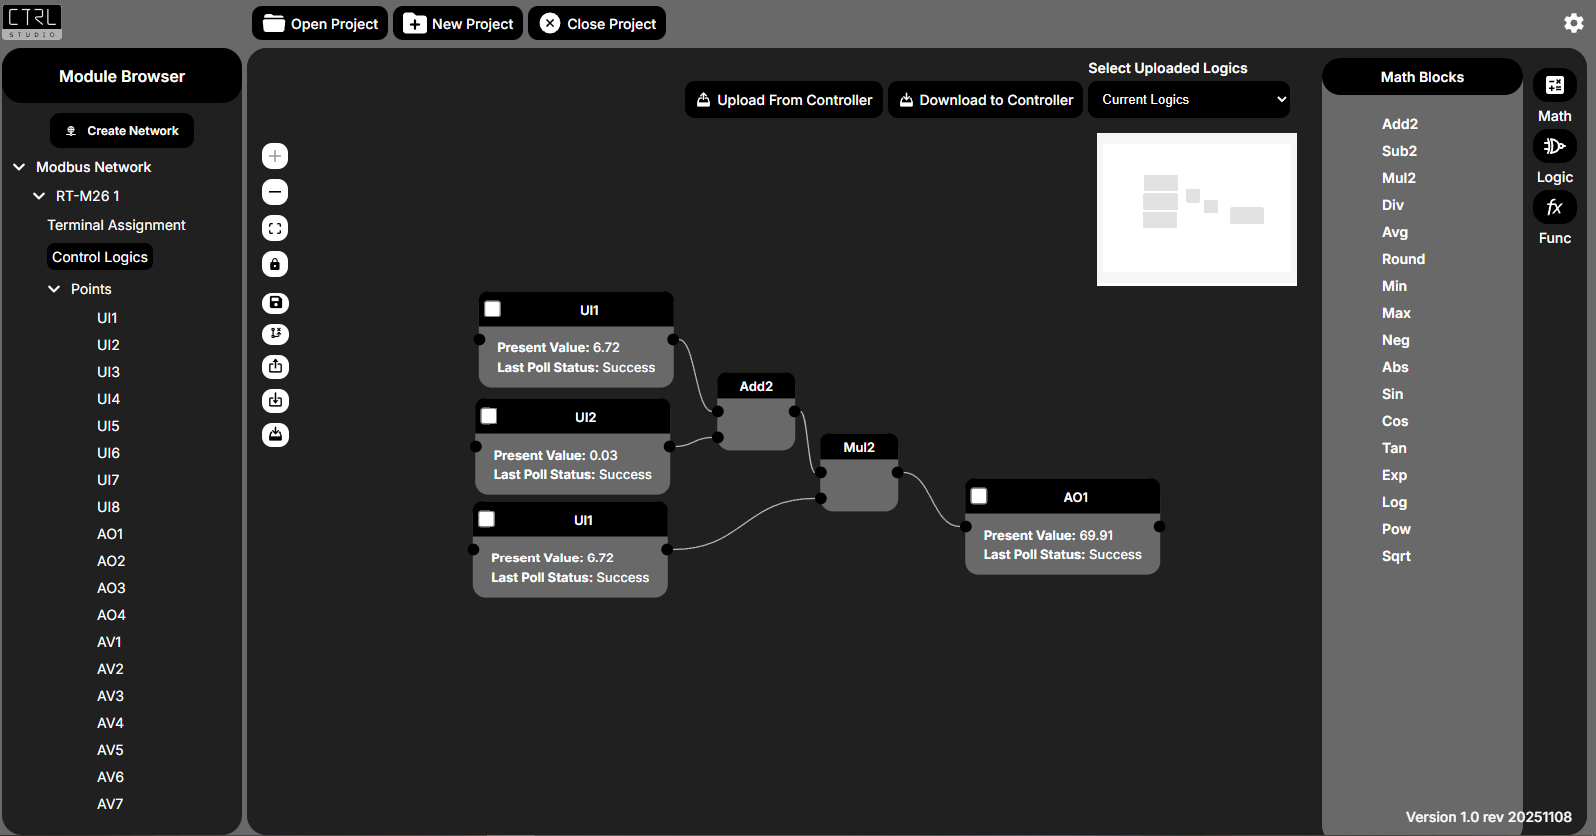
Logic Workflow
- Drag & drop points to build your logic.
- Use operators as needed to design the desired functionality.
- Save your logic once the configuration is complete.
After creating or modifying logic, if you attempt to navigate away without saving, the system will show Unsaved changes.
You can save your logic by clicking the Save button or by pressing Ctrl + S.
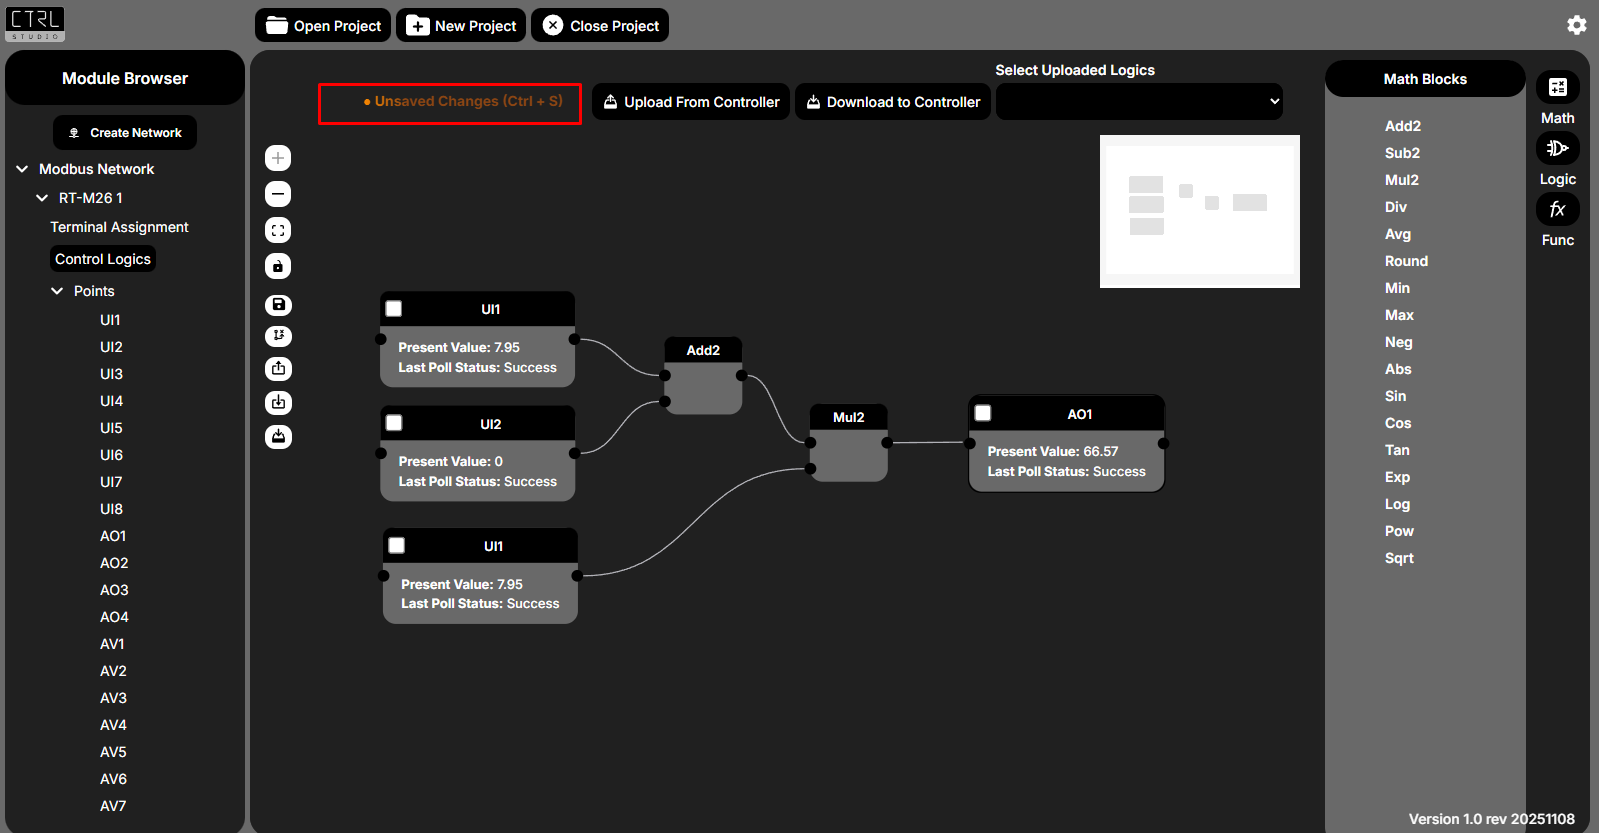
If you move to another section (for example, the Terminal Assignment) without saving, the logic will be saved temporarly. Once you navigate back to the control logics make sure to save it.
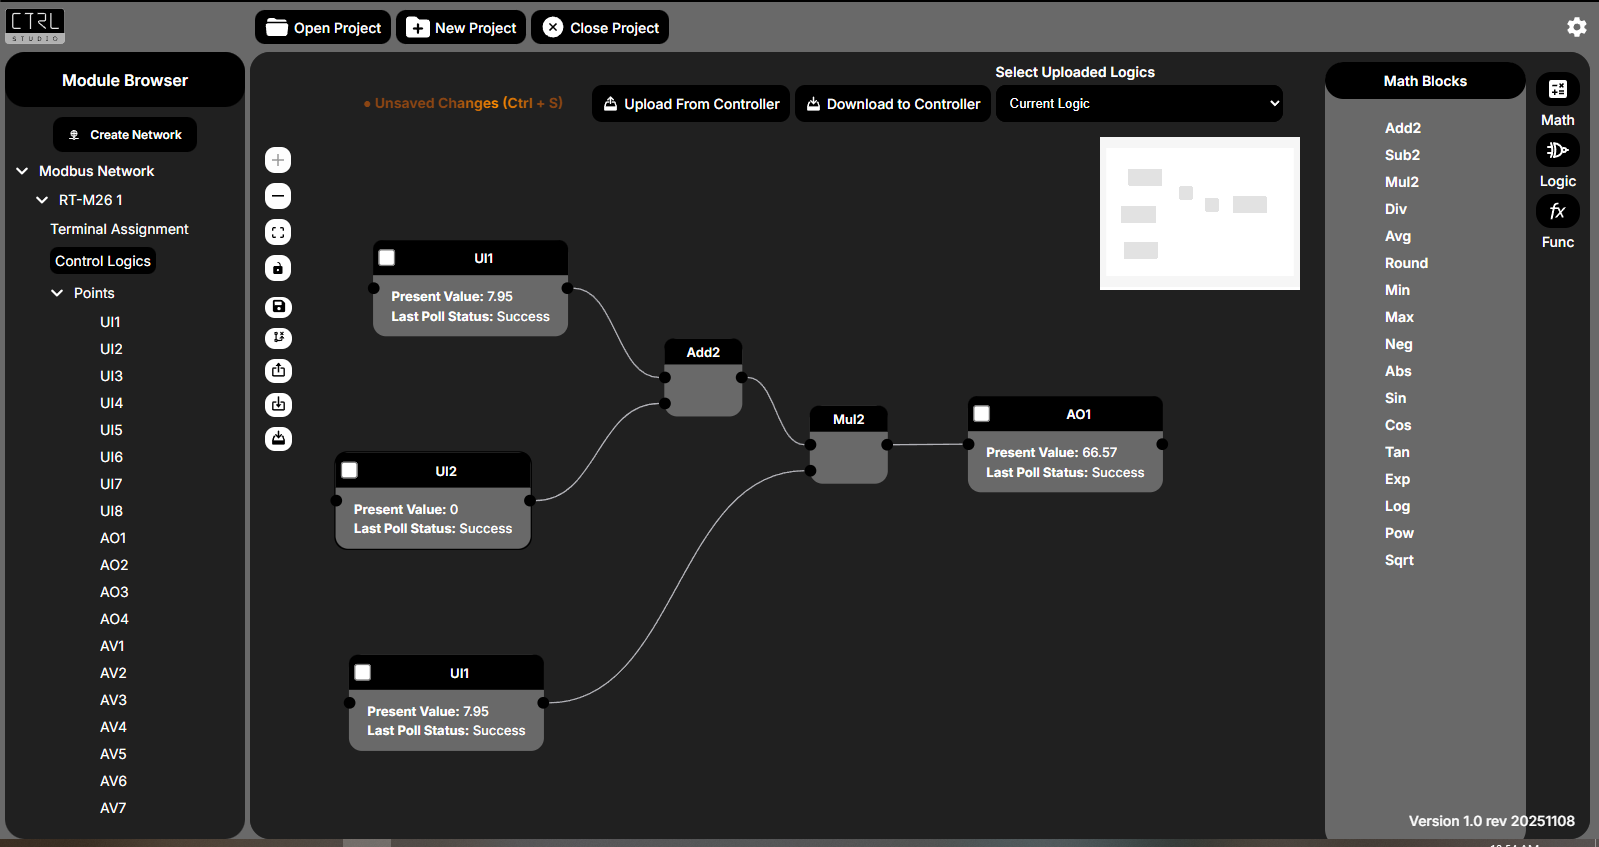
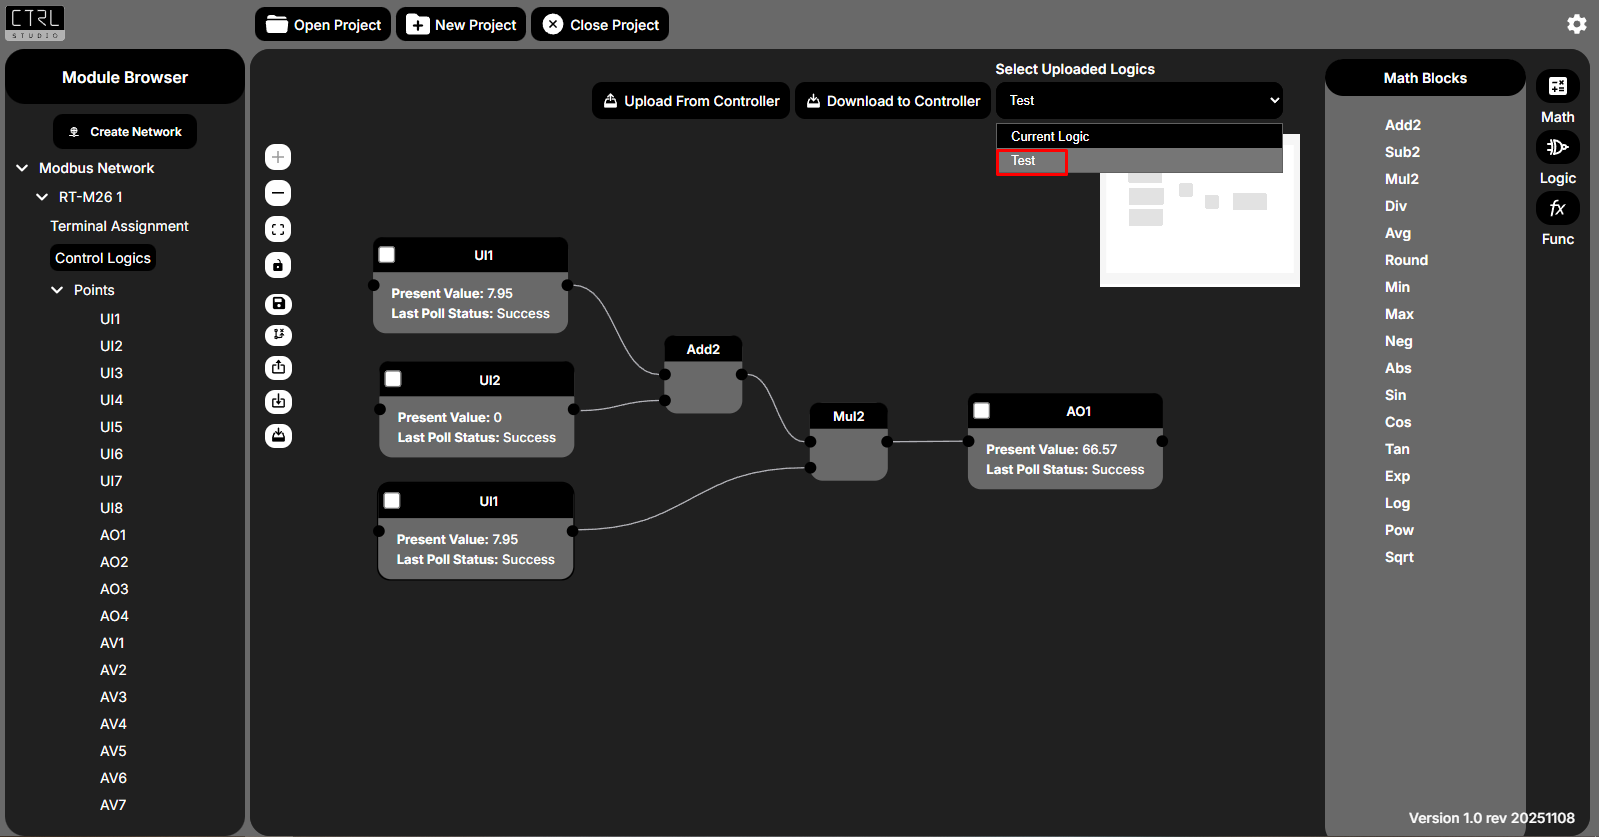
Upload /Download Logic
Upload from Controller
This function allows you to take backup from the controller and save it as a logic sheet.
Click on Upload From Controller .
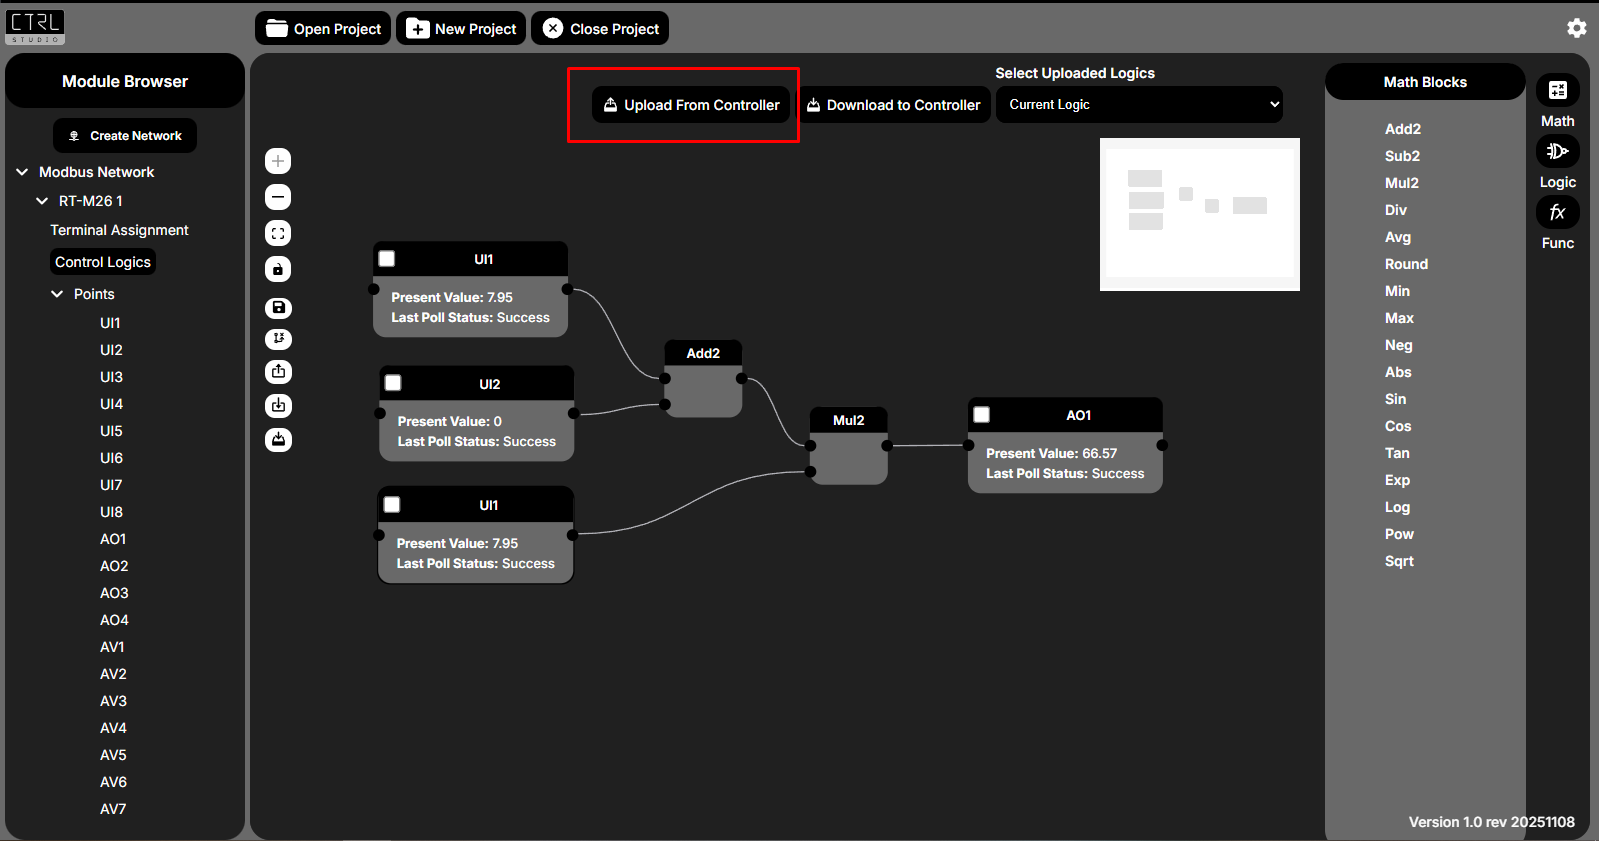
A popup window will appear prompting you to Upload from Controller.
Enter a Logic Name which you want to save in the text field provided.
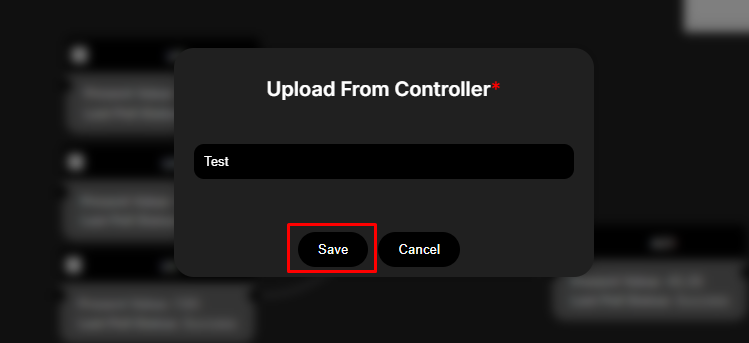
Click the Save button to confirm.
The system will then retrieve the logic from the controller and import it into your project.
Once the upload is complete, you can view and review the imported logic as needed.
Download to Controller
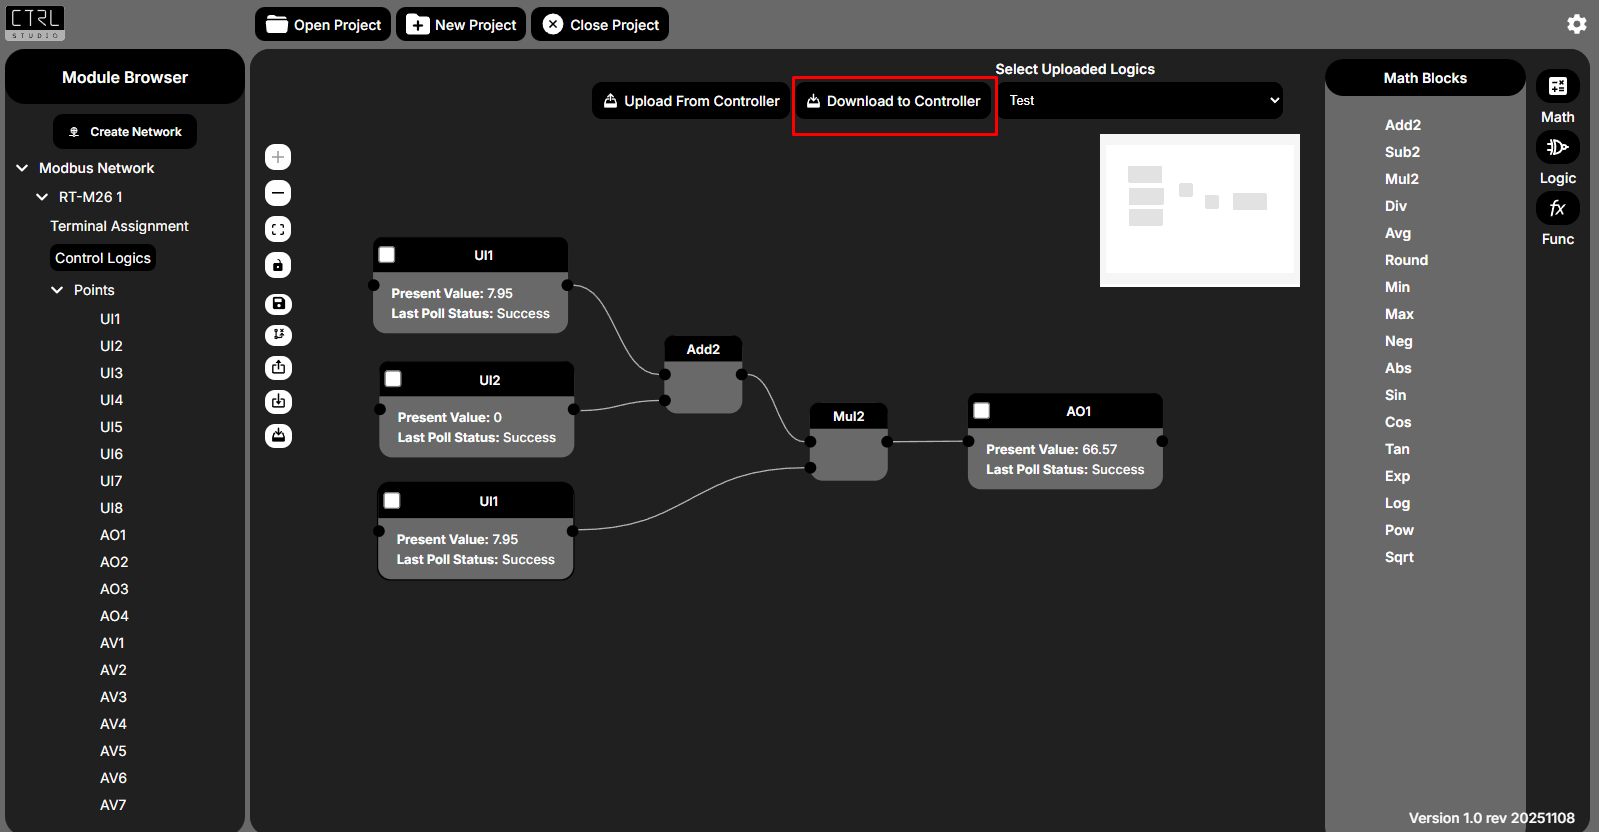
The Download to Controller option compiles your logic and sends it directly to the controller.
This writes the updated logic and configurations into the device, allowing it to run the latest program you created.
Control Blocks
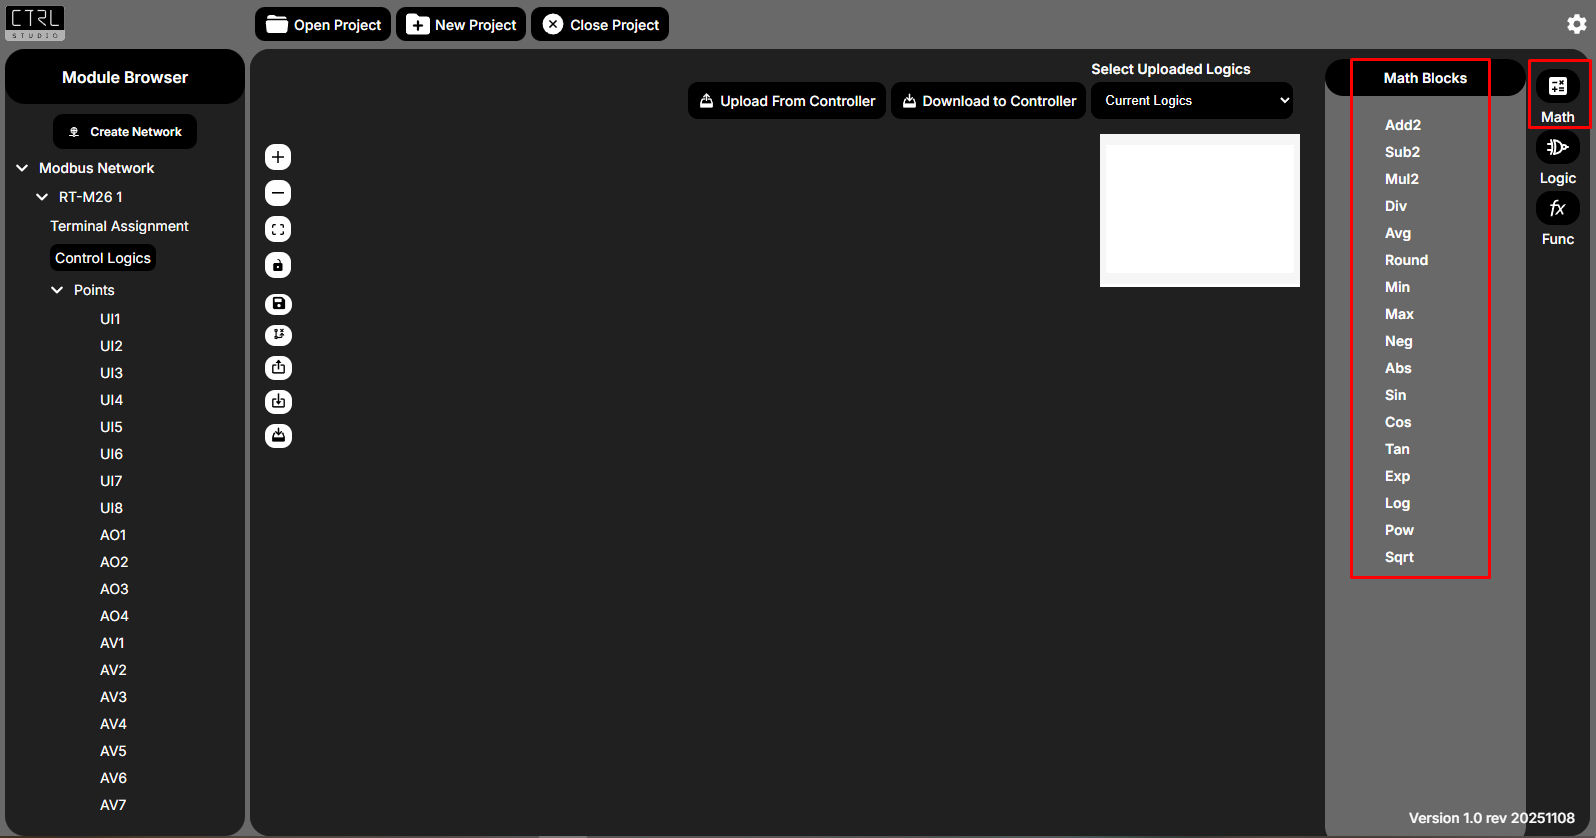
Math Blocks
| Function | Description |
|---|---|
| Add2 | Adds two values. |
| Sub2 | Subtracts input 2 from input 1. |
| Mul2 | Multiplies two values. |
| Div | Divides input 1 by input 2. |
| Avg | Calculates average. |
| Round | Rounds to nearest whole number. |
| Min | Returns smaller value. |
| Max | Returns larger value. |
| Neg | Outputs negative value. |
| Abs | Absolute value. |
| Sin | Sine function. |
| Cos | Cosine function. |
| Tan | Tangent function. |
| Exp | Exponential (eⁿ). |
| Log | Natural logarithm. |
| Pow | Raises input 1 to the power of input 2. |
| Sqrt | Square root. |
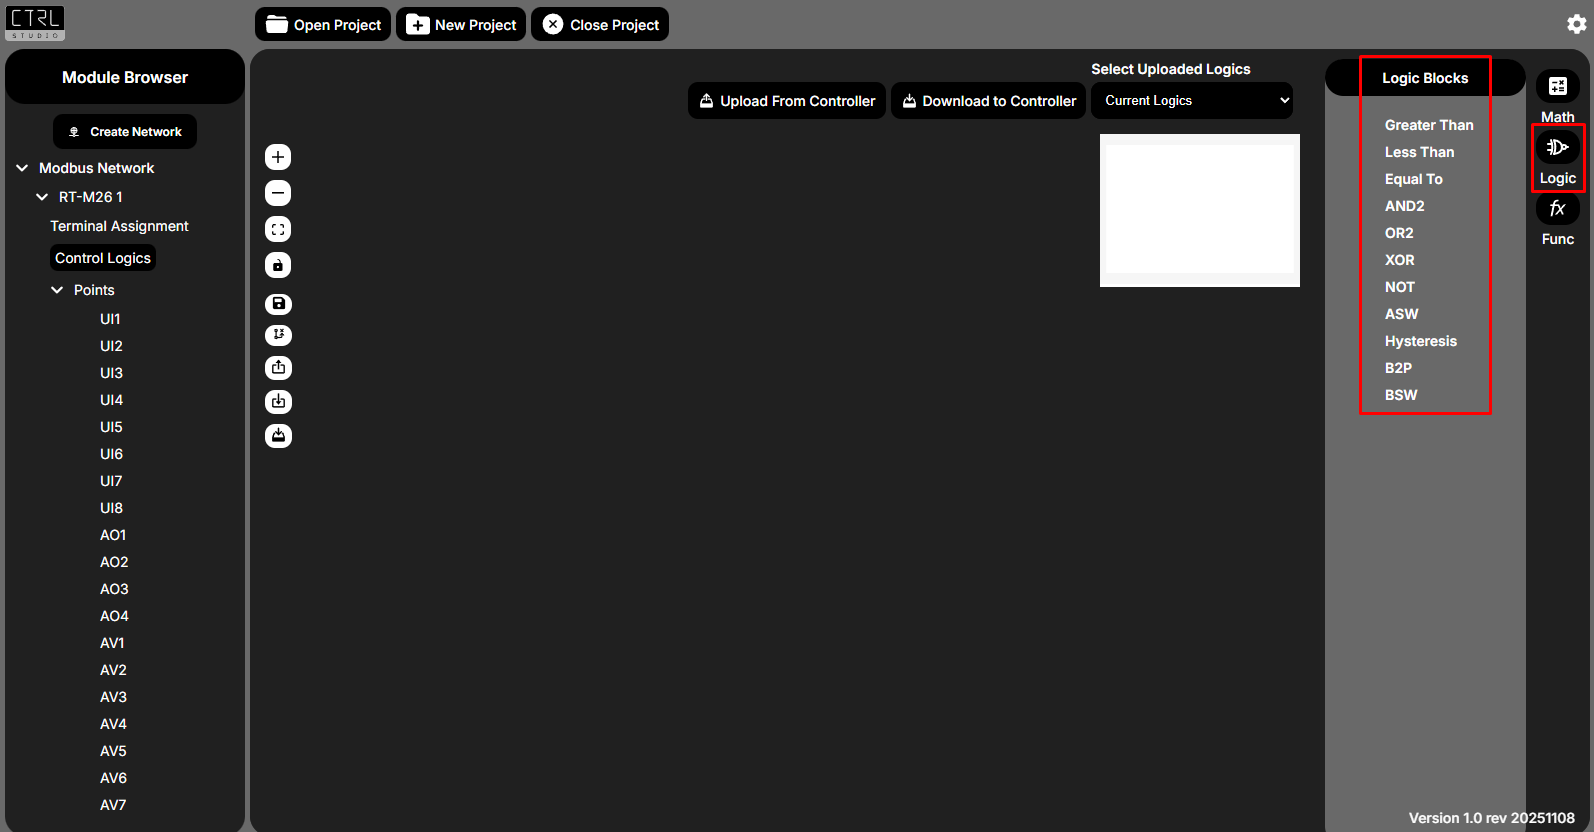
Logic Blocks
| Function | Description |
|---|---|
| Greater Than | Input1 > Input2 |
| Less Than | Input1 < Input2 |
| Equal To | Checks equality |
| AND2 | True if both inputs are true |
| OR2 | True if any input is true |
| XOR | True if exactly one input is true |
| NOT | Inverts input value |
| ASW | Analog switch |
| Hysteresis | ON/OFF threshold control |
| B2P | Binary 0/1 to percent |
| BSW | Binary switch |
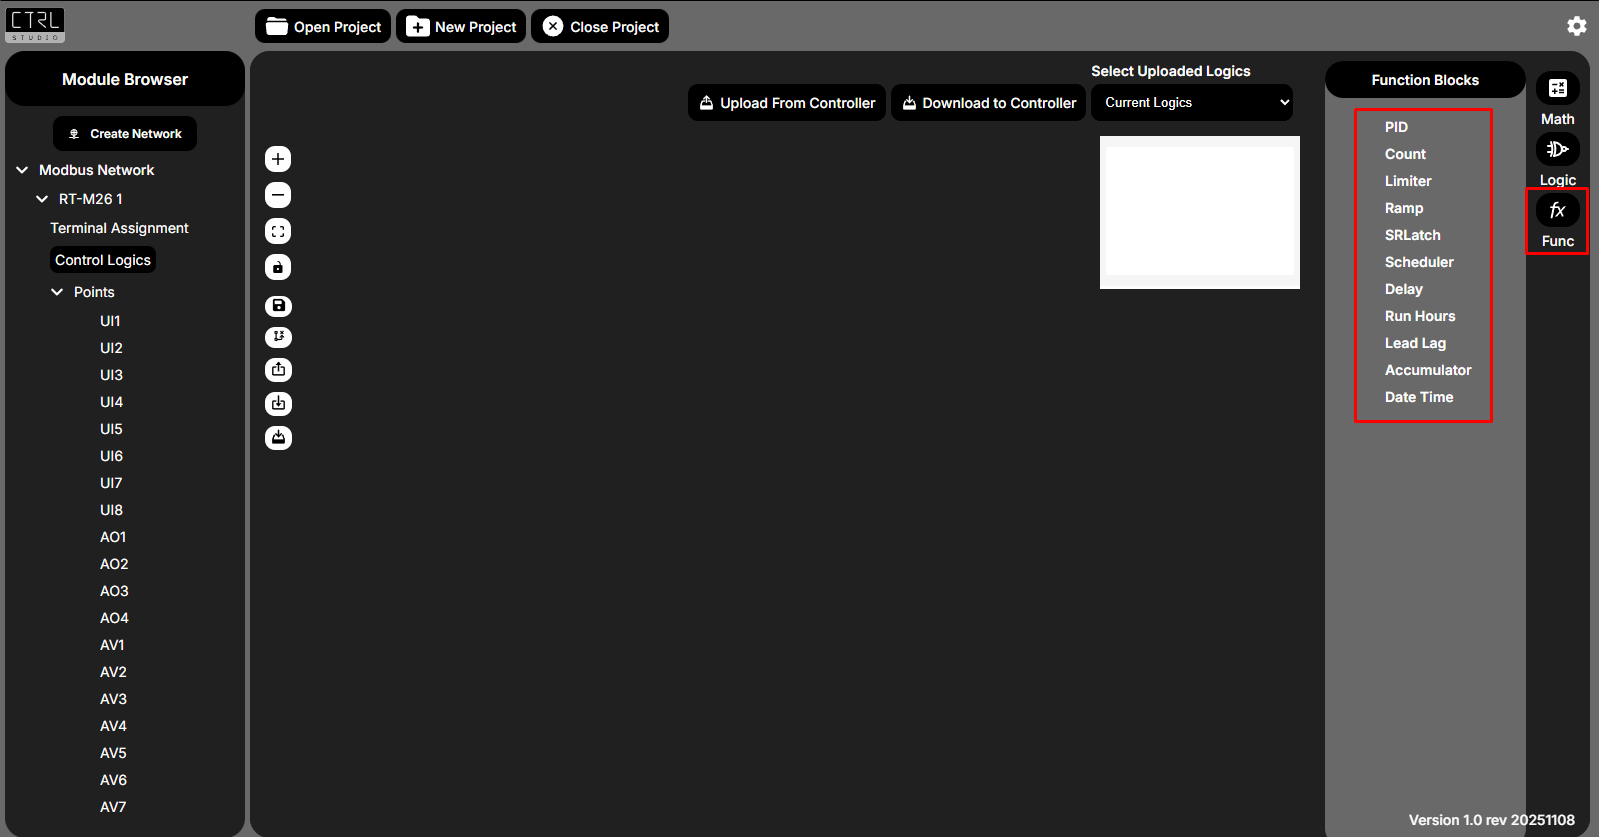
Function Blocks
| Function | Description |
|---|---|
| PID | PID-based process control |
| Count | Event/pulse counting |
| Limiter | Sets min/max limits |
| Ramp | Gradual increase/decrease |
| SRLatch | Switch outputs based on binary input |
| Scheduler | Time & Day-based scheduling |
| Delay | Adds delay |
| Run Hours | Tracks runtime |
| Lead Lag | Pump switching logic |
| Accumulator | Adds values over time |
| Date Time | Provides system time |
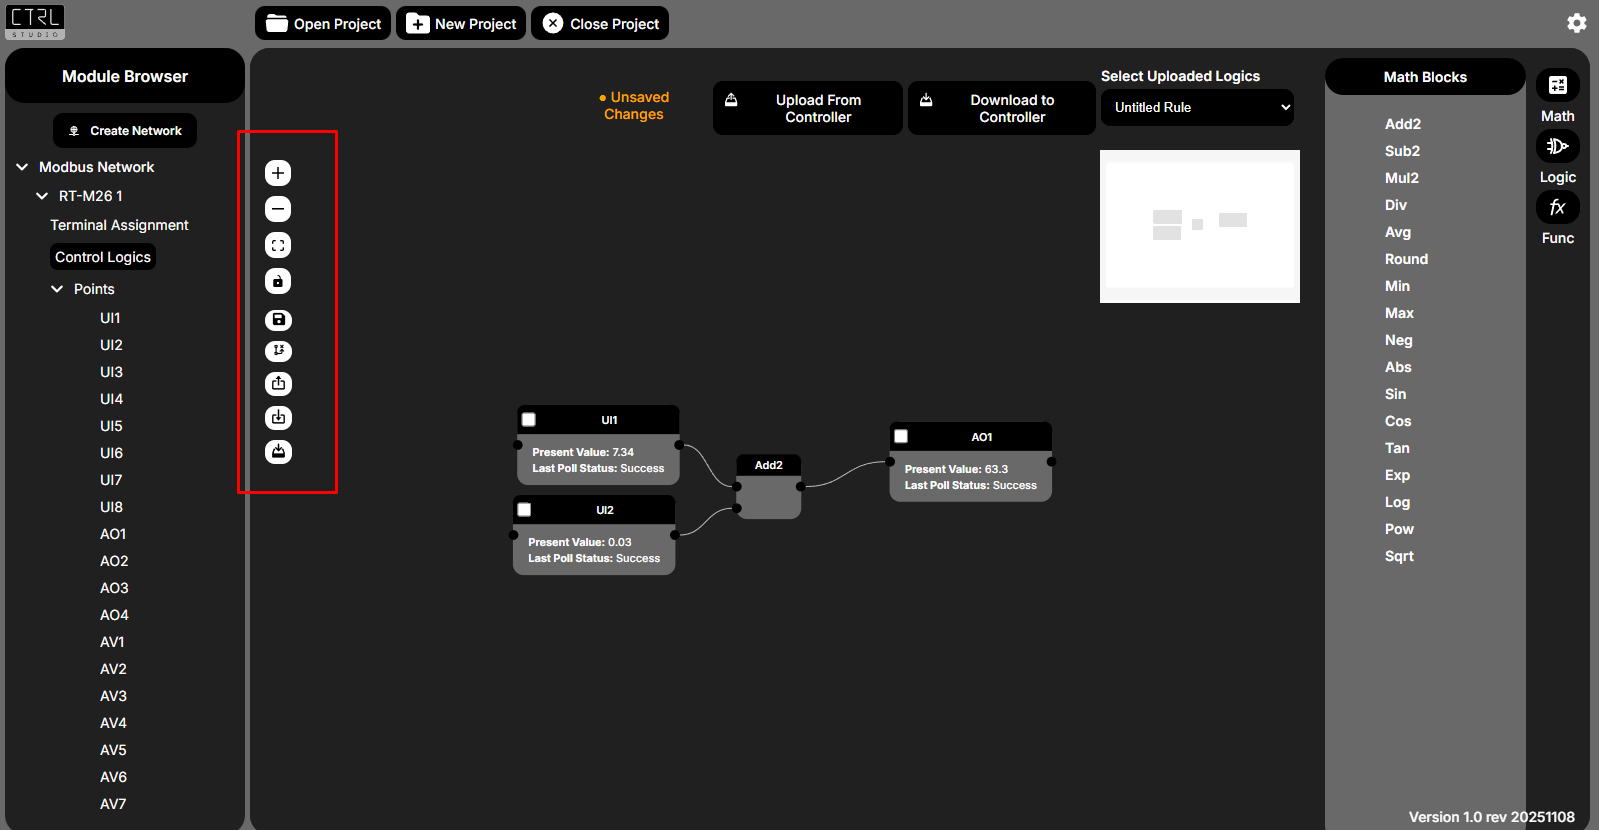
Canvas Toolbar Options
| Option | Description |
|---|---|
| Zoom In | Zooms in on the canvas to view elements more closely. |
| Zoom Out | Zooms out from the canvas to see a wider view. |
| Fit View | Fits all nodes within the canvas to the screen. |
| Toggle Interactivity | Locks or unlocks the nodes, preventing or allowing movement. |
| Save Rules | Saves the current rule configuration. |
| Clear All Nodes | Deletes all nodes from the canvas. |
| Export Rules | Allows users to download all configured rules in formats such as JSON or CSV for backup, sharing, or migration. |
| Import Rules | Lets users upload previously exported rule files to restore or reuse configurations. |
| Download to Controller | Compiles and sends the configured logic/rules directly to the controller for execution. |
Points Management
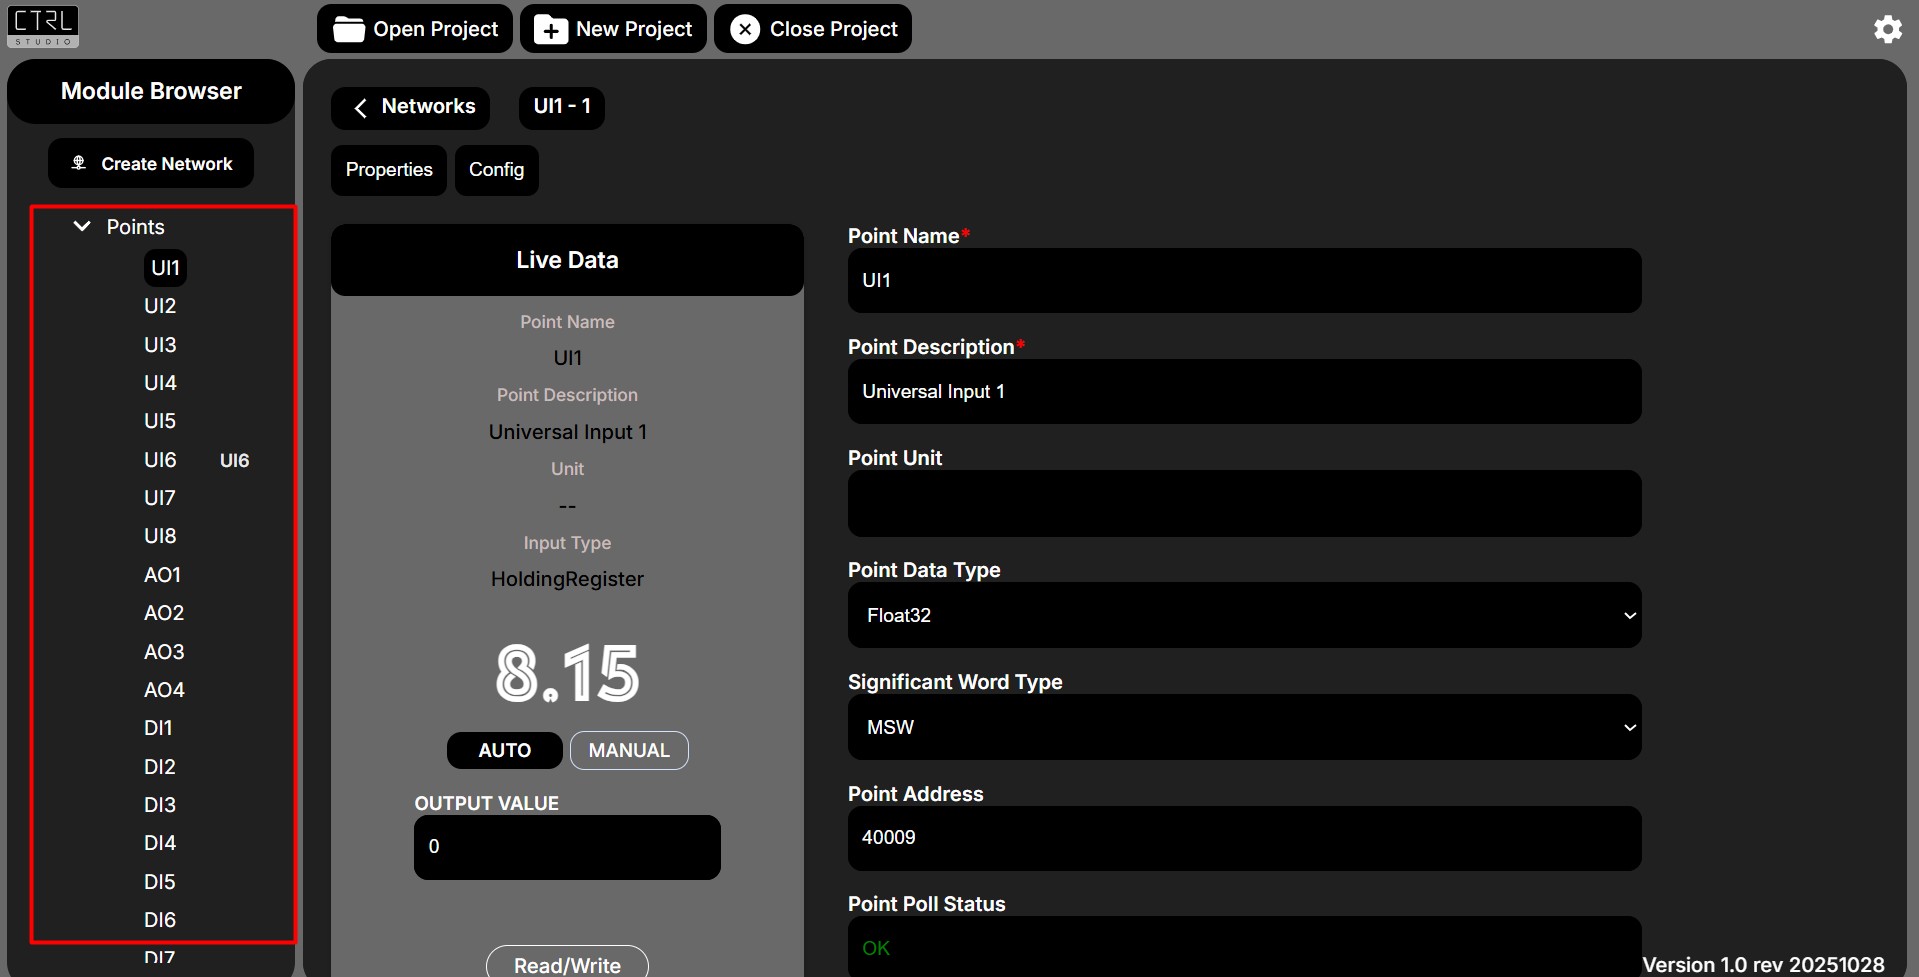
1. View All Points
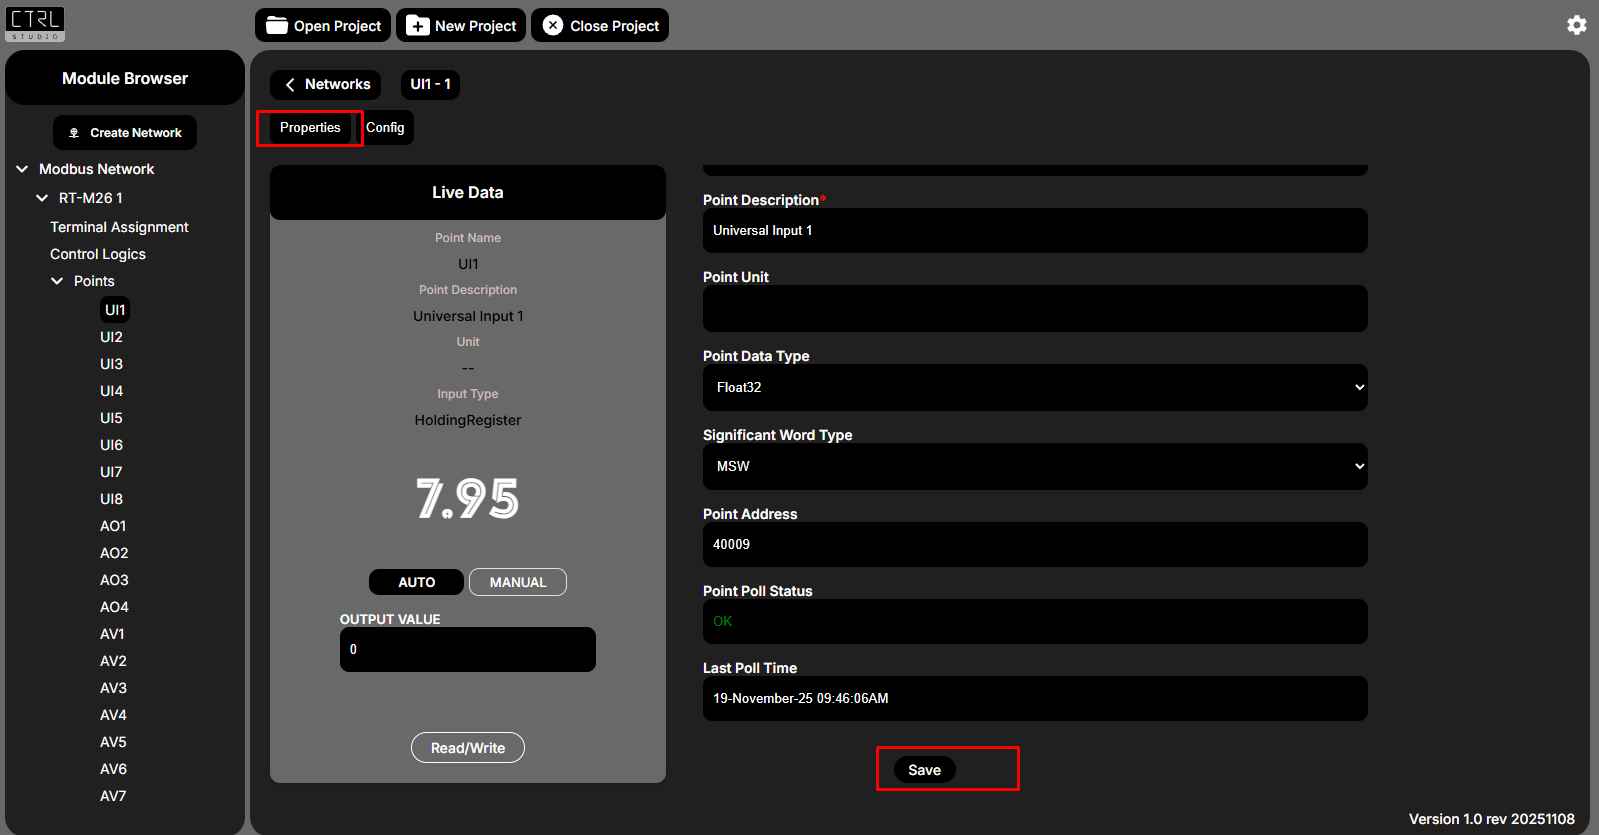
- Displays all points under the selected controller.
2. Edit Properties
- Modify point-related details in the Properties section:
- Point Name
- Point Description
- Point Unit
- Point Data Type
- Significant Word Type
- Point Address
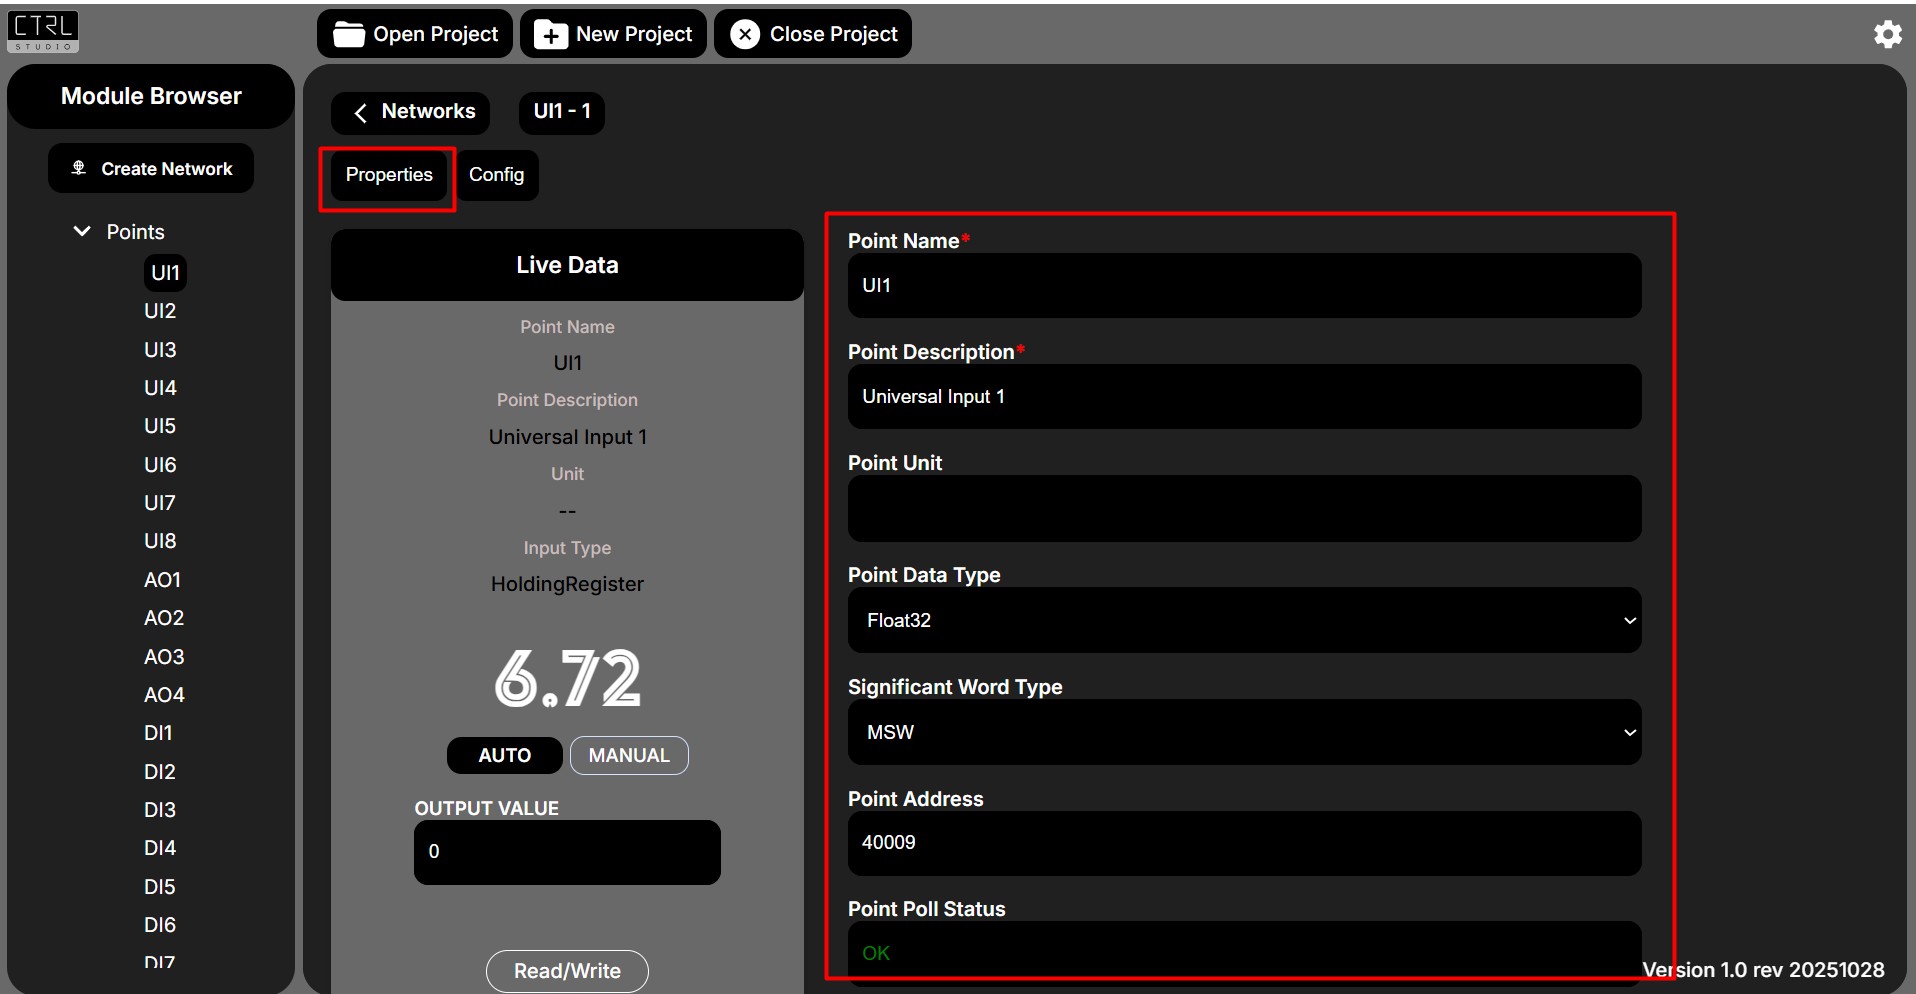
- Click Save to apply changes.
3. Configure Characteristics
Sensor Type
- Select any supported type for the sensor.
- Supported Sensor Types: DI, NTC10k, NTC20k, Voltage, Current, PT1000, Thermistor (up to 10k)
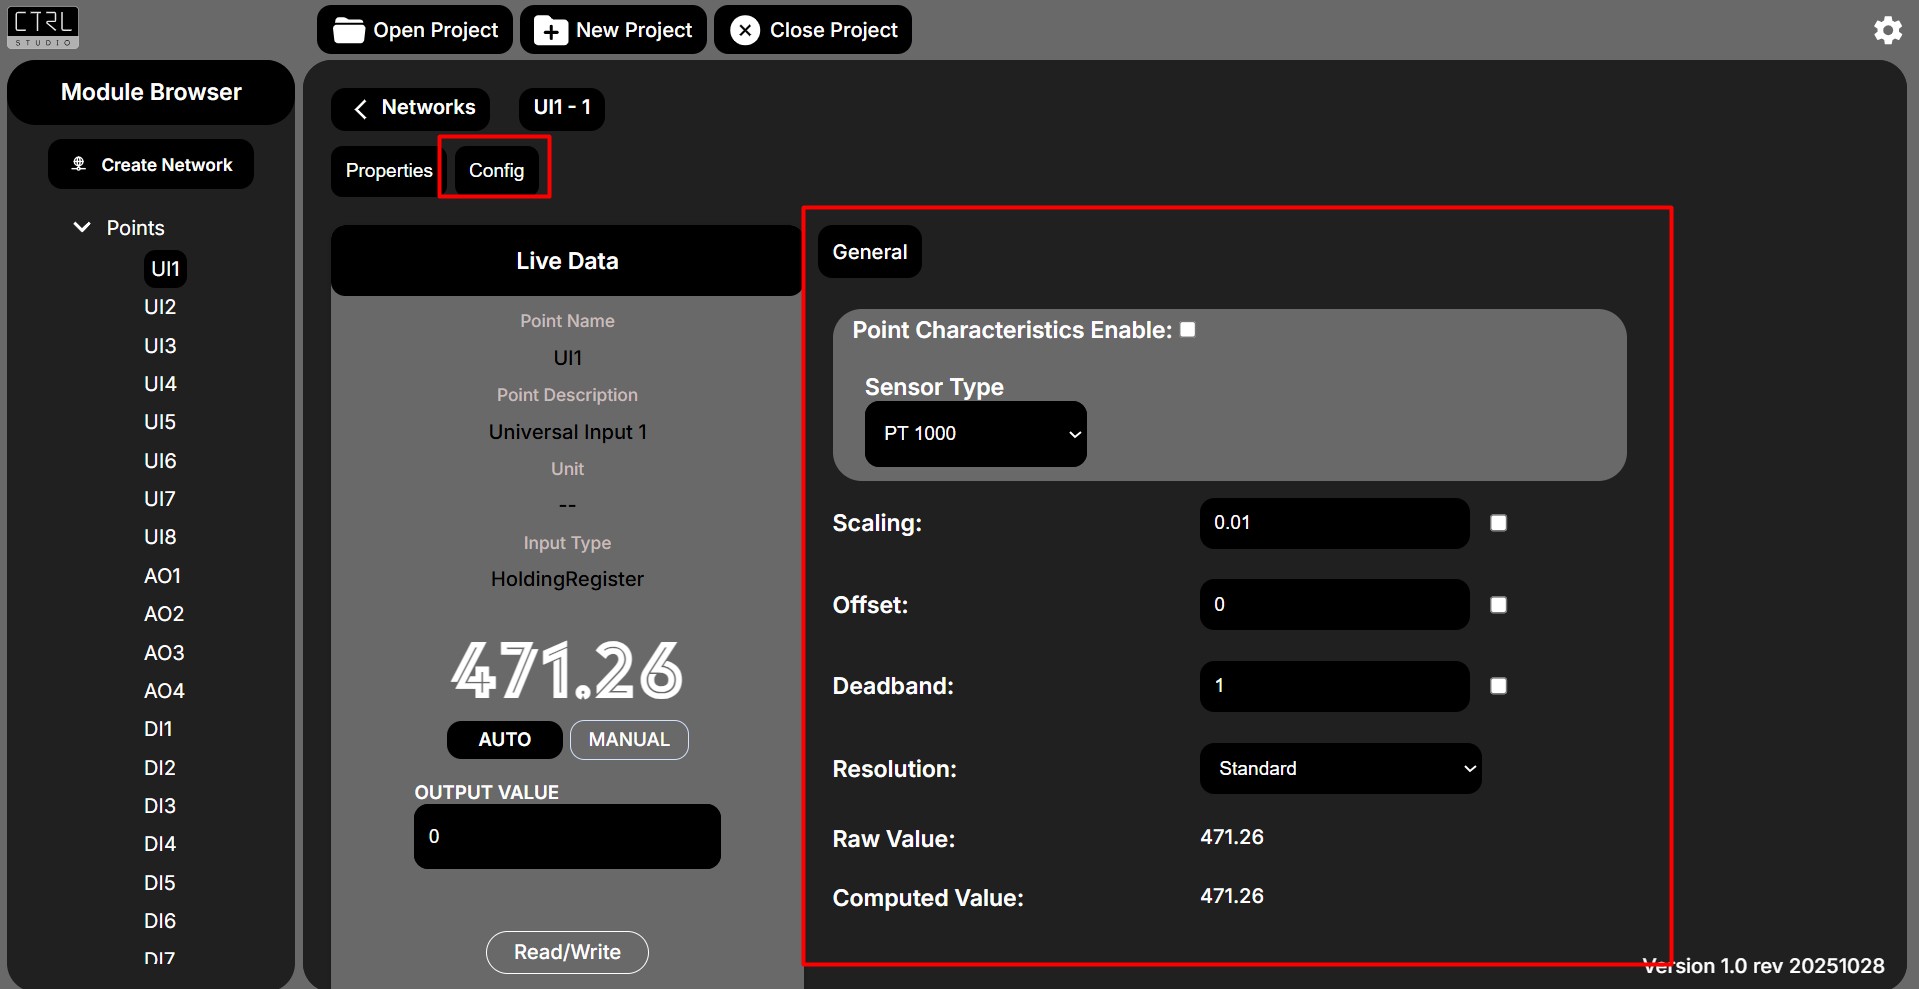
| Term | Description |
|---|---|
| Scaling | Multiply raw input value by a constant. |
| Offset | Constant added/subtracted to obtain corrected reading. |
| Deadband | Range within which changes are ignored to prevent fluctuations. |
| Resolution | Smallest detectable change. |
| Raw Value | Direct, unprocessed data from the sensor. |
| Computed Value | Final value after applying Scaling, Offset, or Point Characteristics. |
Clone Device
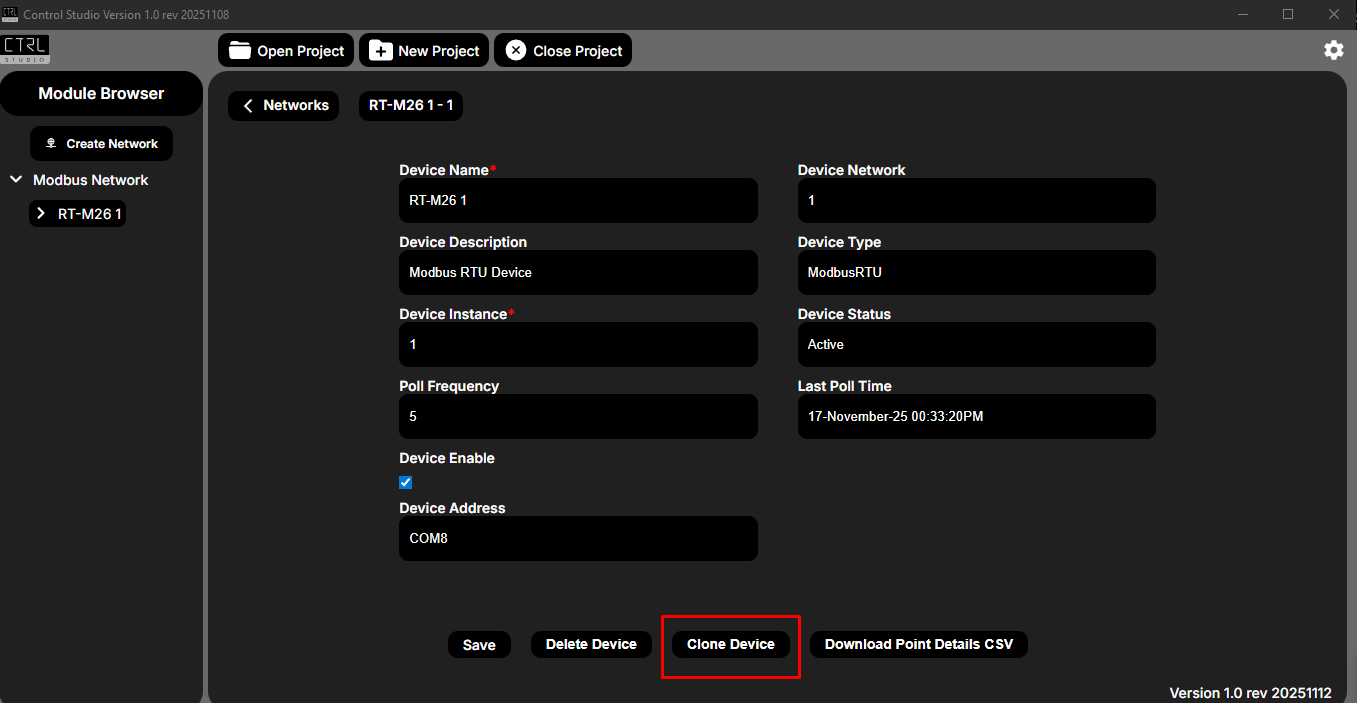
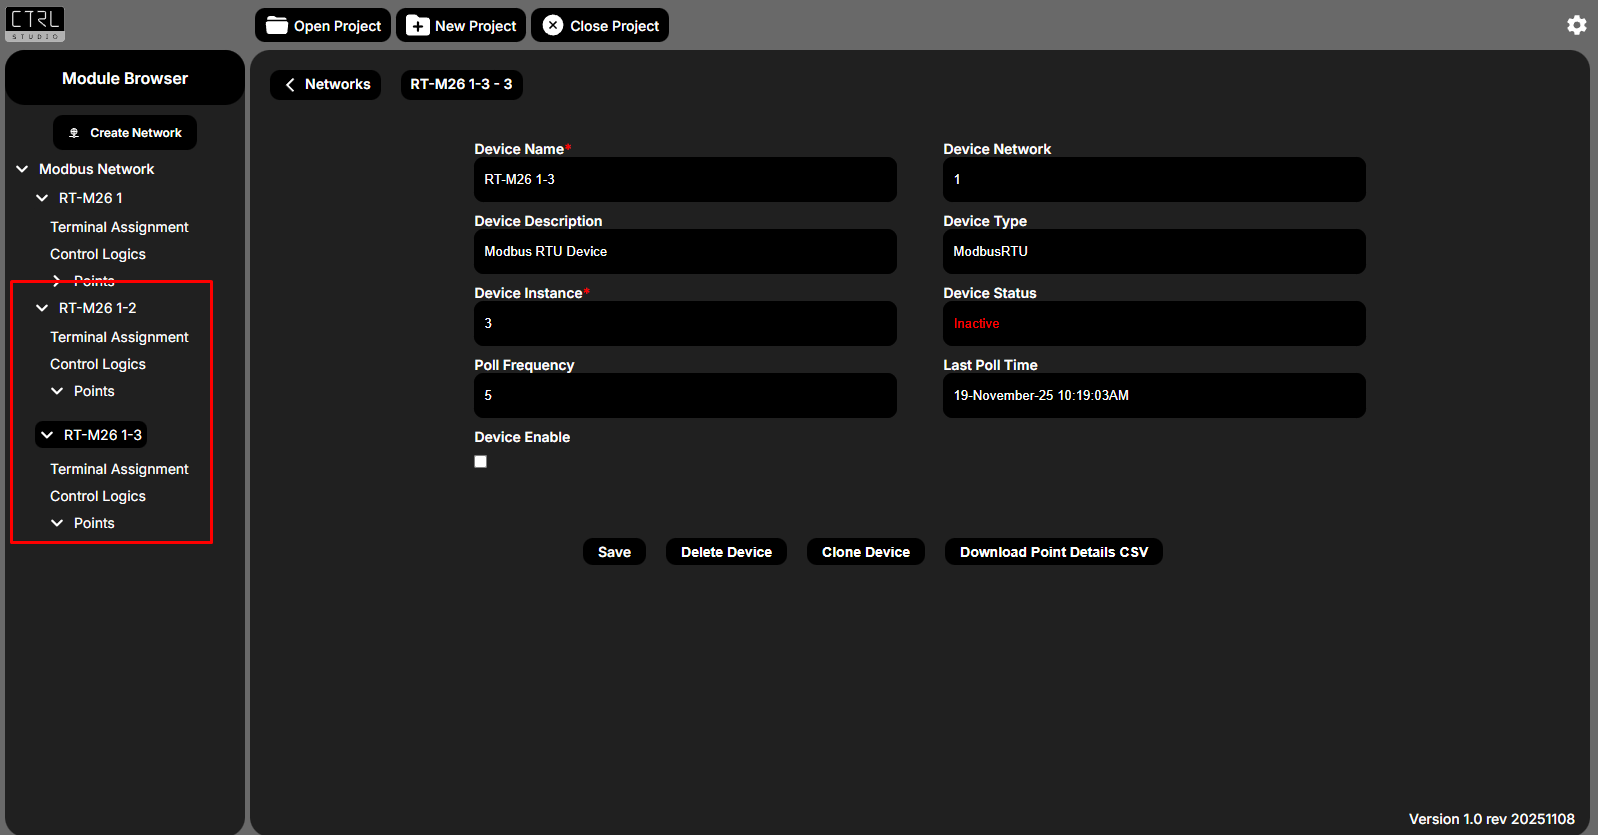
Use the Clone Device option to duplicate an existing device along with all its configured points and logics.
- Set the Clone Count to specify how many copies of the device you want to create.
- Each cloned device will automatically receive a unique Slave ID, ensuring no ID conflicts.
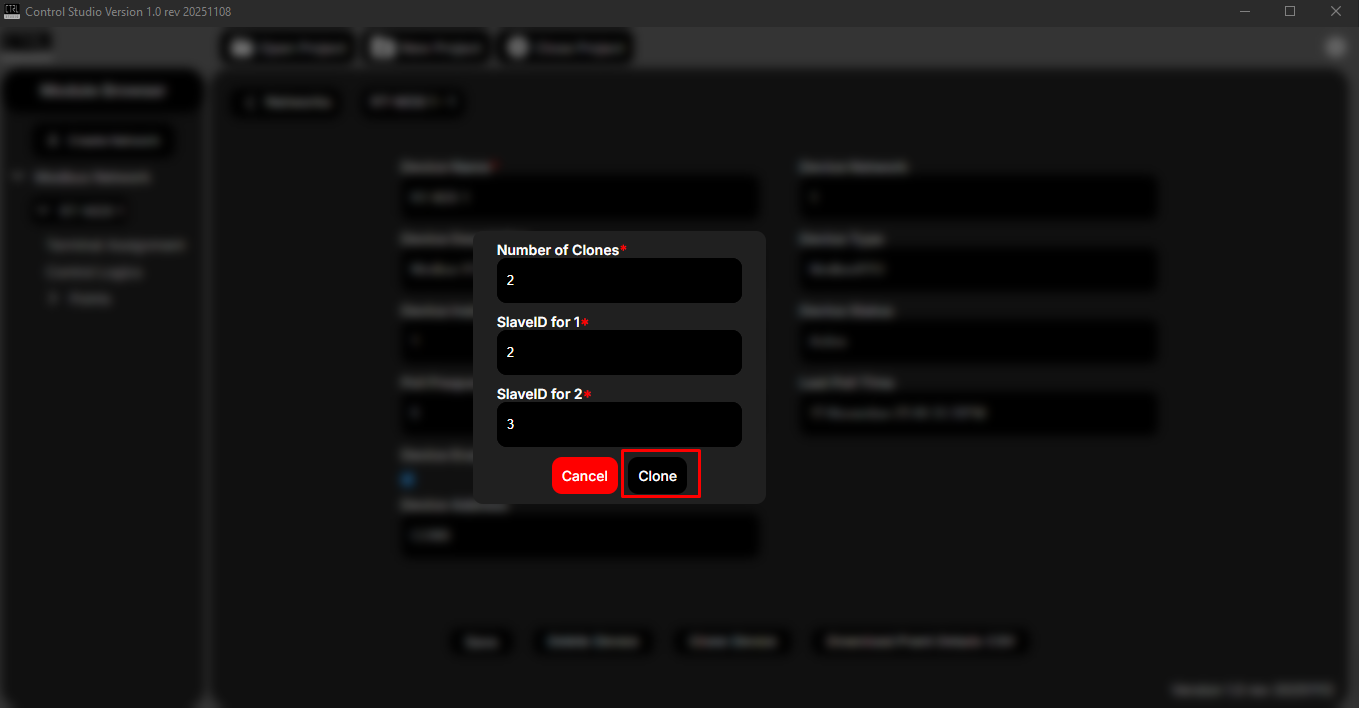
After the cloning process is complete, all points from the original device will be duplicated across the newly created devices, as shown below:
Download Points Details (CSV)
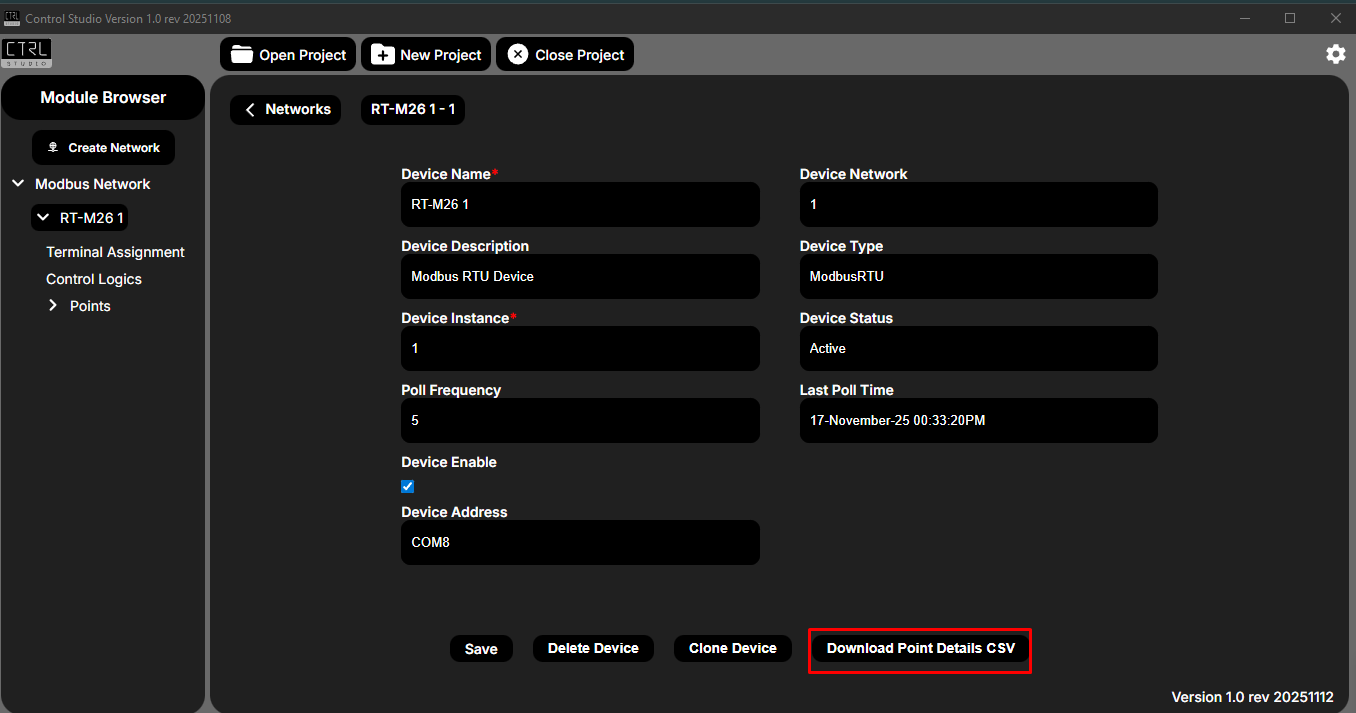
- Saves point information as a CSV file
- Choose save location manually
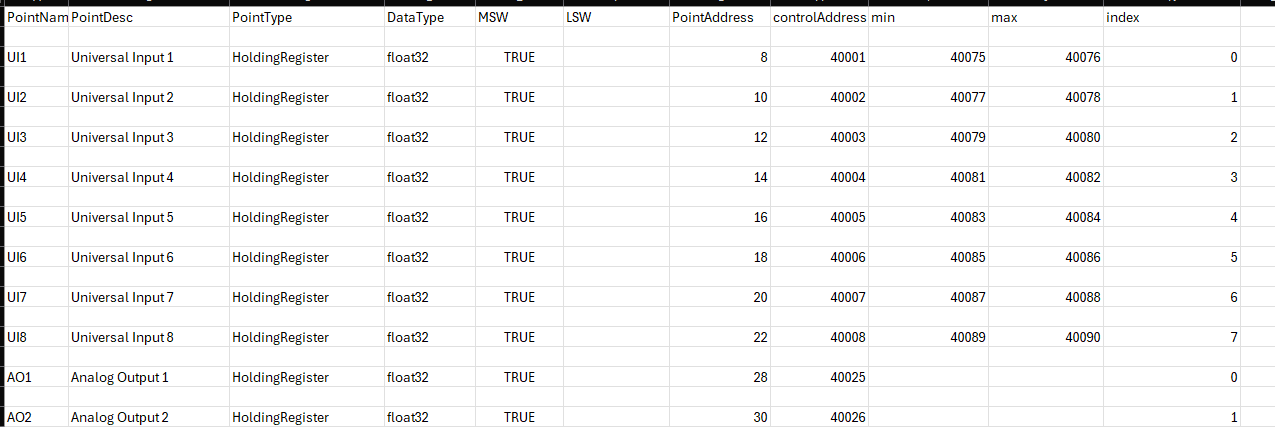
CSV Format Example
Settings
- Click Settings to open the settings page:
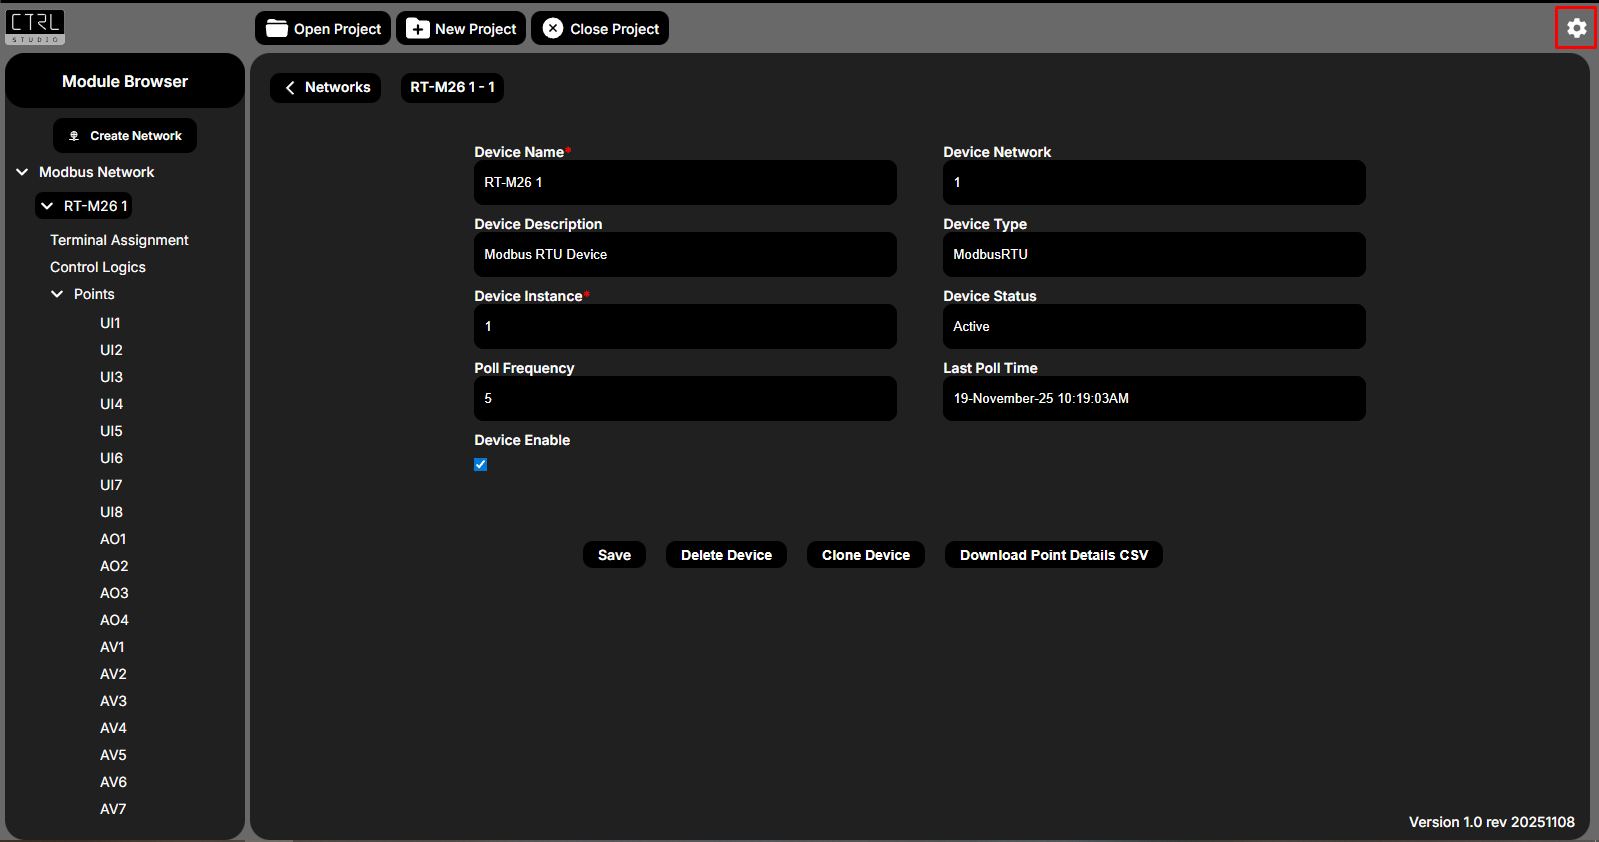
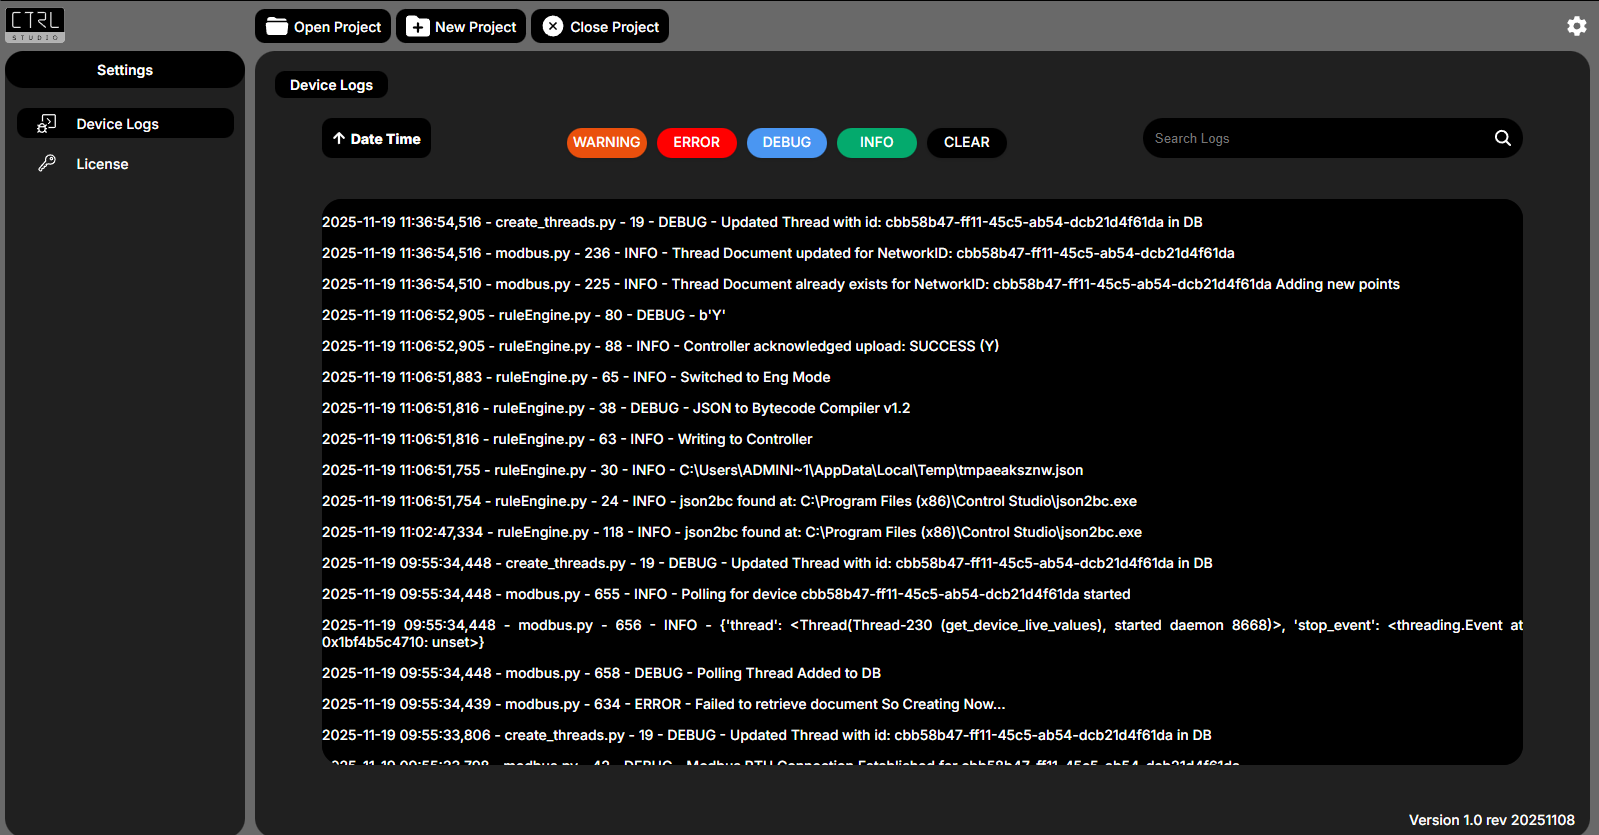
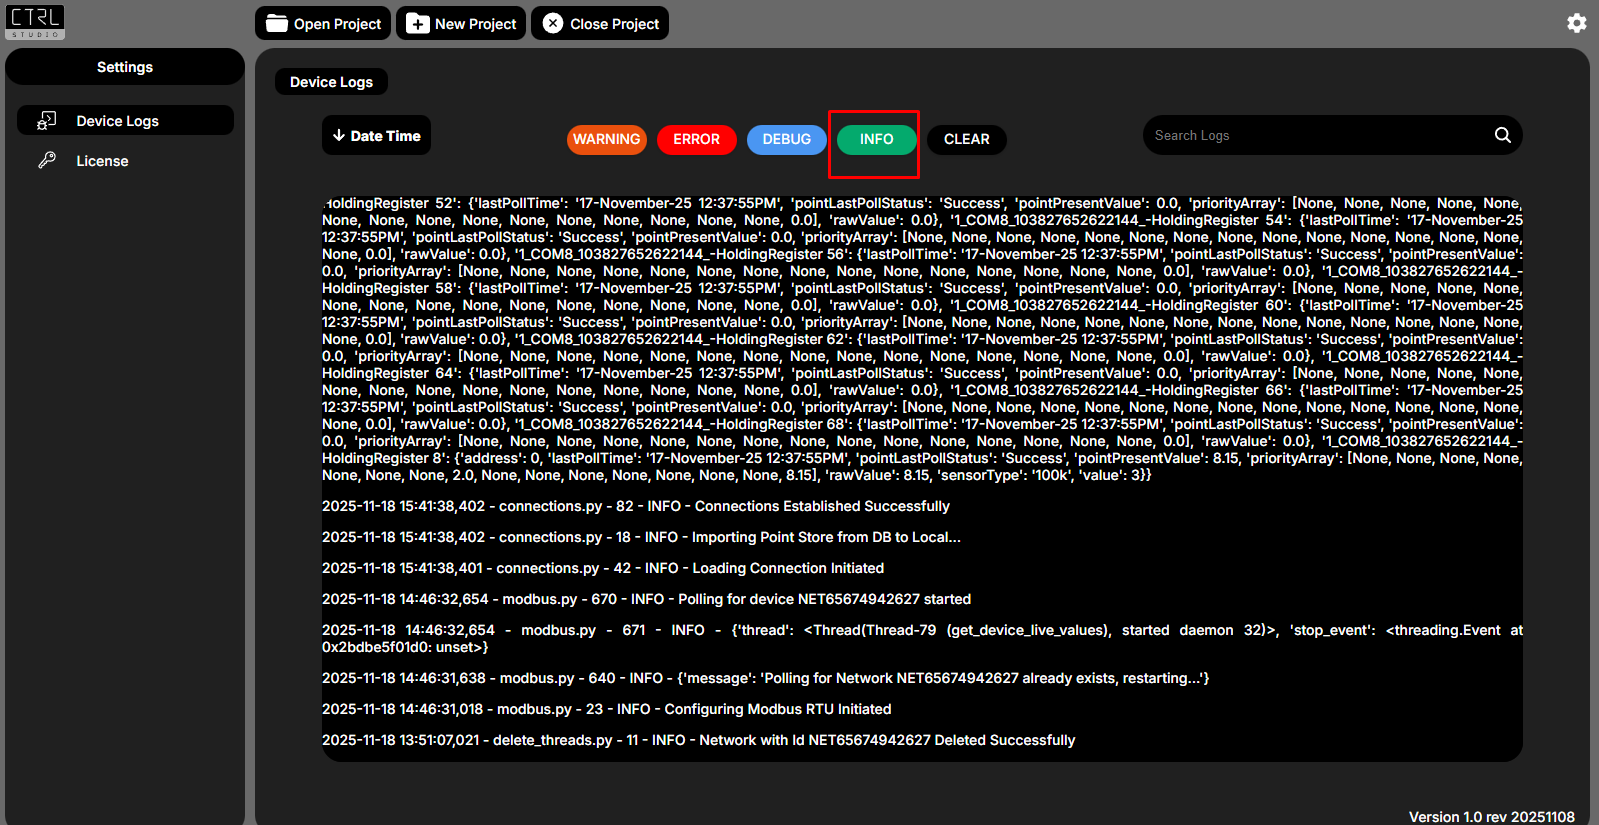
- Device Logs: view logs and filter by date.
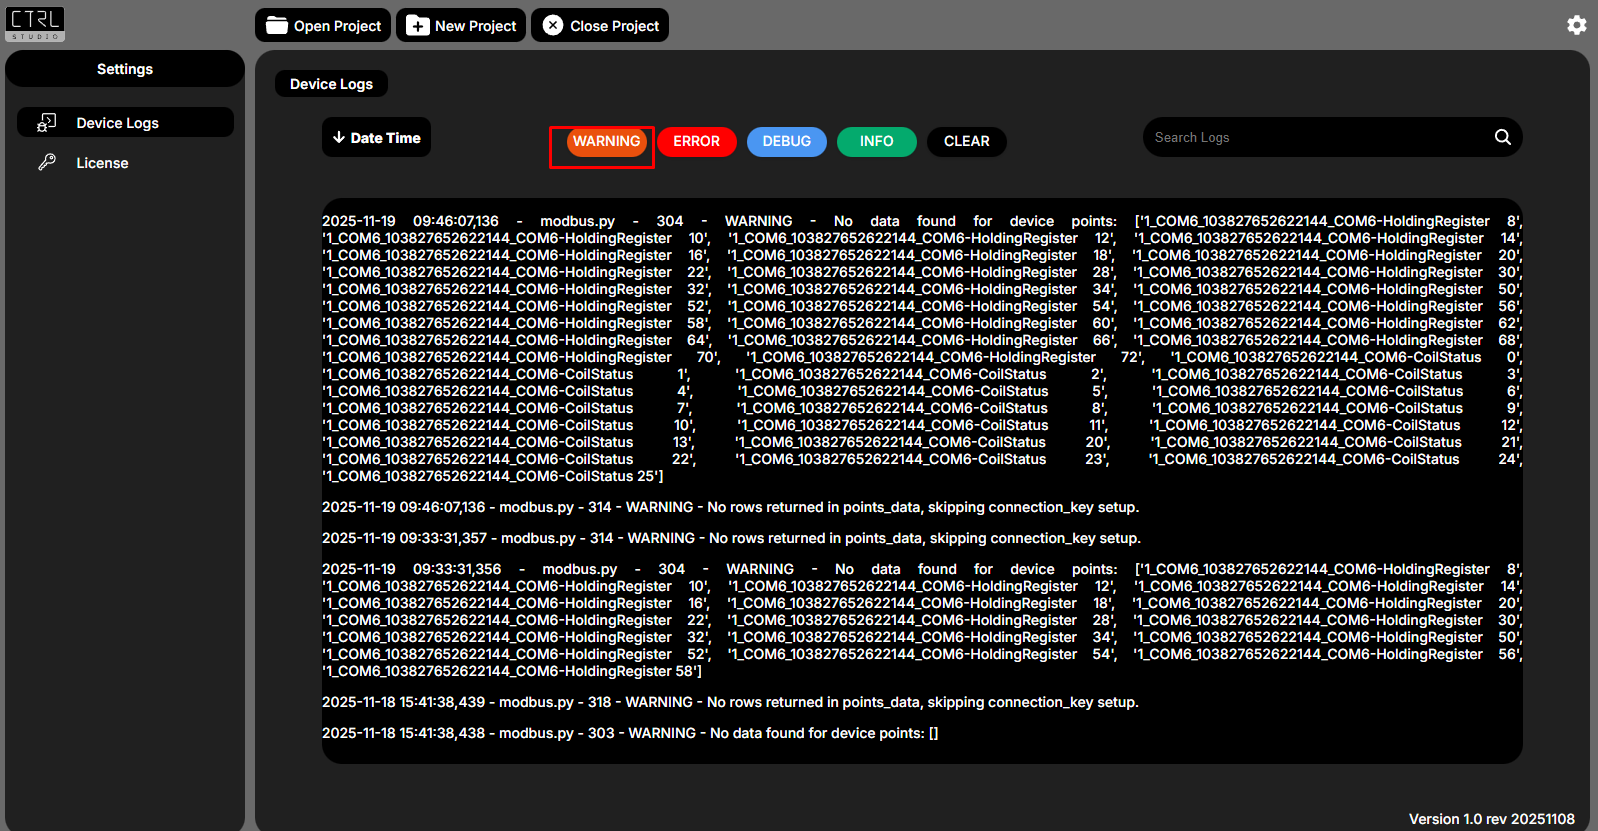
- Warnings: display warning messages.
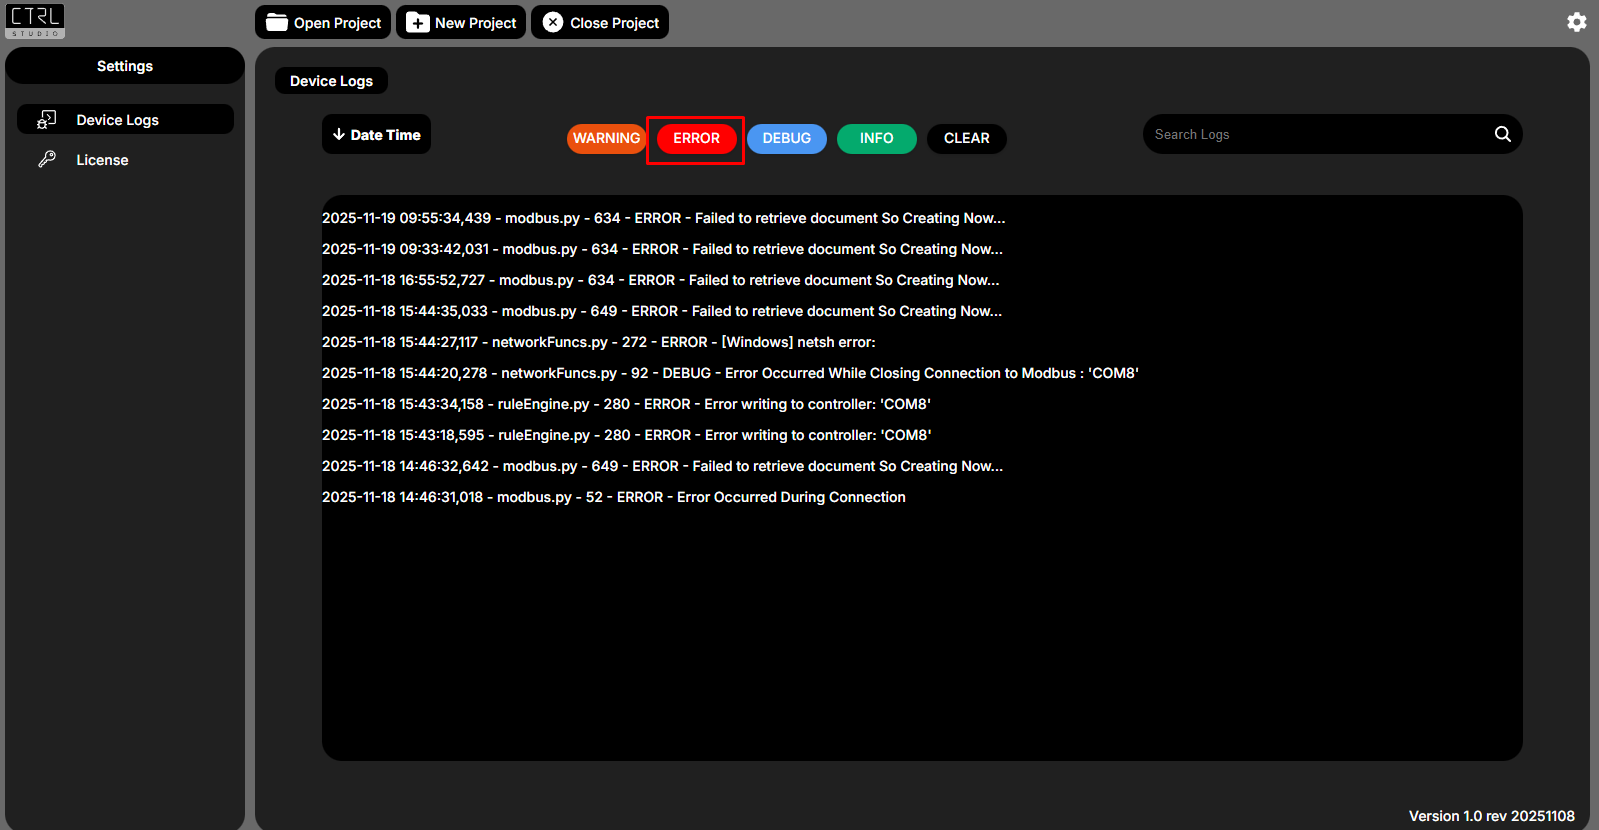
- Errors: display error messages.
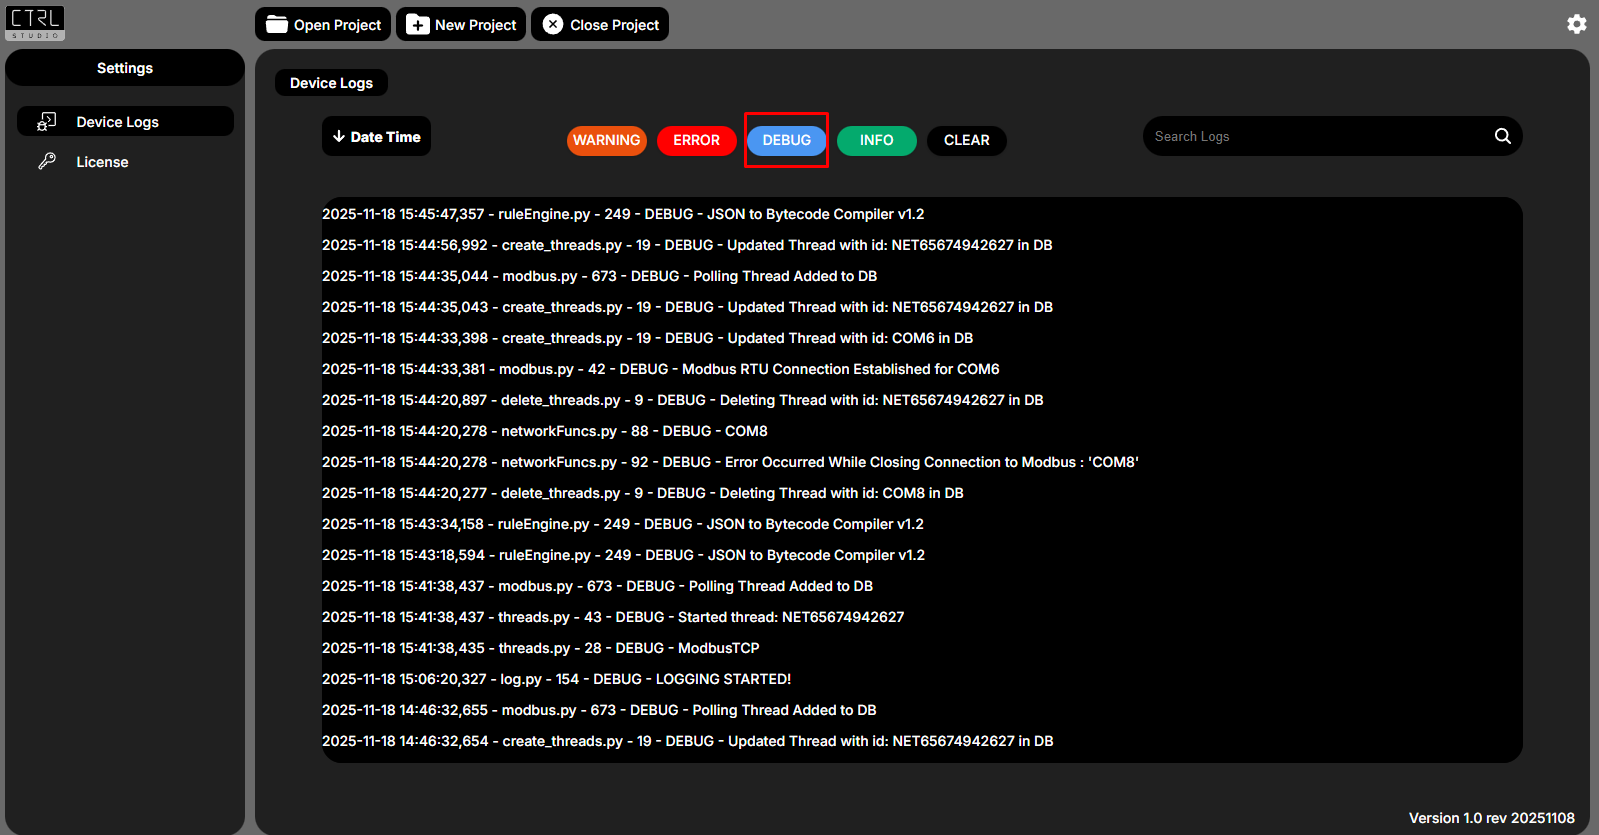
- Debug: view debug options.
- Info: view informational logs.
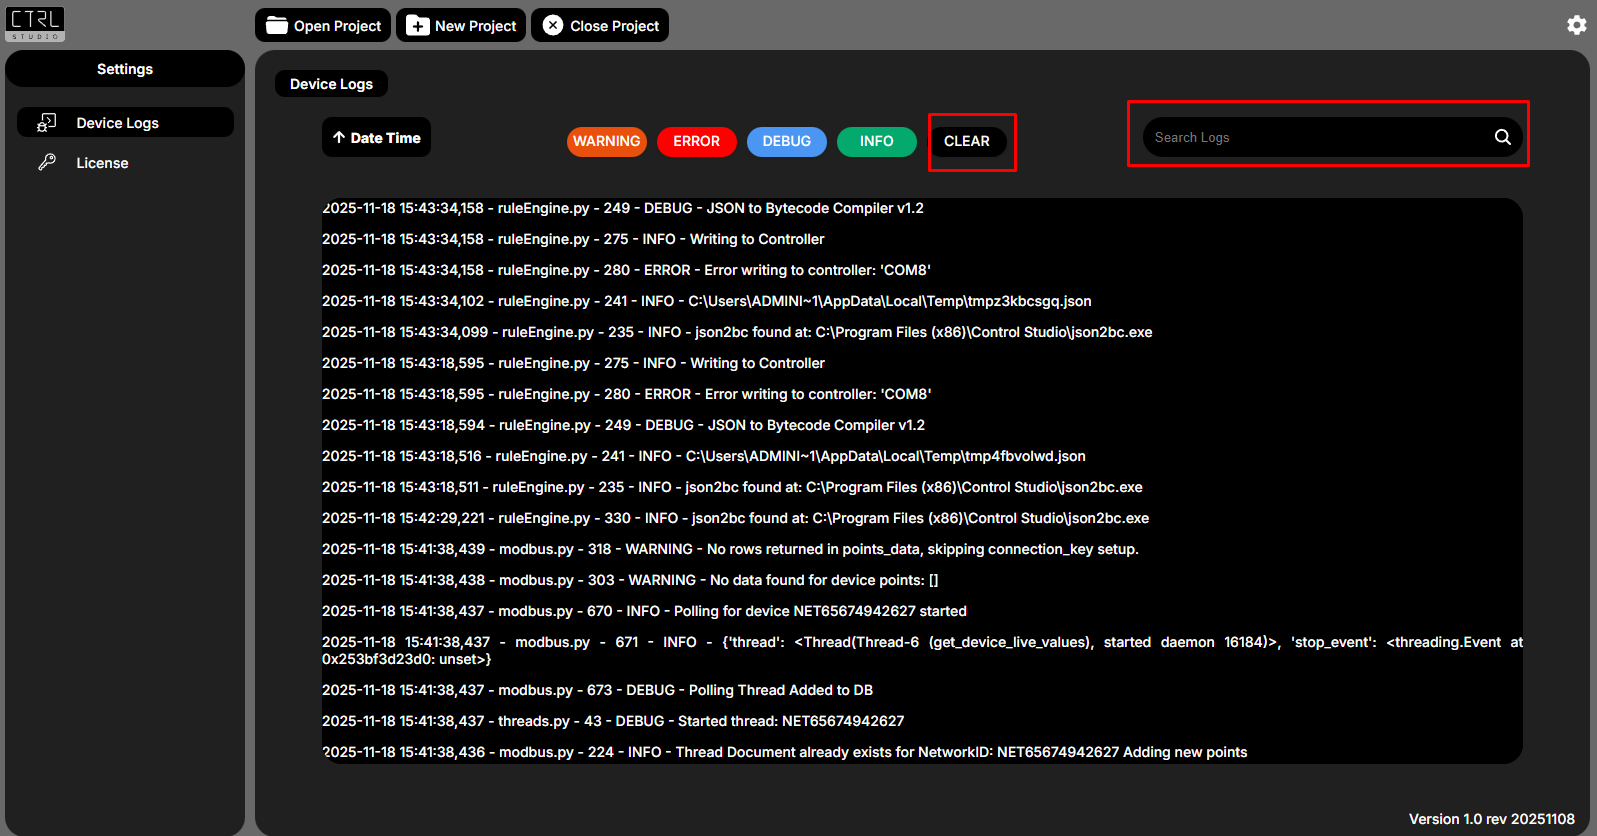
- Clear Logs: remove logs; Search button filters logs.
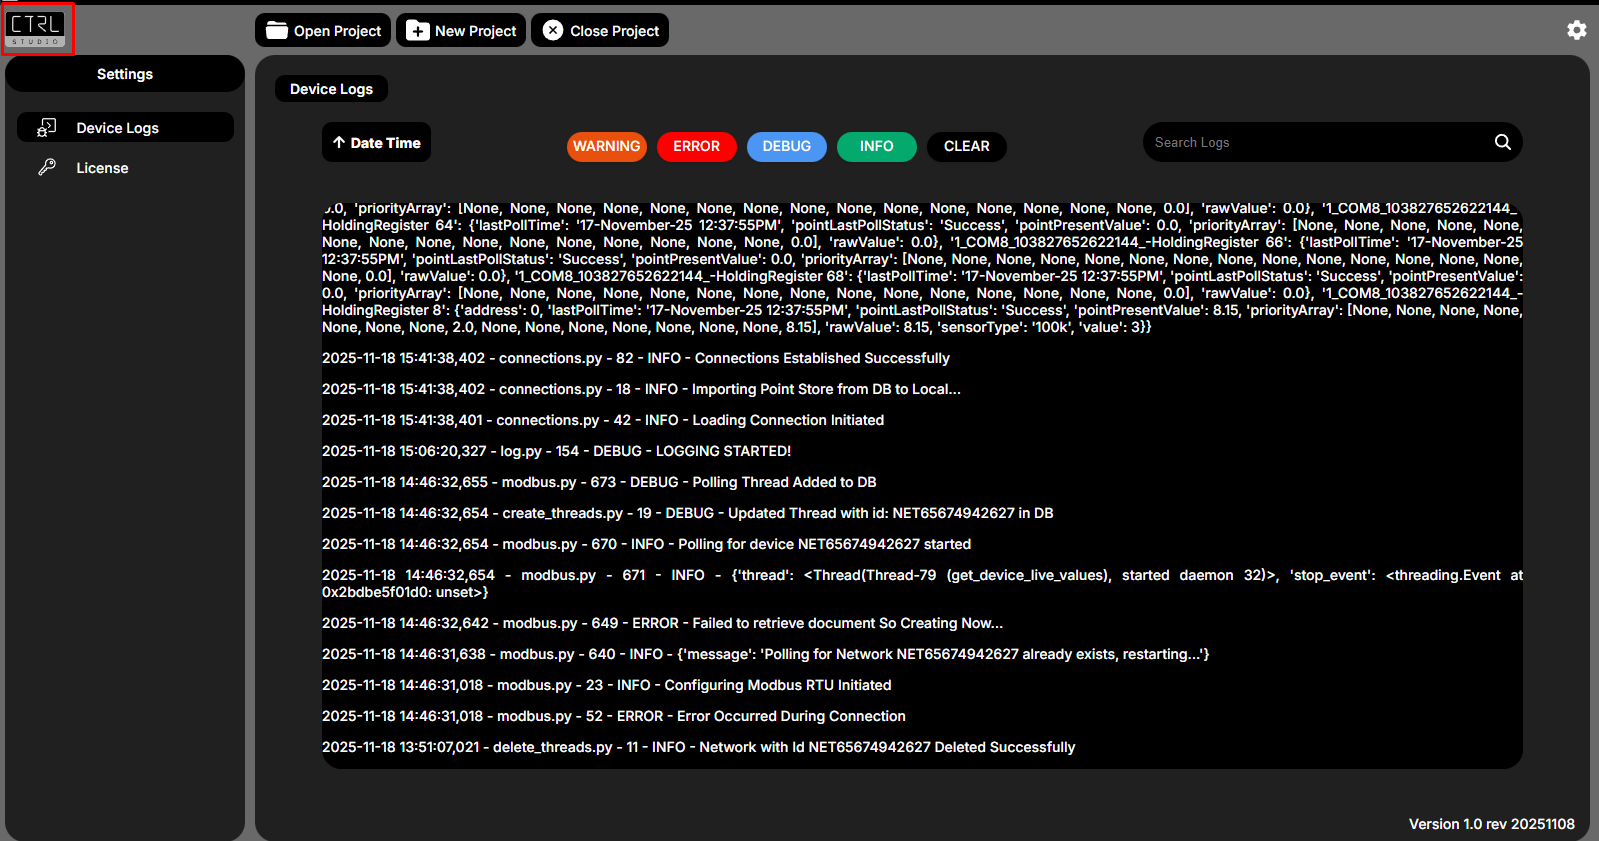
- Return Home: click Control Studio logo.
Opening a Project
-
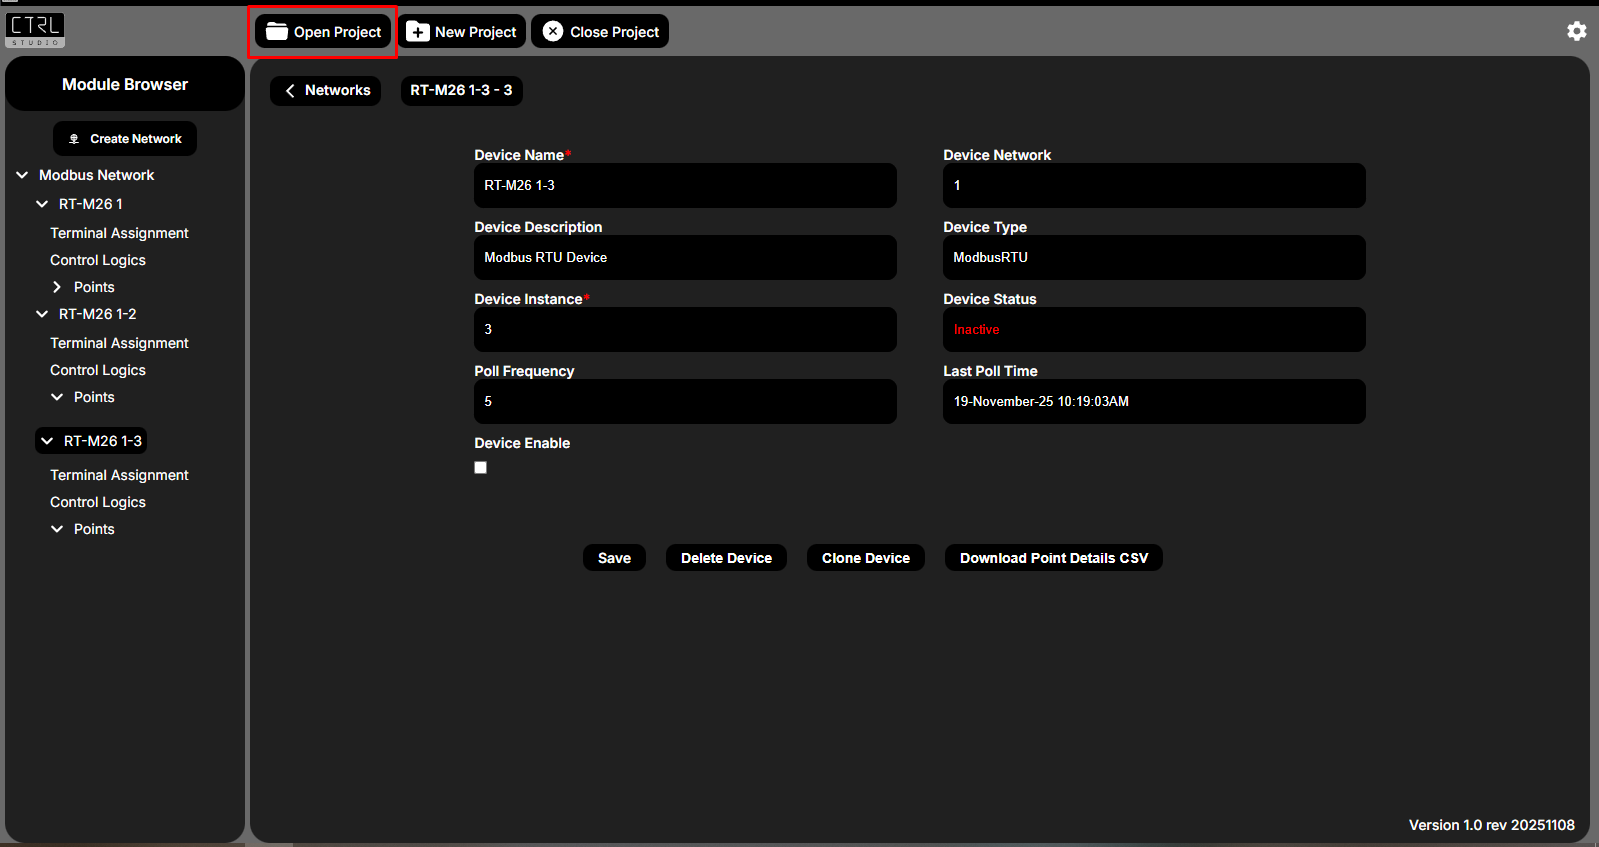
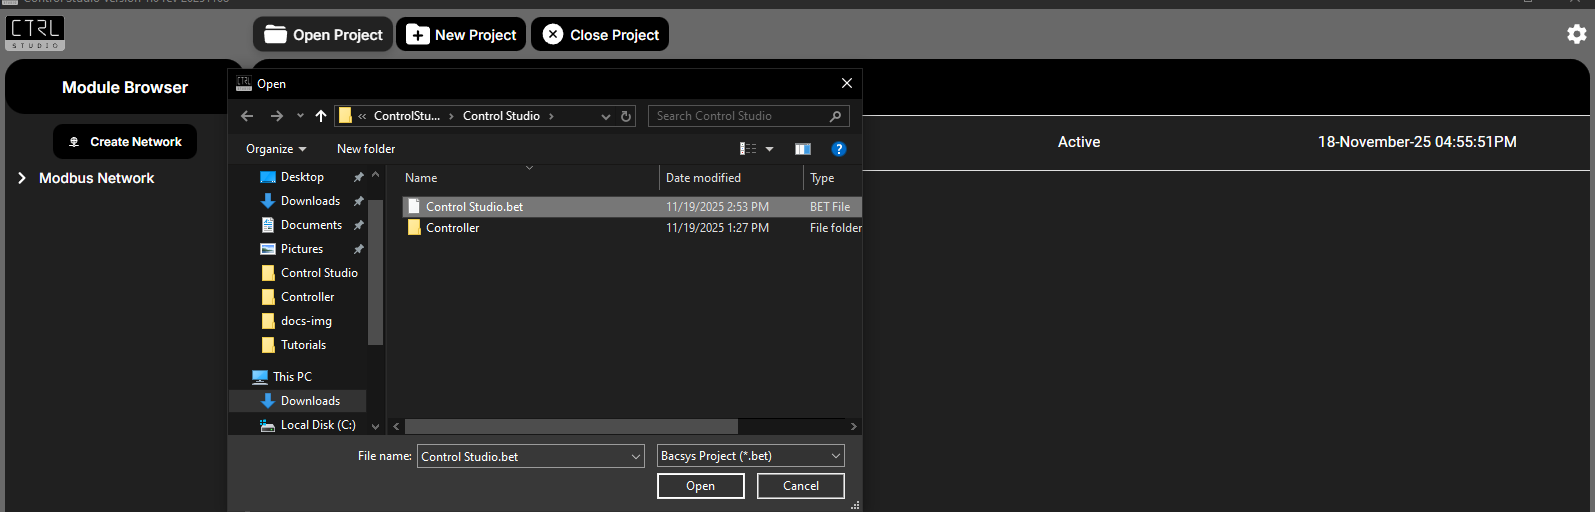
Click Open Project, then browse and select the project file.
-
Select the project folder. It will appear with your project name and typically has a .bet extension.
-
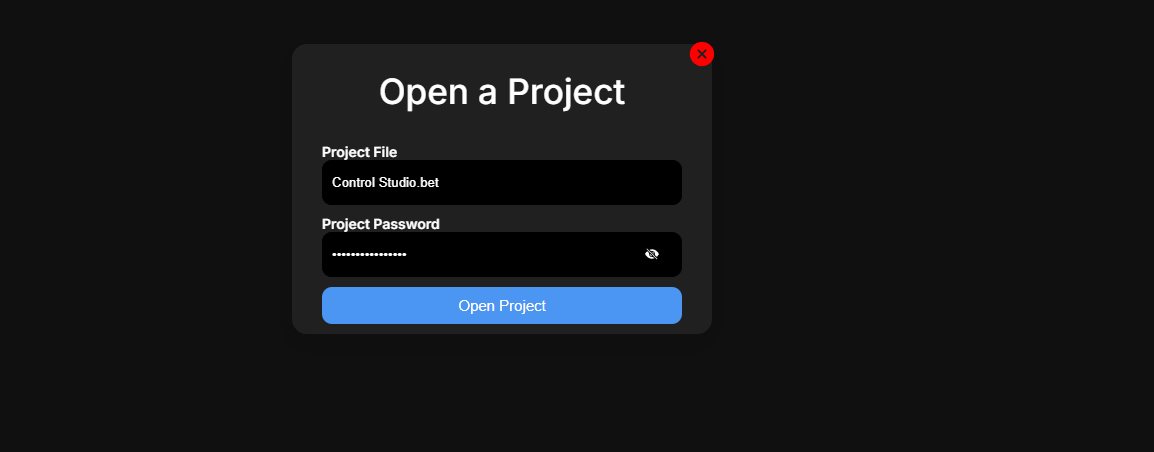
Enter the project password when prompted.
New Project
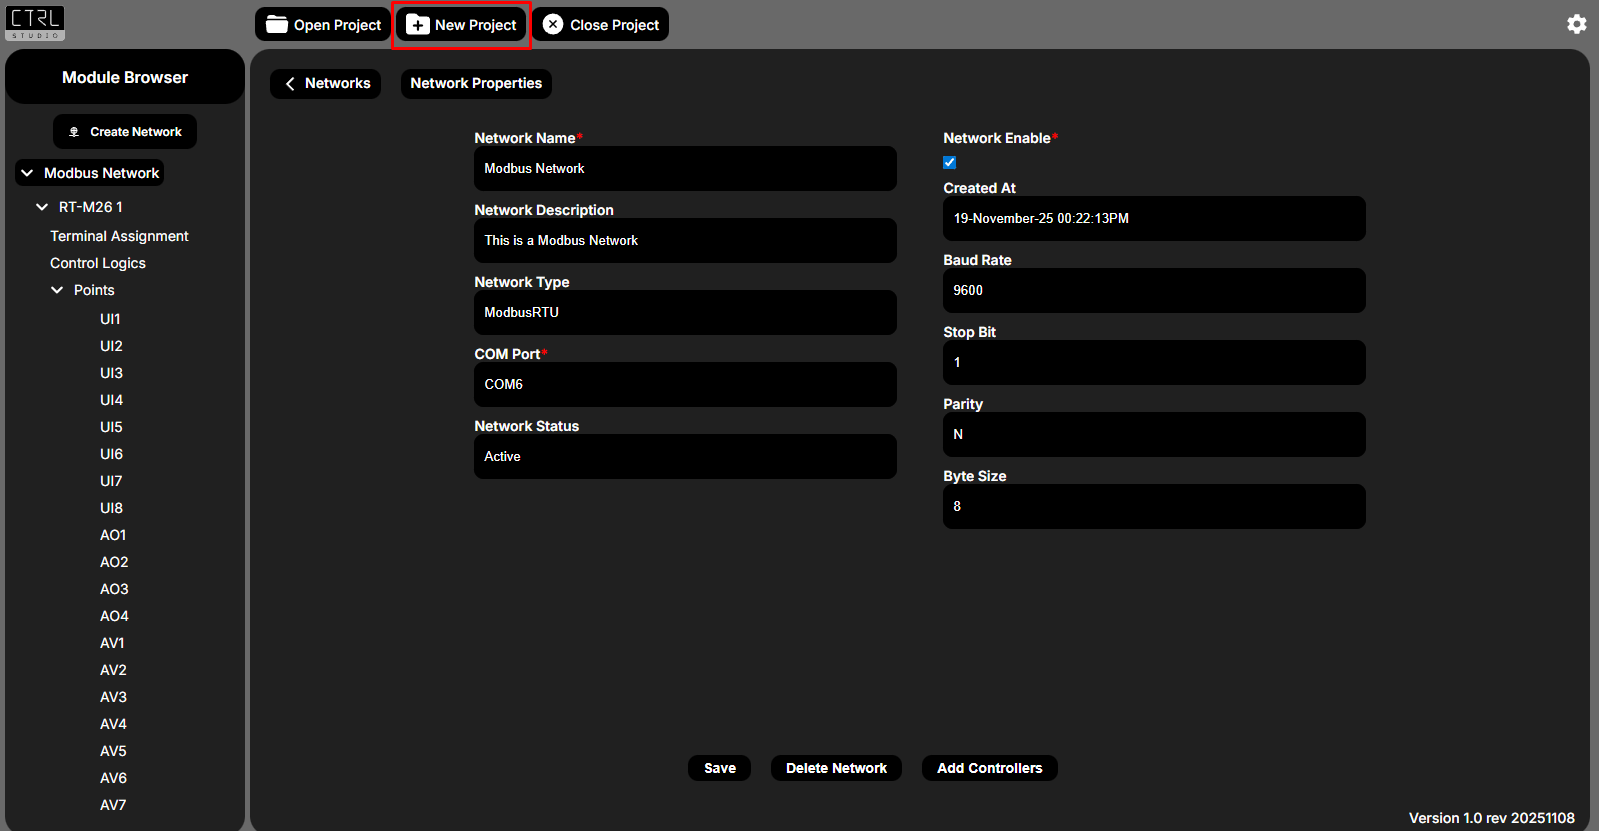
- Click New Project, select the desired project location, fill in the project details, and then click Create Project.
Choose the folder where you want to save your project:
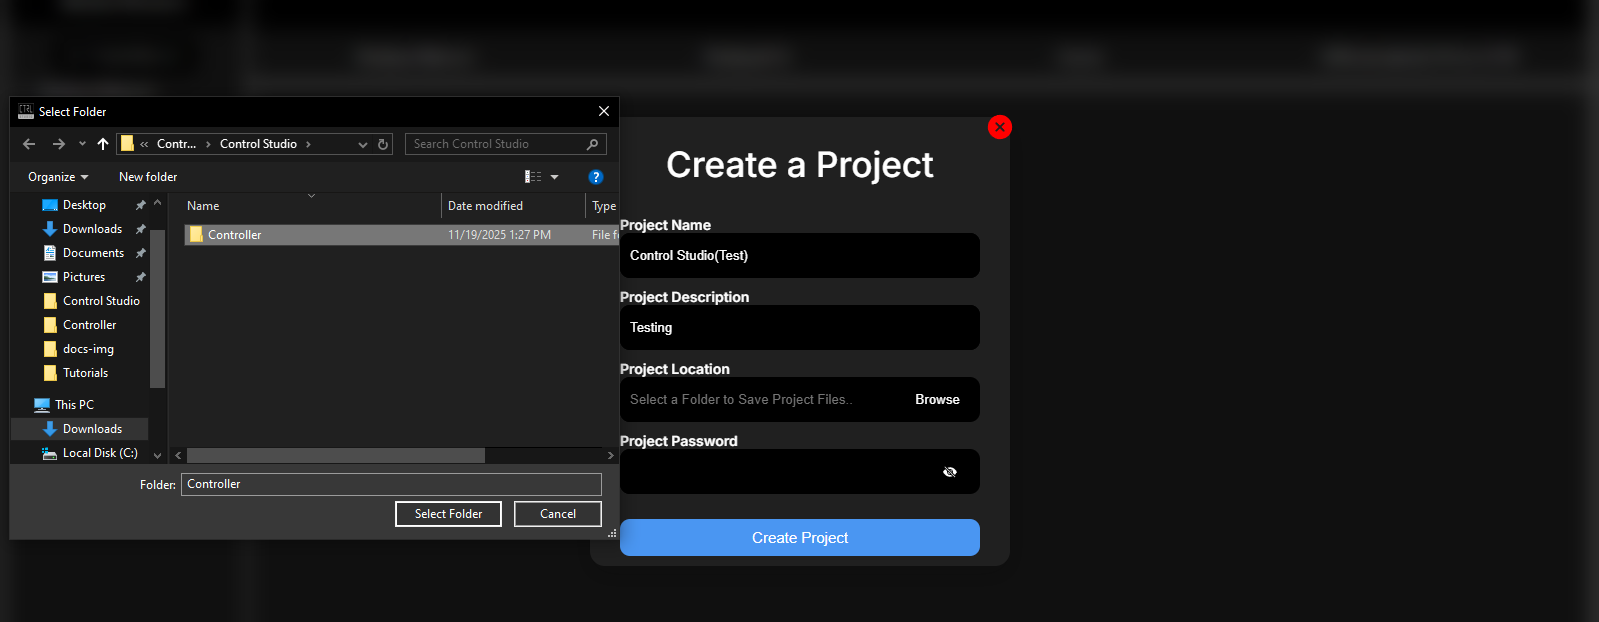
Fill in all required fields and click Create Project to proceed:
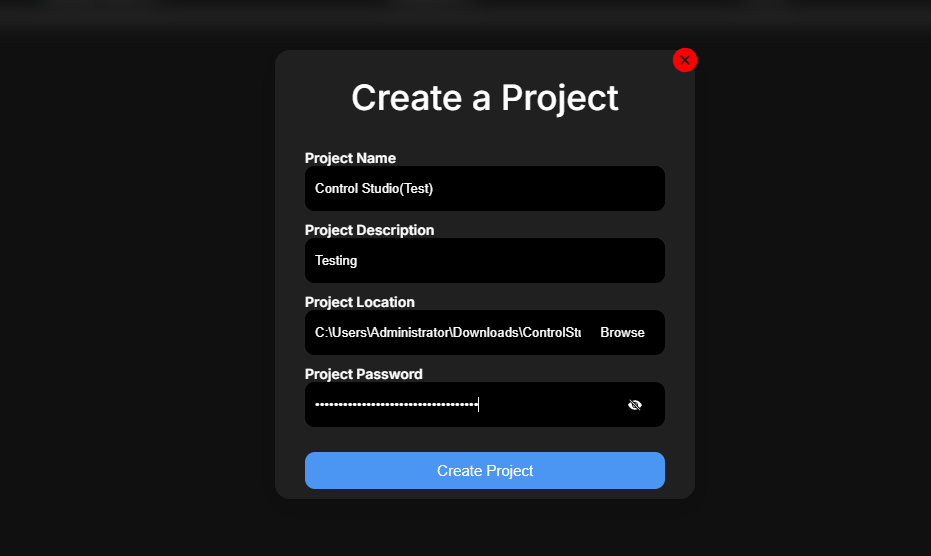
| Field | Description |
|---|---|
| Project Name | Enter project name. |
| Project Description | Short project description. |
| Project Location | Folder/location to save project. |
| Project Password | Password to protect project. |
Open an Existing Project
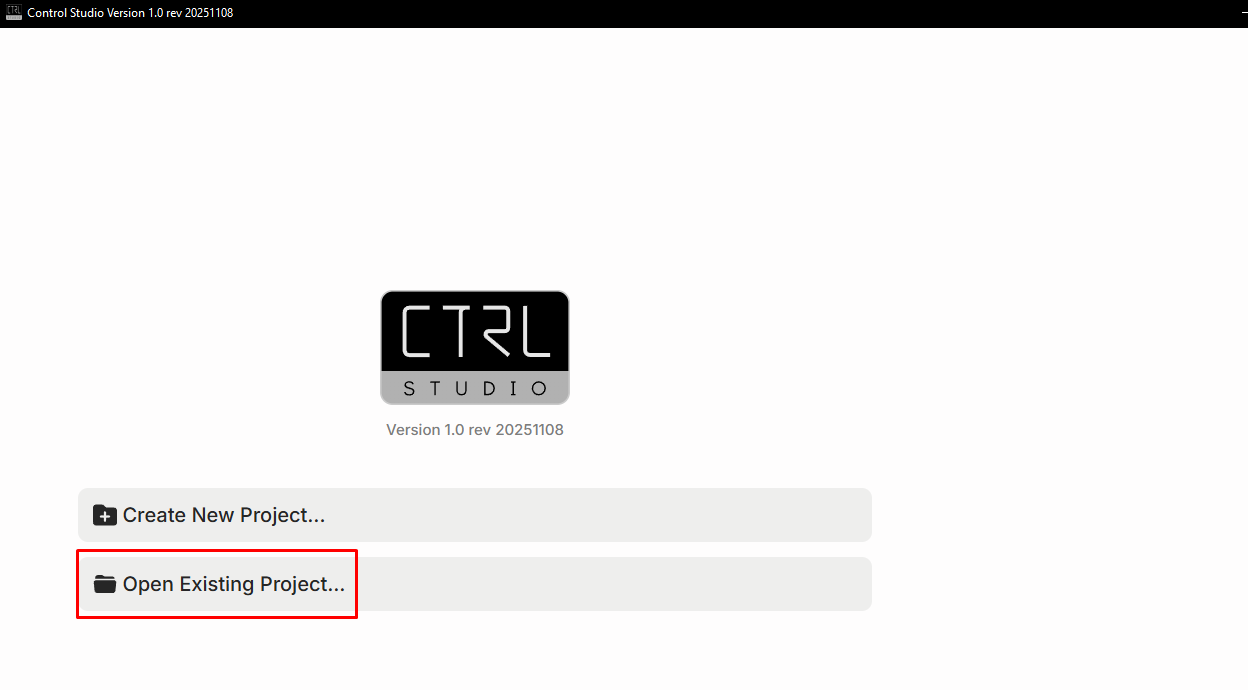
- Launch Control Studio.
- Click Open Existing Project.
-
- Select project folder/location.
- Enter password.
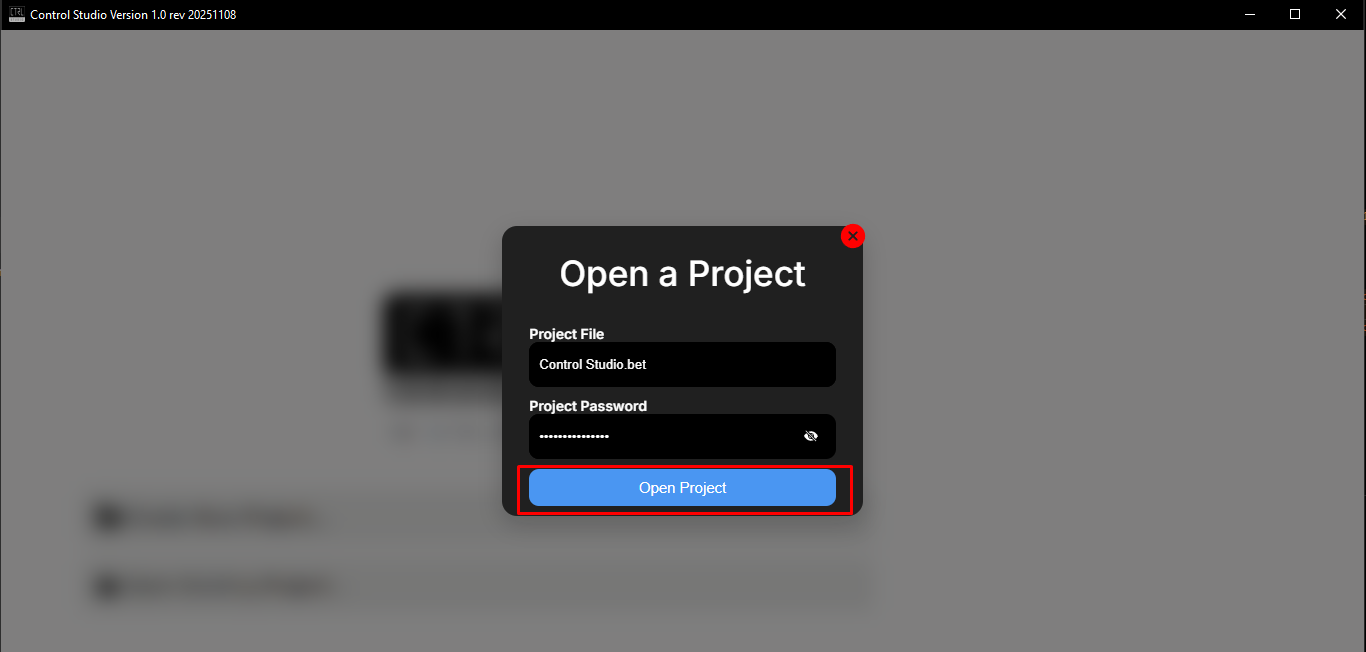
- Click Open Project.
- Continue from last saved state.
Tips
- Hover over icons for tooltips
- Save logic templates
- Ensure RS485 drivers are installed
Support
Email: hello@bacsys.ai
Website: https://bacsys.ai