

Creating a Schedule
To create a new schedule:
- Navigate to the Schedules module.
- Click the + icon in the Schedules panel, or click the New Schedule button.
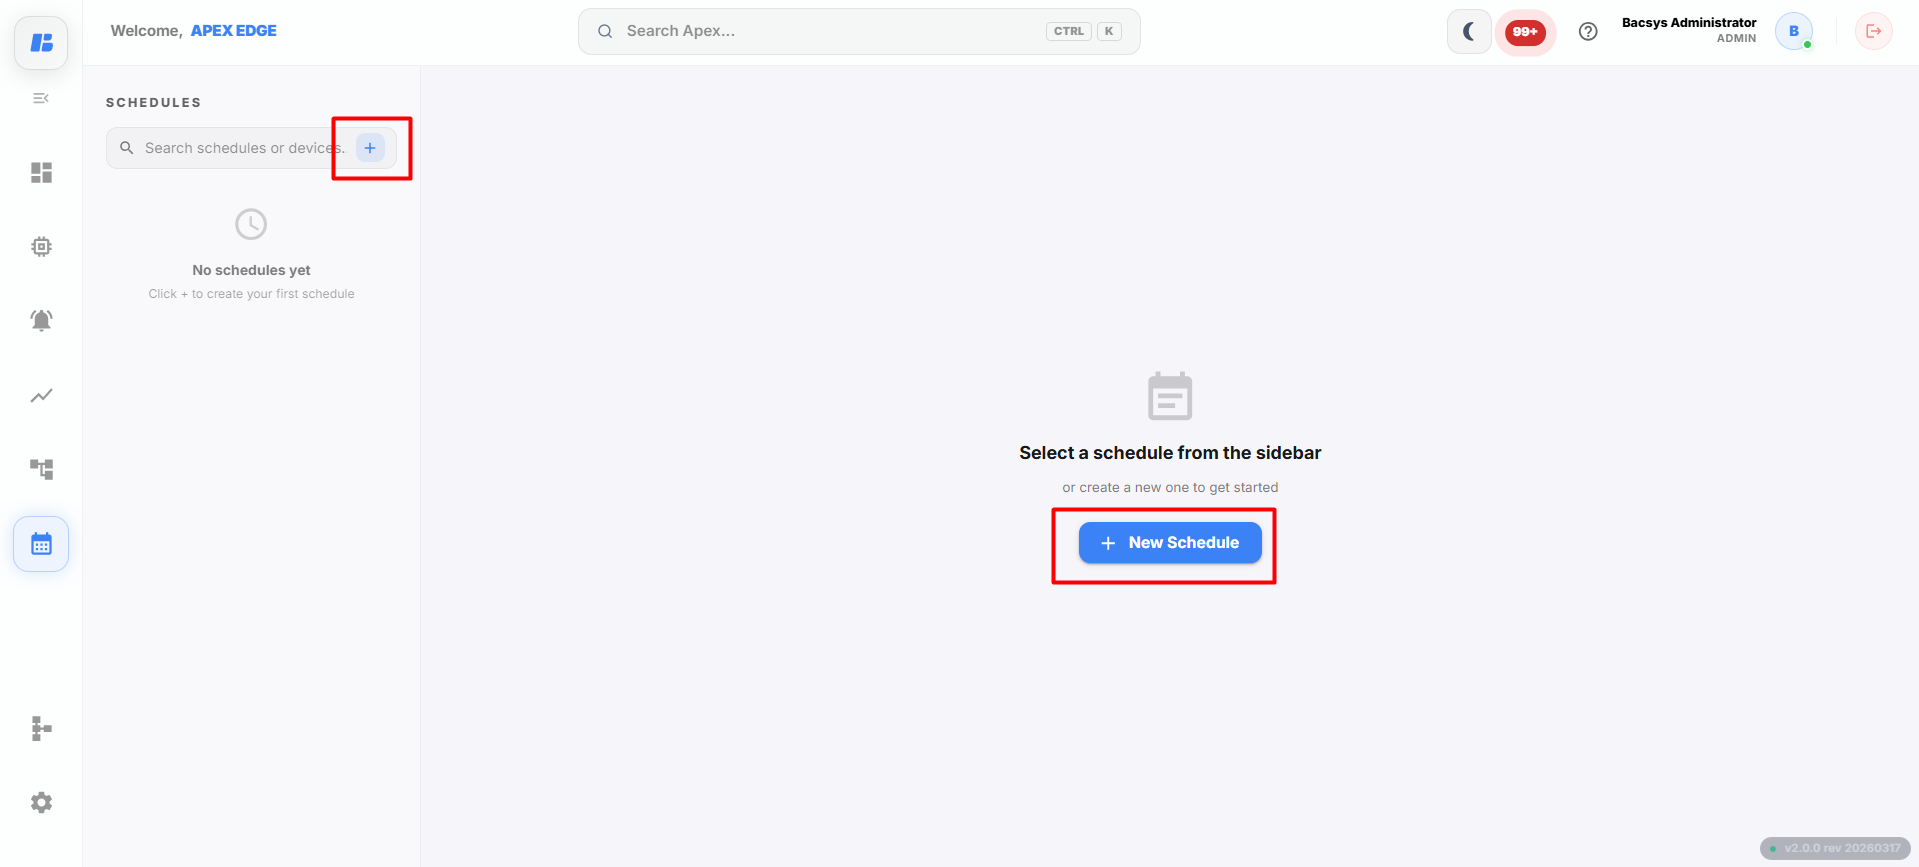
- The Create Schedule dialog box is displayed.
- Enter a name for the schedule in the Schedule Name field.
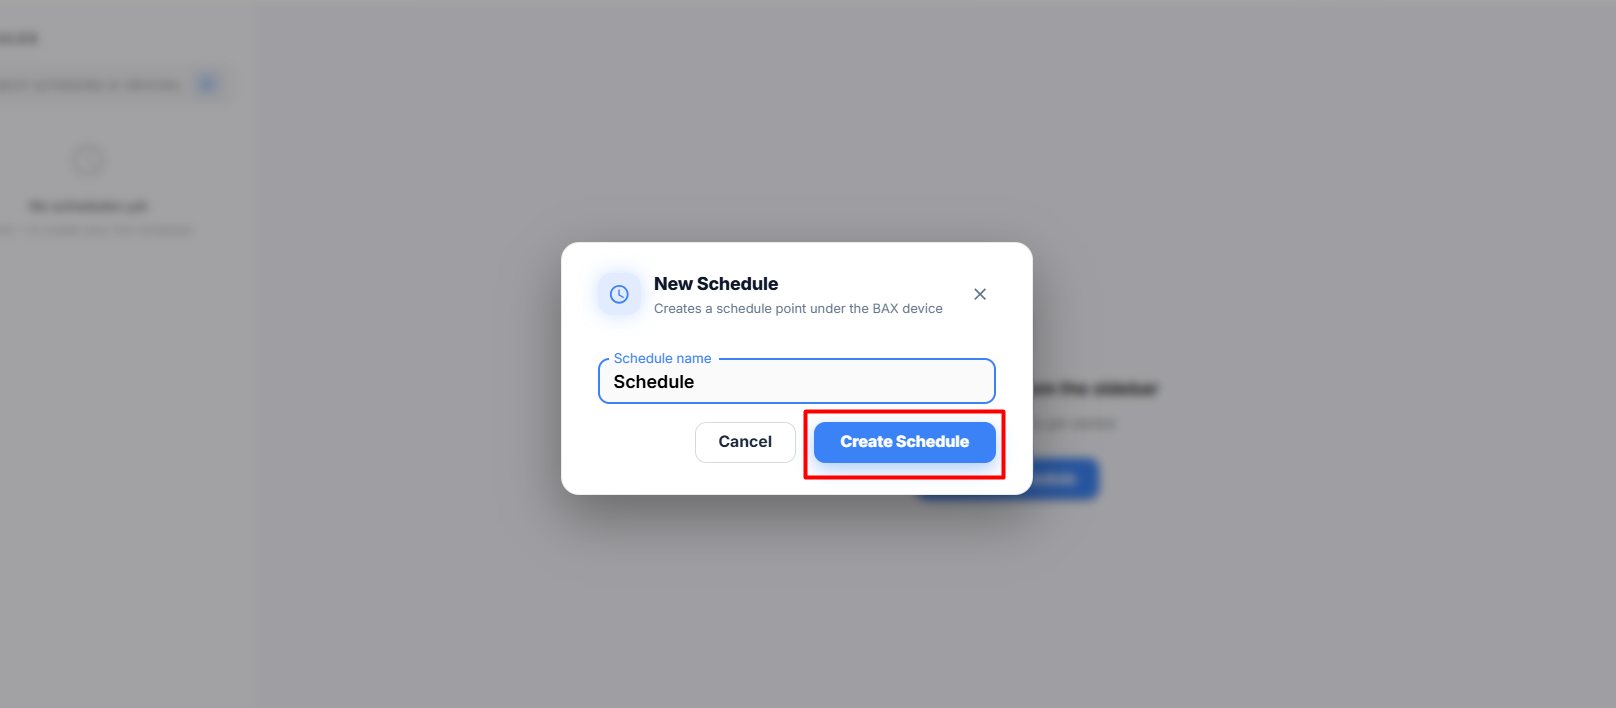
- Click Create Schedule.
A new schedule is created and the Schedule Editor opens.
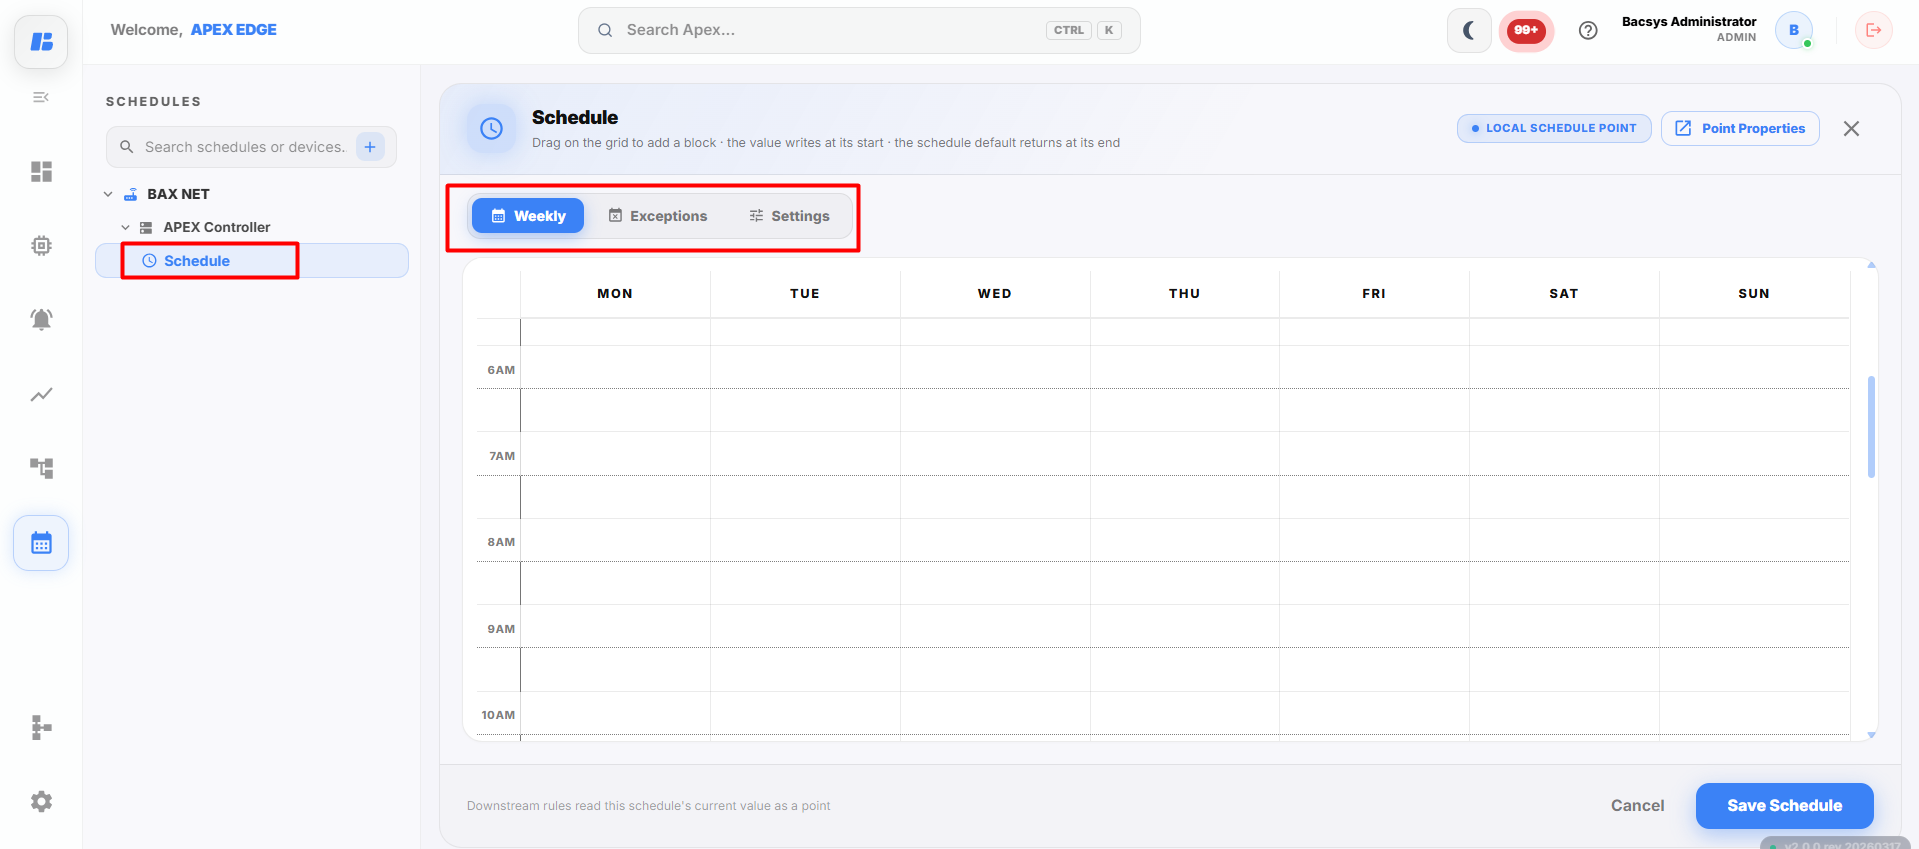
The Schedule Editor contains the following tabs:
- Weekly
- Exceptions
- Settings
Weekly
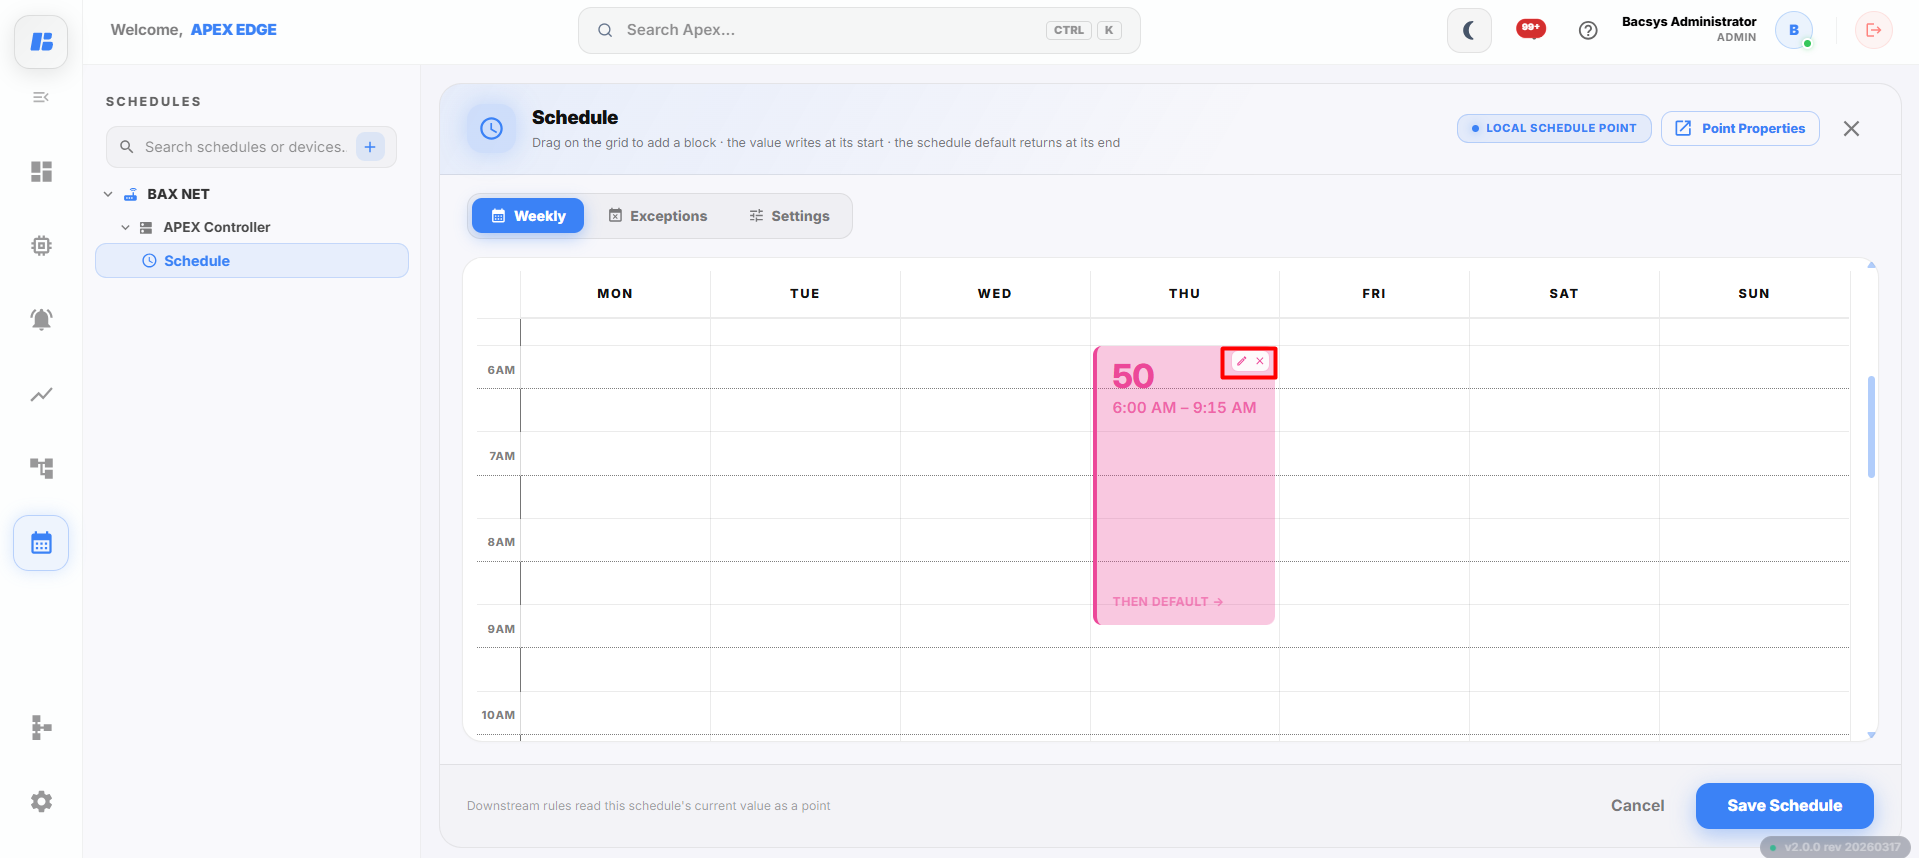
The Weekly tab is used to create recurring schedules for each day of the week.
To add a weekly schedule entry:
- Select the Weekly tab.
- Drag and drop on the required time slot in the schedule grid.
- The Edit Block dialog box is displayed.
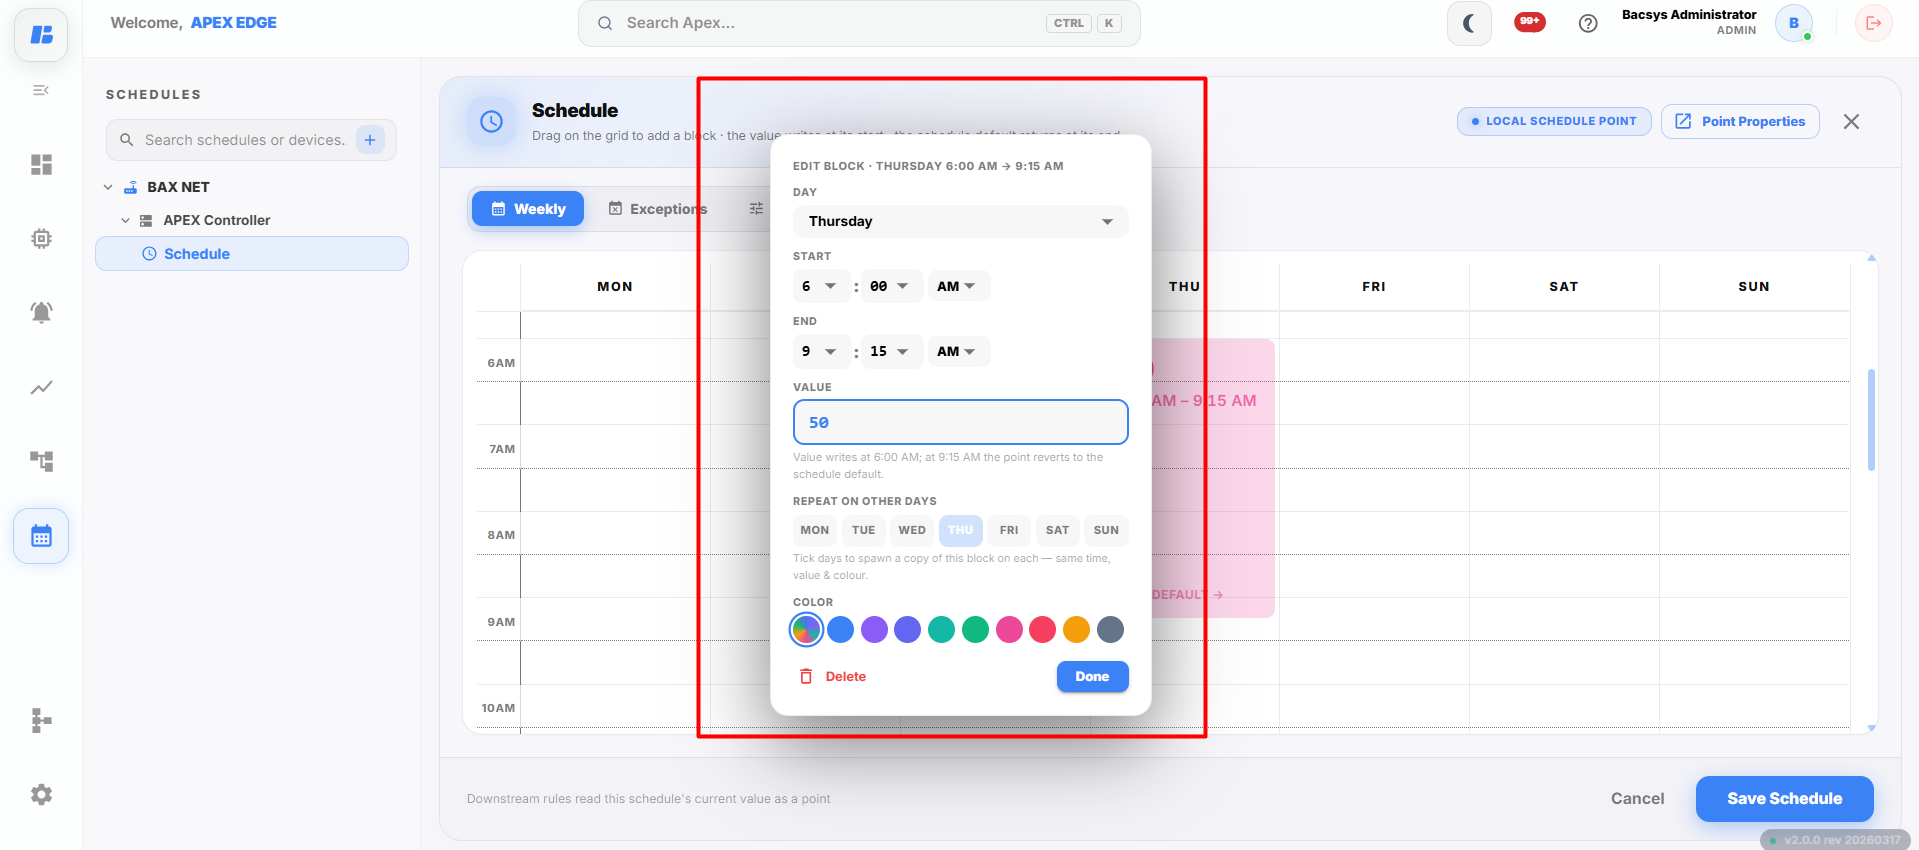
Configure the following fields:
| Field | Description |
|---|---|
| Day | Select the day on which the schedule should run. |
| Start | Specifies the start time of the schedule. |
| End | Specifies the end time of the schedule. |
| Value | Specifies the value that should be written during the scheduled period. |
| Repeat on Other Days | Copies the same schedule entry to the selected days. |
| Color | Selects the display color for the schedule block. |
| Delete | Deletes the selected schedule entry. |
After configuring the required values:
- Click Done.
The schedule block is added to the selected day and time.
During the configured time period, the specified Value is written to the schedule point. When the scheduled period ends, the point automatically returns to the configured Schedule Default value.
Once the schedule block is created, the following actions are available:
- Edit – Click the schedule block to modify the configured day, start time, end time, value, repeat settings, or color.
- Delete – Remove the schedule block if it is no longer required.
Exceptions
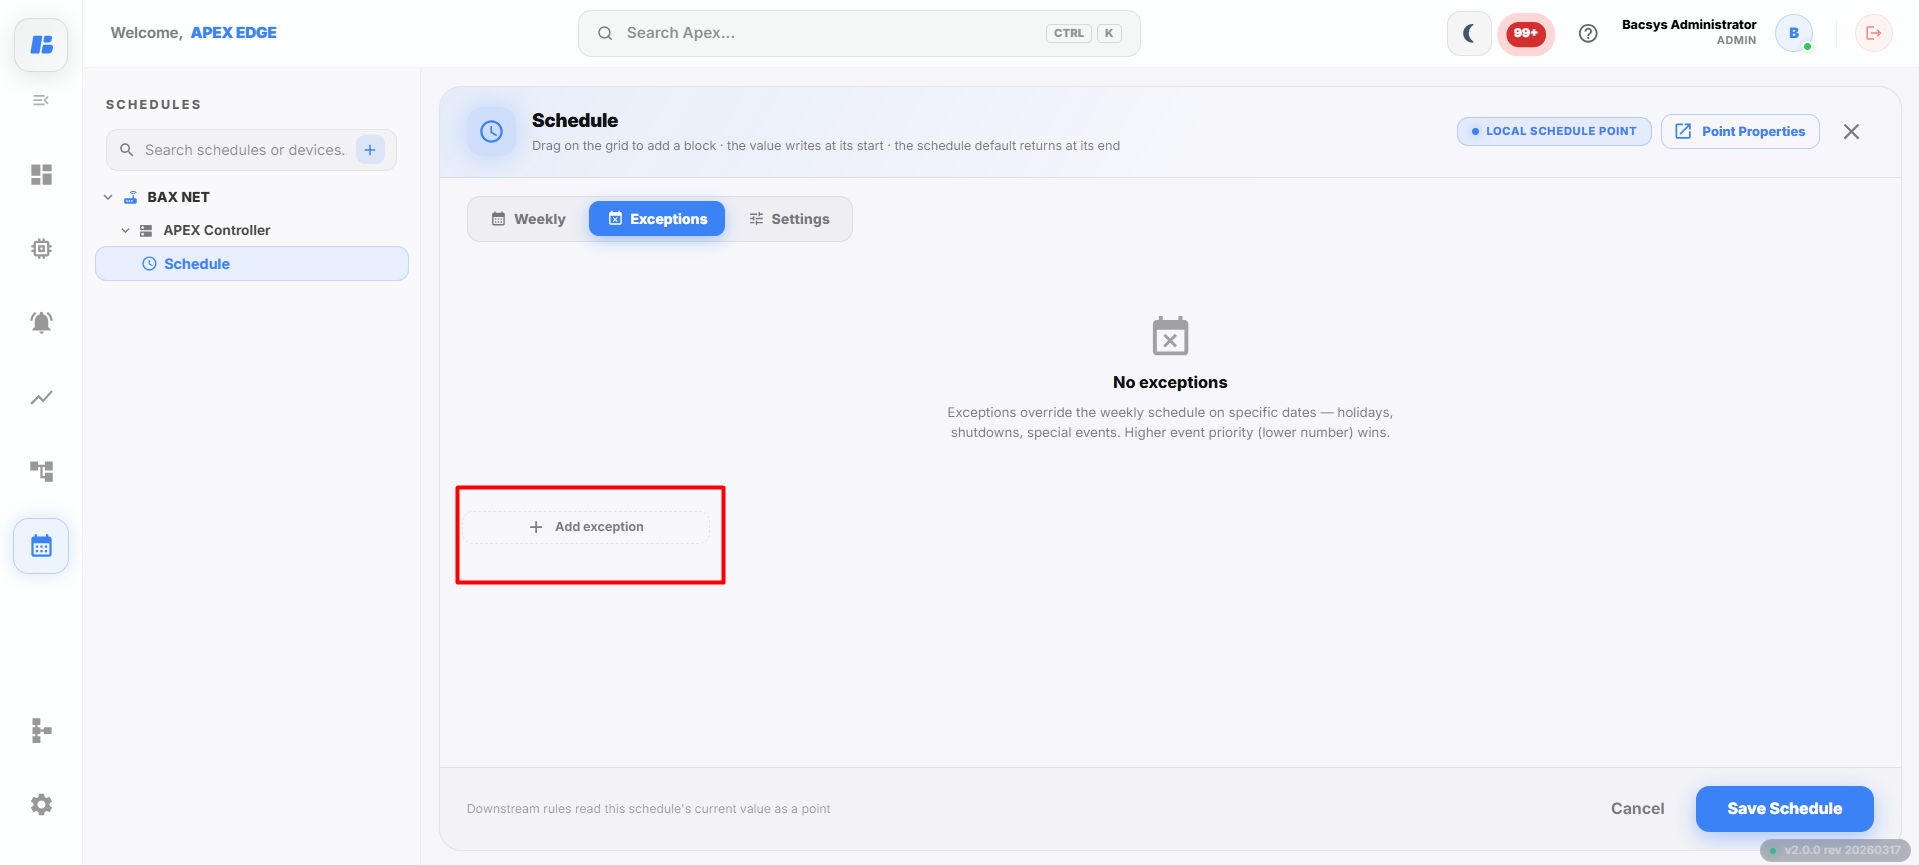
The Exceptions tab is used to configure schedules that override the Weekly schedule for specific dates or date ranges.
To create an exception:
- Select the Exceptions tab.
- Click + Entry to add a new exception.
The following exception types are available:
| Exception Type | Description |
|---|---|
| Single Date | Creates an exception for a specific date. |
| Date Range | Creates an exception that is active between the selected start and end dates. |
| Week & Day | Creates an exception based on a specific week and day combination. |
| Calendar | Creates an exception using the selected calendar configuration. |
After selecting the required exception type:
- Select the required date, date range, week and day, or calendar.
- Click + Entry to add one or more schedule entries for the selected exception.
- Configure the required start time, end time, and value for each entry.
- Repeat the process to add multiple entries, if required.
- Click the Delete icon to remove an unwanted entry.
- Click Save Schedule to save the exception.
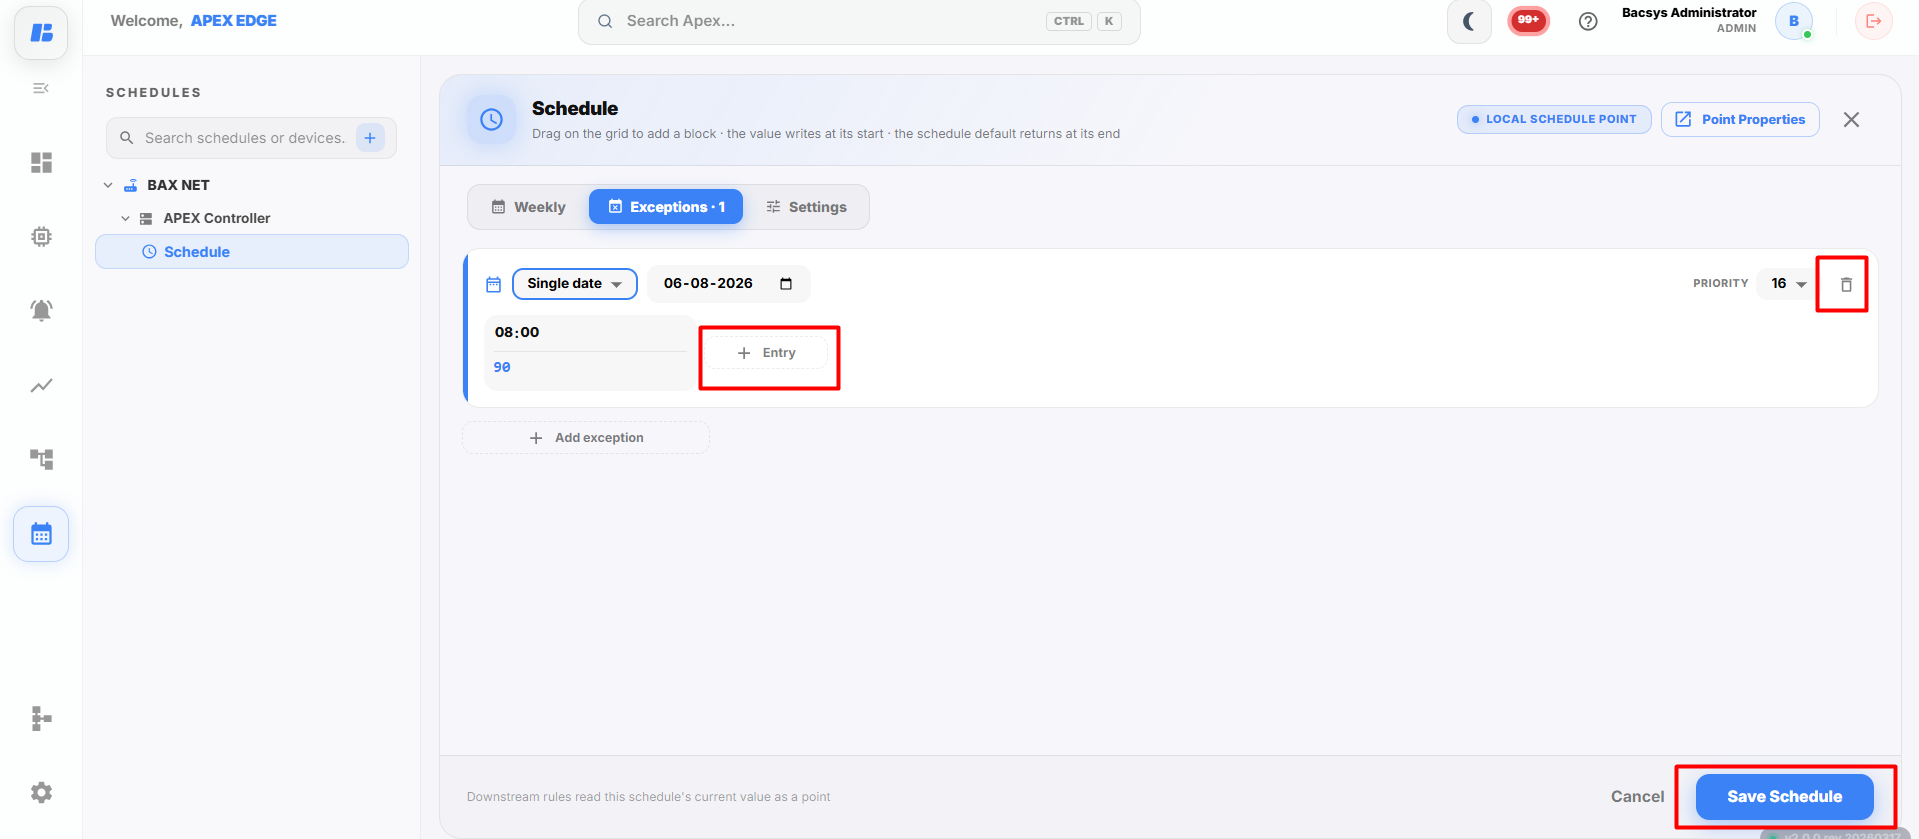
Exceptions take priority over the Weekly schedule and are applied only for the configured date, date range, week and day, or calendar.
Settings
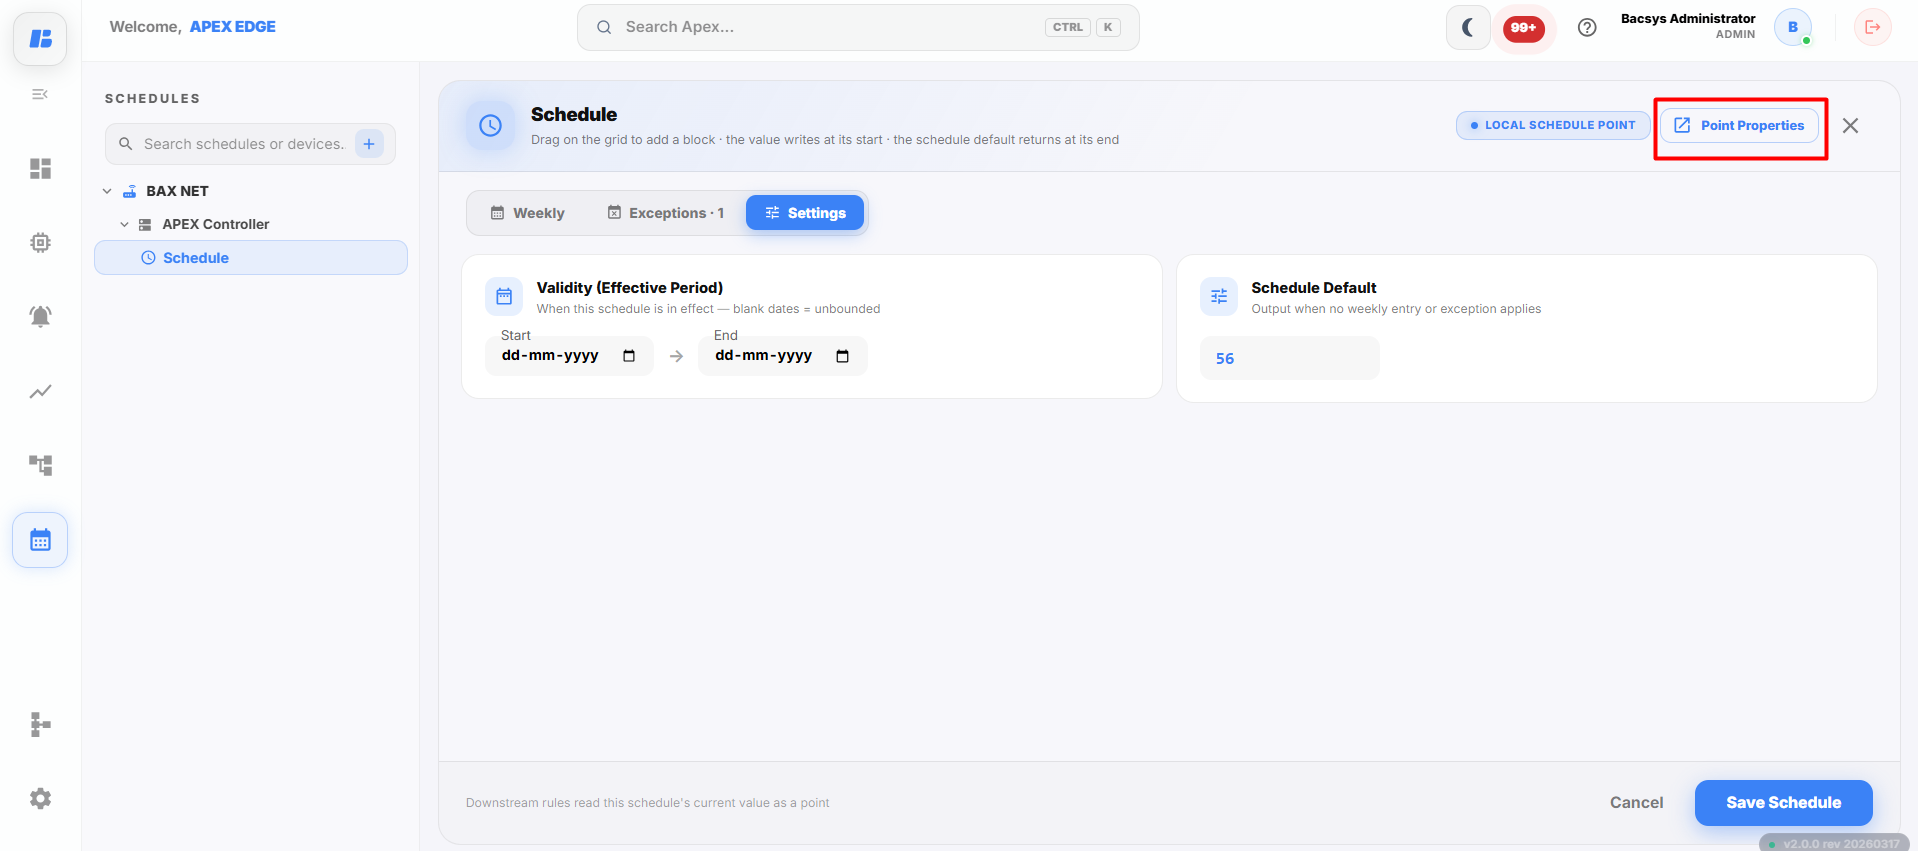
The Settings tab is used to configure the schedule's effective period and the default value that is applied when no Weekly or Exception schedule is active.
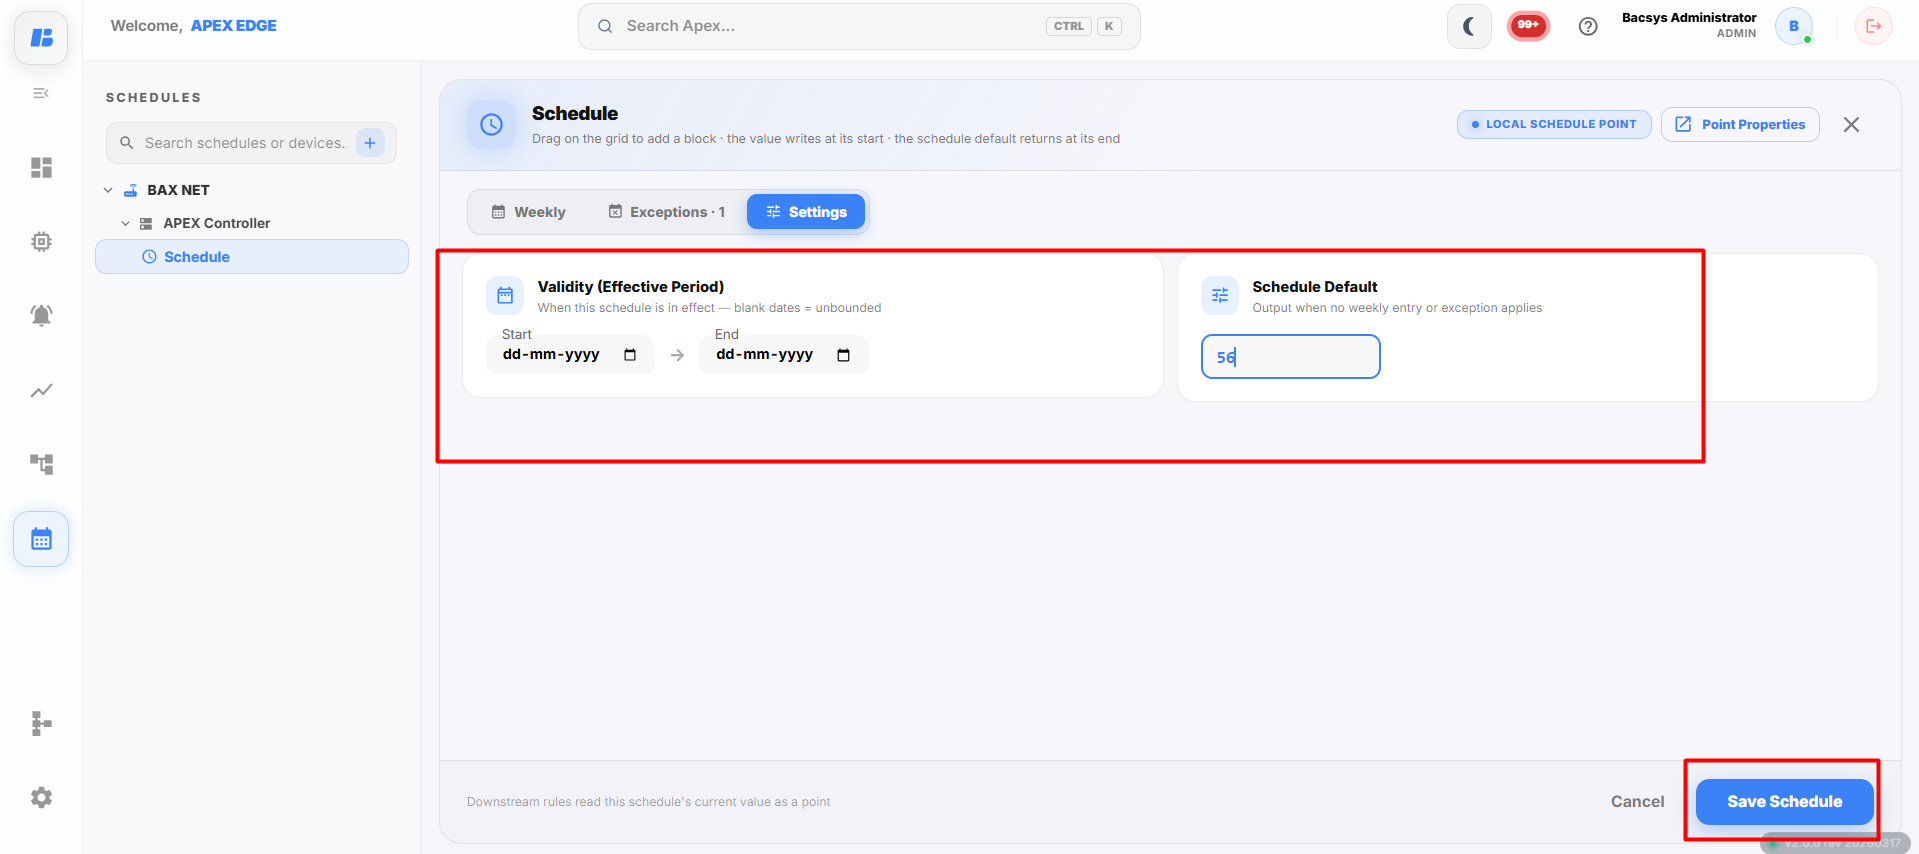
Configure the following settings:
| Field | Description |
|---|---|
| Start Date | Specifies the date from which the schedule becomes active. |
| End Date | Specifies the date until which the schedule remains active. If no end date is specified, the schedule remains active indefinitely. |
| Schedule Default | Specifies the default value that is written to the schedule point whenever no Weekly or Exception entry is active. |
After configuring the required settings:
- Select the Start Date.
- Select the End Date, if required.
- Enter the required Schedule Default value.
- Click Save Schedule.
The schedule becomes active during the configured effective period. When no Weekly or Exception schedule is active, the configured Schedule Default value is automatically written to the schedule point.
Point Properties
The Point Properties option allows users to navigate directly to the selected schedule point in the Points module.
To view the point properties:
- Click Point Properties.
- The system opens the corresponding point in the Points module.
- You can view and modify the point configuration directly from the Points page.
This provides quick access to the selected point without manually navigating through the device hierarchy.
Object Browser
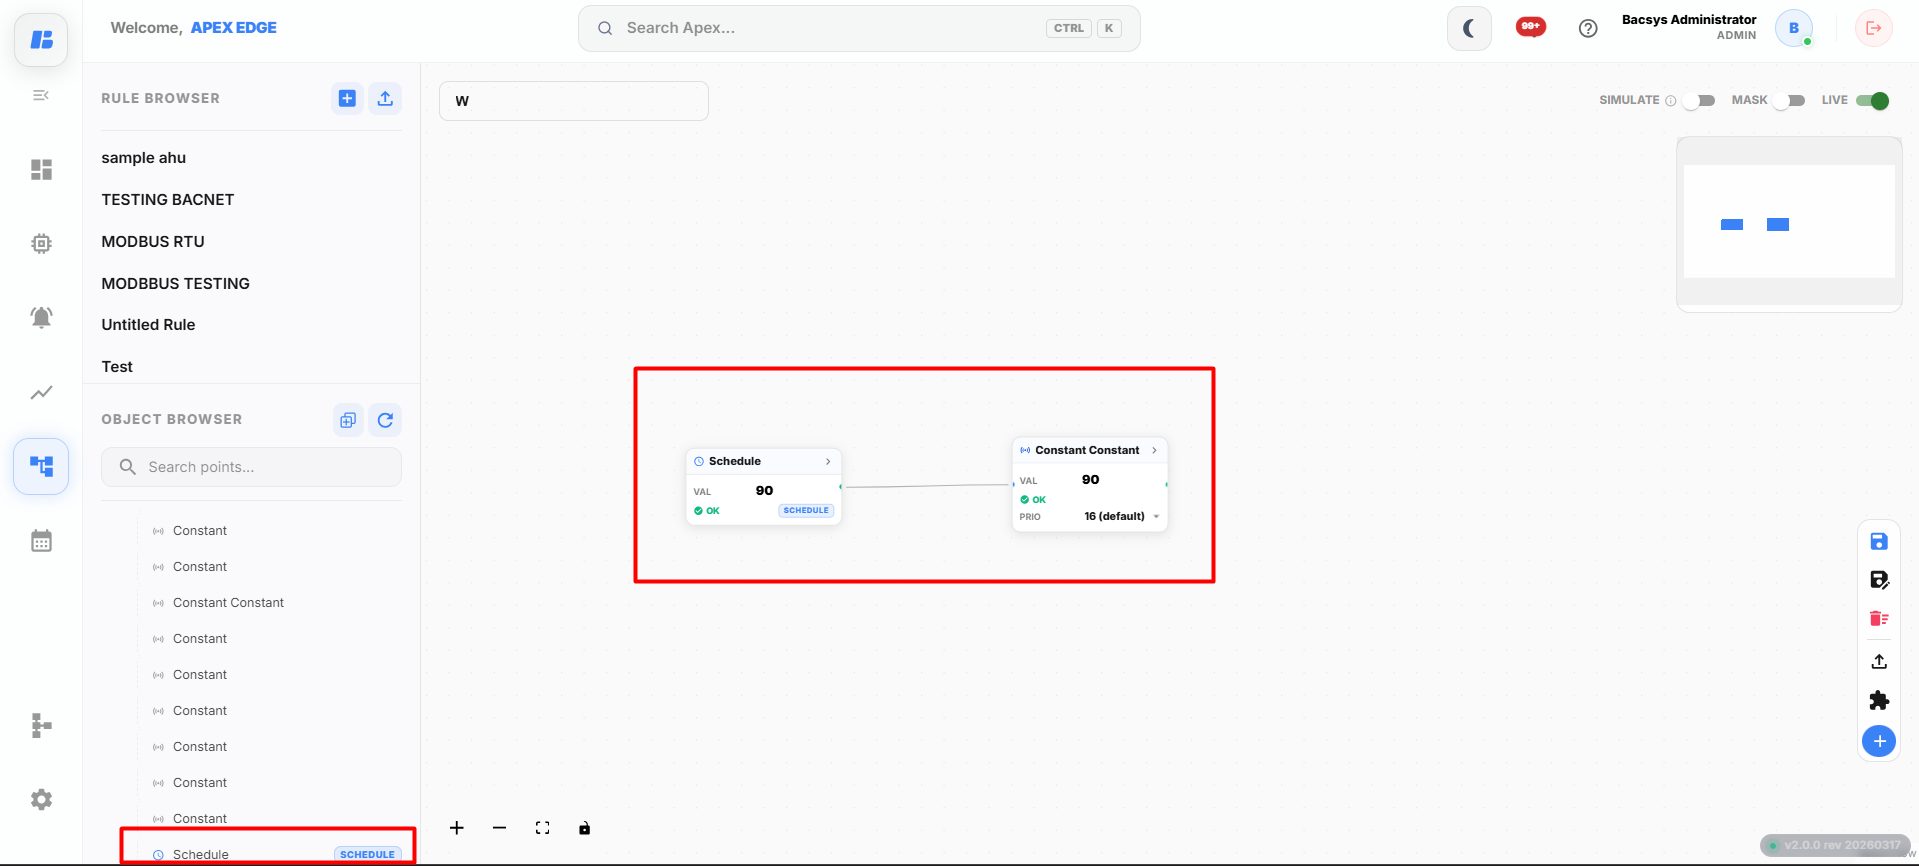
The Object Browser displays all available device points that can be used while creating a schedule.
To assign a point to a schedule:
- Open the Object Browser.
- Browse or search for the required device point.
- Drag and drop the required point onto the Schedule Editor.
- The selected point is added to the schedule and can be configured using the Weekly, Exceptions, and Settings tabs.
The Object Browser allows users to quickly associate any available device point with a schedule.
Viewing the Scheduled Point
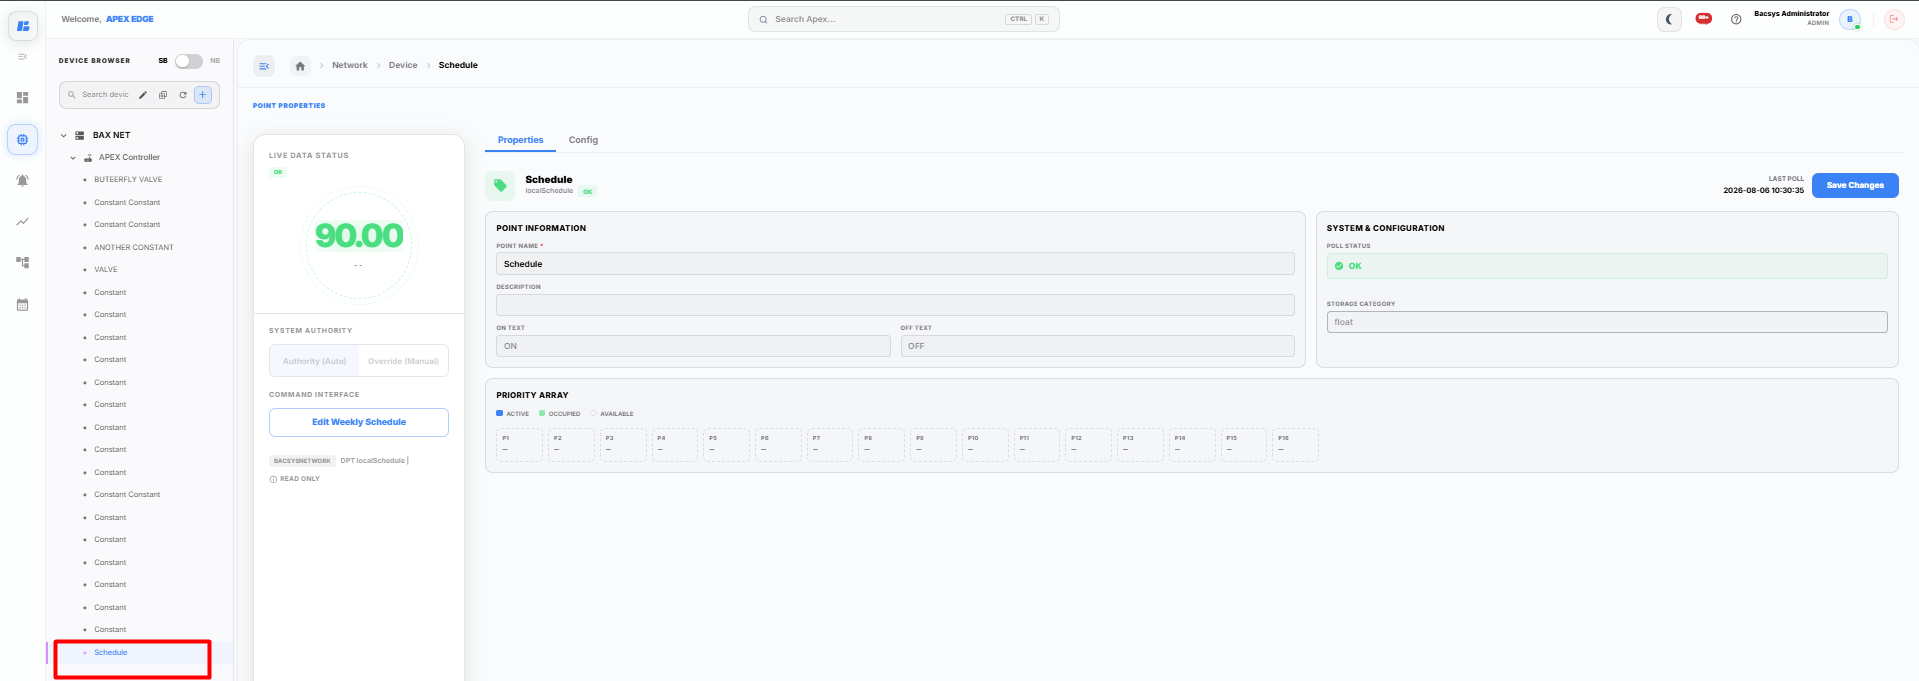
After assigning a point to a schedule, you can verify it from the Devices module.
To view the scheduled point:
- Navigate to the Devices module.
- Expand the required Network.
- Select the required Device.
- Locate the point that was assigned to the schedule.
The selected point displays the configured schedule and updates its value according to the defined Weekly, Exceptions, and Settings configuration.
Searching for a Scheduled Point
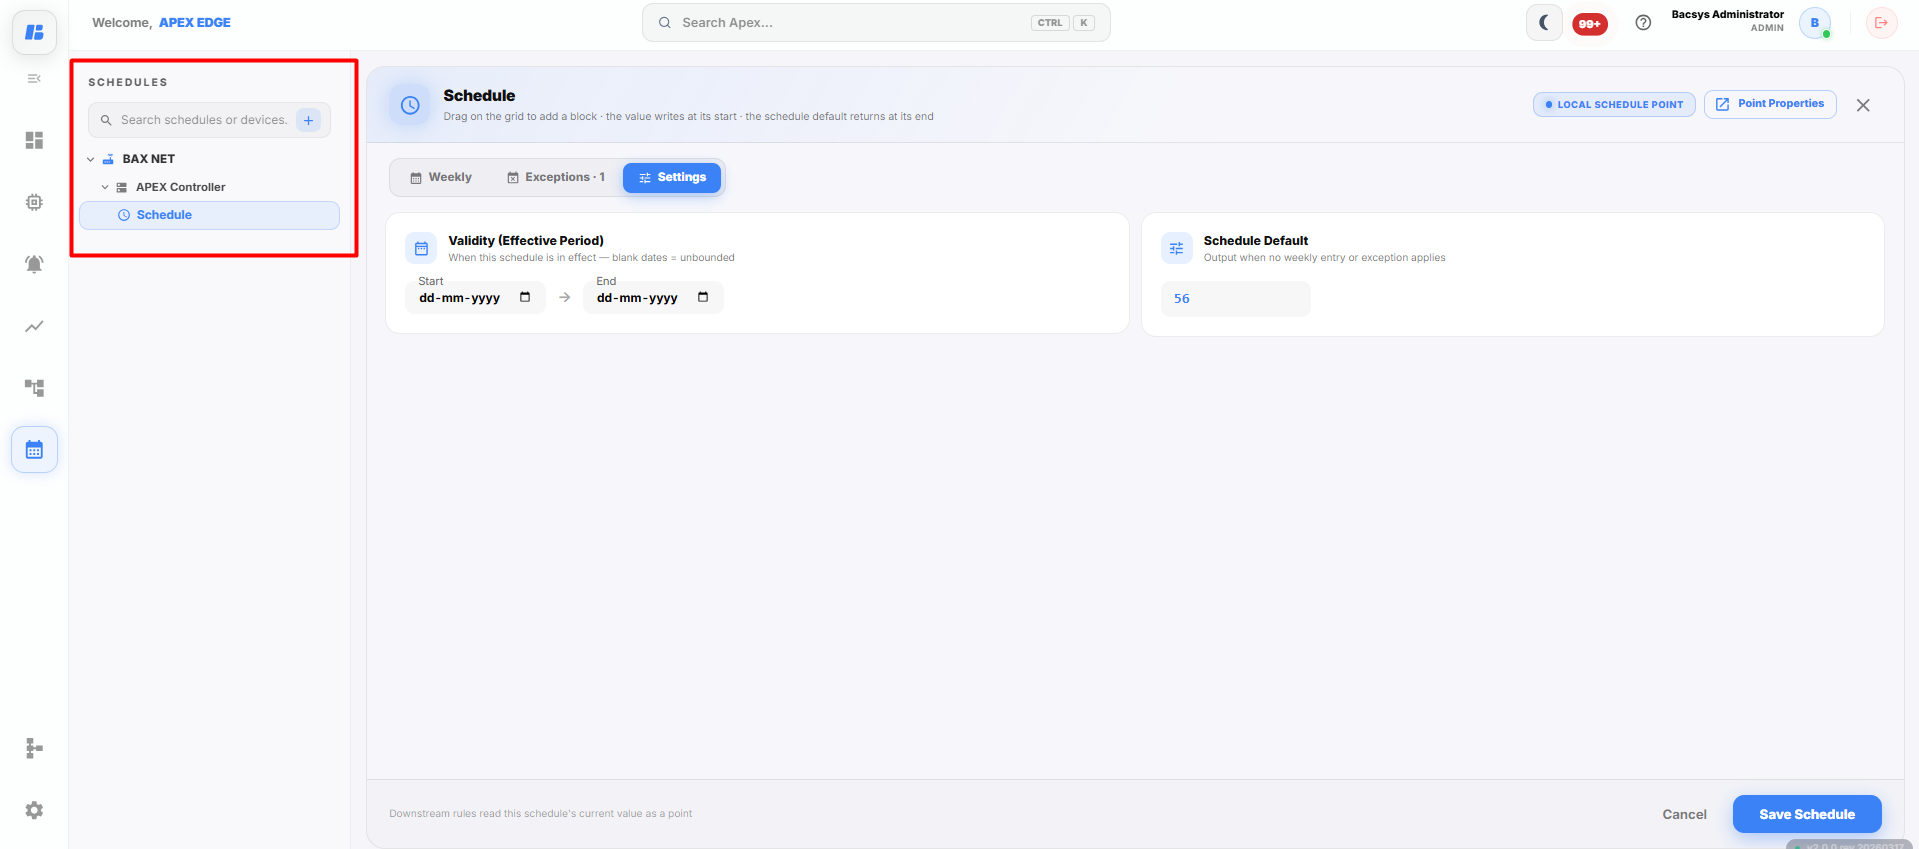
The Search option allows users to quickly locate a scheduled point within the Devices module.
To search for a point:
- Navigate to the Devices module.
- Click the Search field.
- Enter the name of the required point.
- Select the point from the search results.
The selected point is displayed, allowing you to view its schedule and associated properties.
Complete Workflow
Create and configure a schedule by following the workflow below:
- Open the Schedules module.
- Click the + icon or New Schedule.
- Enter a name for the schedule.
- Click Create Schedule.
- Configure the Weekly schedule by dragging and dropping on the required time slot.
- Enter the required schedule details and click Done.
- Edit or delete the schedule entry if required.
- Configure Exceptions by selecting the required exception type and adding one or more schedule entries.
- Configure the Start Date, End Date, and Schedule Default value in the Settings tab.
- Click Save Schedule to save the schedule configuration.
- Click Point Properties to open the associated point in the Points module, if required.
- Use the Object Browser to browse or search for the required device point.
- Drag and drop the required point from the Object Browser onto the Schedule Editor.
- Navigate to the Devices module to verify that the schedule has been applied to the selected point.
- Use the Search option in the Devices module to quickly locate the scheduled point.
The schedule is successfully created and applied to the selected point. The configured value is written according to the Weekly and Exceptions schedule. When no scheduled entry is active, the configured Schedule Default value is applied automatically.