

Assets
The Assets Module provides a hierarchical structure to organize data points based on physical or logical entities such as devices, floors, buildings, and locations. Users can create a root folder and define multiple subfolders and assets within it, allowing for efficient categorization and management.
This structure not only improves data visibility but also enables seamless integration with the Display Module. When an asset is linked to a corresponding display template, selecting the asset in the Assets Module will automatically render the associated display for quick monitoring and interaction.
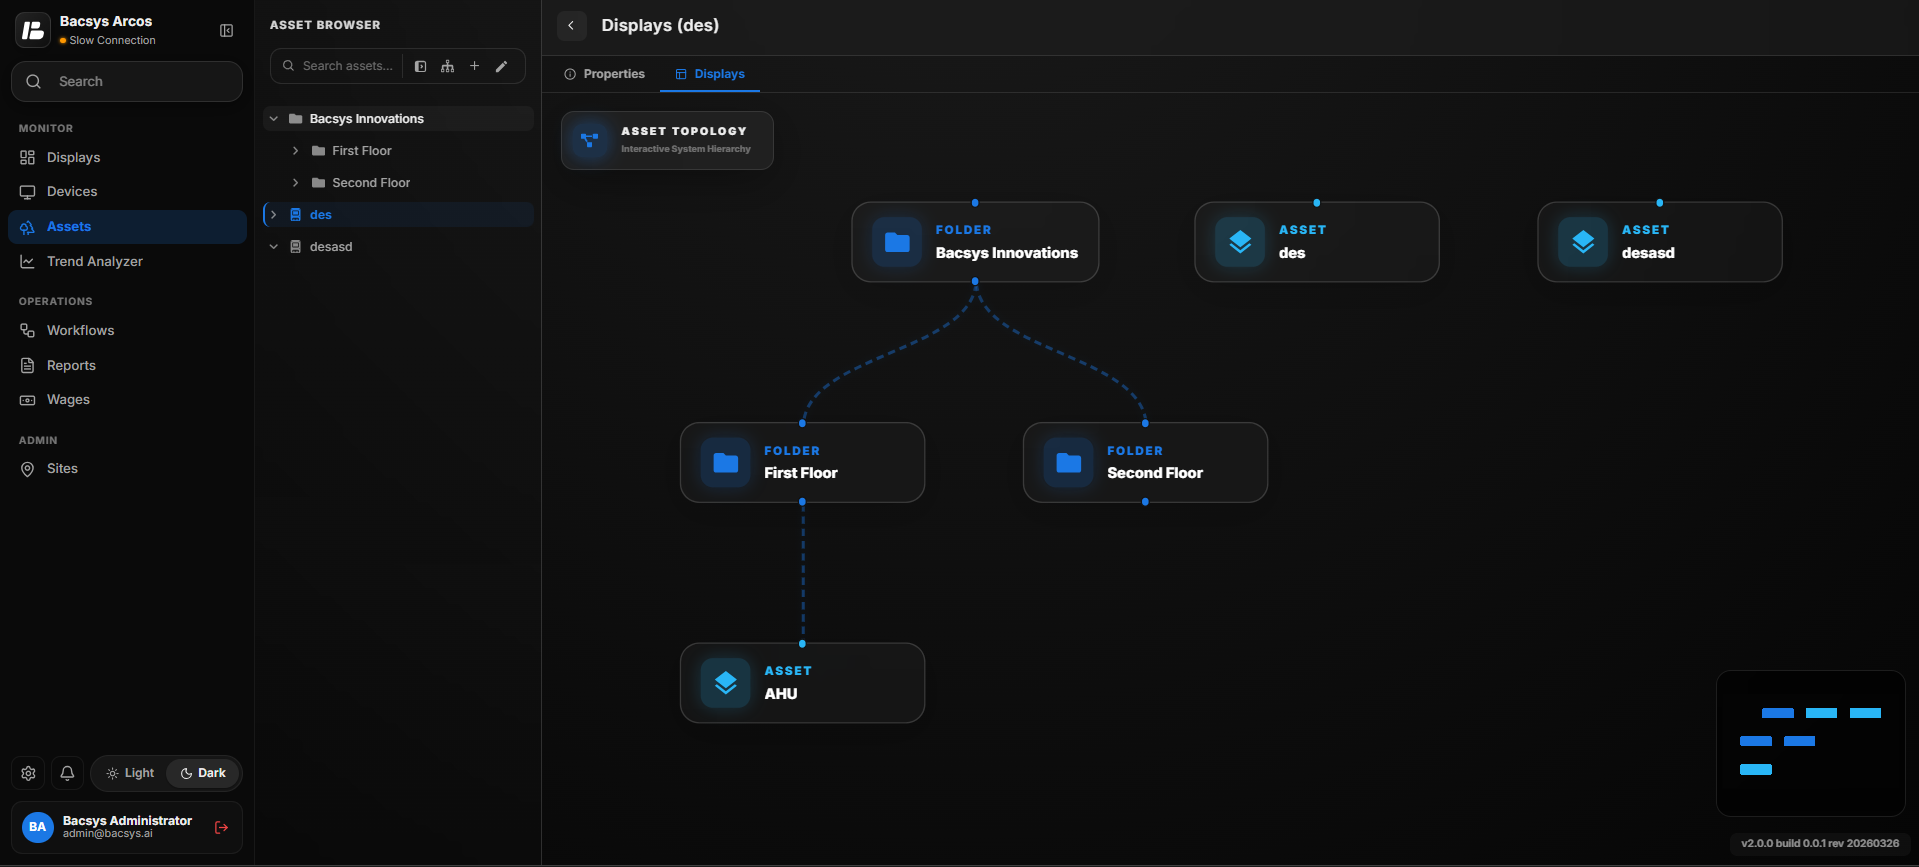 Assets Module
Accessing the Assets Module
- Click on the Assets icon on the main menu.
- Click on () button to Expand or () button to collapse the browser menu.
- The browser menu lists all the created assets.
Creating Root Folder, Sub folder and Assets
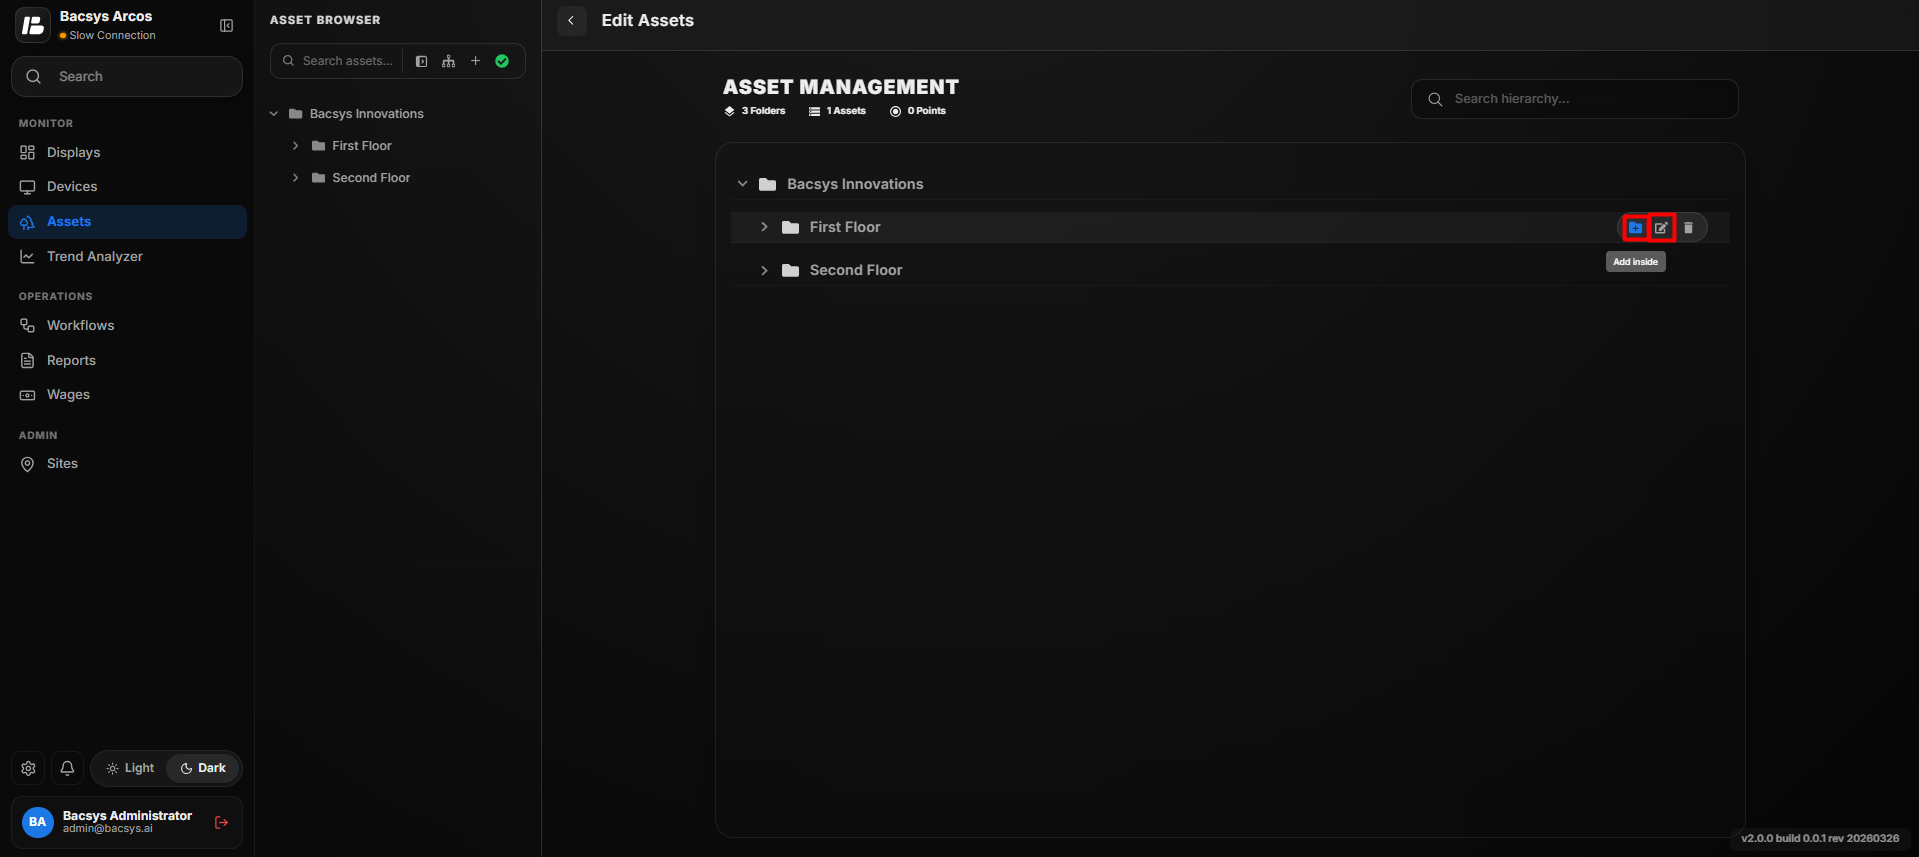 Assets Module
Root Folder Creation and Management
To create a root folder in the Assets Module, follow these steps:
- Navigate to the Assets Module Open the Assets Module from the main navigation panel.
- Enter Edit Mode Click the Edit button located at the top-right corner of the assets browser. This enables Edit Hierarchical Assets options.
- Create a New Folder Click the Create New Folder button displayed at the center of the screen. This will open a dialog box.
- Name the Folder In the dialog box, enter a suitable name for the root folder.
- Save or Cancel
- Click Save to create the root folder.
- Click Cancel if you want to discard the action without creating a folder.
- Edit Root Folder Name You can rename an existing root folder by clicking the Edit Folder button next to the folder name.
- Delete Root Folder To remove a root folder, click the Delete button located next to the Edit Folder button.
Note: Deleting a root folder will also remove all subfolders and assets under it.
Subfolder Creation and Management
layout Assets Module To create and manage subfolders within a root folder in the Assets Module, follow these steps:
- Add a Subfolder Click the Add Folder button located next to the desired root folder. A dialog box will appear.
- Name the Subfolder Enter a name for the subfolder in the dialog box.
- Save or Cancel
- Click Create to create the subfolder under the selected root folder.
- Click Cancel to discard the action.
- Edit Subfolder Name To rename an existing subfolder, click the Edit Folder button next to the subfolder's name.
- Delete Subfolder To delete a subfolder, click the Delete button located next to the Edit Folder button.
Note: Deleting a subfolder will also remove any assets or nested folders within it.
Asset Creation and Management
To create and manage assets within a root or subfolder in the Assets Module, follow these steps:
- Add an Asset Click the Add Folder button next to the root folder or subfolder where you want to create the asset. A dialog box will appear.
- Enter Asset Name In the dialog box, enter a name for the asset.
- Mark as Asset Tick the Is an Asset? checkbox to indicate that the item being created is an asset rather than a regular folder.
- Save or Cancel
- Click create the asset under the selected folder.
- Click Cancel to discard the action.
- Edit Asset Name You can rename an existing asset by clicking the Edit Asset button located next to the asset name.
- Delete Asset To remove an asset, click the Delete button next to the Edit Asset button.
Note: Deleting an asset will remove associated data points and display template links.
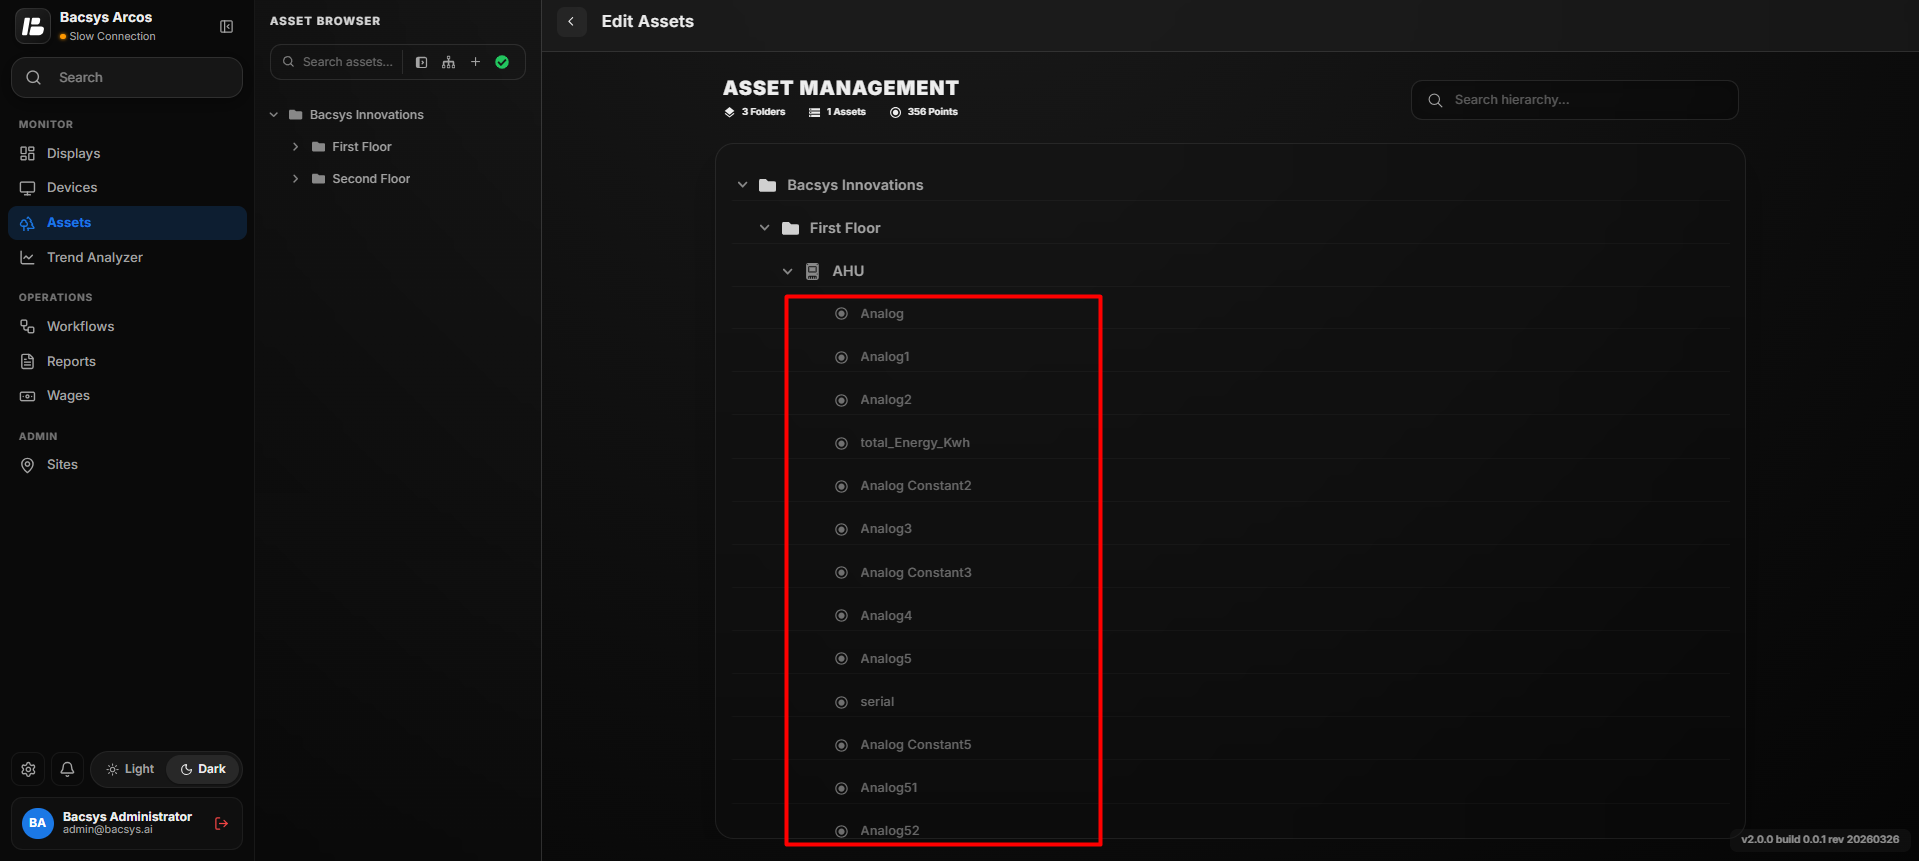 Managemnt Points
-
Select All — Allows users to select all Asset Management points at once for bulk actions or configuration.
-
The list of available points is displayed.
-
Users can select the required points.
After selecting the required points, click Add Selected Points.
- Add Data Points Click the "+" button next to the desired asset where you want to add data points. A dialog box will appear displaying the list of available points from the Bacsys platform.
- Select Data Points
- Tick the checkbox next to each data point you want to add.
- To select all available data points at once, tick the Select All checkbox at the top.
- Search for Data Points Use the search bar to quickly find and select specific data points.
- Add Selected Points After selecting the required data points, click the Add Points button to add them to the asset.
- Cancel Addition Click the Close button to cancel the data point addition process without saving changes.
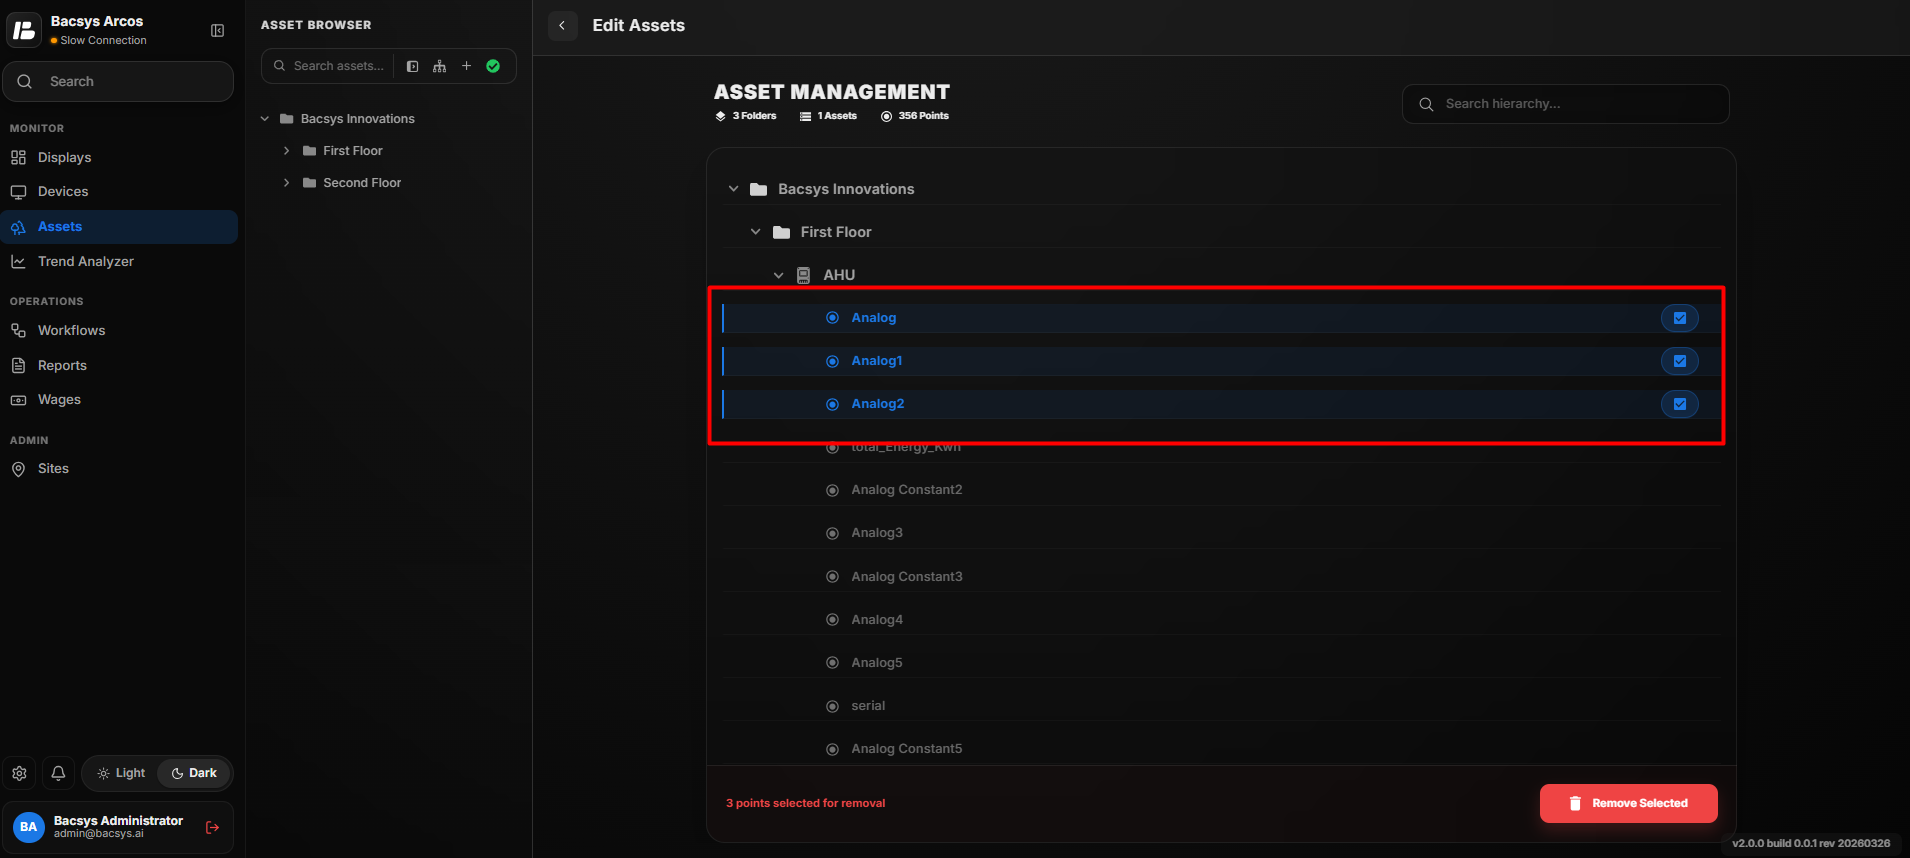
- Delete Data Points
-
To remove data points, tick the checkbox next to each data point you want to delete.
-
To select all data points under an asset, tick the checkbox next to the asset name.
-
Click the Remove Selected Points button to delete the selected data points.
-
The selected points will be added to the asset.
When the Edit button is clicked:
- Users can modify the Asset Name.
- Users can update the Asset Type as required.
If changes are made, click Update to save the modifications.
To modify the asset hierarchy:
- Users can change the asset hierarchy structure.
- After making the required changes, click Update to apply them.
When the Delete button is clicked:
- The selected asset will be removed from the system.
- The asset and its associated configurations will be permanently deleted.
Warning: This action cannot be undone. To add and manage data points under an asset in the Assets Module, follow these steps:
Expand All Button
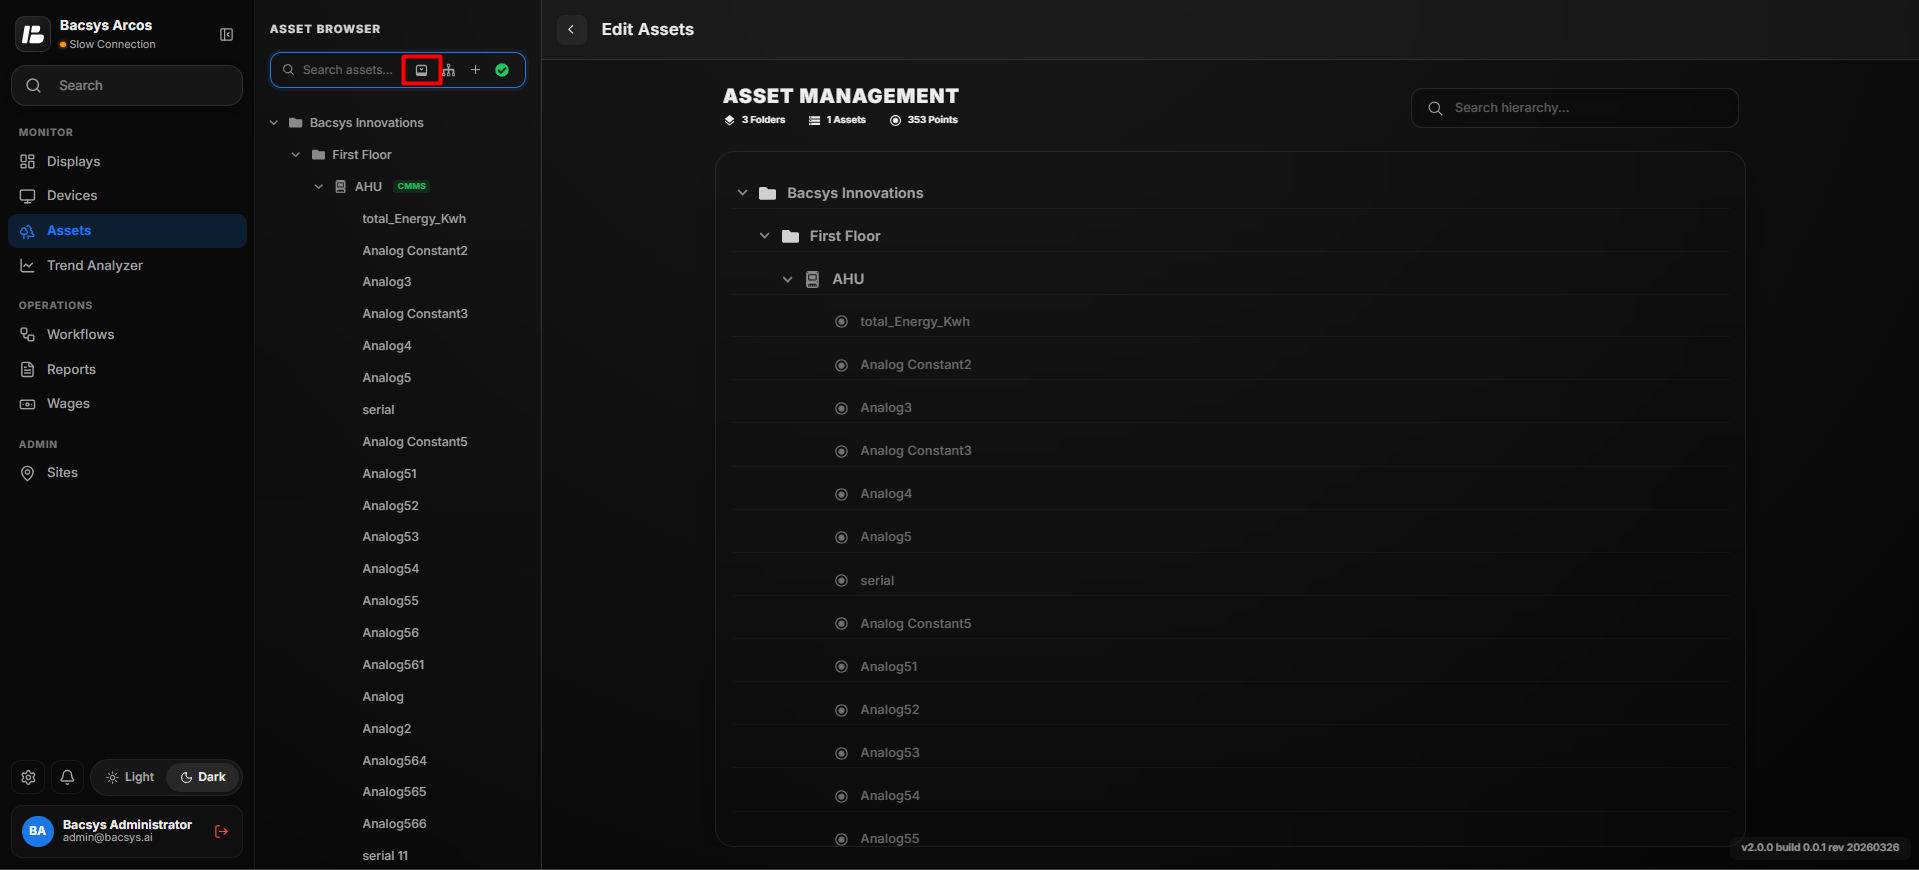 Expand All
When the Expand All button is clicked:
- All asset hierarchies are expanded.
- All child assets and associated points are displayed.
- Users can view the complete structure without manually expanding each level.
Assets View
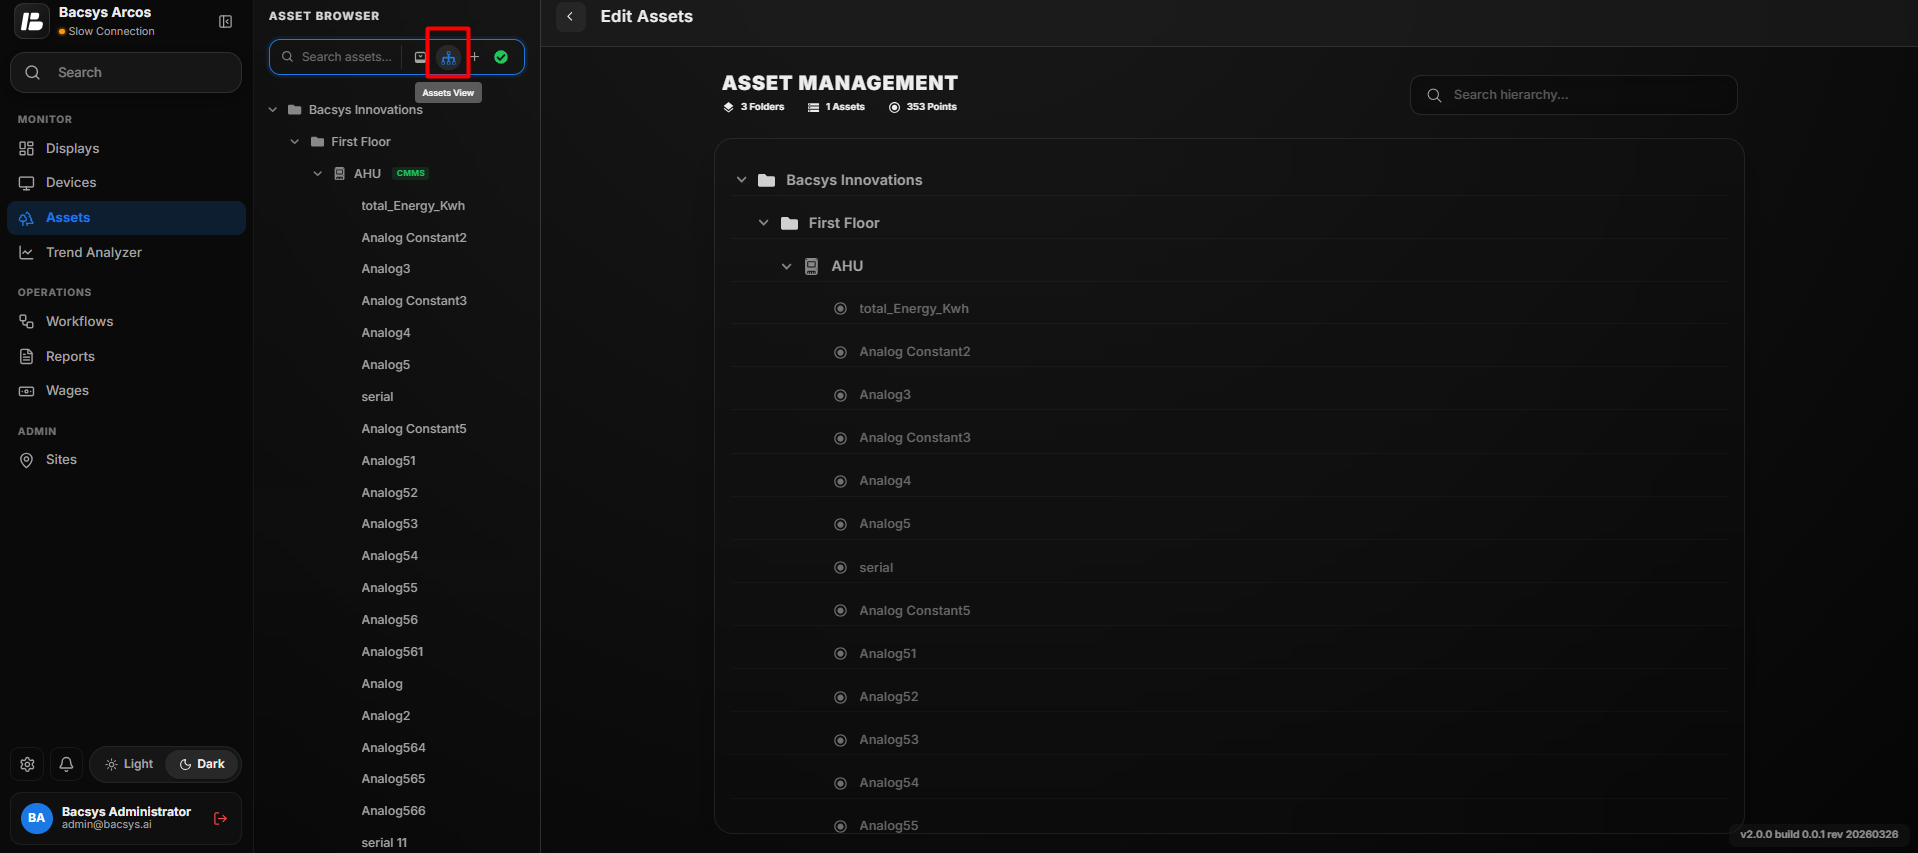 Assets View
The Assets View displays the complete hierarchy of configured assets in the system.
- Users can view asset names and types.
- Associated points linked to each asset are displayed.
- The hierarchy structure shows parent and child asset relationships.
- Users can expand or collapse assets to navigate the structure easily.