

Building Management
The Wages application follows the hierarchy below:
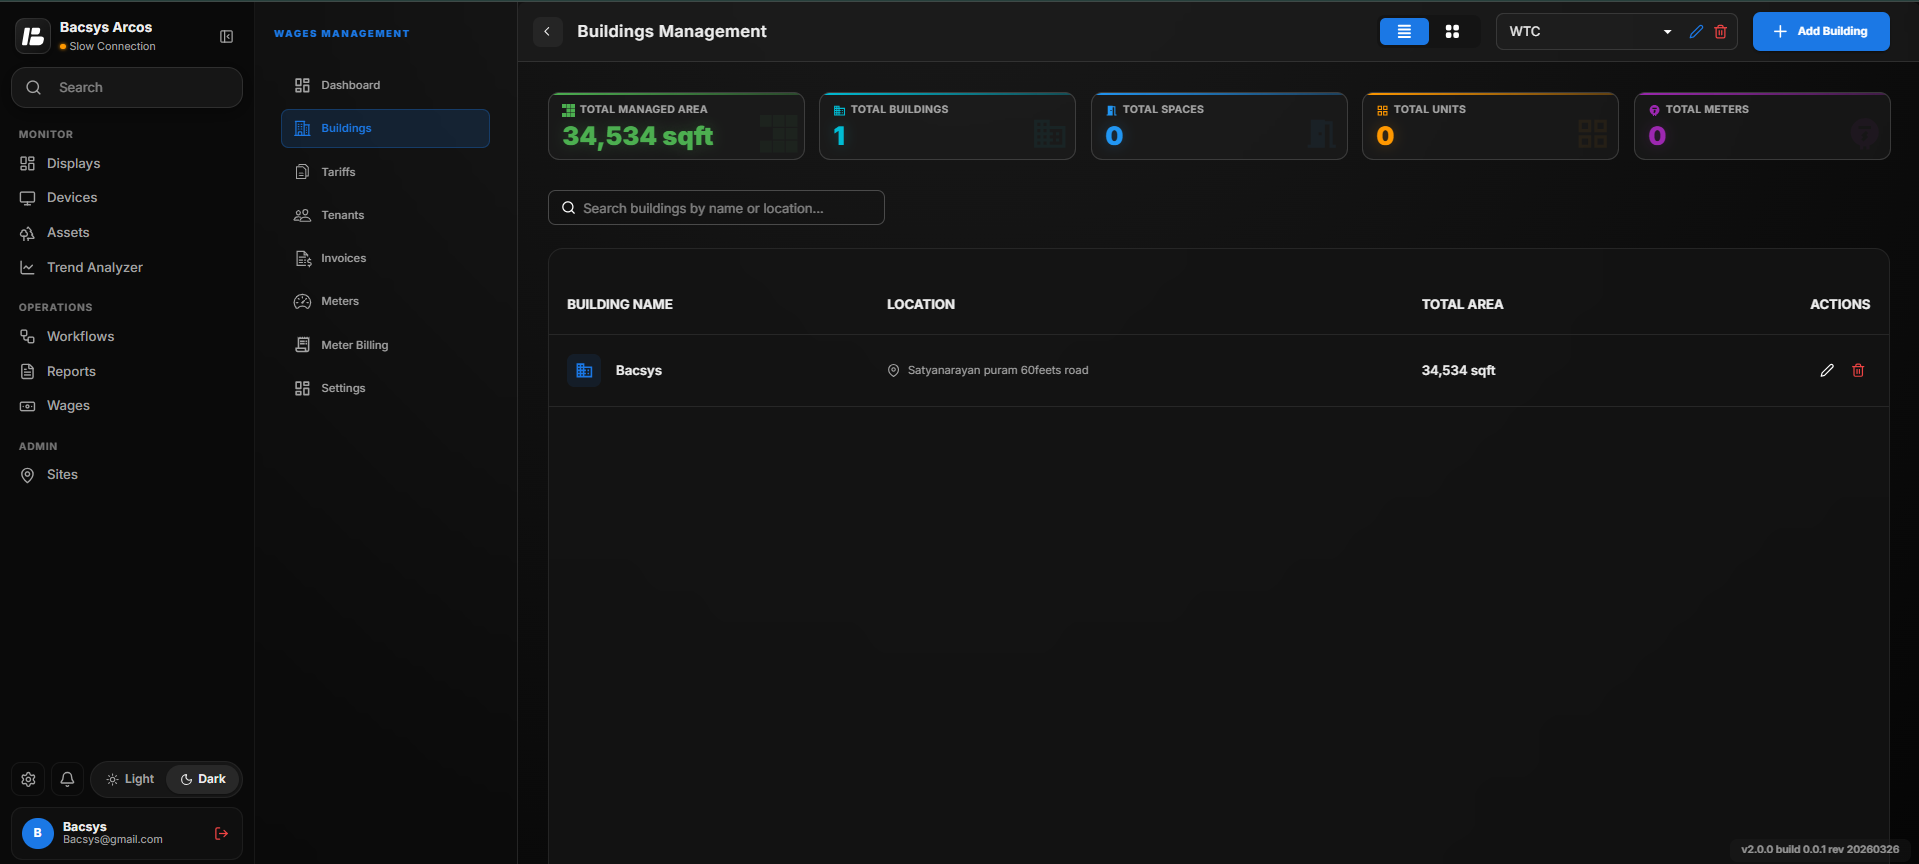 The Building Management module allows users to organize their properties by creating Sites, Buildings, Spaces, Units, and Meters. This hierarchical structure helps manage multiple properties and their utility meters efficiently.
Site Hierarchy
The Wages application follows the hierarchy below:
Site
 ├── Building
 │ ├── Space
 │ │ ├── Unit
 │ │ │ └── Meter
Creating a New Site
A Site represents the top-level location where one or more buildings can be managed. Each site can contain one or more buildings.
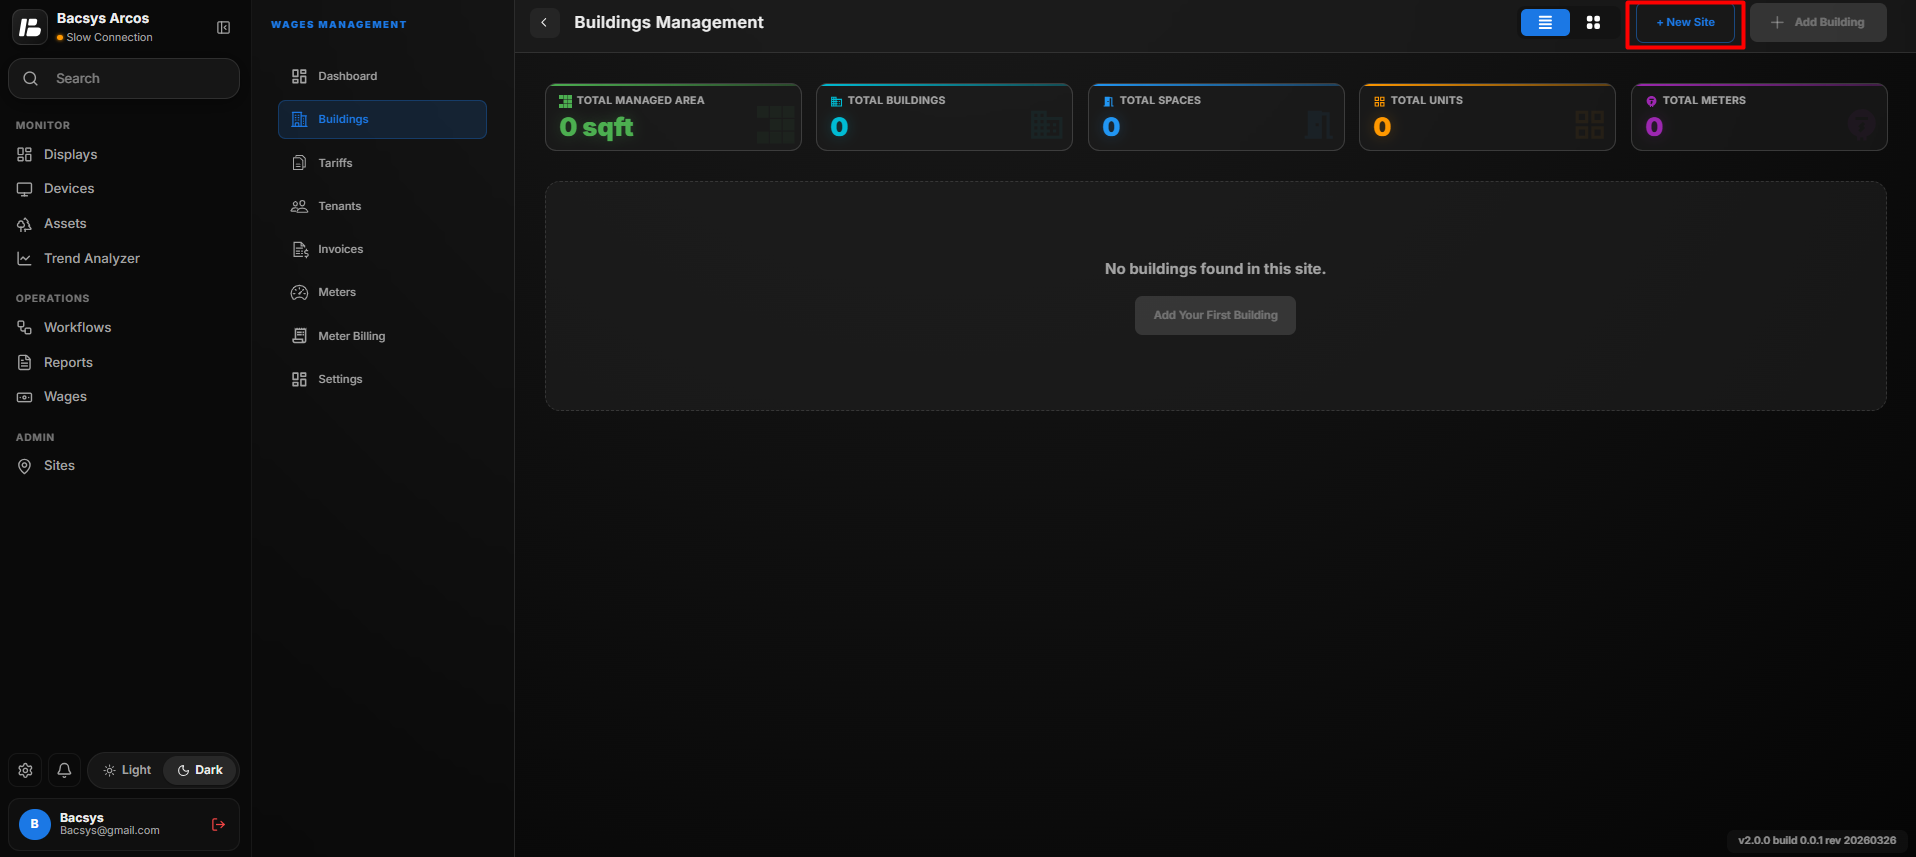
Step 1: Create a New Site
Click New Site to create a new site.
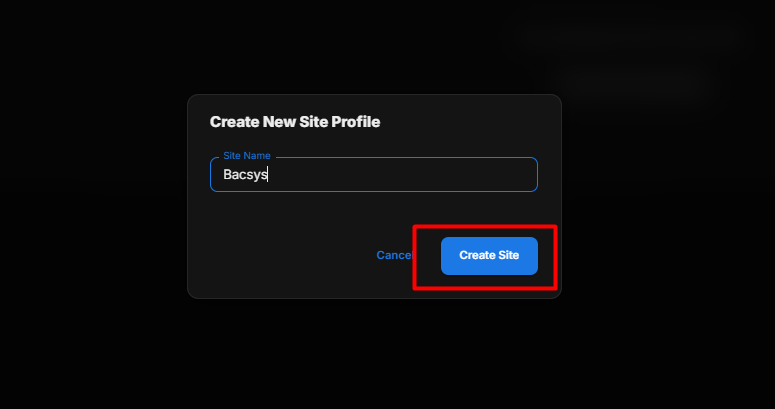
Step 2: Enter the Site Details
A New Site pop-up window appears.
- Enter the Site Name.
- Click Create Site.
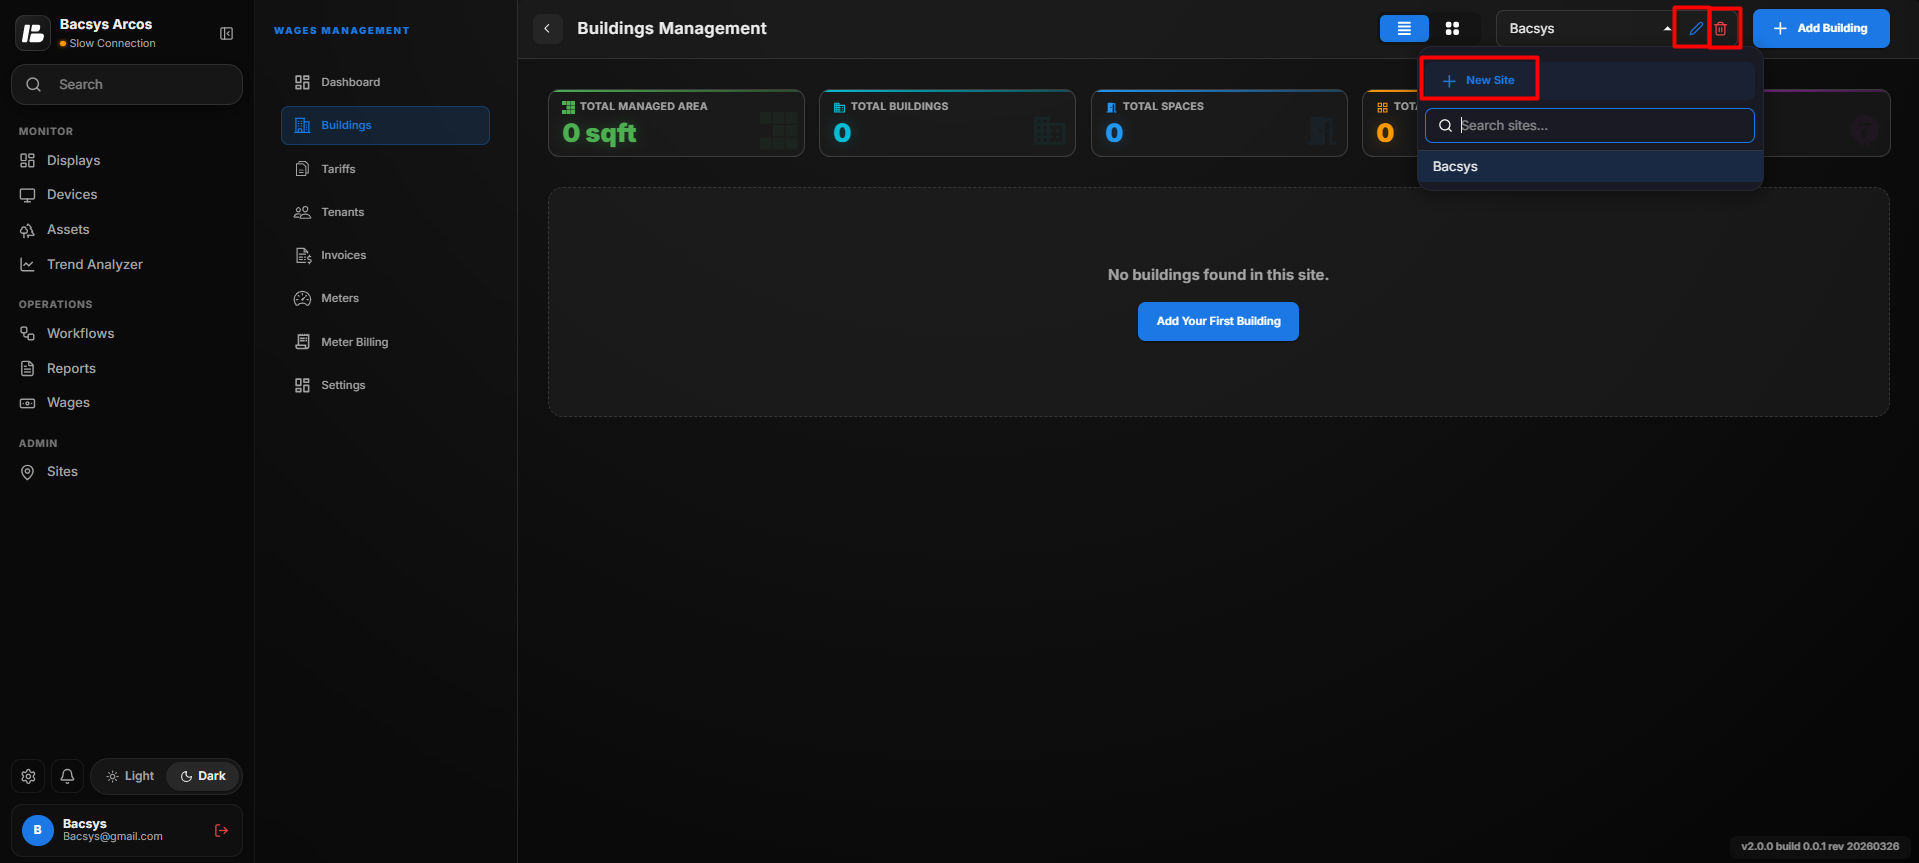
Step 3: View the Created Site
After saving, the newly created site is displayed in the list.
From here, you can:
- Create additional sites by clicking New Site.
- Edit an existing site.
- Delete a site if it is no longer required.
- Use the Search box to quickly find a site.
Note
- You can create multiple sites.
- Each site can contain one or more buildings.
- After creating a site, you can proceed to add buildings under it.
Creating a Building
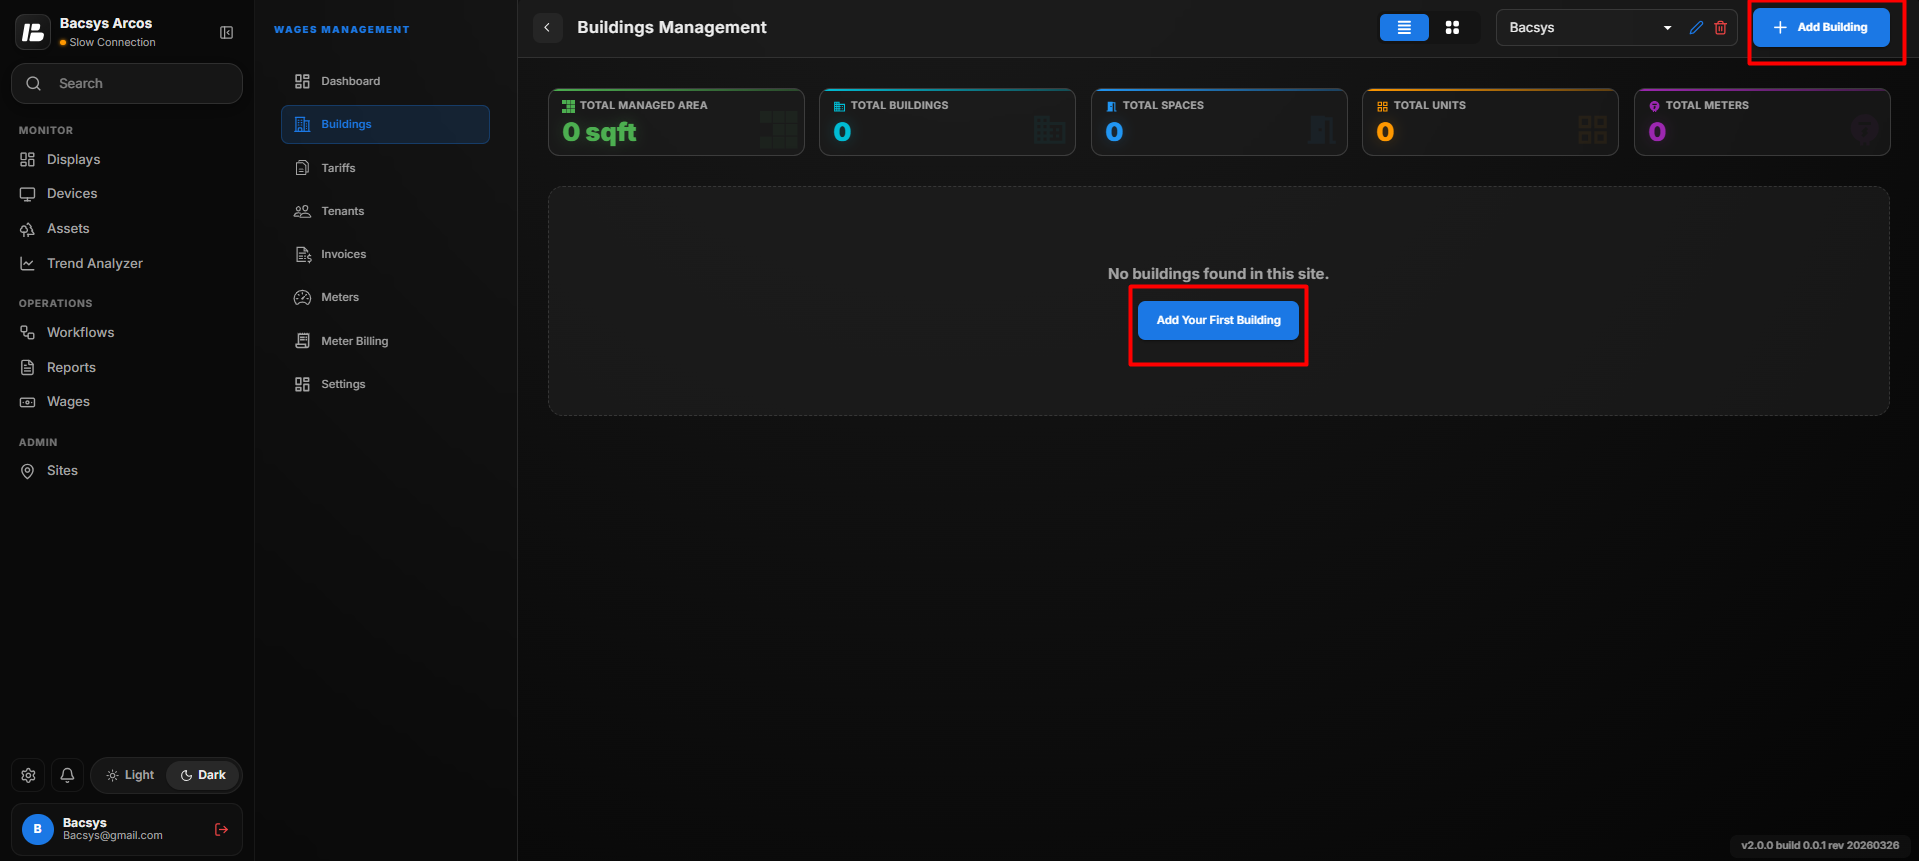
Once a site has been created, you can add one or more buildings.
Steps
- Open the required site.
- Click Add Building.
- The Building dialog box appears.
- Enter the following information:
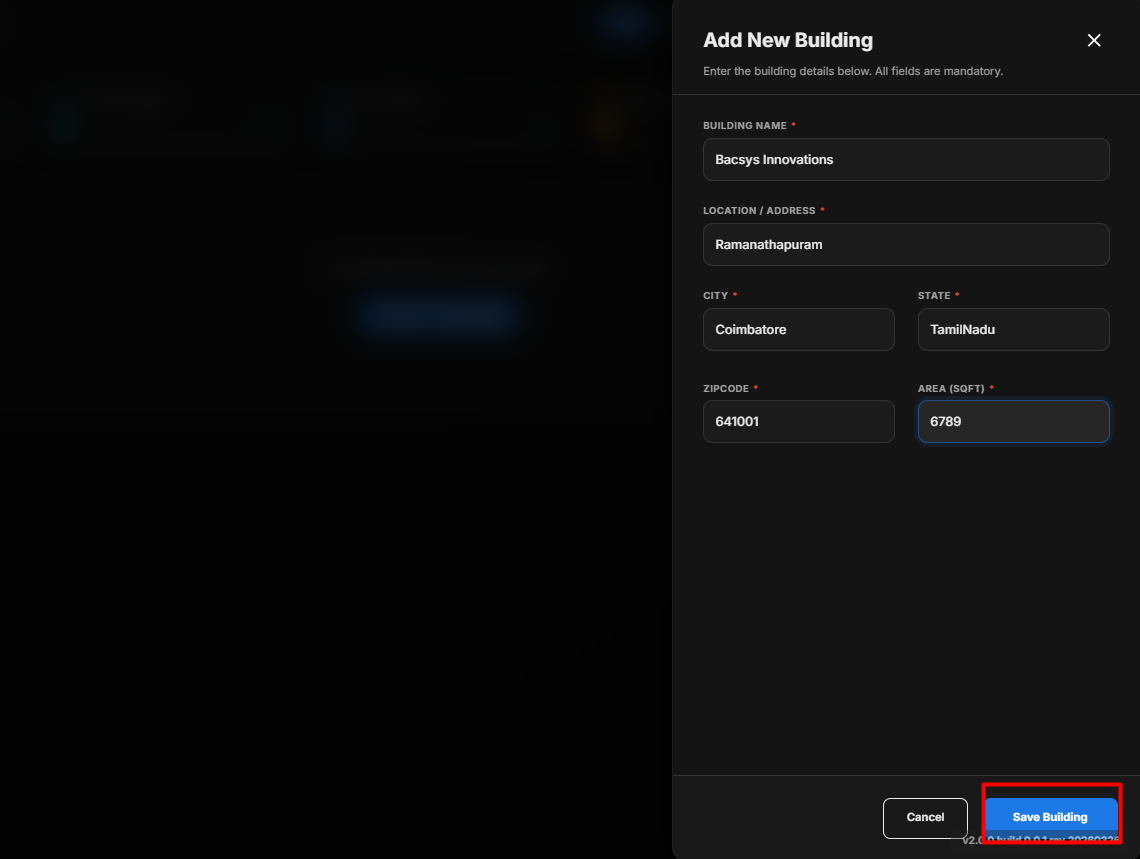
| Field | Description |
|---|---|
| Building Name | Name of the building. |
| Location | Building location. |
| City | City where the building is located. |
| State | State where the building is located. |
| Zip Code | Postal or ZIP code. |
| Area | Total building area. |
- Click Save Building.
The building is added to the selected site.
Viewing Buildings
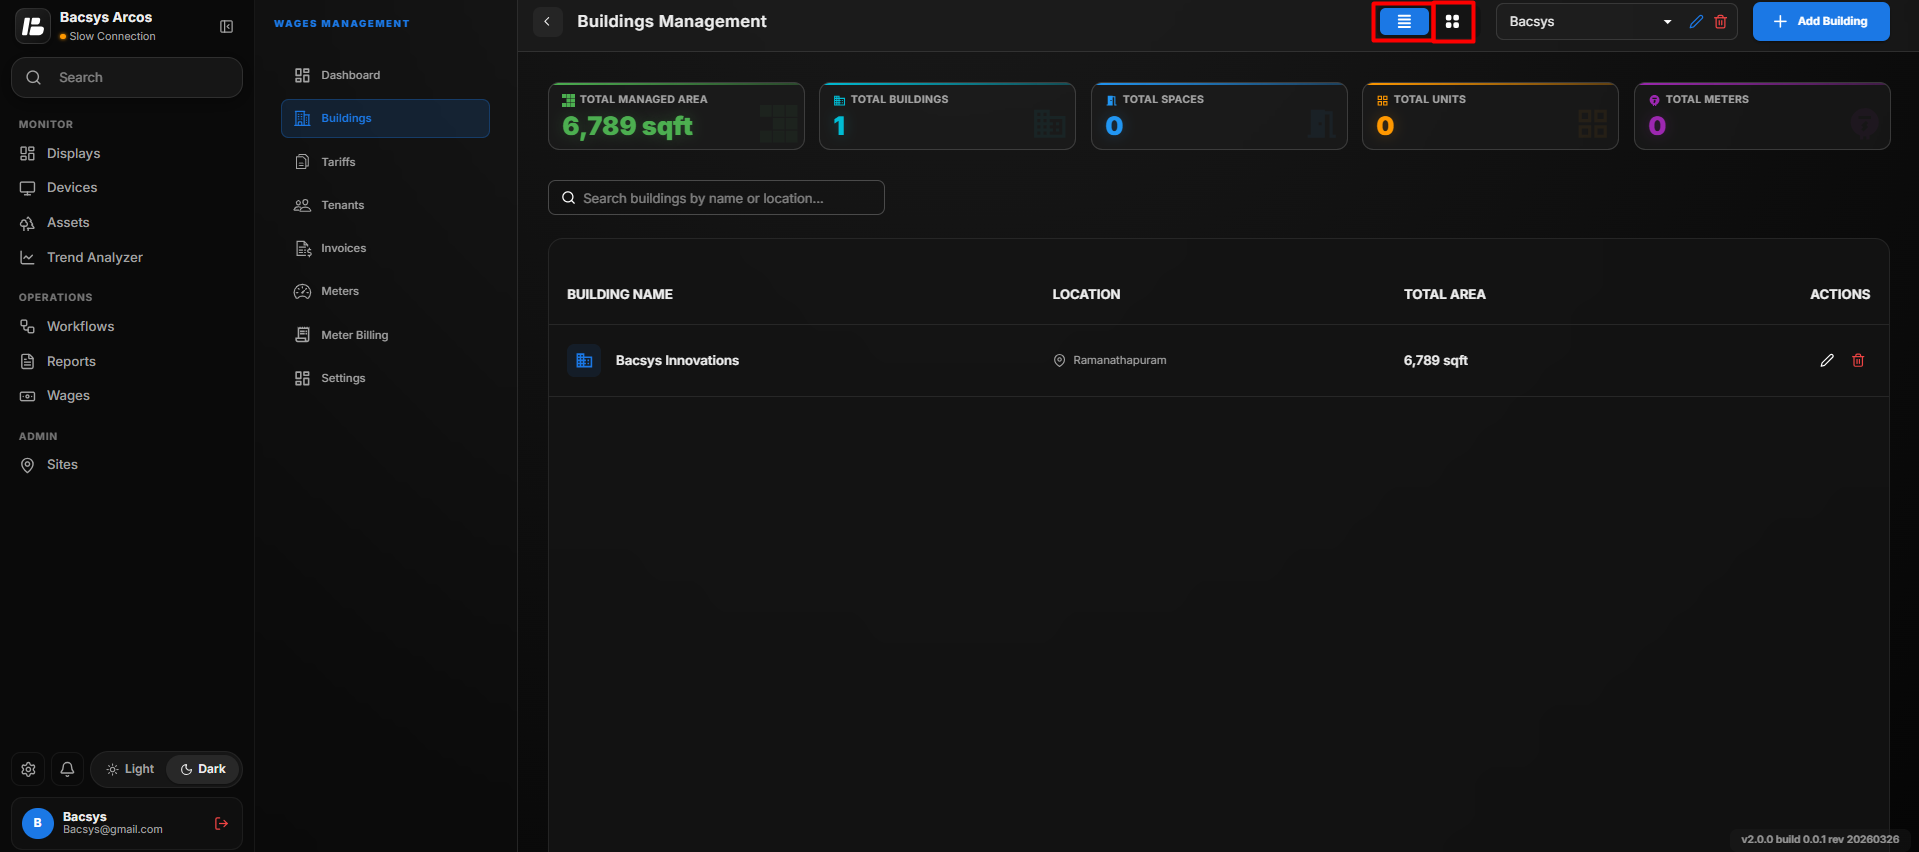 Buildings can be viewed in two different layouts.
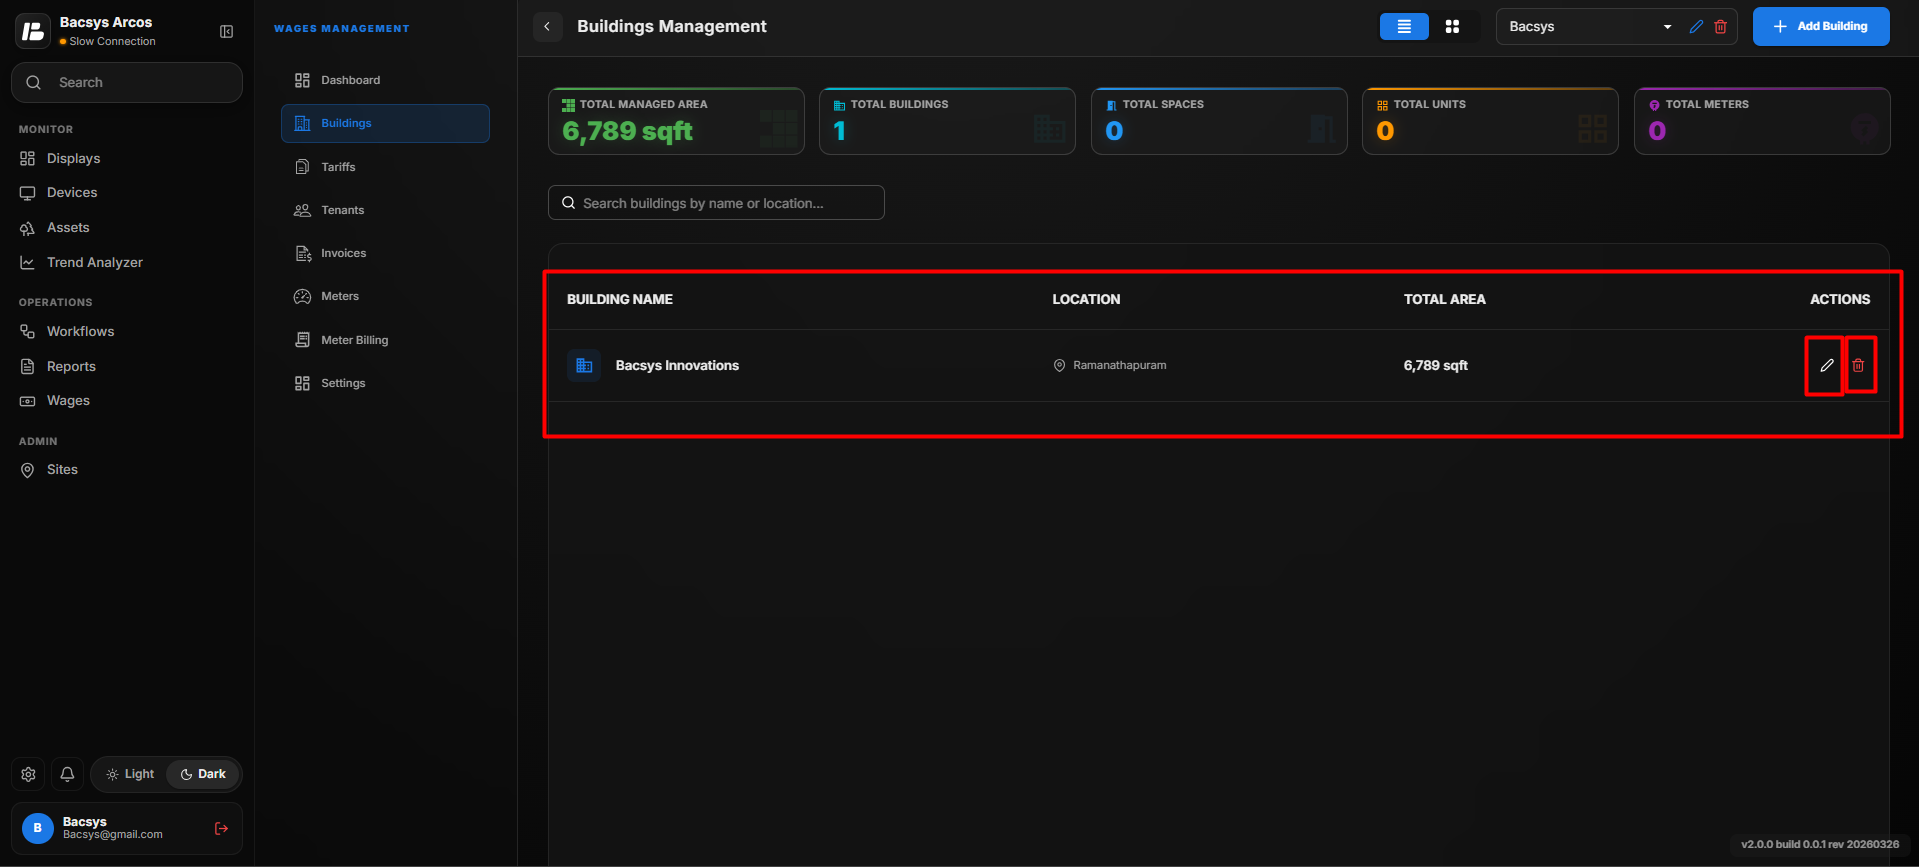
List View
Displays all buildings in a table format.
##
Card View
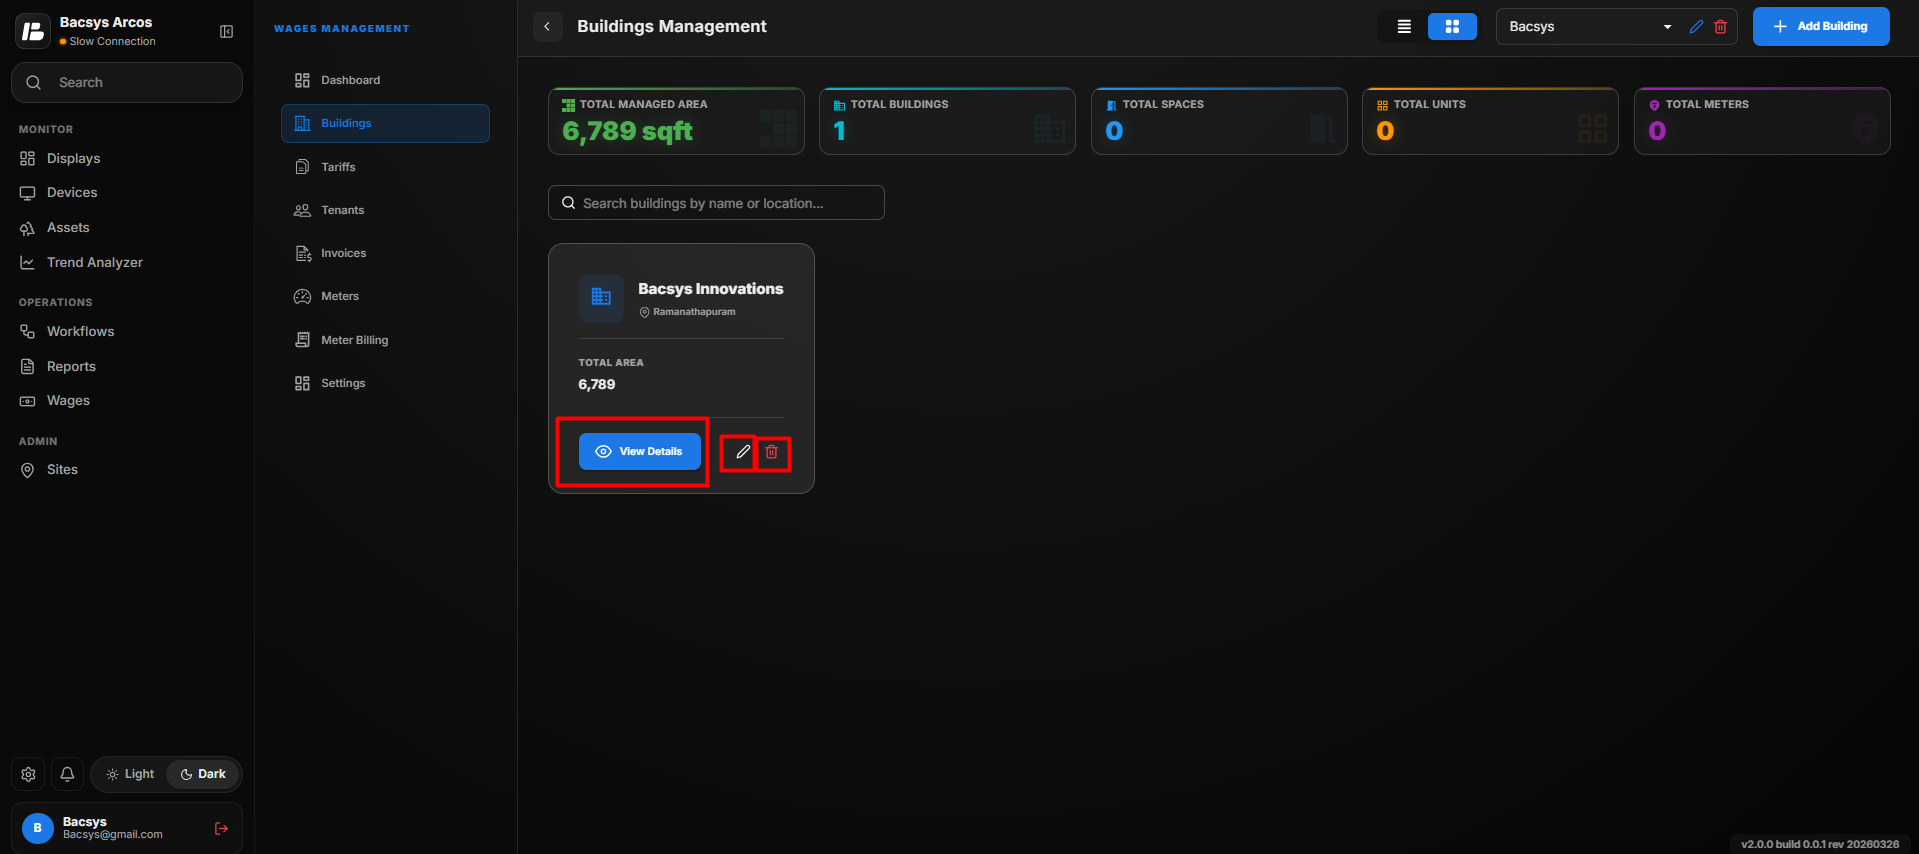
Displays each building as an individual card.
Each building card provides options to:
- View Details
- Edit
- Delete
To continue configuring the building, click View Details.
Creating a Space
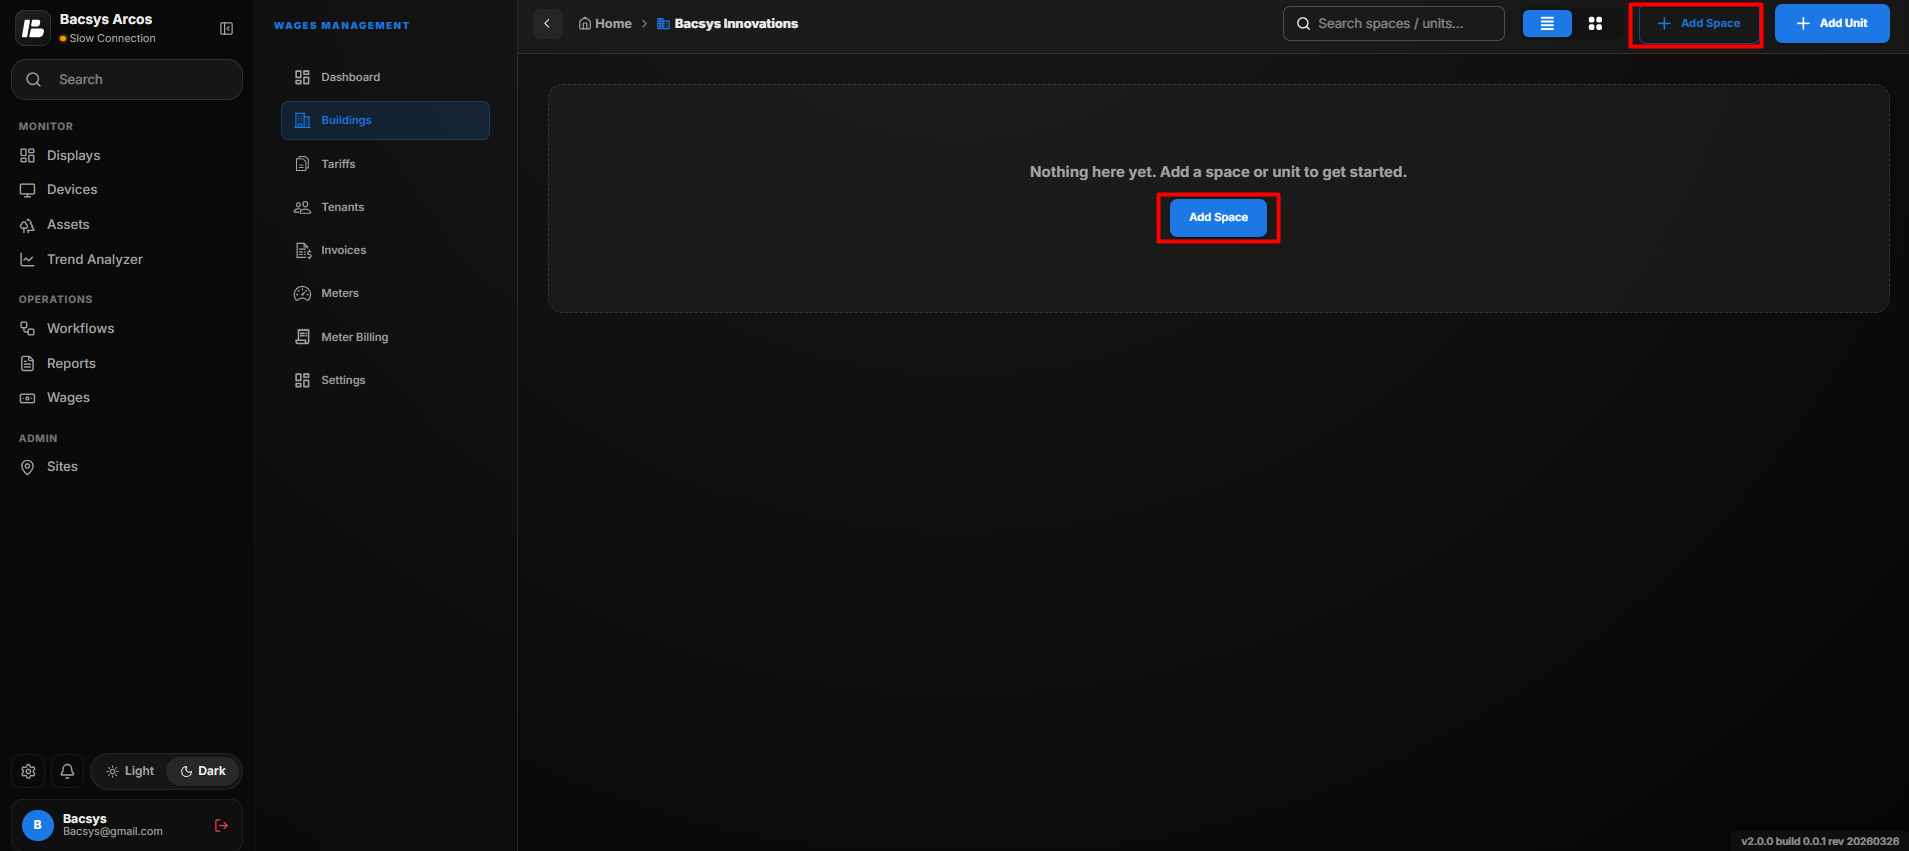
A Space represents a section or area within a building. Each building can contain one or more spaces.
Steps
- Open the required building.
- Click Add Space.
- The Add Space pop-up window appears.
- Enter the following information.
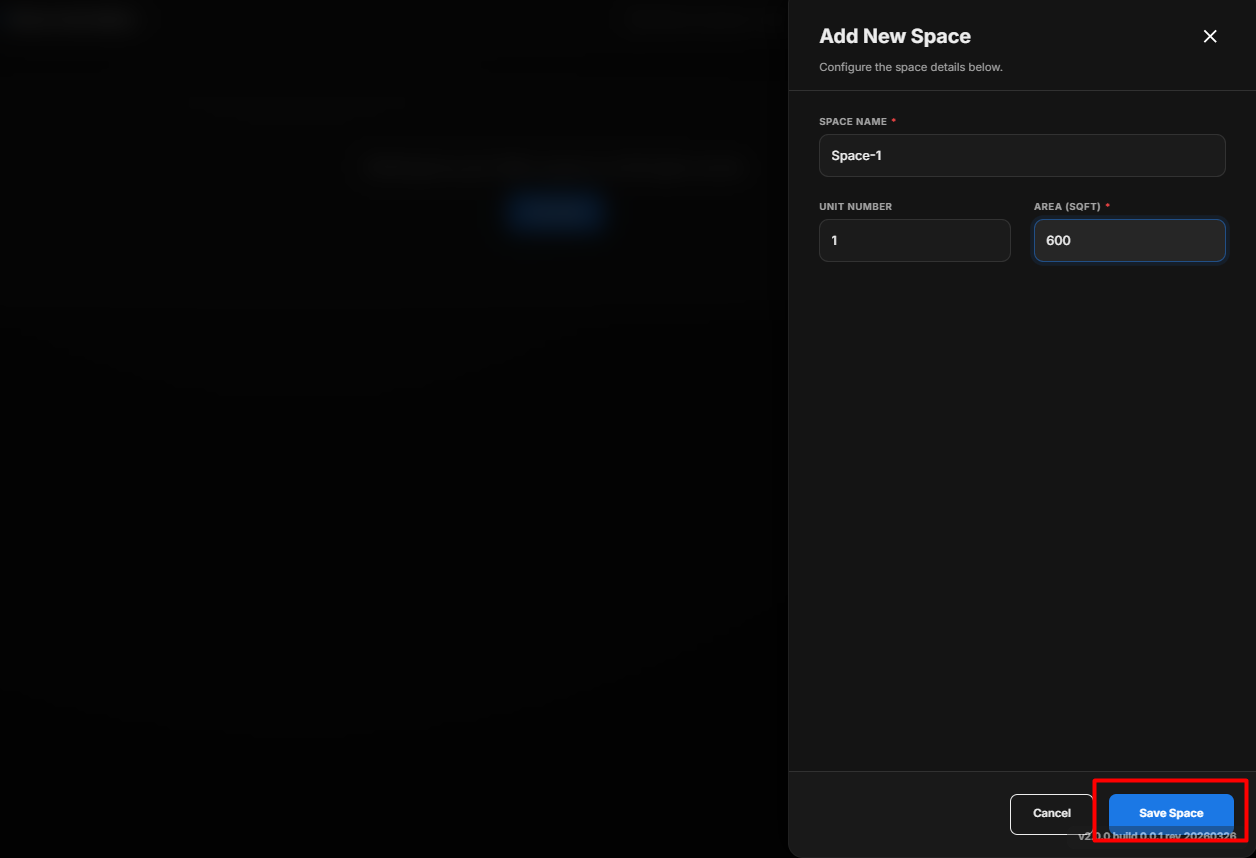
| Field | Description |
|---|---|
| Space Name | Enter the name of the space. |
| Unit Number | Enter the associated unit number. |
| Area | Enter the total area of the space. |
- Click Save Space.
The space is created successfully and is displayed in the list of spaces.
You can repeat the same process to create multiple spaces within the same building.
Note
- A building can contain multiple spaces.
- Each space can be edited or deleted whenever required.
Managing Spaces
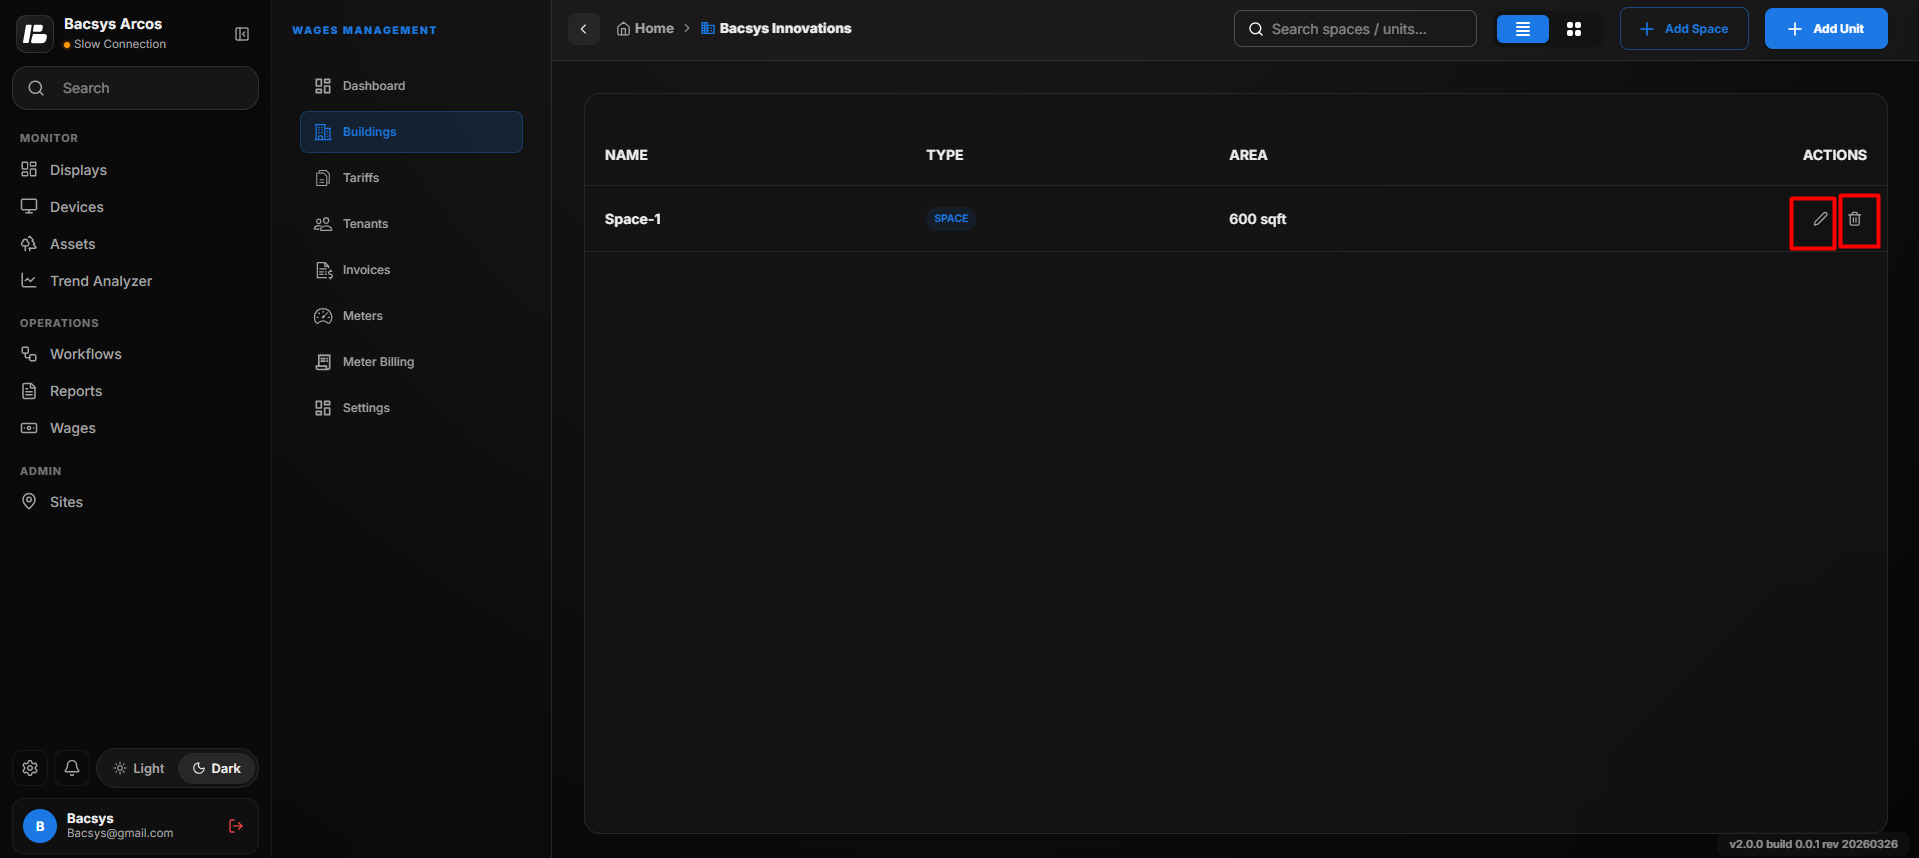 For every space, the following actions are available:
- Edit
- Delete
Users can modify or remove spaces whenever required.
Creating a Unit
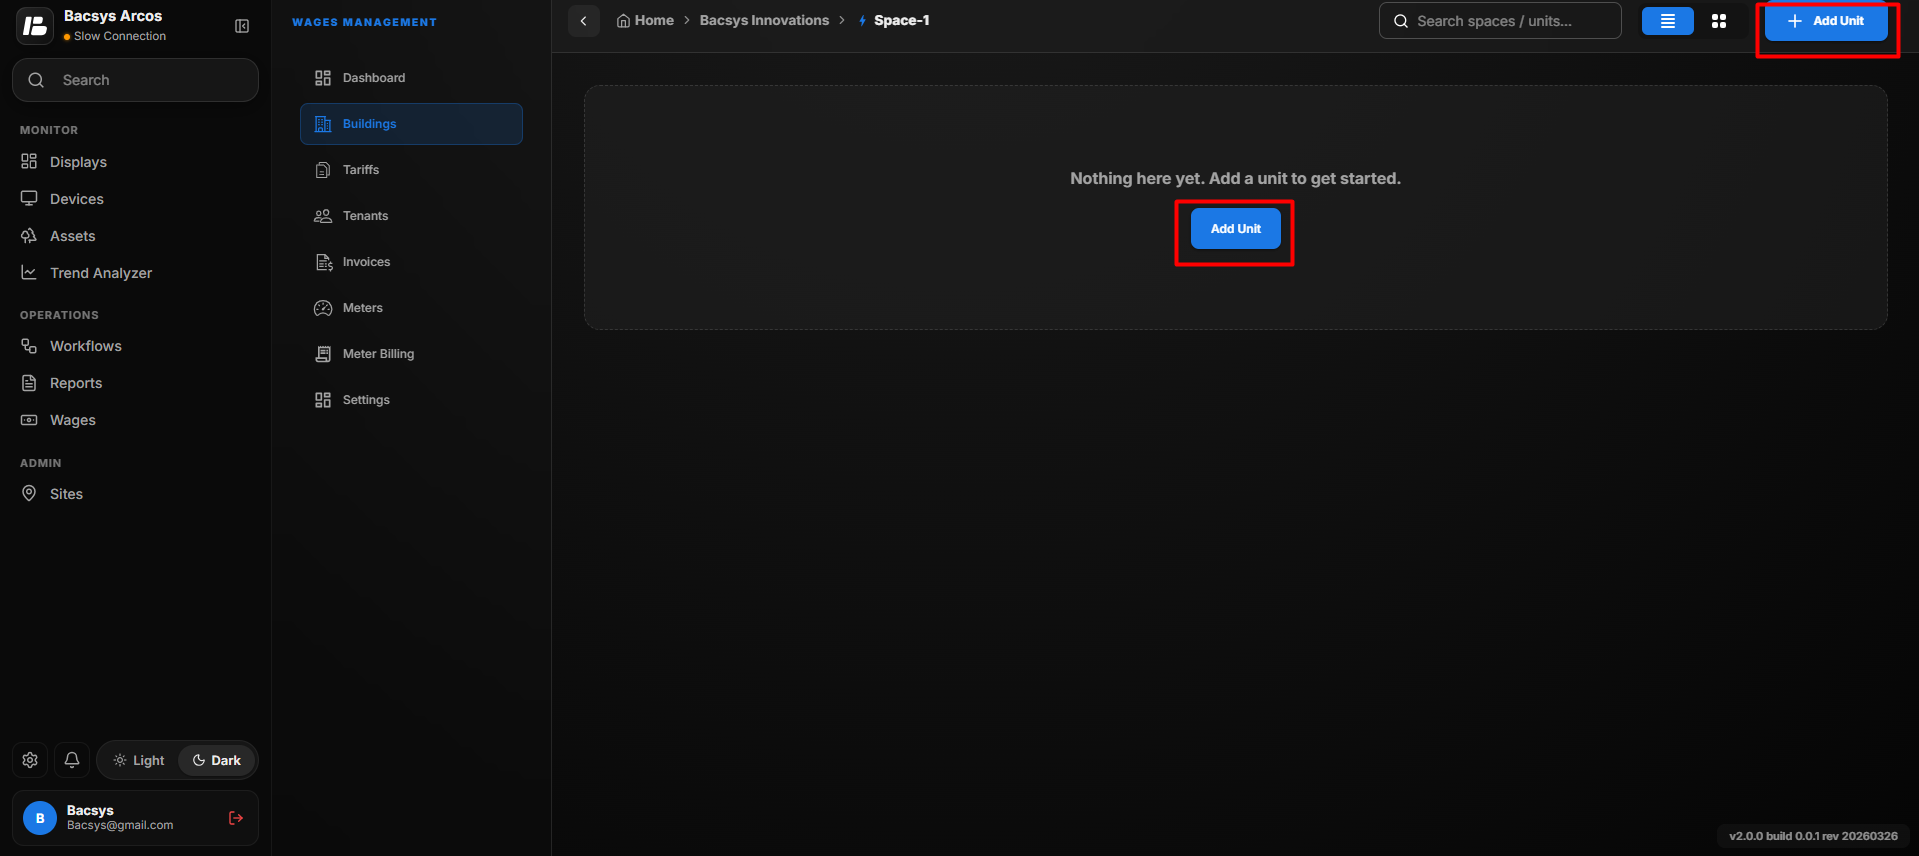 Each space can contain one or more units.
Steps
- Open the required space.
- Click Open.
- Click Add Unit.
- The Unit dialog box appears.
- Enter the following details.
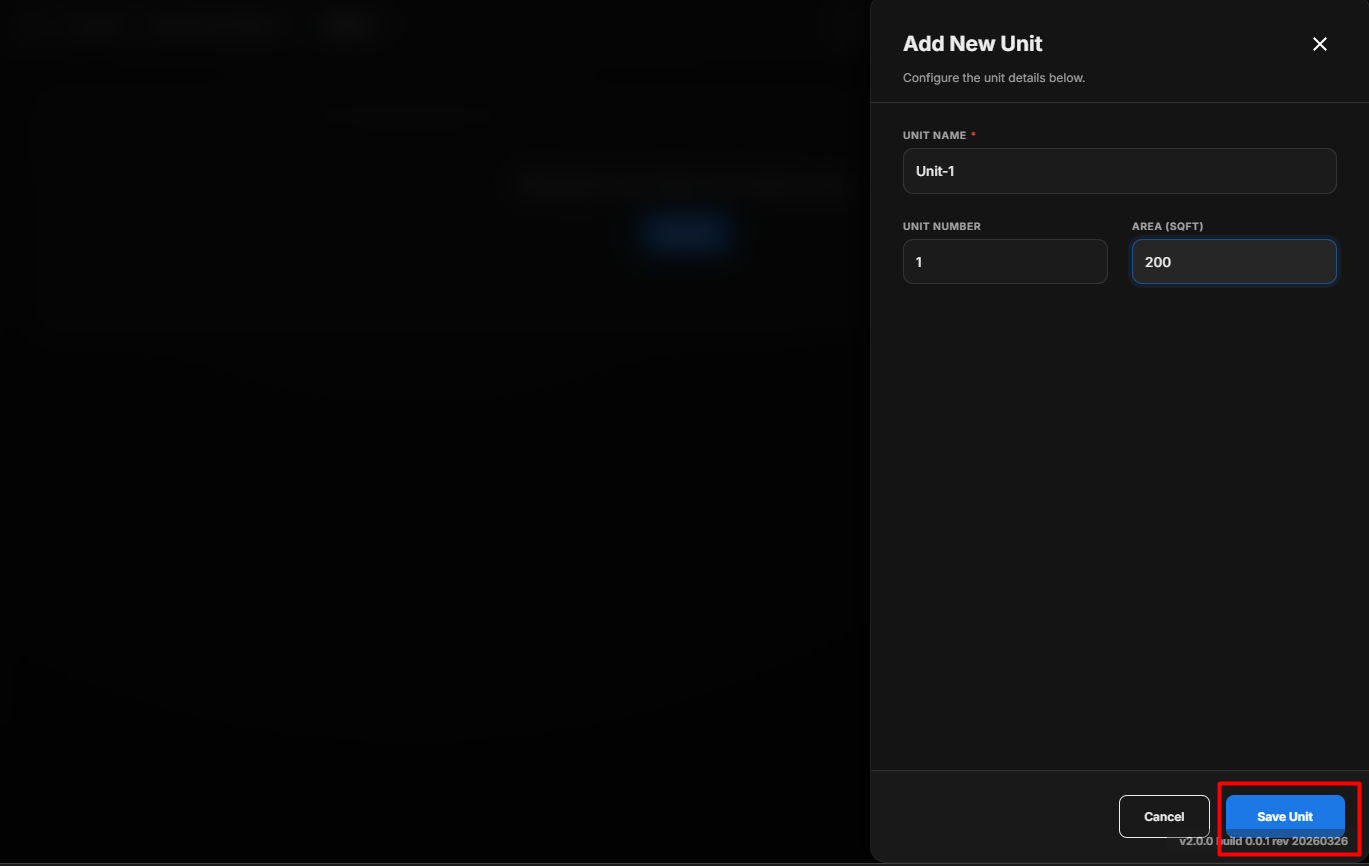
| Field | Description |
|---|---|
| Unit Name | Name of the unit. |
| Unit Number | Unique unit number. |
| Area | Unit area. |
- Click Save Unit.
The unit is created successfully.
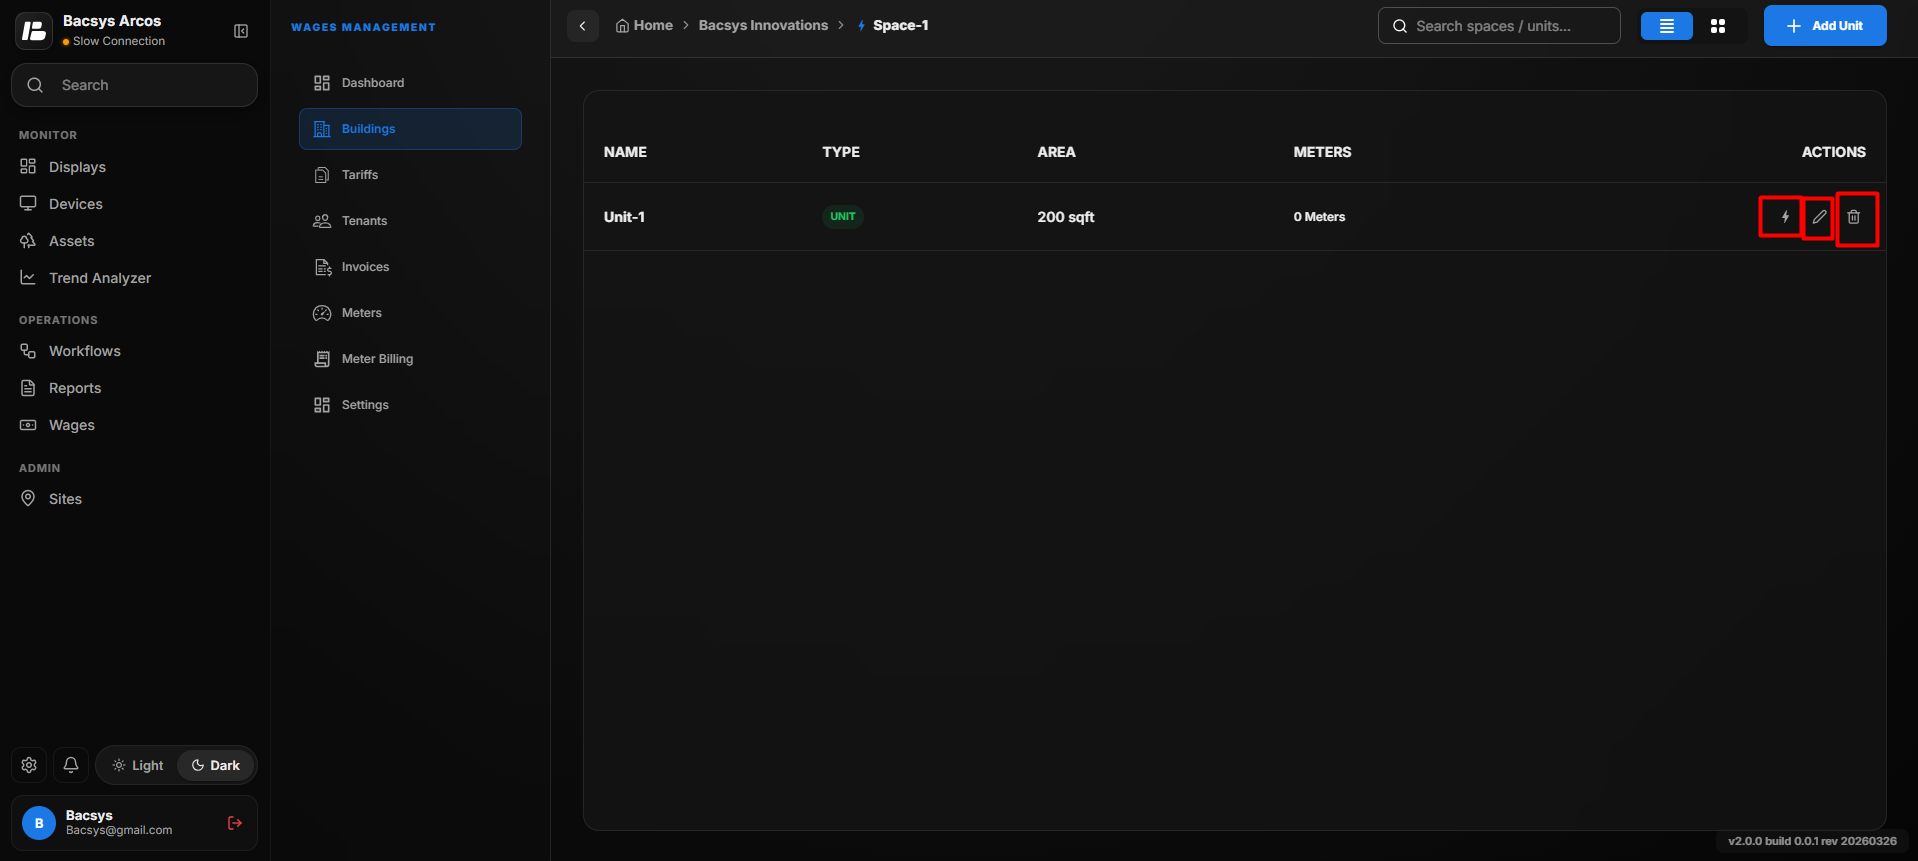
Configuring a Meter
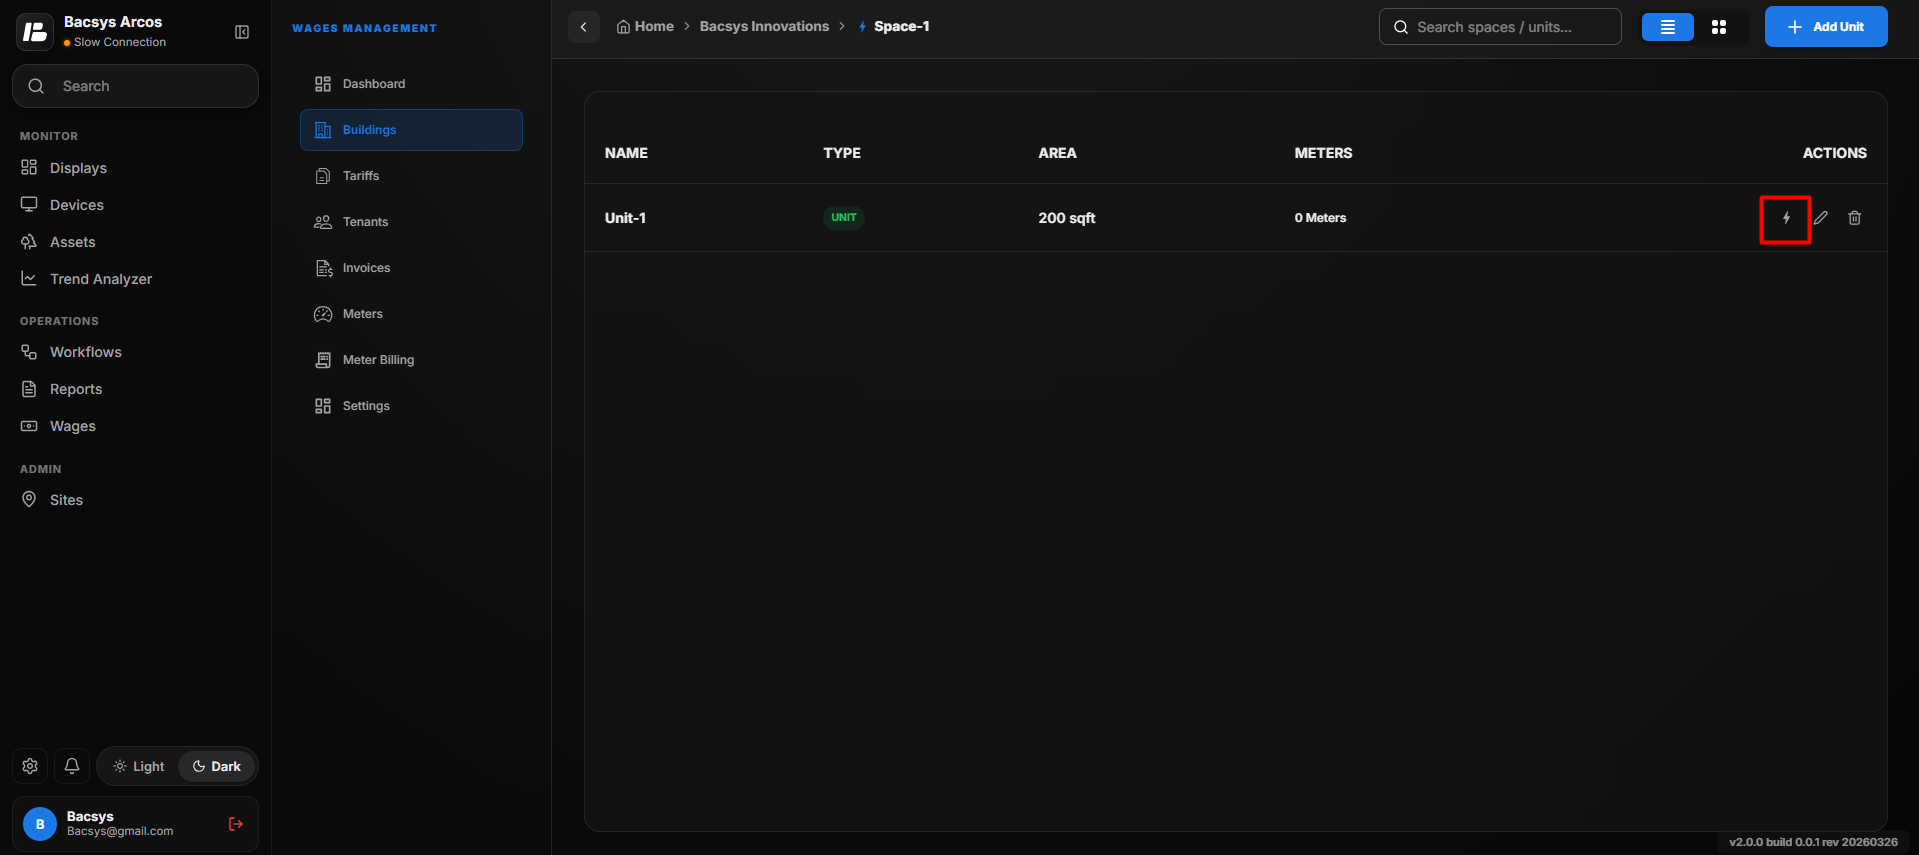 After creating a unit, utility meters can be assigned.
Steps
- Open the required unit.
- Click Configure Meter.
- The Configure Meter dialog box appears.
- Enter the following information.
| Field | Description |
|---|---|
| Meter Name | Name of the utility meter. |
| Unit Type | Select the utility type. |
| Serial Number | Select the hardware serial number. |
| Point | Select the point to be mapped. |
| MF | Enter the Multiplication Factor if required. |
- Click Map Hardware.
- Click Save.
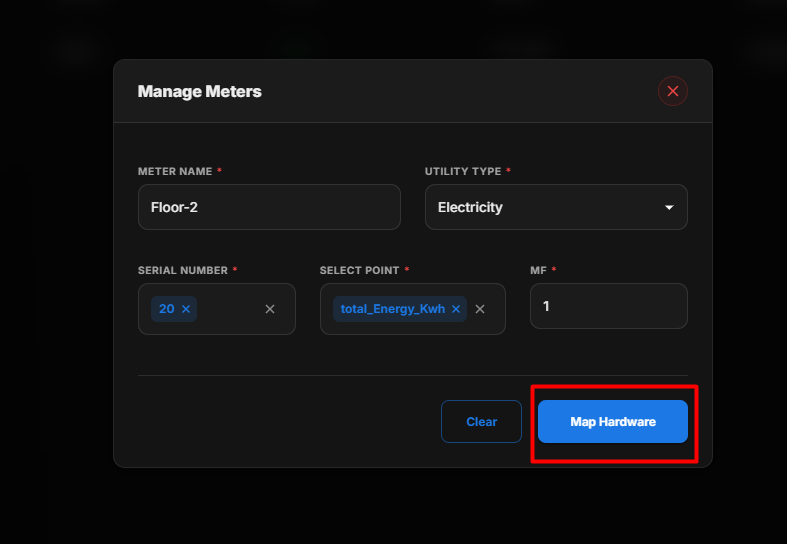
The meter is successfully configured and mapped to the selected hardware point.
Mapping the Hardware
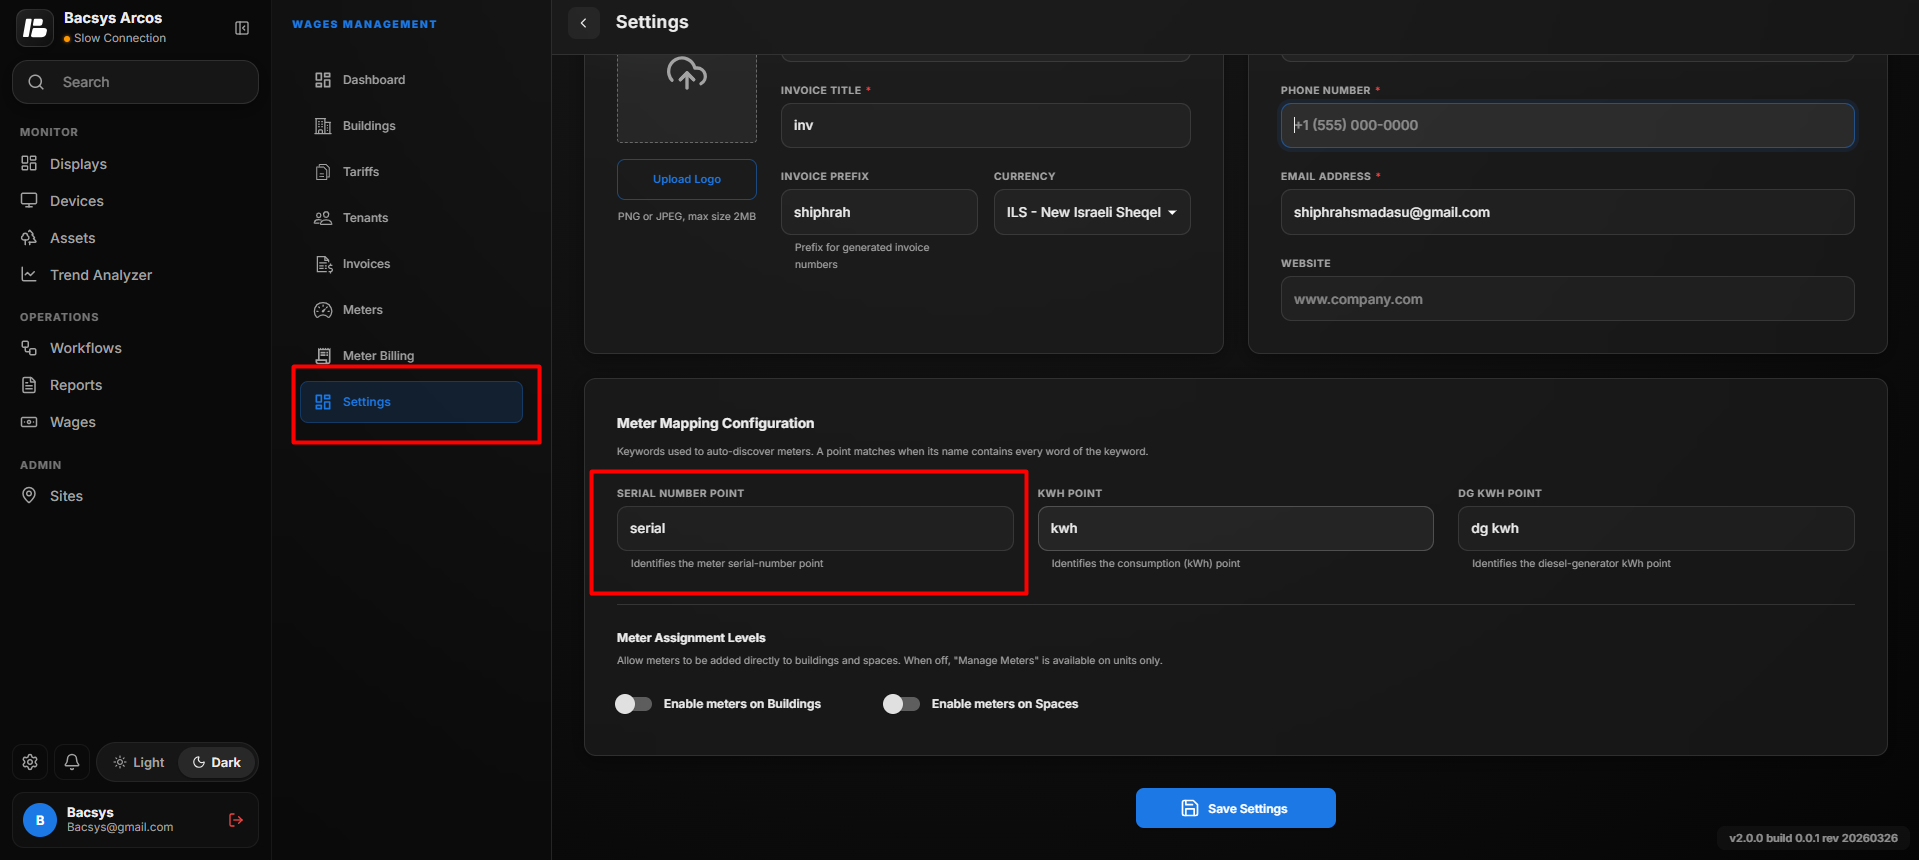
Before configuring a meter, the hardware device must be added.
In the Settings module, assign a Serial Number to the hardware device.
For example:
Serial Number: SERIAL001When configuring the meter, this serial number becomes available in the Serial Number selection list. Select the appropriate device to map the meter with the correct hardware.
Managing Configured Meters
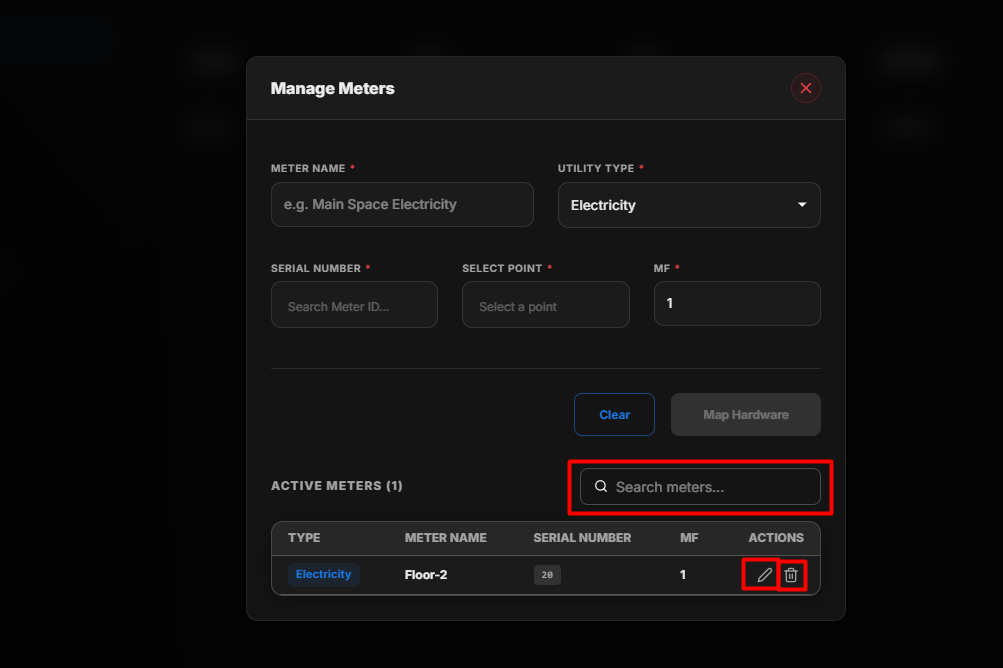
Once a meter has been configured, users can perform the following actions:
- Edit the meter configuration.
- Delete the configured meter.
- Change the mapped point.
- Update hardware mapping.
- Modify meter information.
These options allow users to maintain and update meter configurations whenever necessary.
Workflow Summary
Create Site
      ↓
Create Building
      ↓
View Building Details
      ↓
Create Space
      ↓
Create Unit
      ↓
Configure Meter
      ↓
Map Hardware
      ↓
Save Configuration
This hierarchy enables users to organize properties, configure utility meters, and map hardware devices for accurate billing and consumption monitoring.