

Tenant Management
The Tenant Management module allows users to create and manage tenant information, assign one or more units, and maintain billing details. Users can v...
The Tenant Management module allows users to create and manage tenant information, assign one or more units, and maintain billing details. Users can view tenants in both List View and Card View, making it easy to manage tenant records.
Viewing Tenants
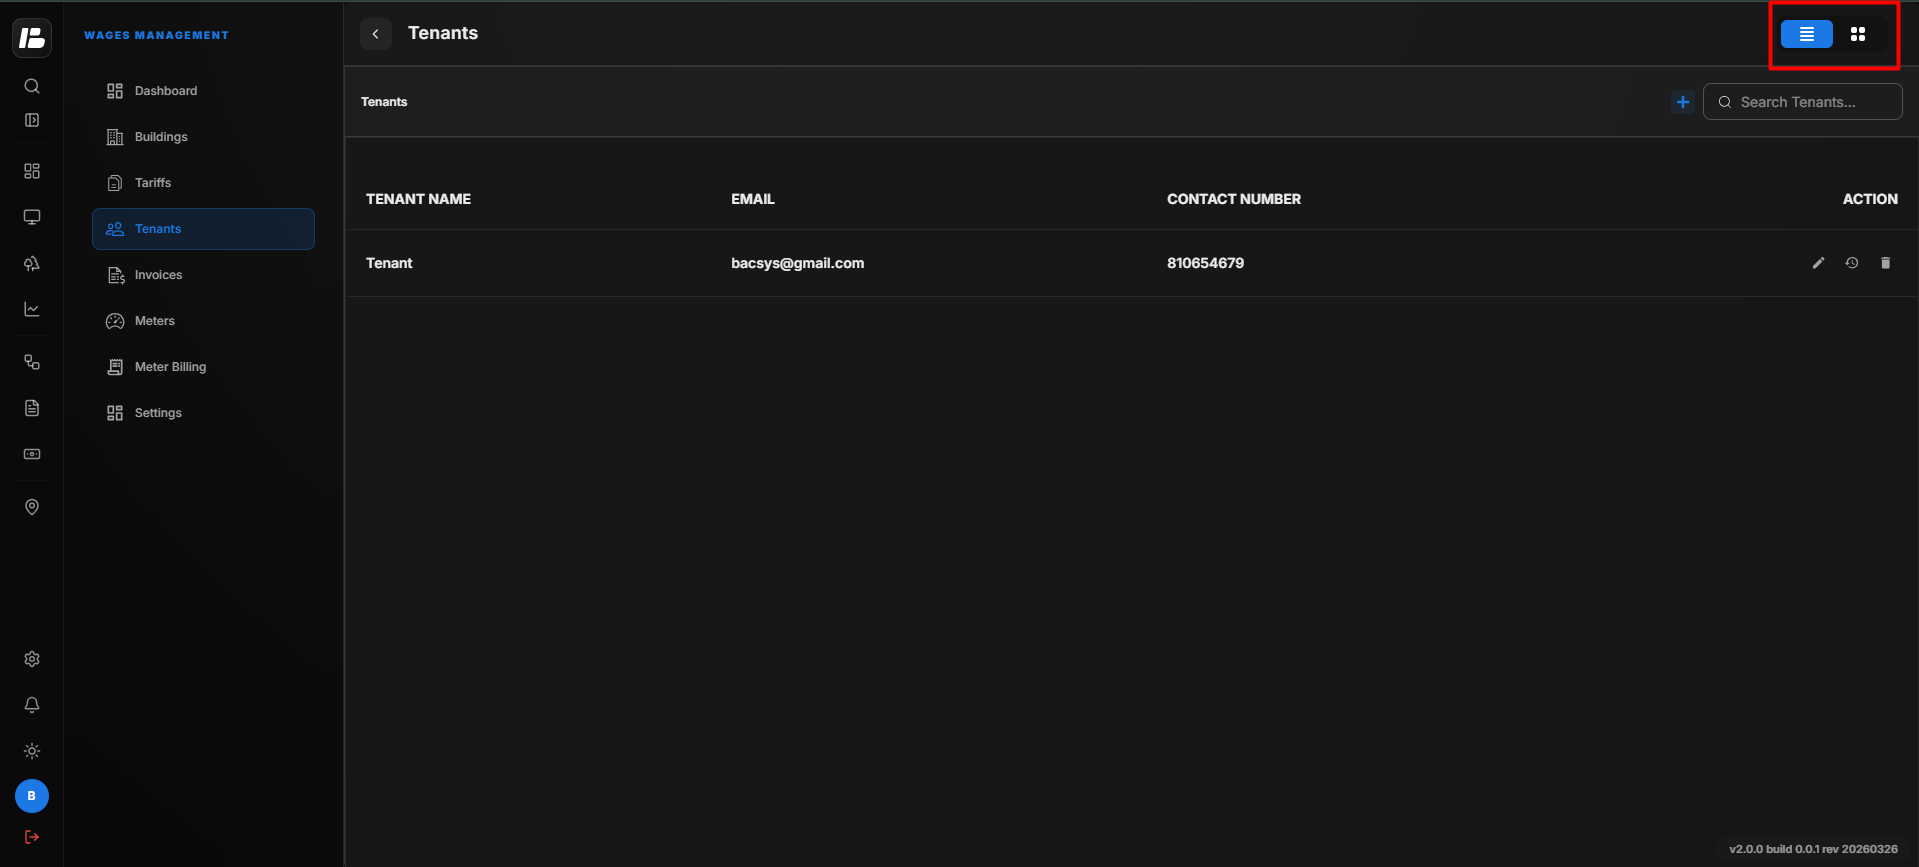
The Tenants page allows you to view tenant records in both List View and Card View for easy management and quick access.
Creating a Tenant
- Navigate to the Tenants module.
- Click the + icon.
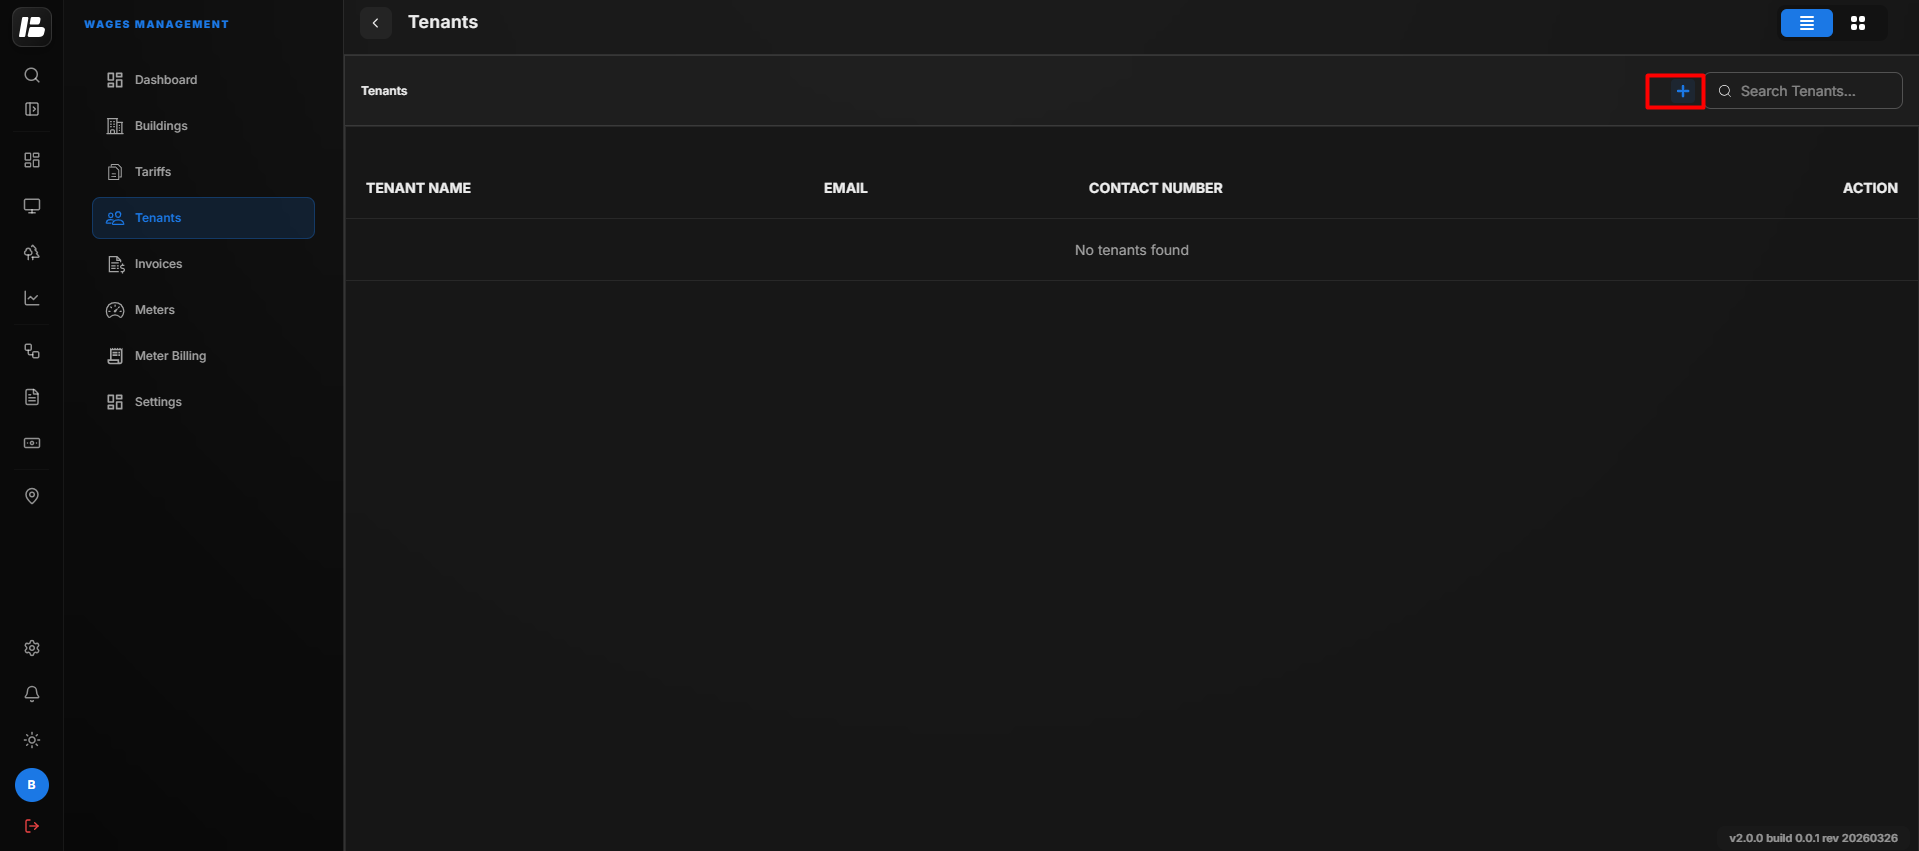
- The Add Tenant pop-up window appears.
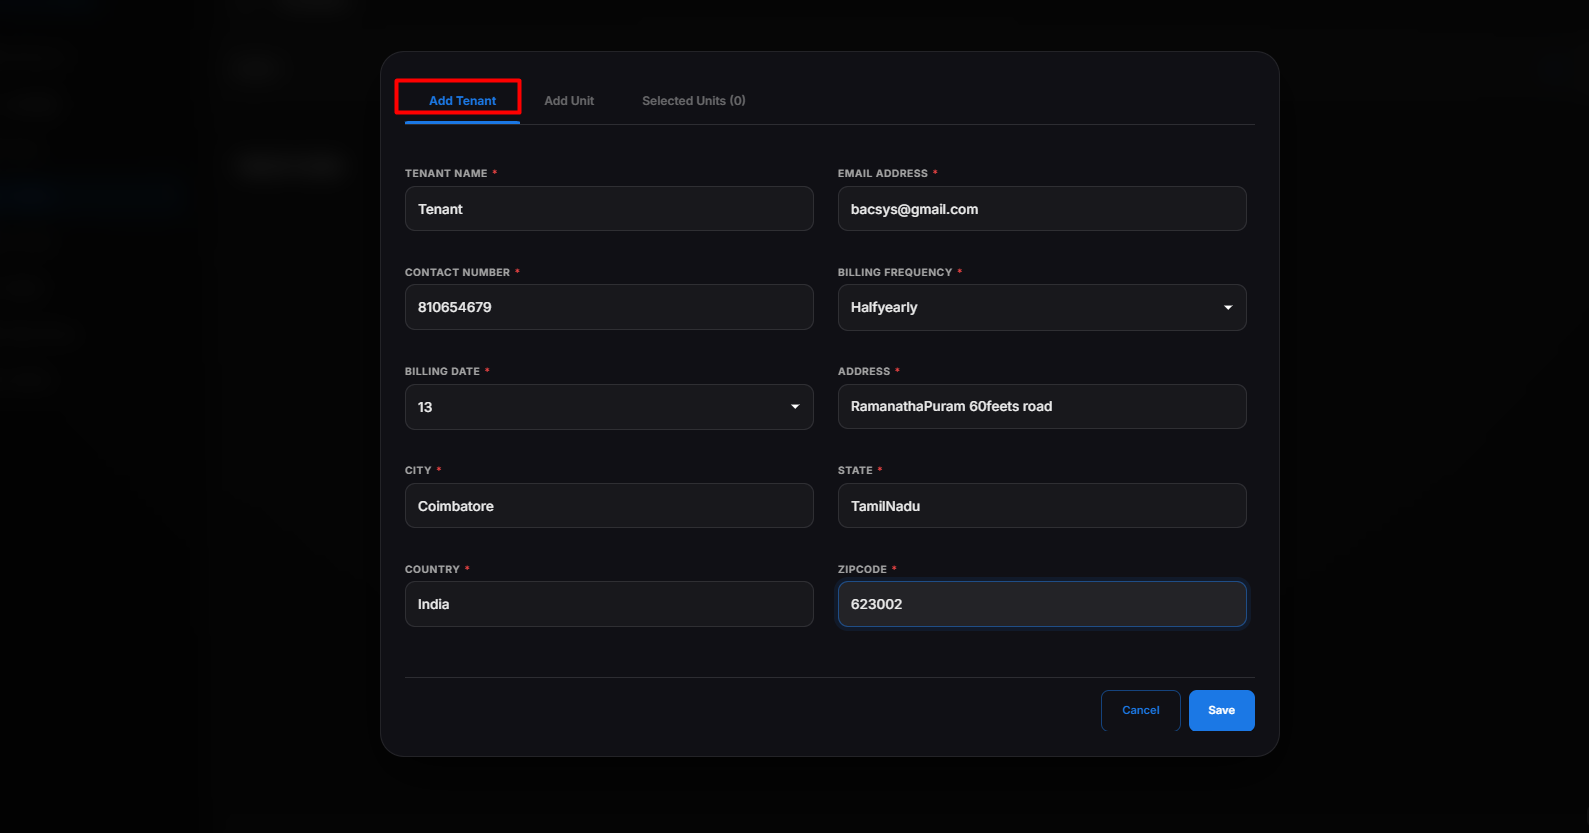
- Enter the following tenant details.
| Field | Description |
|---|---|
| Tenant Name | Enter the tenant's name. |
| Email Address | Enter the tenant's email address. |
| Contact Number | Enter the tenant's contact number. |
| Billing Frequency | Select the billing cycle for the tenant. Available options are 1 Week, 2 Weeks, 3 Weeks, Monthly, Quarterly, Half-Yearly, and Annually. |
| Billing Date | Select the billing date. |
| Address | Enter the tenant's address. |
| City | Enter the city. |
| State | Enter the state. |
| Country | Select the country. |
| Zip Code | Enter the postal or ZIP code. |
Assigning Units
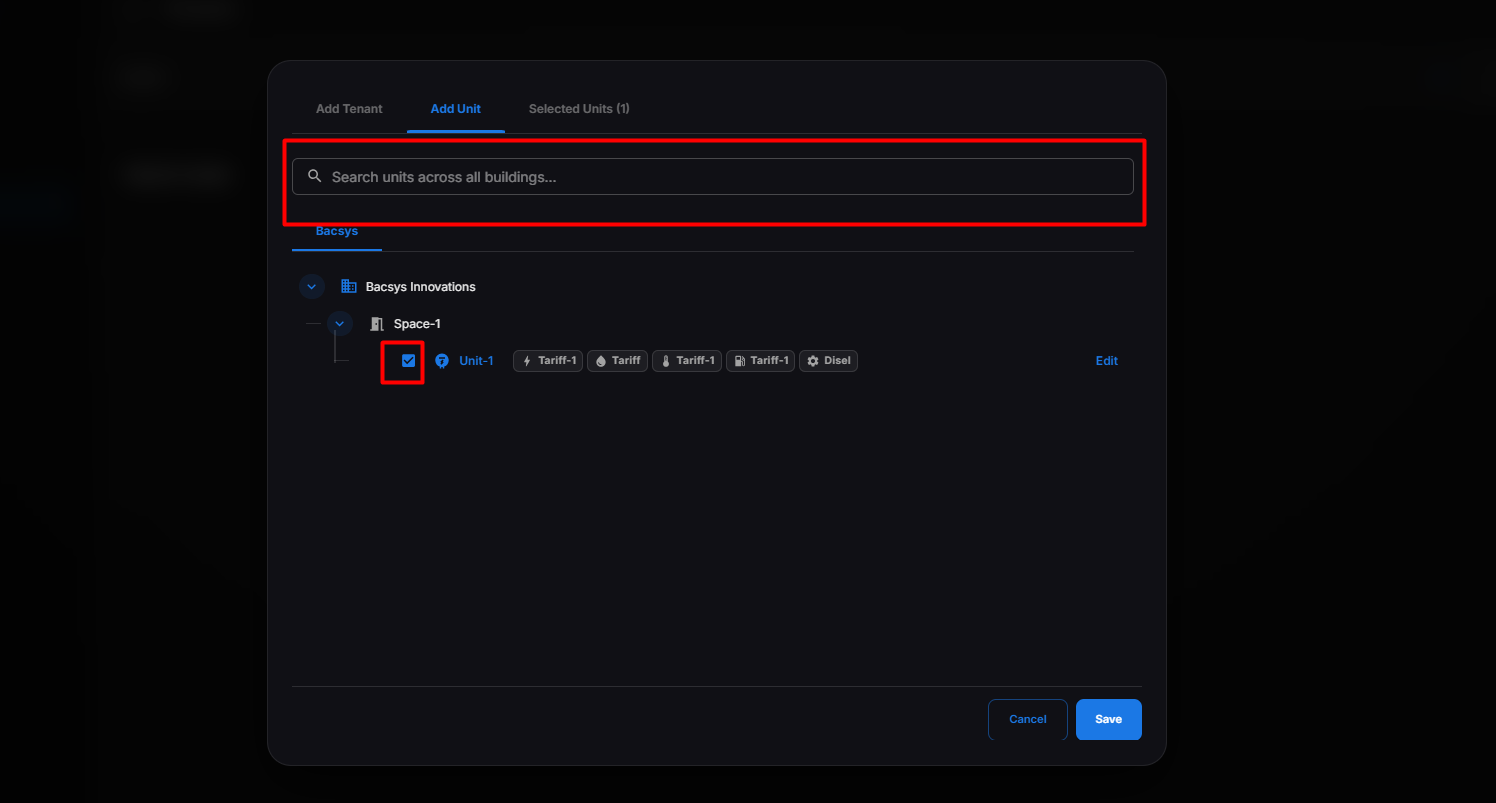
The Add Unit section allows you to assign one or more units to the tenant.
Steps
- Click Add Unit.
- Use the Search box to find the required unit.
- Click Assign for the unit you want to allocate.
- Repeat the process to assign additional units if required.
- The assigned units are displayed in the Selected Units section.
- Click Save.
The tenant is created successfully, and the selected units are assigned to the tenant.
Note
- A tenant can be assigned one or multiple units.
- The Selected Units section displays all assigned units before saving.
- You can search for units to quickly locate and assign them.
Managing Tenants
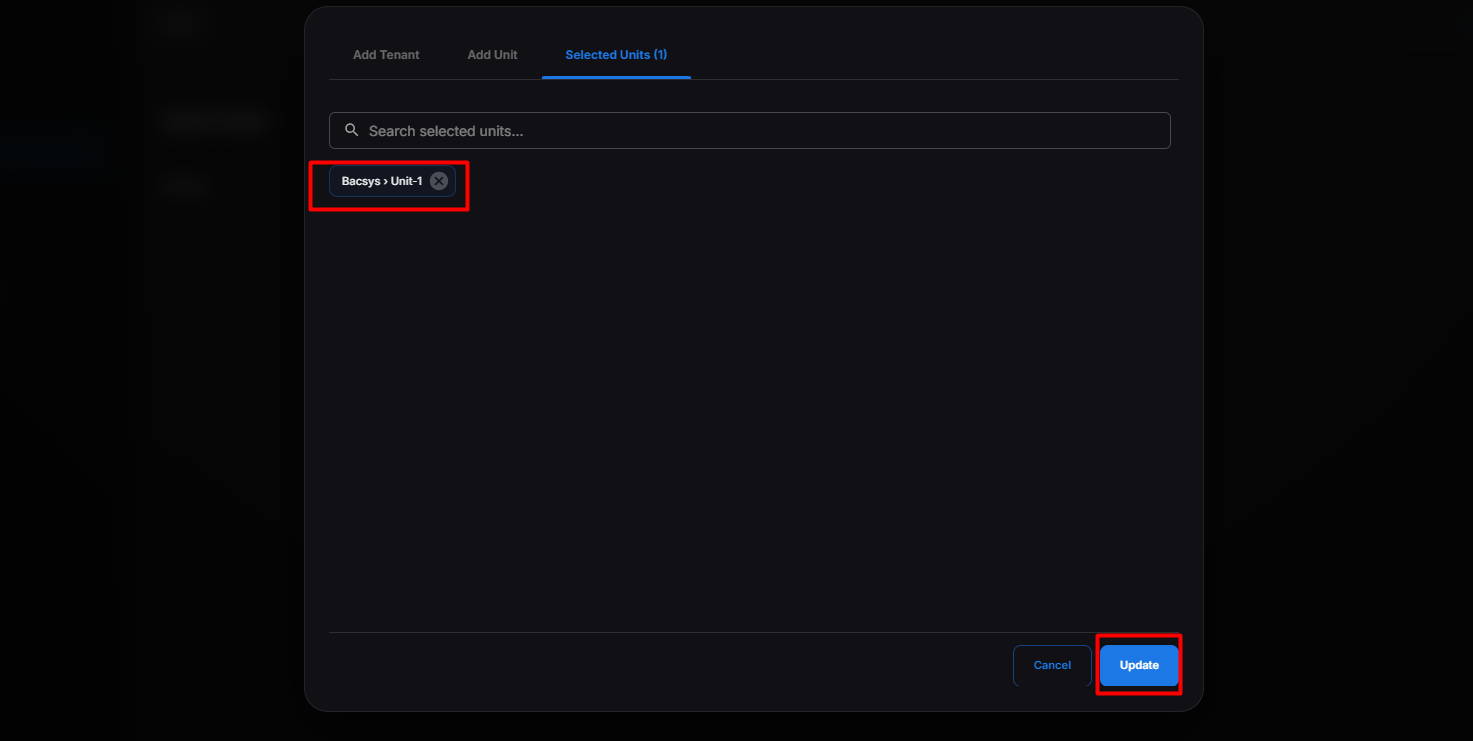
After a tenant has been created, it is displayed in the tenant list.
From here, you can:
- Edit the tenant information.
- Search for a tenant using the search box.
- View tenants in List View or Card View.
Editing Assigned Units
The Edit option allows you to update the units assigned to a tenant.
Steps
- Click Edit for the required tenant.
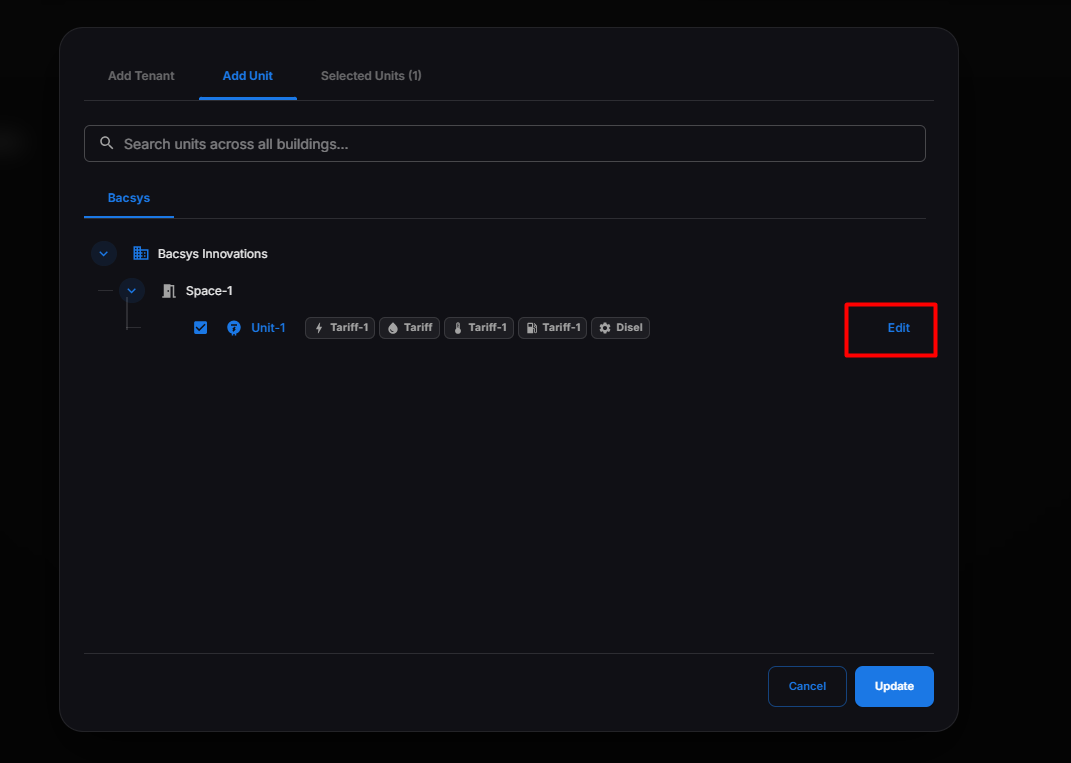
- Navigate to the Add Unit section.
- The Selected Units section displays all units currently assigned to the tenant.
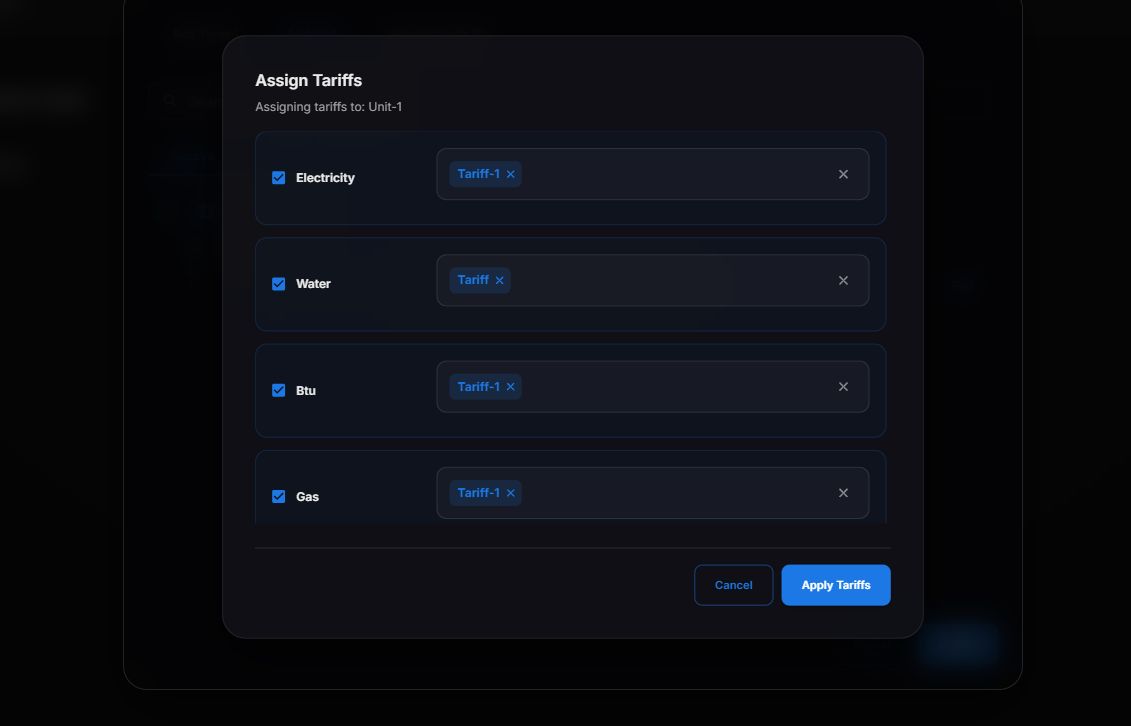
- Add or remove units as required.
- Click Save to update the tenant information.
The tenant information and assigned units are updated successfully.
Note
- The Selected Units section displays all units currently assigned to the tenant.
- You can add new units or remove existing units while editing the tenant.
- All changes are saved after clicking Save.
Viewing Billing History
The History option allows you to view the billing history of a selected tenant.
Steps
- Navigate to the Tenants module.
- Locate the required tenant.
- Click the History button.
The Billing History for Tenant pop-up window appears.
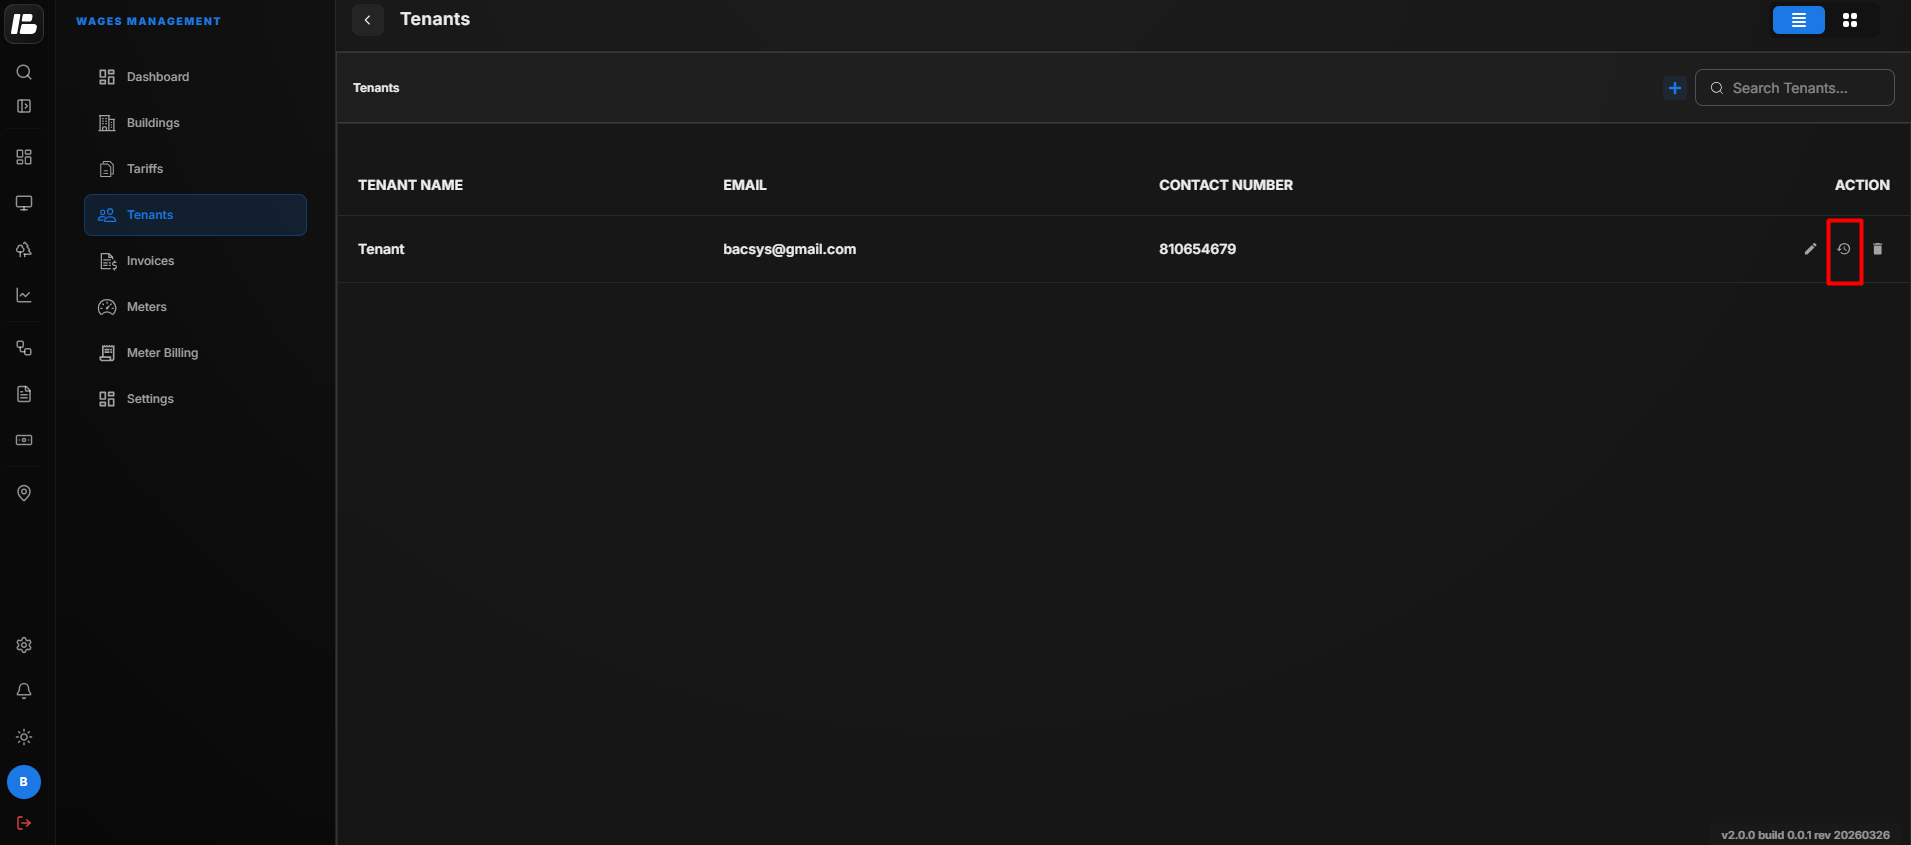
The pop-up displays the billing history of the selected tenant in a table format.
| Column | Description |
|---|---|
| Invoice No | Displays the invoice number for the generated bill. |
| Date | Displays the invoice generation date. |
| Amount | Displays the total bill amount. |
| Status | Displays the current payment status of the invoice. |
| Actions | Displays the available actions for the invoice, if applicable. |
If no bills have been generated for the tenant, the message "No invoices found" is displayed.
Click Close to exit the billing history window.
Note
- The billing history displays all invoices generated for the selected tenant.
- Invoice details are displayed in a table for easy reference.
- If no invoices are available, the table displays "No invoices found."
Viewing Billing History
The History option allows you to view the billing history of a selected tenant.
Steps
- Navigate to the Tenants module.
- Locate the required tenant.
- Click the History button.
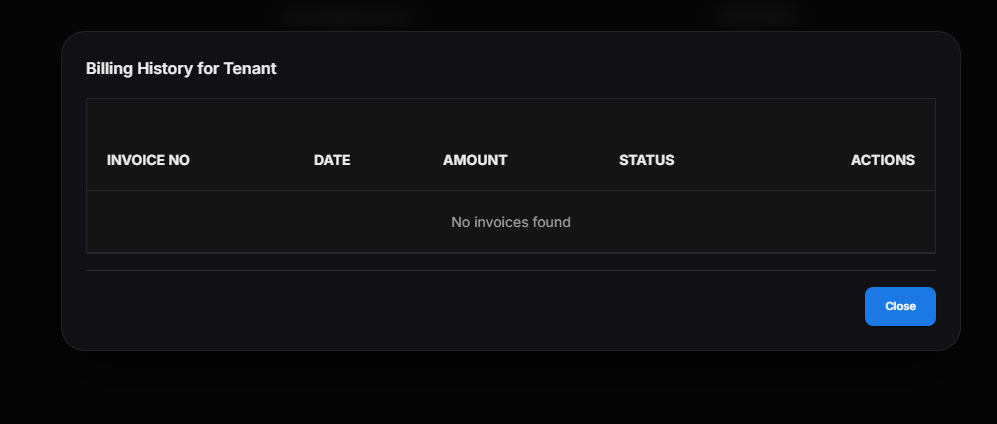
The Billing History for Tenant pop-up window appears.
The pop-up displays the billing history of the selected tenant in a table format.
| Column | Description |
|---|---|
| Invoice No | Displays the invoice number for the generated bill. |
| Date | Displays the invoice generation date. |
| Amount | Displays the total bill amount. |
| Status | Displays the current payment status of the invoice. |
| Actions | Displays the available actions for the invoice, if applicable. |
If no bills have been generated for the tenant, the message "No invoices found" is displayed.
Click Close to exit the billing history window.
Note
- The billing history displays all invoices generated for the selected tenant.
- Invoice details are displayed in a table for easy reference.
- If no invoices are available, the table displays "No invoices found."