

Meter Billing
The Meter Billing module allows users to configure meters for billing. Users can add meters, map hardware devices, assign tariffs, and generate invoic...
The Meter Billing module allows users to configure meters for billing. Users can add meters, map hardware devices, assign tariffs, and generate invoices based on the configured meter readings.
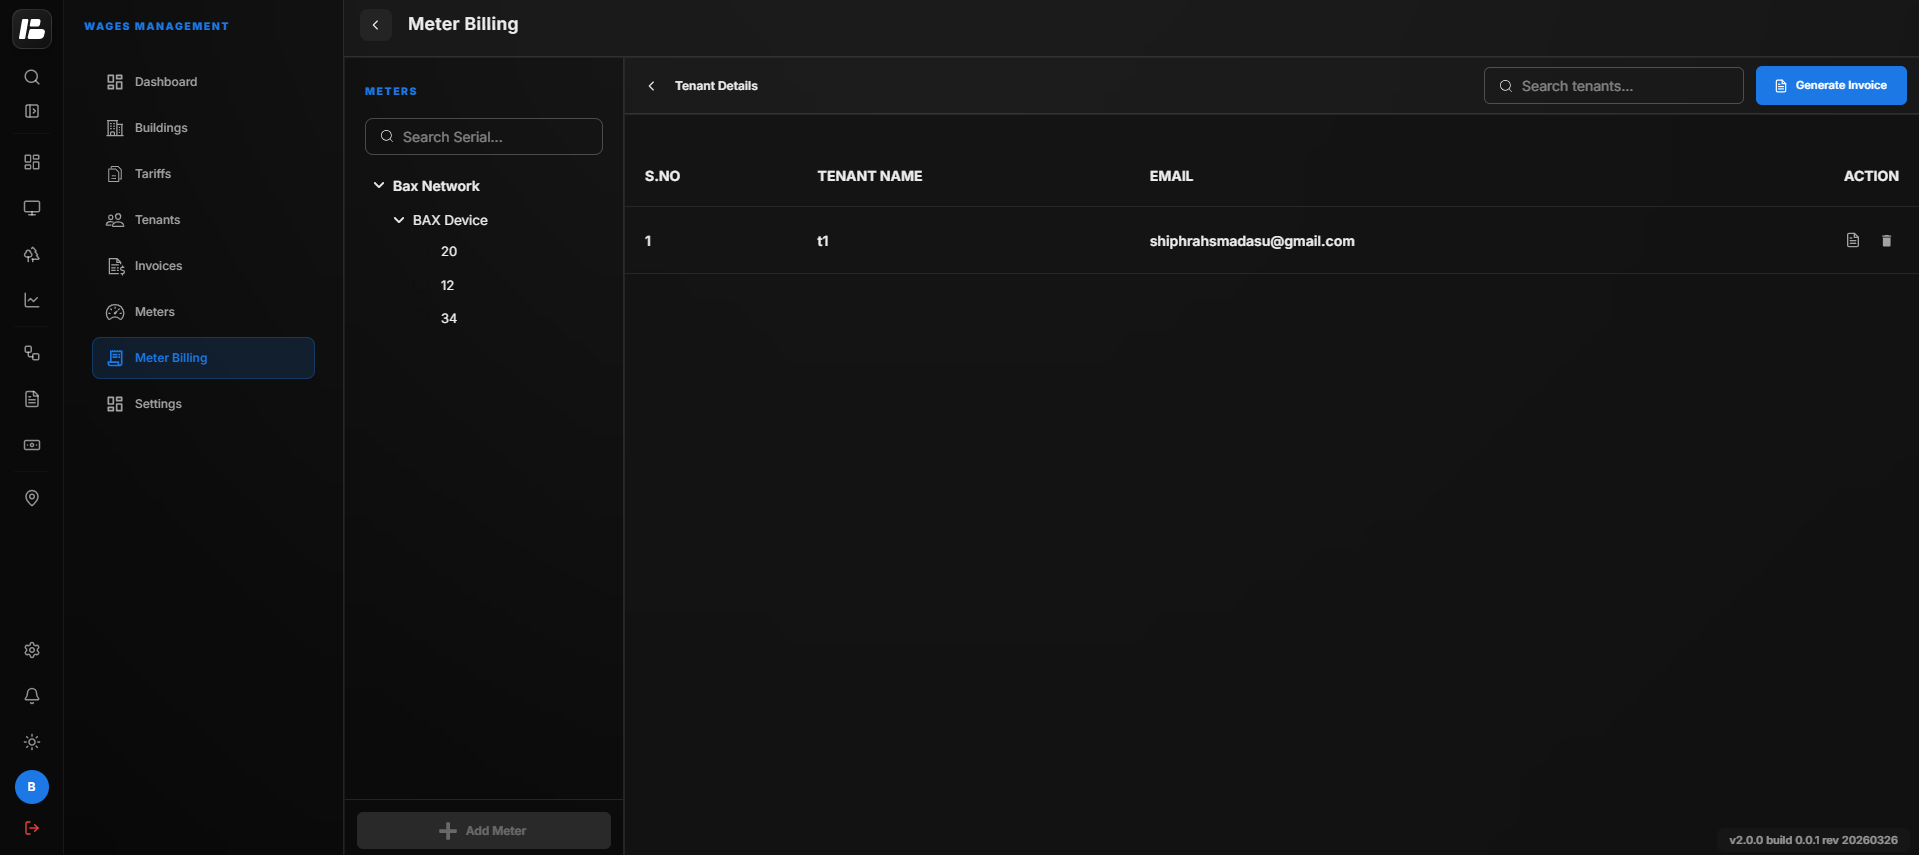
Viewing Meter Billing
The Meter Billing page displays all tenants that have been configured for meter billing. From this page, users can search for tenants, configure billing meters, and manage meter billing information.
The following information is displayed on the page:
| Column | Description |
|---|---|
| S.No | Displays the serial number of the record. |
| Tenant Name | Displays the name of the tenant. |
| Displays the tenant's email address. | |
| Actions | Provides options to configure and manage meter billing for the selected tenant. |
Adding a Meter
To configure a billing meter for a tenant:
- Select the required Points from the Meter Billing page.
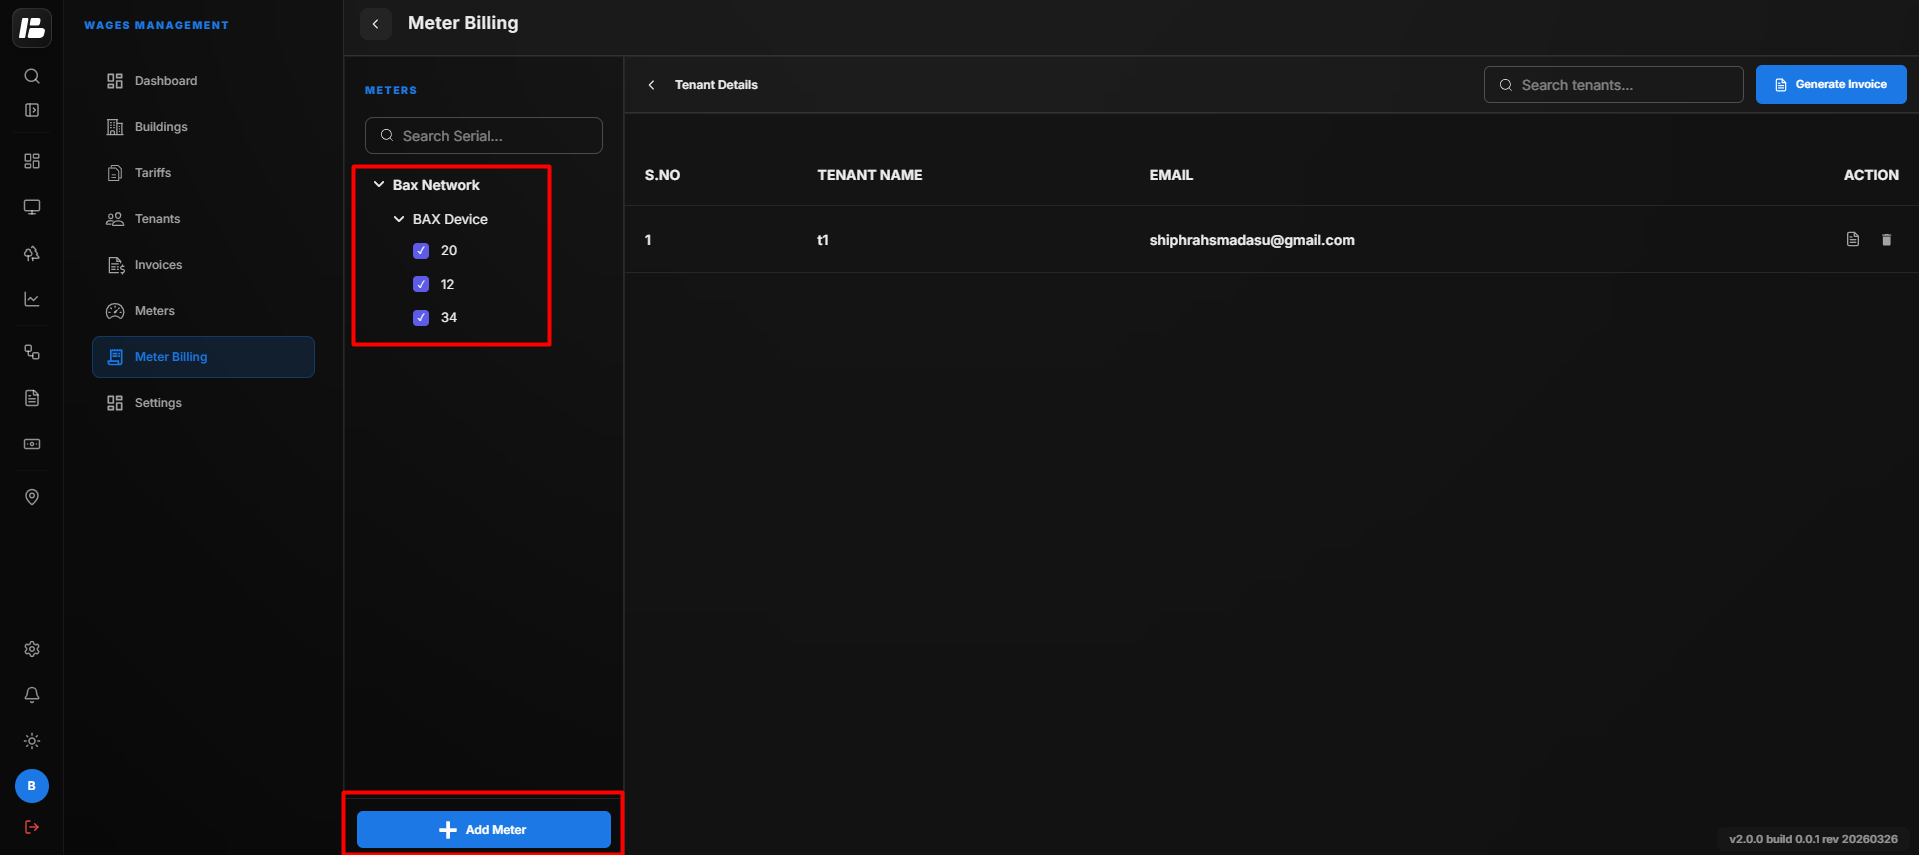
- Click Add Meter.
The Add Meter pop-up window appears.
- Enter the following information.
| Field | Description |
|---|---|
| Meter Name | Enter the name of the meter. |
| Utility Type | Select the utility type (Electricity, Water, BTU, Gas, etc.). |
| Serial Number | Select the hardware serial number. |
| Select Point | Select the point to be mapped with the meter. |
| Select Tariff | Select the tariff to be applied for billing. |
| MF | Enter the Multiplication Factor (MF), if required. |
- Select the required point.
- Click Add Meter.
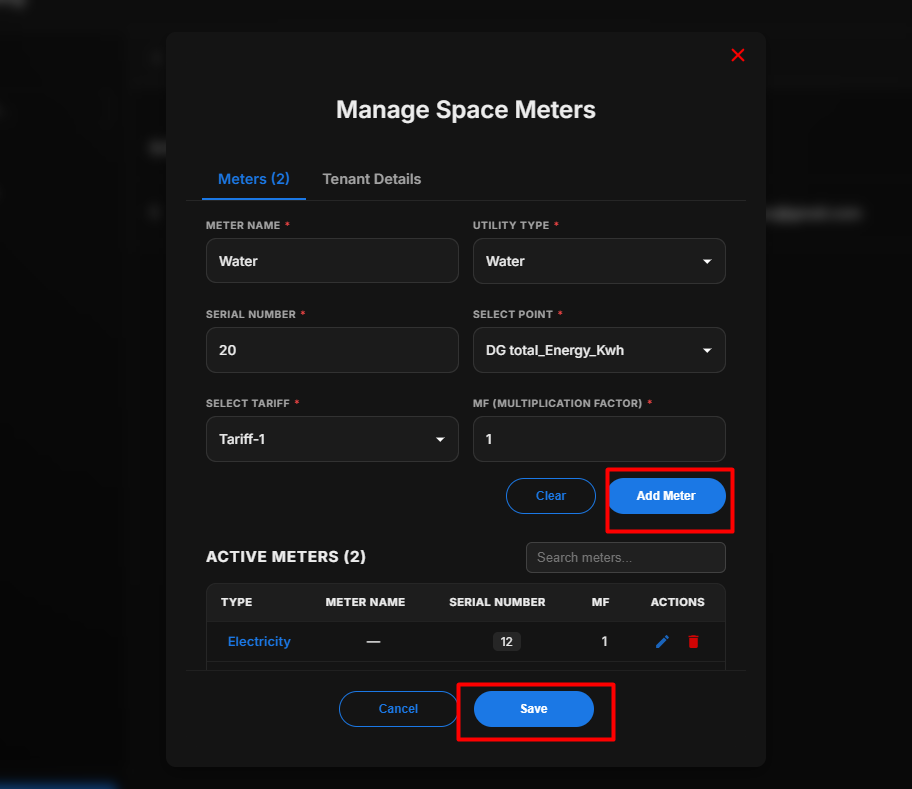
The selected meter is added to the billing configuration.
Note
- Before adding a meter, ensure that the hardware device has been configured with a valid Serial Number in the Settings module.
- The configured serial numbers are displayed in the Serial Number drop-down list.
- You can add multiple meters for a tenant by repeating the same process.
Configuring the Serial Number
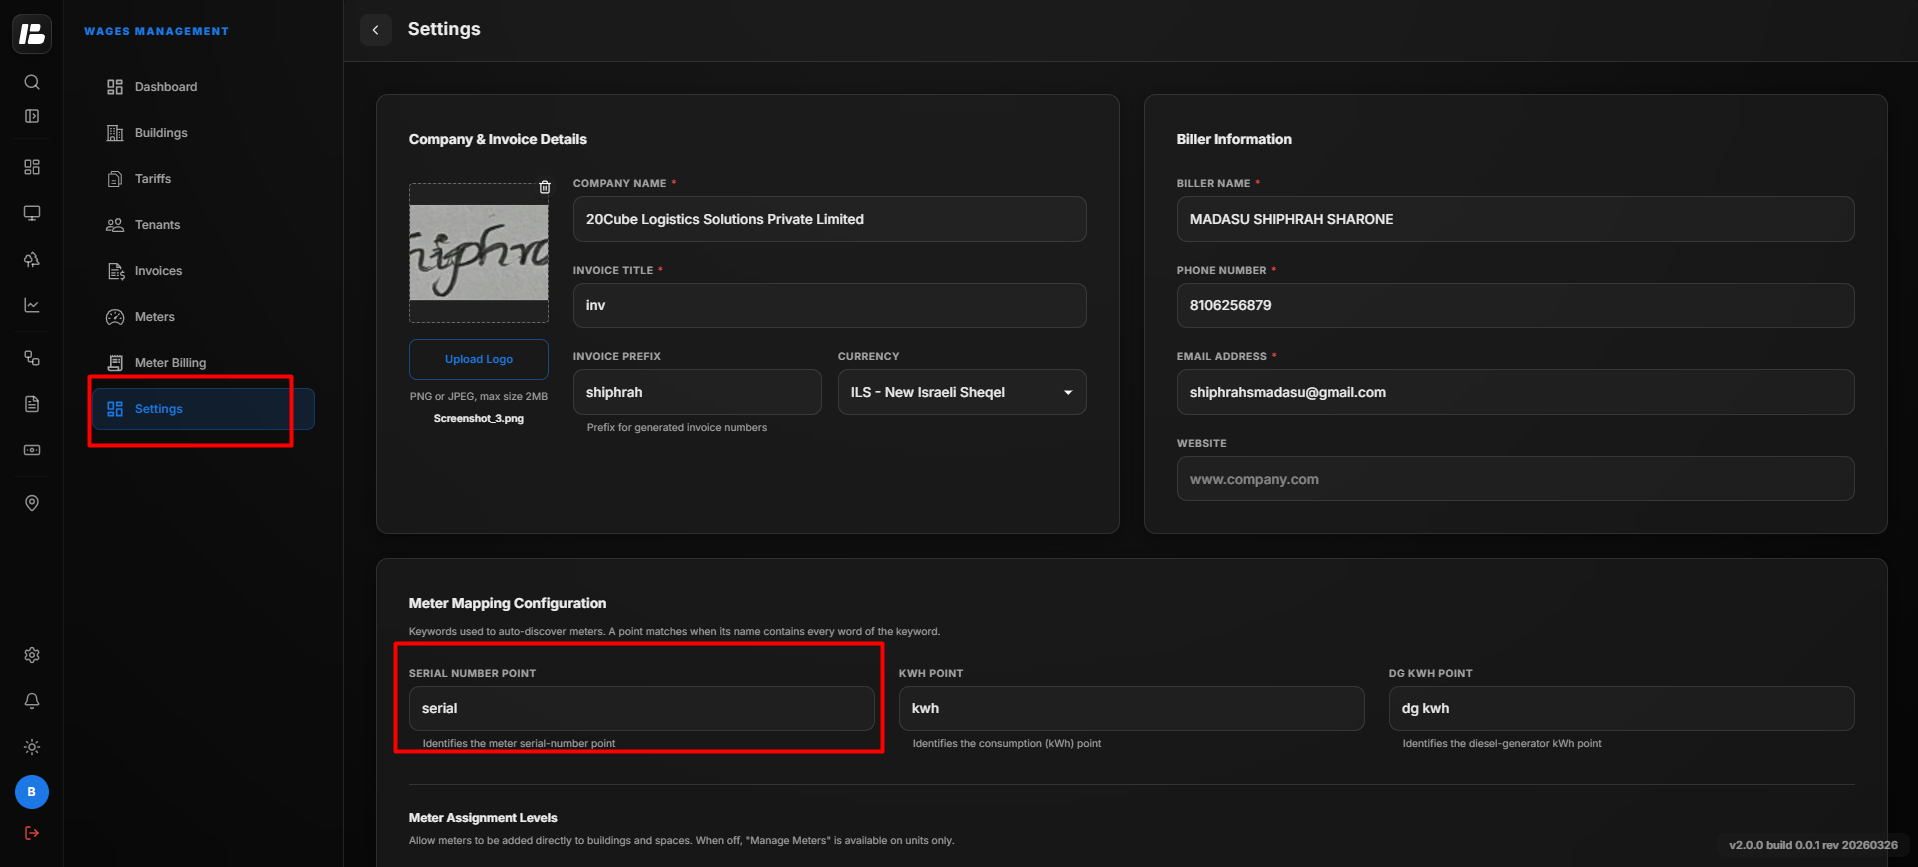
Before adding a meter, the hardware device must be configured in the Settings module.
Assign a Serial Number to the hardware device.
Once the hardware is configured, the assigned serial number becomes available in the Serial Number drop-down list while adding a meter.
This ensures that the billing meter is mapped to the correct hardware device.
Tenant Details
After selecting a tenant, the Tenant Details section displays the tenant's billing information.
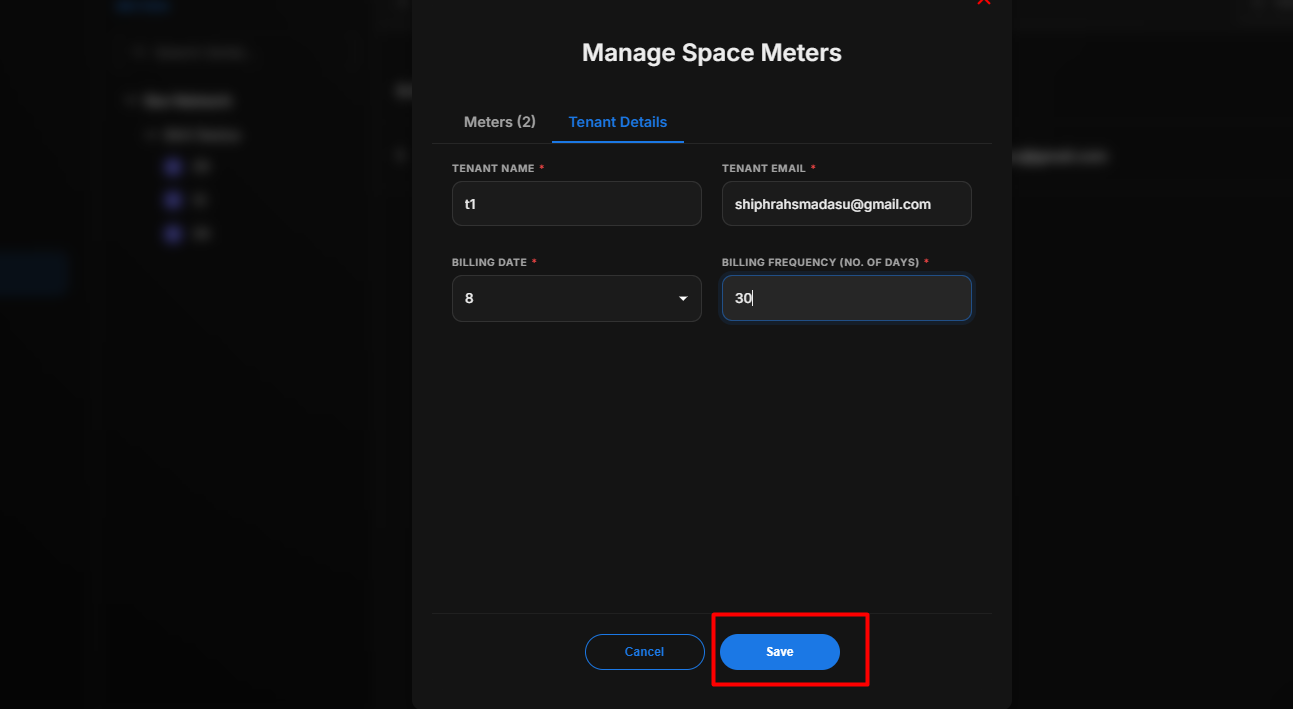 The following details are displayed:
| Field | Description |
|---|---|
| Tenant Name | Displays the name of the selected tenant. |
| Tenant Email | Displays the email address of the selected tenant. |
| Billing Date | Displays the configured billing date for the tenant. |
| Billing Frequency | Displays the billing frequency assigned to the tenant (1 Week, 2 Weeks, 3 Weeks, Monthly, Quarterly, Half-Yearly, or Annually). |
The displayed information helps verify that the correct tenant has been selected before configuring billing meters.
Managing Billing Meters
After adding a meter, the following actions are available:
| Action | Description |
|---|---|
| Search | Locate a configured billing meter. |
| Delete | Remove the configured billing meter. |
Generating an Invoice
The Generate Invoice option allows users to generate an invoice for a tenant based on the selected billing period.
Steps
- Click Generate Invoice.
- The Generate Invoice pop-up window appears.
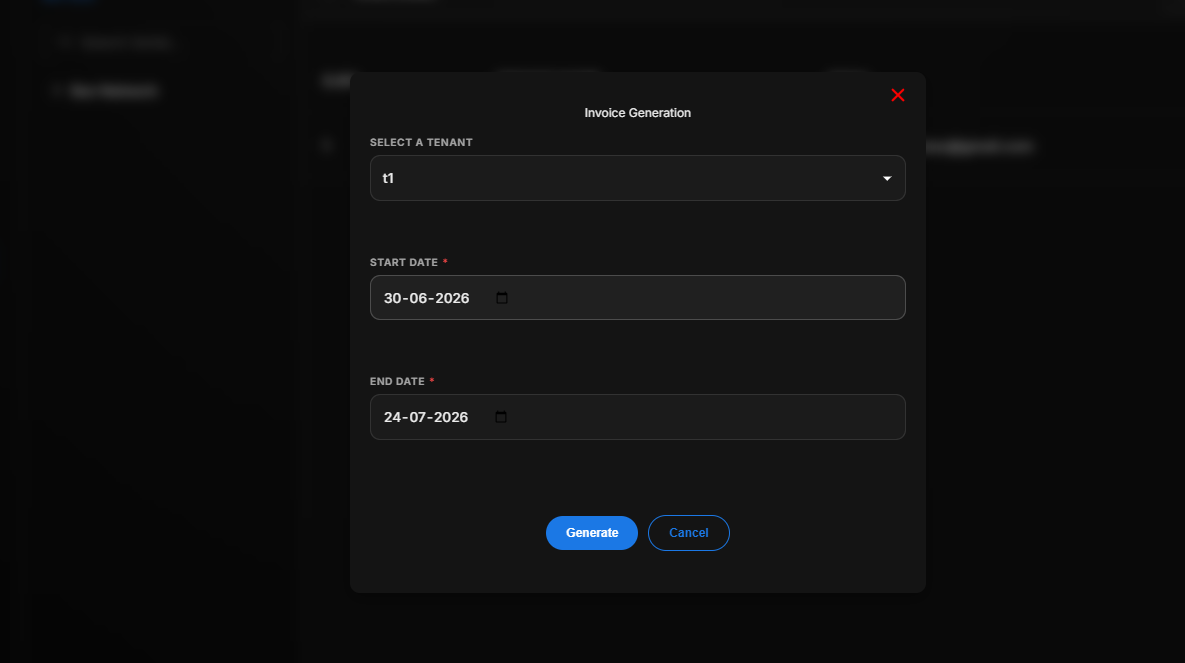
- Enter the following details.
| Field | Description |
|---|---|
| Tenant Name | Select the tenant for whom the invoice will be generated. |
| Start Date | Select the beginning date of the billing period. |
| End Date | Select the ending date of the billing period. |
- Click Generate Invoice.
The invoice is generated automatically for the selected tenant and is downloaded directly to your system.
Note
- Ensure that the correct tenant and billing period are selected before generating the invoice.
- The generated invoice is downloaded automatically after the generation process is completed.