

Categories
Categories Module
The Categories module allows users to group assets by type. Categories can be used to organize assets and make it easier to filter and report asset information.
1. Categories Overview
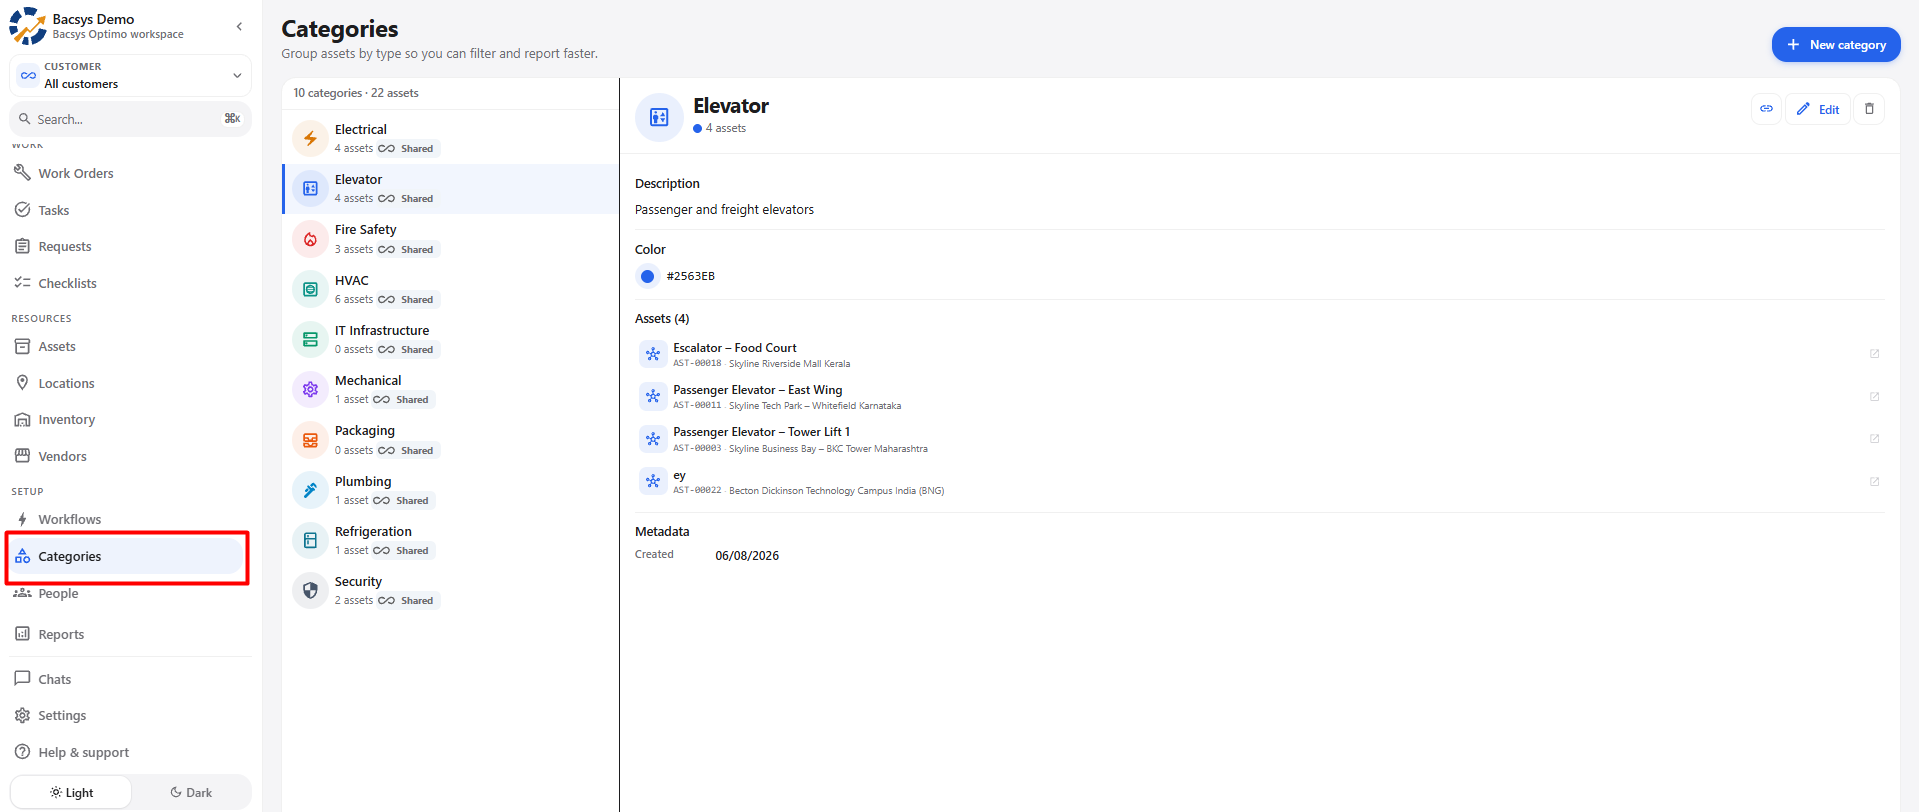
The Categories page displays the available asset categories and the assets assigned to each category.
From this page, users can:
- View existing categories.
- View the number of assets assigned to each category.
- Select a category to view its details.
- View the category description.
- View the category color and icon.
- View the assets assigned to the category.
- View category metadata.
- Edit an existing category.
- Copy the category link.
- Delete a category.
- Create a new category.
1.1 Categories Page
| Section / Option | Description |
|---|---|
| Categories | Displays the Categories module. |
| Category List | Displays all available asset categories. |
| Asset Count | Displays the number of assets assigned to each category. |
| Shared | Indicates that the category is available across the applicable customer scope. |
| Category Details | Displays the information of the selected category. |
| Description | Displays the description entered for the selected category. |
| Color | Displays the color assigned to the category. |
| Assets | Displays the assets associated with the selected category. |
| Metadata | Displays information such as the category creation date. |
| Copy Link | Copies the link of the selected category. |
| Edit | Opens the category information for editing. |
| Delete | Deletes the selected category. |
| New category | Opens the New category pop-up to create a new category. |
2. Category List
The category list is displayed on the left side of the Categories page.
Each category can display:
- Category icon.
- Category name.
- Number of assets assigned to the category.
- Shared indicator when applicable.
2.1 Category List Fields
| Field | Description |
|---|---|
| Category Icon | Displays the icon selected for the category. |
| Category Name | Displays the name of the category. |
| Asset Count | Displays the number of assets assigned to the category. |
| Shared | Indicates that the category is shared according to its customer scope. |
2.2 Selecting a Category
- Open the Categories module.
- Review the available categories in the category list.
- Click the required category.
- The selected category is highlighted.
- The category details are displayed on the right side.
3. Category Details
When a category is selected, its details are displayed in the main section.
| Section | Description |
|---|---|
| Category Name | Displays the name of the selected category. |
| Asset Count | Displays the number of assets assigned to the category. |
| Description | Displays the description of the category. |
| Color | Displays the color assigned to the category. |
| Assets | Displays the assets associated with the category. |
| Metadata | Displays category information such as the creation date. |
4. Creating a New Category
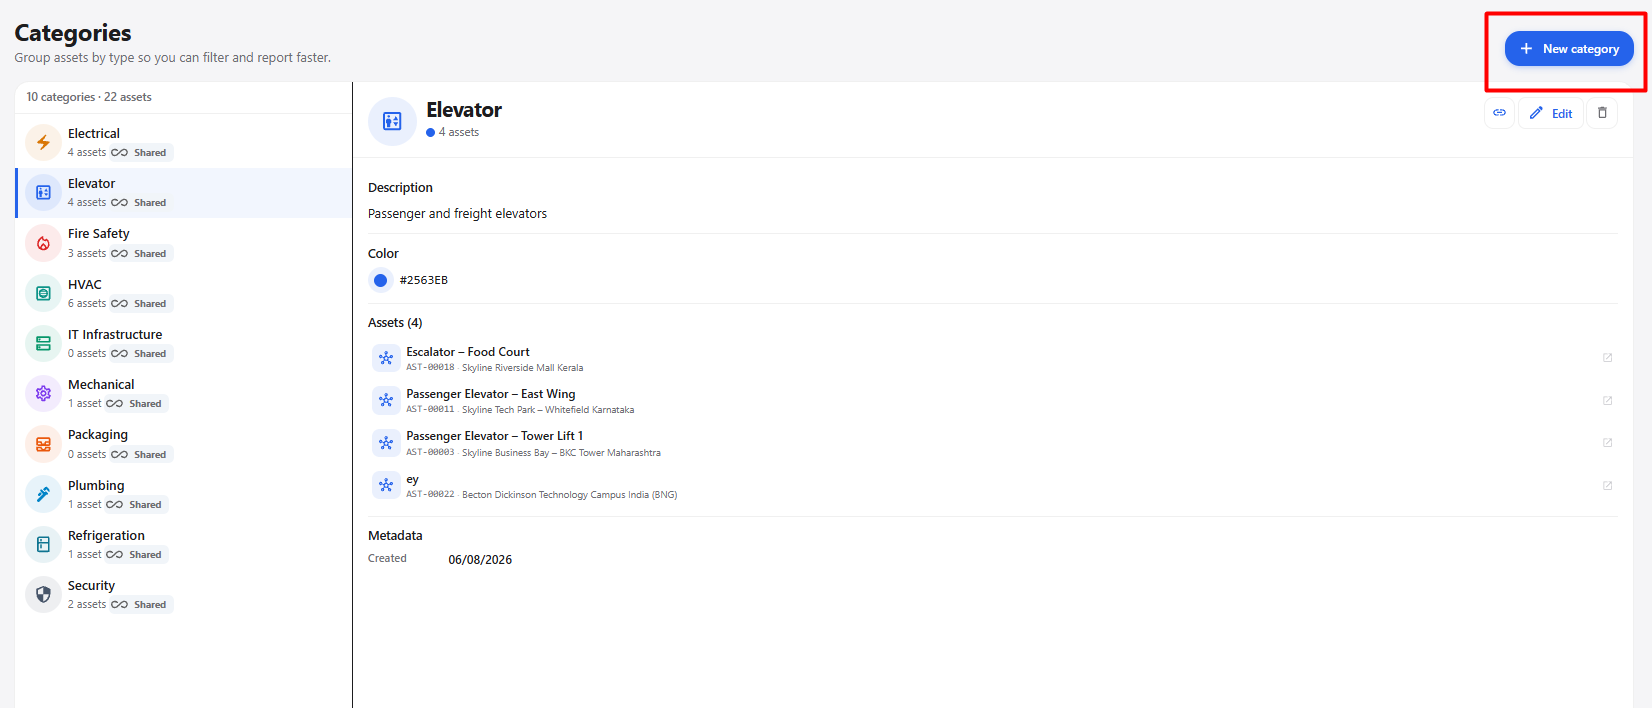
The New category option allows users to create a new category for grouping assets.
Steps
- Open the Categories module.
- Click + New category.
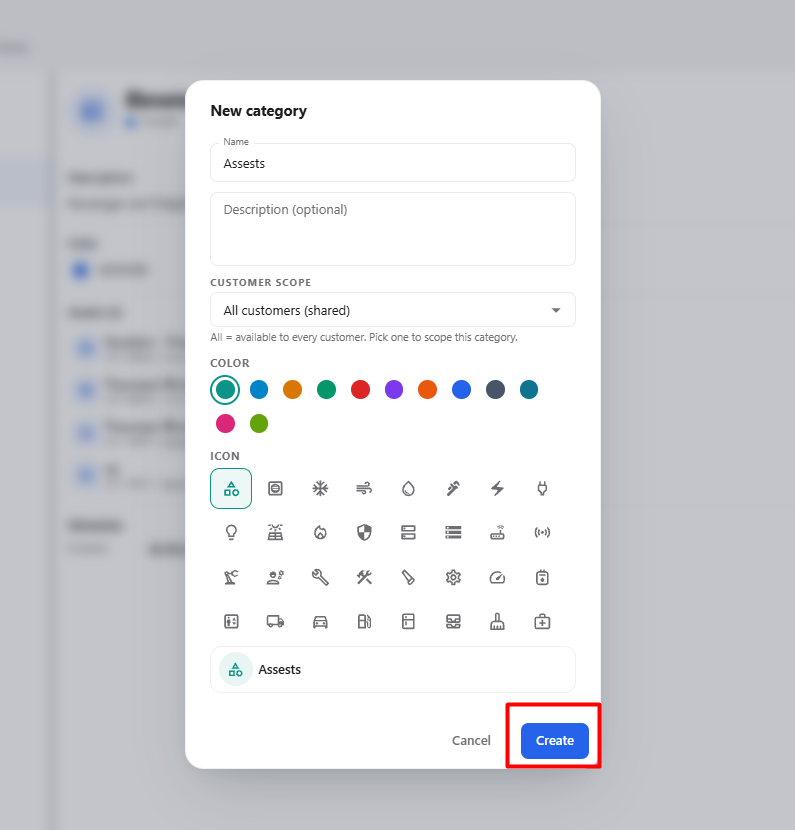
- The New category pop-up is displayed.
- Enter the required category information.
- Select the required color.
- Select an icon according to the category type.
- Review the selected information in the Preview section.
- Click Create.
- The new category is created and added to the category list.
4.1 New Category Fields
| Field / Option | Description |
|---|---|
| Name | Enter the name of the new category. |
| Description (optional) | Enter a description for the category, if required. |
| Customer Scope | Select the customer scope for the category. |
| All customers (shared) | Makes the category available to all customers. |
| Color | Select a color to visually identify the category. |
| Icon | Select an icon according to the type or purpose of the category. |
| Preview | Displays a preview of the selected category icon and appearance. |
| Cancel | Closes the pop-up without creating the category. |
| Create | Creates the new category after the required information is entered. |
4.2 Selecting a Category Icon
The Icon section provides multiple icons that can be used to represent the category.
- Click + New category.
- The New category pop-up is displayed.
- Go to the Icon section.
- Review the available icons.
- Select an icon according to the category type or purpose.
- The selected icon is highlighted.
- Check the Preview section to verify the selected icon.
- Continue with the category configuration.
- Click Create to create the category.
5. Assets Assigned to a Category
The Assets section displays the assets that belong to the selected category.
| Information | Description |
|---|---|
| Asset Name | Displays the name of the asset assigned to the category. |
| Asset ID | Displays the asset identifier. |
| Site / Location | Displays the site or location associated with the asset when available. |
| Asset Link | Allows the user to open the related asset when the link option is available. |
Steps
- Select the required category.
- Locate the Assets section.
- Review the assets assigned to the category.
- Select an asset when additional asset information is required.
6. Category Management Actions
After selecting an existing category, the following actions are available:
| Action | Description |
|---|---|
| Copy Link | Copies the link of the selected category so it can be shared or accessed directly. |
| Edit | Opens the selected category for updating its information. |
| Delete | Removes the selected category from the Categories module. |
7. Copy Category Link
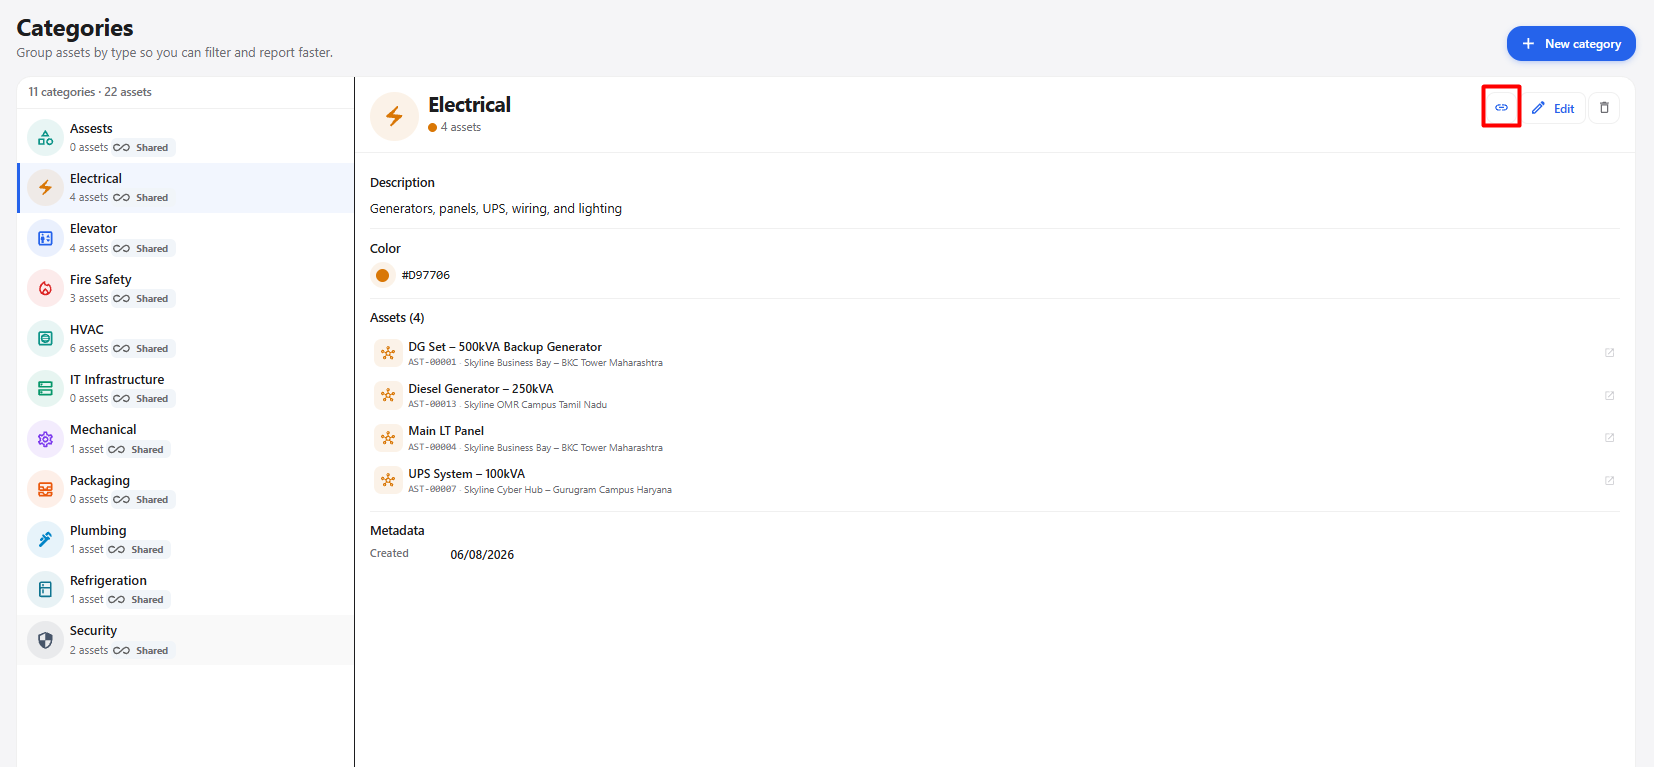
The Copy Link option allows users to copy a direct link to the selected category.
Steps
- Open the Categories module.
- Select the required category.
- Click the Copy Link icon.
- The category link is copied.
- The copied link can be used to access or share the category.
8. Edit Category
The Edit option allows users to update an existing category.
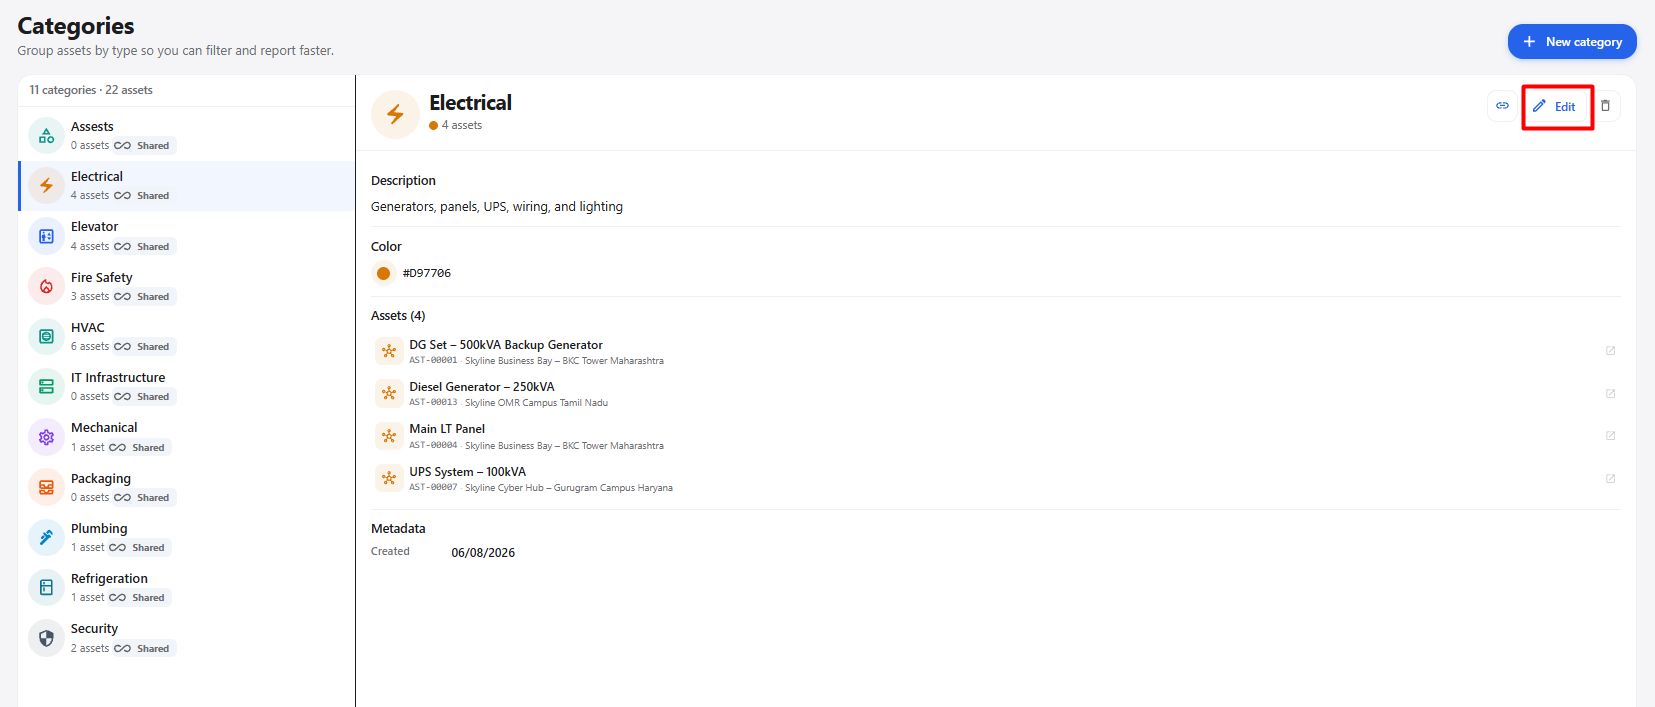
Steps
- Open the Categories module.
- Select the required category.
- Click Edit.
- Update the required category information.
- Review the updated information.
- Save the changes.
- The category information is updated.
9. Delete Category
The Delete option allows users to remove an existing category.
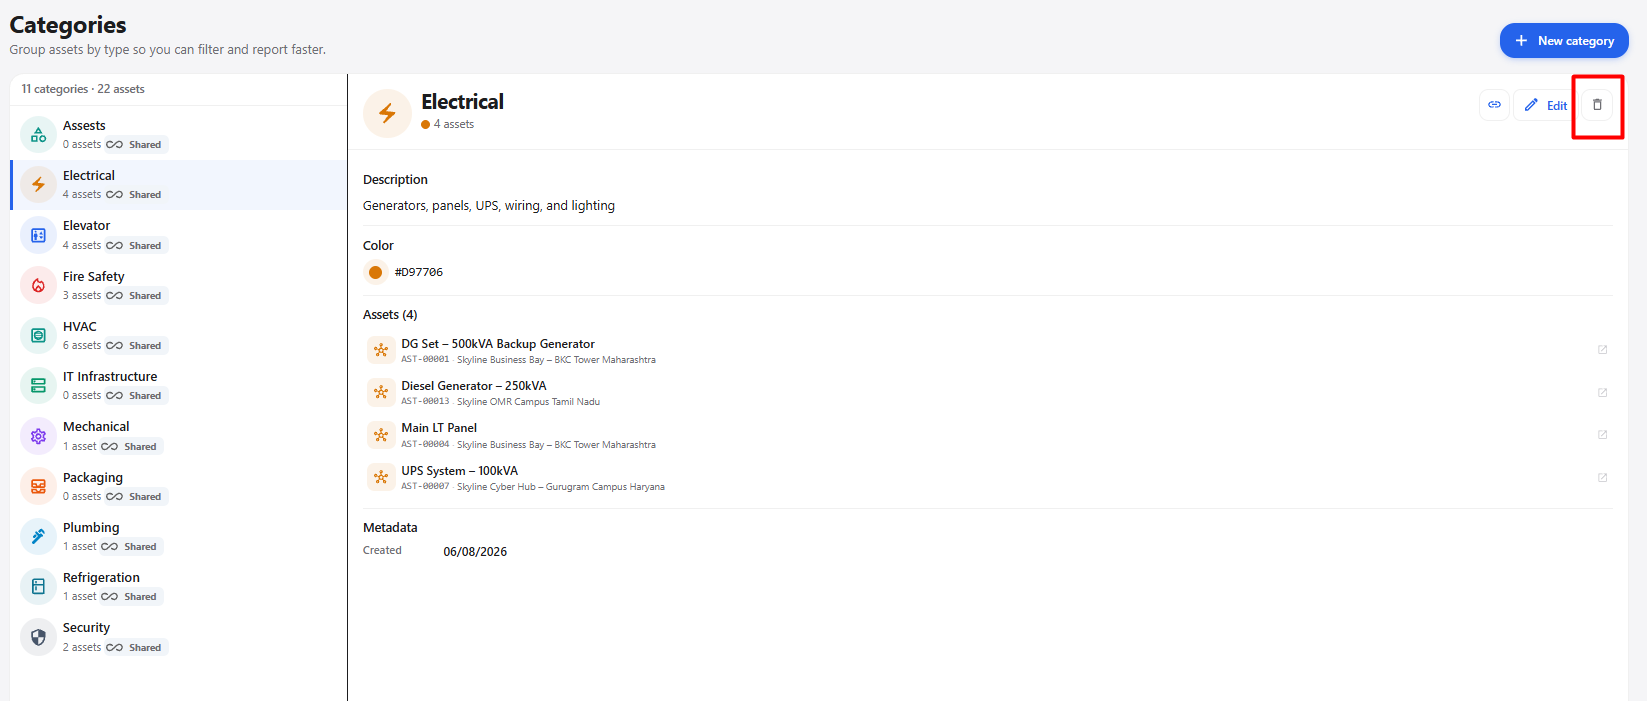
Steps
- Open the Categories module.
- Select the category that needs to be removed.
- Click Delete.
- Confirm the deletion if a confirmation prompt is displayed.
- The category is removed from the Categories list.
10. Complete Category Workflow
Open Categories
      ↓
View Categories List
      ↓
Select Required Category
      ↓
View Category Details
      ↓
Review Category Information
      ↓
Review Assigned Assets
      ↓
Choose Required Action
      ↓
Copy Link
      ↓
Copy Category Link
      ↓
Category Link Available for Sharing

OR

Choose Required Action
      ↓
Edit
      ↓
Update Category Information
      ↓
Save Changes
      ↓
Updated Category Details

OR

Choose Required Action
      ↓
Delete
      ↓
Confirm Deletion
      ↓
Category Removed