

Vendors
Vendors Module
The Vendors module allows users to manage vendor information within the system. Users can search and filter vendors, create new vendors, view vendor details, copy vendor links, edit vendor information, and delete vendors.
1. Vendors Overview
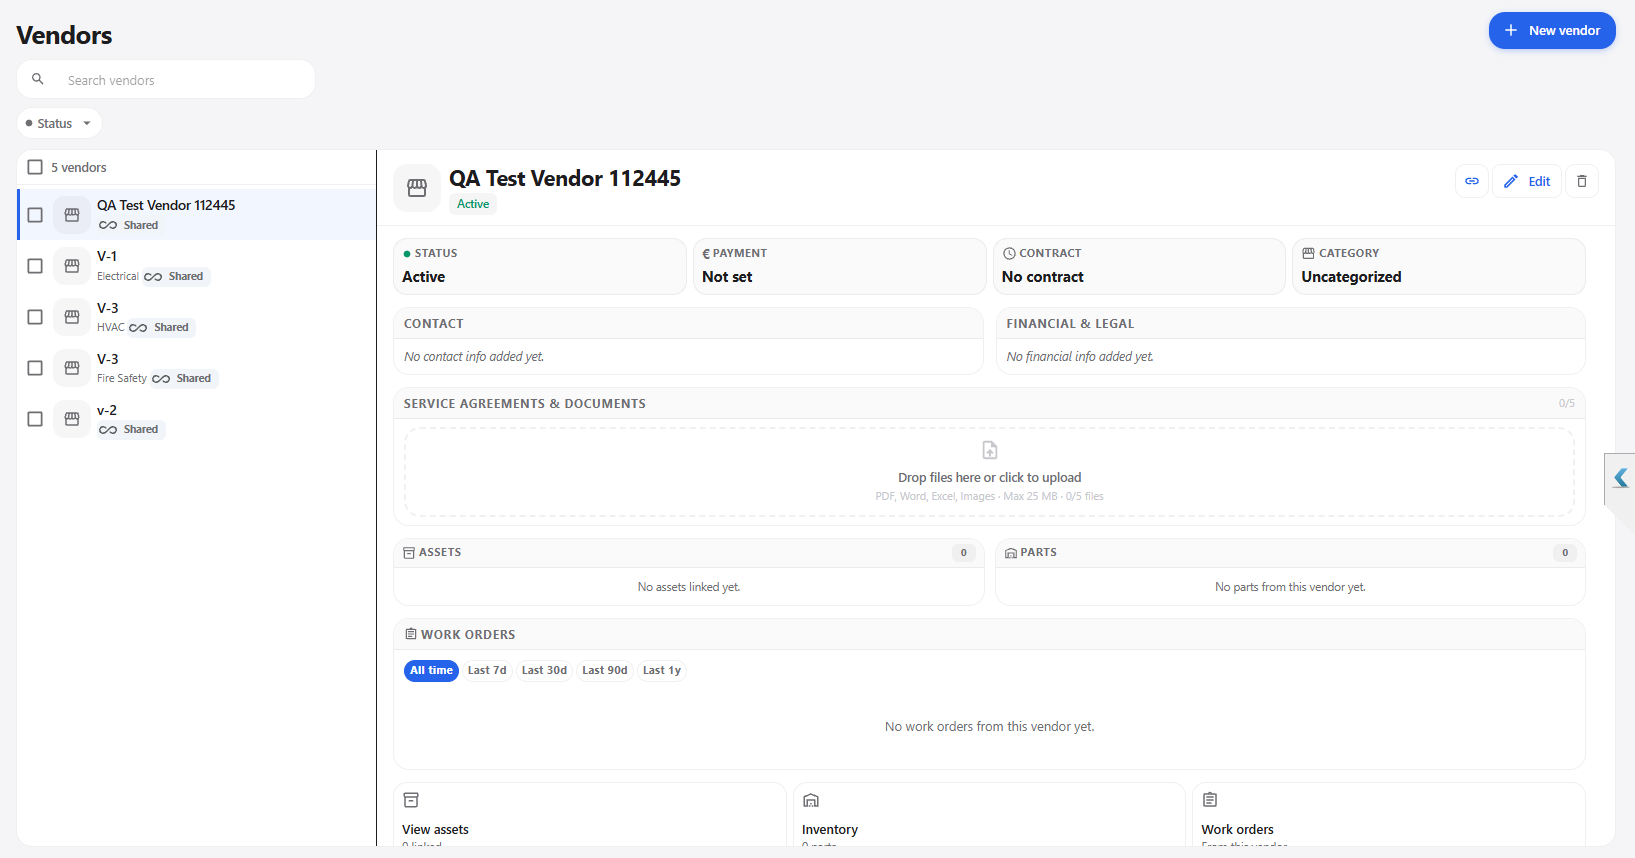
The Vendors page displays the available vendors in the system.
The page provides options to search, filter, create, and manage vendors.
Vendors Page Options
| Option | Description |
|---|---|
| Search vendors | Allows users to search for a specific vendor. |
| Status | Allows users to filter vendors based on their status. |
| New vendor | Allows users to create a new vendor. |
| Vendor List | Displays the available vendors. |
| Copy Link | Copies the link of the selected vendor. |
| Edit | Allows users to update the selected vendor information. |
| Delete | Allows users to remove the selected vendor. |
2. Search Vendors
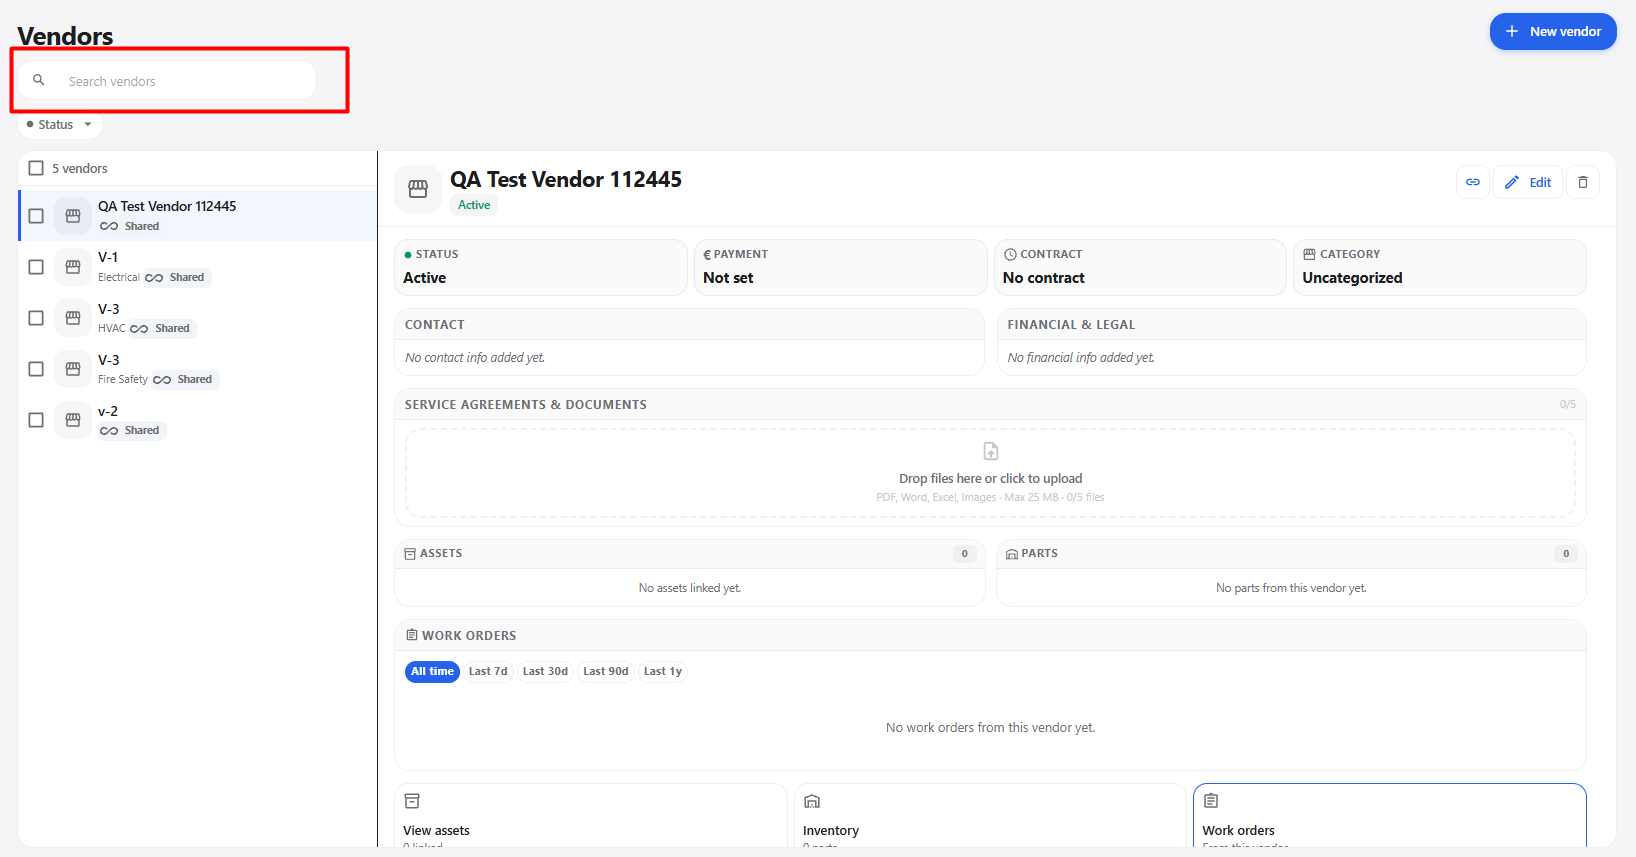
The Search vendors option allows users to quickly find a specific vendor from the vendor list.
Steps
- Open the Vendors module.
- Click the Search vendors field.
- Enter the vendor name or relevant search information.
- The vendor list is filtered based on the entered search information.
- Select the required vendor to view its details.
Search Field
| Field | Description |
|---|---|
| Search vendors | Enter the vendor name or relevant information to search for the vendor. |
3. Filter Vendors by Status
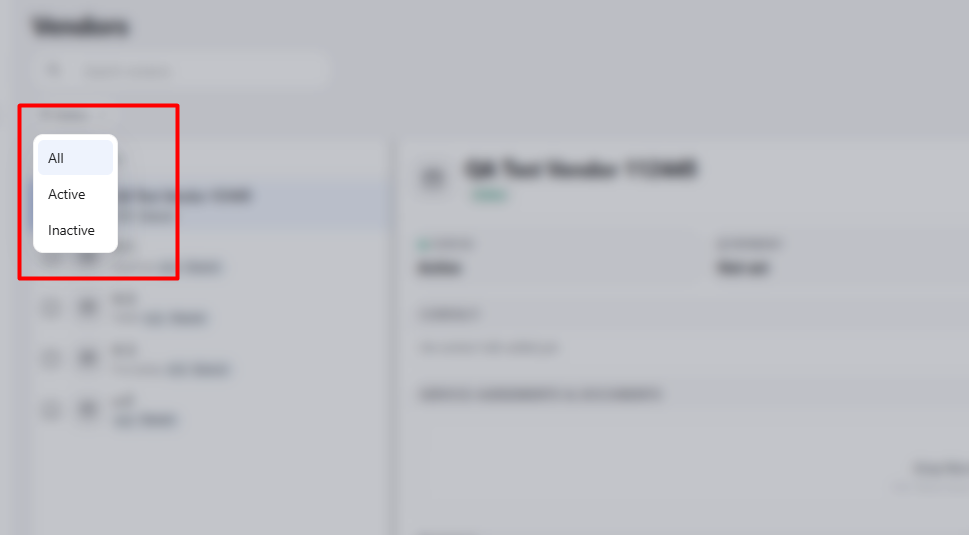
The Status filter allows users to display vendors based on their current status.
Steps
- Open the Vendors module.
- Click Status.
- The available status options are displayed.
- Select the required status.
- The vendor list is filtered according to the selected status.
Status Options
| Option | Description |
|---|---|
| All | Displays vendors with all available statuses. |
| Active | Displays vendors that are currently active. |
| Inactive | Displays vendors that are currently inactive. |
4. Create a New Vendor
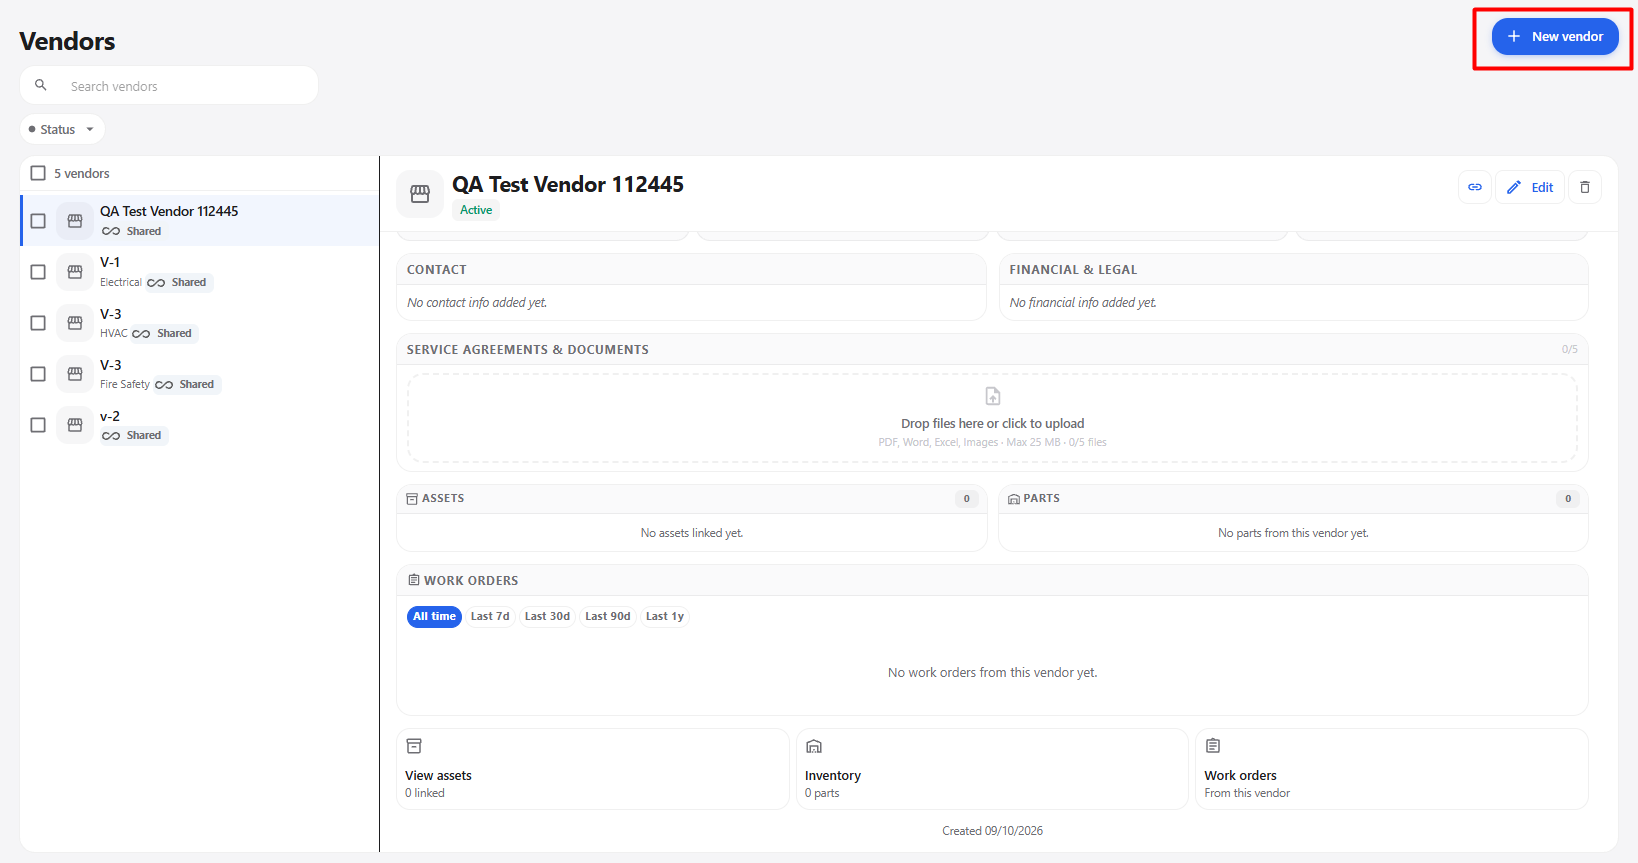
The New vendor option allows users to create a vendor by entering the required vendor, contact, customer scope, financial, legal, contract, and service information.
Steps
- Open the Vendors module.
- Click + New vendor.
- The New vendor pop-up is displayed.
- Enter the required vendor information.
- Review the entered information.
- Click Create vendor.
- The vendor is created and added to the Vendors list.
New Vendor Fields
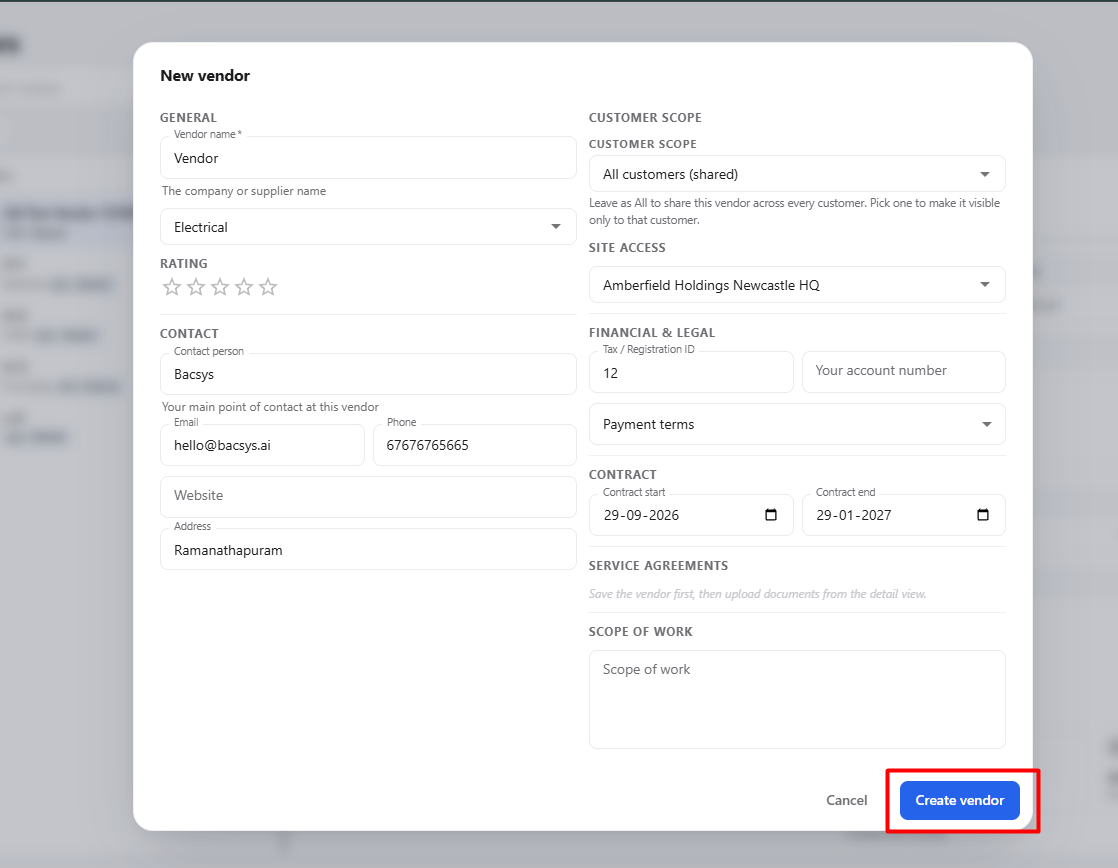
| Section | Field | Description |
|---|---|---|
| General | Vendor name* | Enter the company or supplier name. This field is mandatory. |
| General | Select category | Select the category associated with the vendor. |
| General | Rating | Select the vendor rating using the available star rating. |
| Contact | Contact person | Enter the main contact person for the vendor. |
| Contact | Enter the vendor contact email address. | |
| Contact | Phone | Enter the vendor contact phone number. |
| Contact | Website | Enter the vendor website address. |
| Contact | Address | Enter the vendor address. |
| Customer Scope | Customer scope | Select the customers for whom the vendor should be available. |
| Site Access | Site access | Select the sites where the vendor should be available. |
| Financial & Legal | Tax / Registration ID | Enter the vendor's tax or registration identification number. |
| Financial & Legal | Your account number | Enter the account number associated with the vendor. |
| Financial & Legal | Payment terms | Select the applicable payment terms for the vendor. |
| Contract | Contract start | Select the contract start date. |
| Contract | Contract end | Select the contract end date. |
| Service Agreements | Service agreements | Service agreements can be uploaded after the vendor is created from the vendor details page. |
| Scope of Work | Scope of work | Enter the scope of work or services provided by the vendor. |
| Actions | Cancel | Closes the pop-up without creating the vendor. |
| Actions | Create vendor | Creates the vendor using the entered information. |
Customer Scope
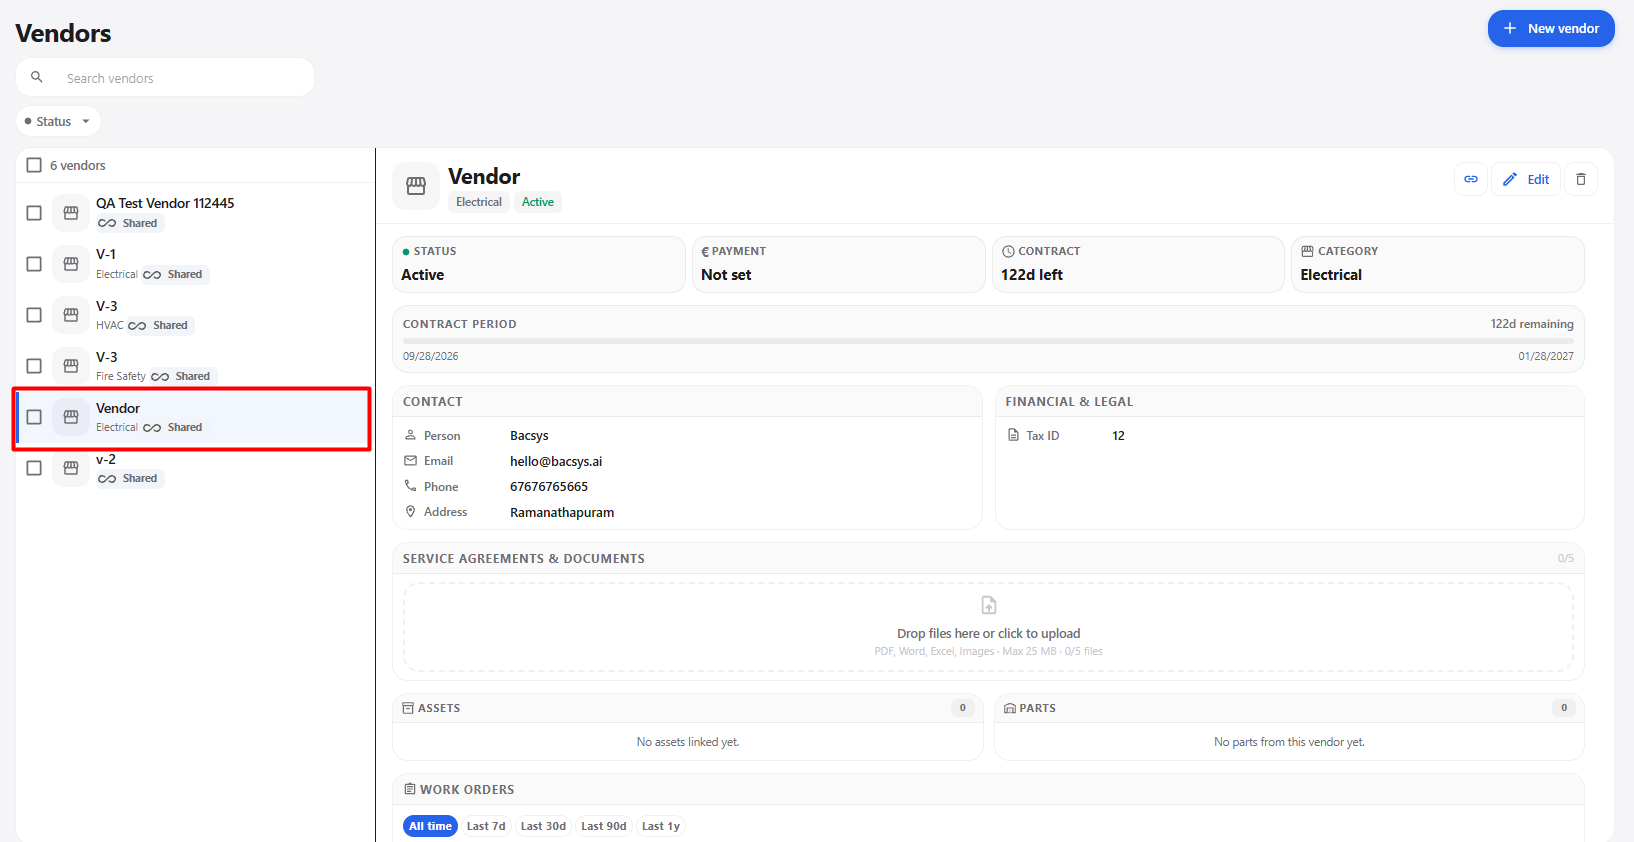
| Option | Description |
|---|---|
| All customers (shared) | Makes the vendor available across all customers. |
| Specific customer | Makes the vendor visible only to the selected customer. |
Site Access
| Option | Description |
|---|---|
| All sites (no restriction) | Makes the vendor available across all sites. |
| Specific site | Restricts the vendor access to the selected site. |
Note: Service agreements are uploaded after the vendor is created, from the vendor details page.
5. Vendor Details
After selecting a vendor from the vendor list, the vendor details are displayed.
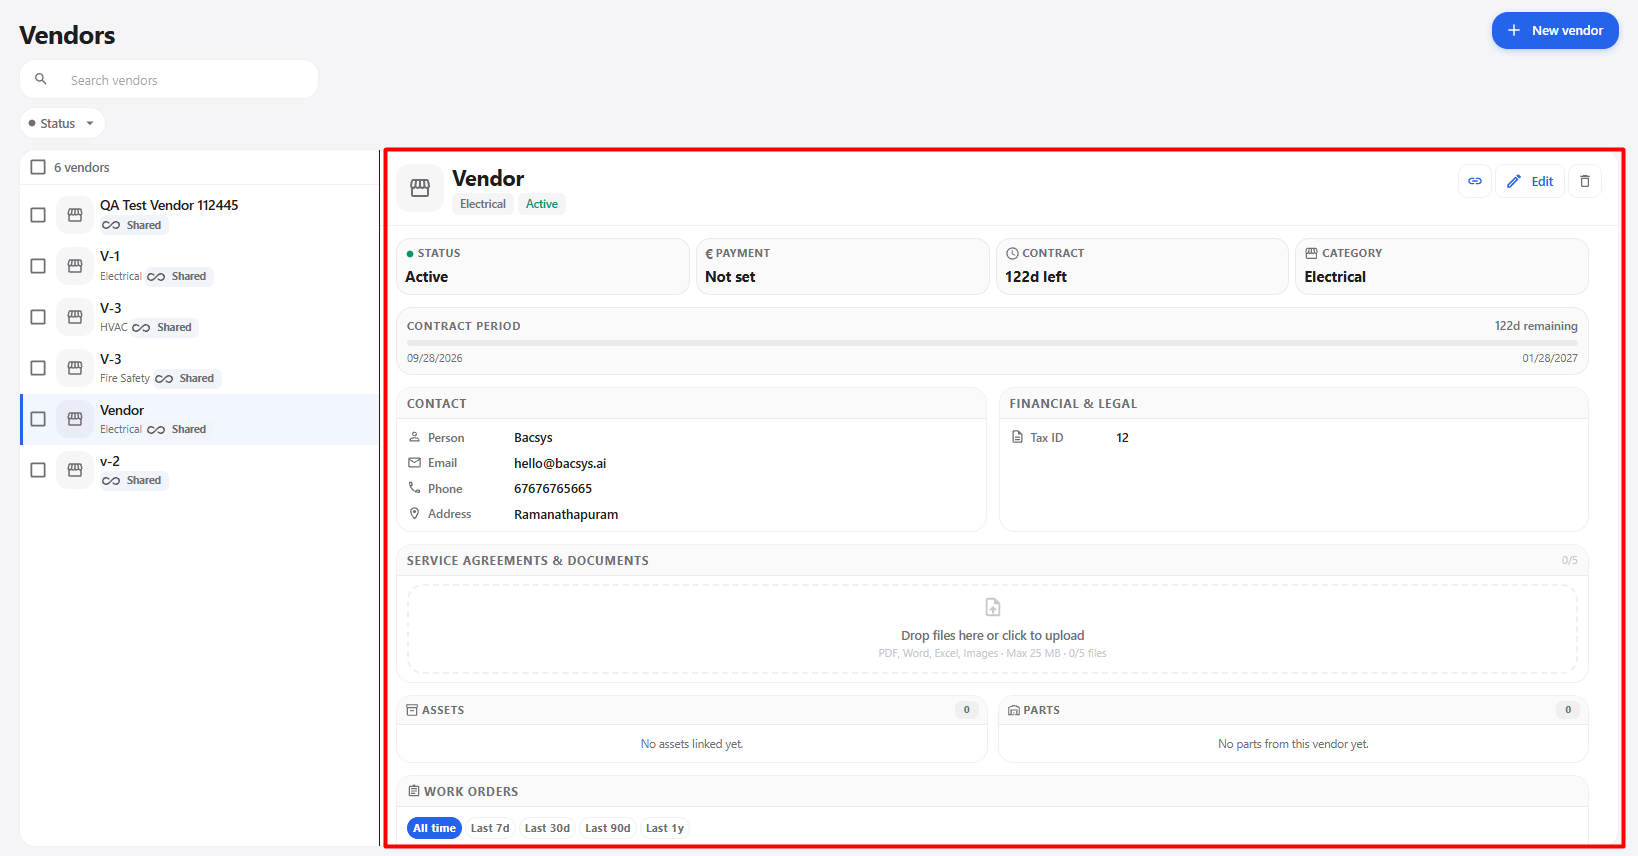
Vendor Details Information
| Section | Information | Description |
|---|---|---|
| Vendor Information | Vendor Name | Displays the name of the selected vendor. |
| Vendor Information | Status | Displays the current status of the vendor. |
| Payment | Payment | Displays the payment information configured for the vendor. |
| Contract | Contract | Displays the contract information associated with the vendor. |
| Category | Category | Displays the category assigned to the vendor. |
| Contact | Contact | Displays the available contact information for the vendor. |
| Financial & Legal | Financial & Legal | Displays the available financial and legal information. |
| Service Agreements & Documents | Documents | Allows users to upload service agreements and supporting documents. |
| Assets | Assets | Displays assets linked to the selected vendor. |
| Parts | Parts | Displays parts associated with the vendor. |
| Work Orders | Work Orders | Displays work orders associated with the vendor. |
| View assets | View assets | Provides access to assets linked to the vendor. |
| Inventory | Inventory | Displays inventory parts associated with the vendor. |
| Work orders | Work orders | Provides access to work orders associated with the vendor. |
| Created | Created Date | Displays the date on which the vendor was created. |
6. Service Agreements and Documents
The Service Agreements & Documents section allows users to store documents related to the selected vendor.
Steps
- Select the required vendor.
- Open the vendor details page.
- Locate Service Agreements & Documents.
- Upload the required vendor document.
- The document is added to the vendor details.
Supported Document Types
| Type | Description |
|---|---|
| Allows PDF documents to be uploaded. | |
| Word | Allows Word documents to be uploaded. |
| Excel | Allows Excel documents to be uploaded. |
| Images | Allows image files to be uploaded. |
7. Assets
The Assets section displays assets associated with the selected vendor.
Steps
- Select the required vendor.
- Locate the Assets section.
- Review the assets linked to the vendor.
- Click View assets when you want to access the linked assets.
| Option | Description |
|---|---|
| Assets | Displays the number of assets linked to the vendor. |
| View assets | Opens the assets associated with the vendor. |
8. Parts
The Parts section displays parts associated with the selected vendor.
Steps
- Select the required vendor.
- Locate the Parts section.
- Review the available parts associated with the vendor.
- Use Inventory to access the related inventory information when available.
| Option | Description |
|---|---|
| Parts | Displays the number of parts associated with the vendor. |
| Inventory | Provides access to inventory parts associated with the vendor. |
9. Work Orders
The Work Orders section displays work orders associated with the selected vendor.
The section provides different time-range options for reviewing vendor work orders.
Available Time Ranges
| Option | Description |
|---|---|
| All time | Displays work orders for all available periods. |
| Last 7d | Displays work orders from the last 7 days. |
| Last 30d | Displays work orders from the last 30 days. |
| Last 90d | Displays work orders from the last 90 days. |
| Last 1y | Displays work orders from the last one year. |
Steps
- Select the required vendor.
- Locate the Work Orders section.
- Select the required time range.
- Review the available work orders for the selected vendor.
10. Copy Link
The Copy Link option allows users to copy the link of the selected vendor.
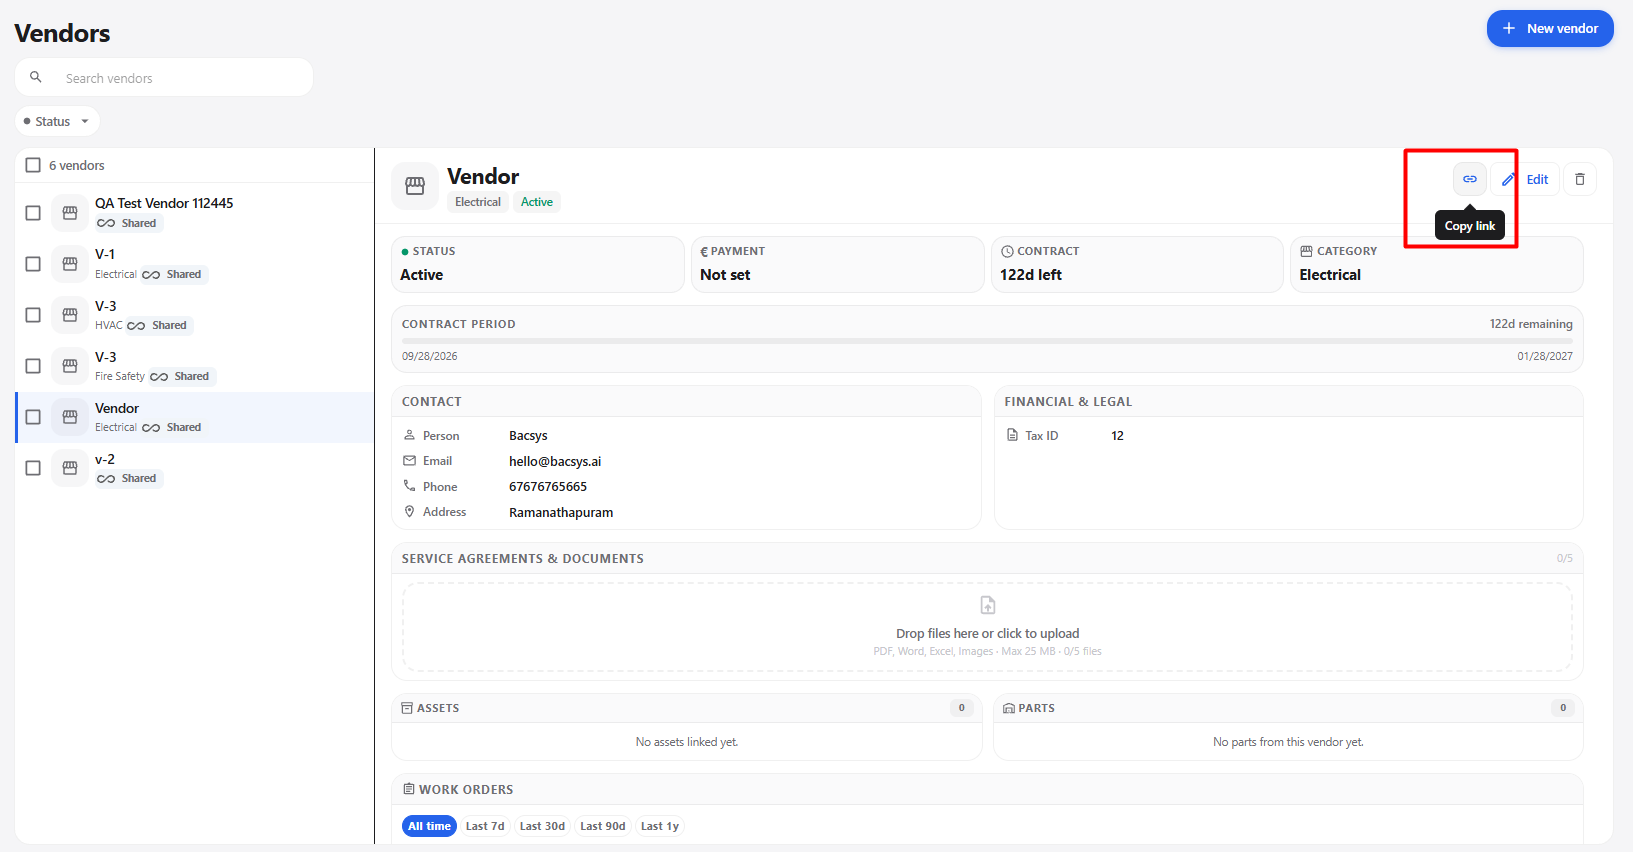
Steps
- Open the Vendors module.
- Select the required vendor.
- The vendor details are displayed.
- Click the Copy Link icon at the top of the vendor details page.
- The vendor link is copied.
- The copied link can be shared or opened as required.
11. Edit Vendor
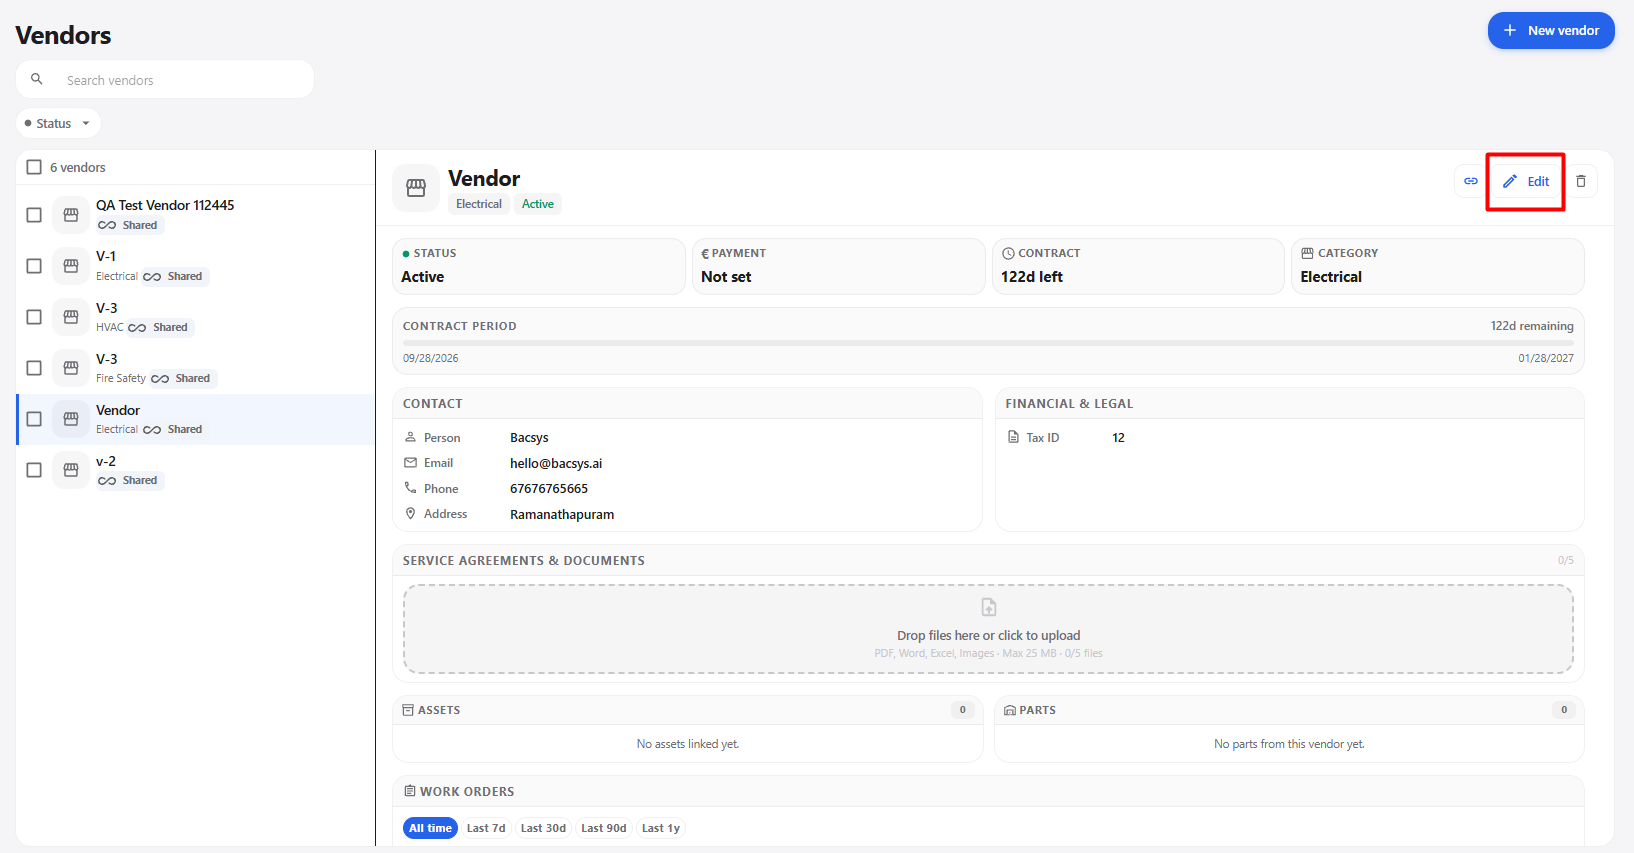
The Edit option allows users to update information for an existing vendor.
Steps
- Open the Vendors module.
- Select the required vendor.
- The vendor details page is displayed.
- Click Edit.
- Update the required vendor information.
- Review the updated information.
- Save the changes.
- The updated vendor information is displayed in the vendor details.
12. Delete Vendor
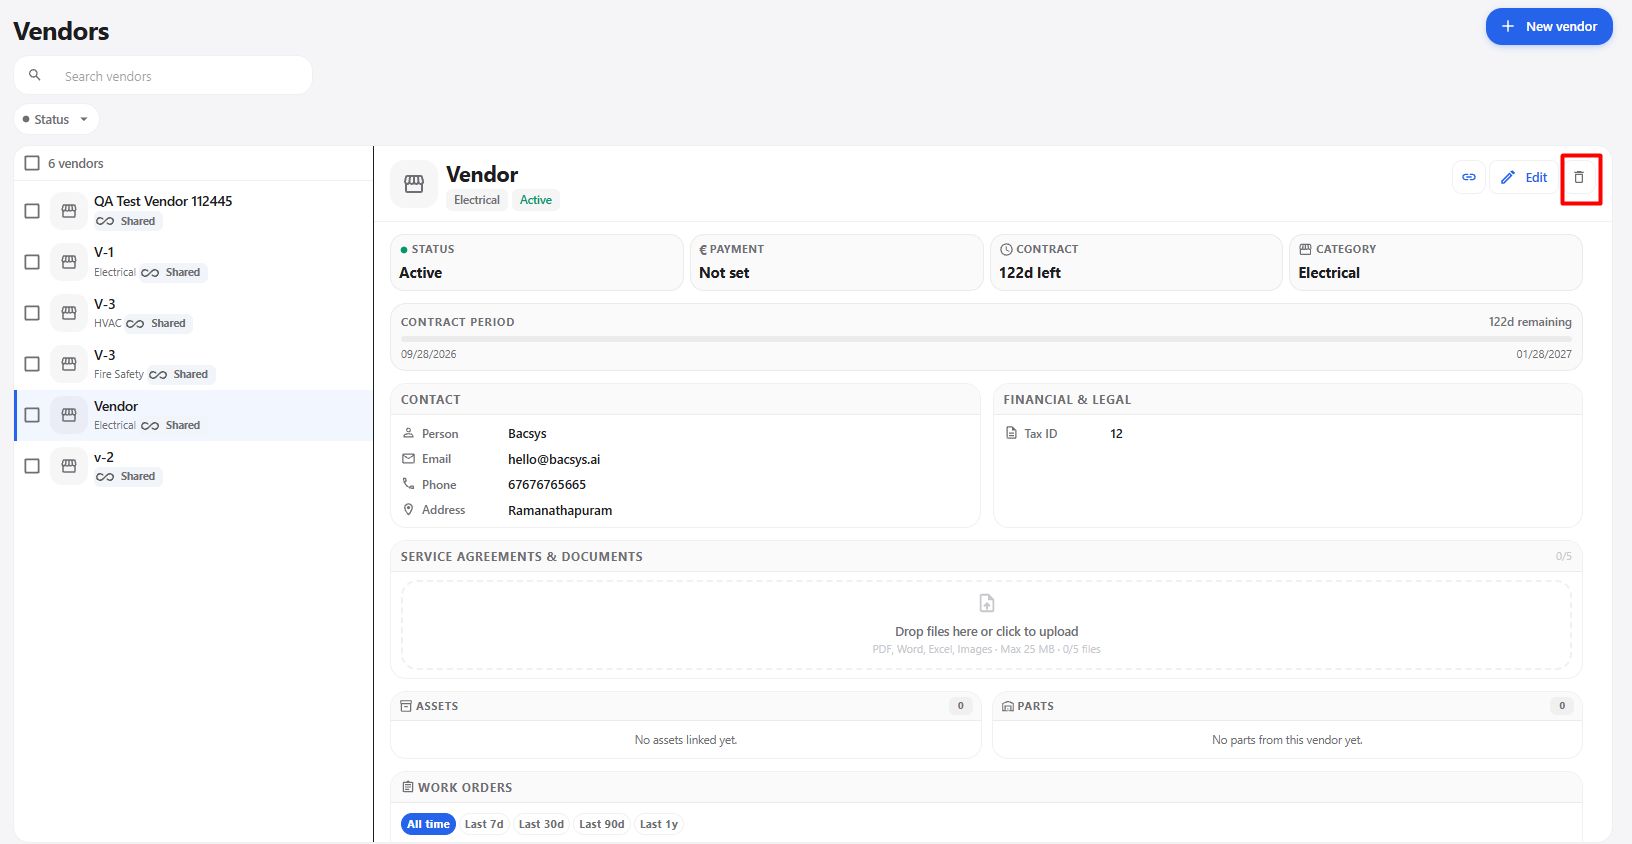
The Delete option allows users to remove the selected vendor.
Steps
- Open the Vendors module.
- Select the required vendor.
- The vendor details page is displayed.
- Click the Delete icon.
- A confirmation message may be displayed.
- Confirm the deletion.
- The selected vendor is removed from the vendor list.
13. Complete Vendors Workflow
Open Vendors
      ↓
View Vendors List
      ↓
Search Vendor / Filter by Status
      ↓
Select Required Vendor
      ↓
View Vendor Details
      ↓
Review Vendor Information
      ↓
Review Contact Information
      ↓
Review Payment and Contract Information
      ↓
Review Financial & Legal Information
      ↓
Review Service Agreements & Documents
      ↓
Review Assets
      ↓
Review Parts
      ↓
Review Work Orders
      ↓
Choose Required Action
      ↓
Copy Link
      ↓
Copy Vendor Link
      ↓
Edit
      ↓
Update Vendor Information
      ↓
Save Changes
      ↓
Updated Vendor Details
      ↓
Delete
      ↓
Confirm Deletion
      ↓
Vendor Removed