

Configuring ModbusTCP
Configuring Modbus TCP/IP
The Modbus TCP/IP section allows users to configure Modbus networks, discover connected devices, and monitor real-time data through the Modbus TCP/IP protocol.
Using Modbus TCP/IP, users can establish communication between the platform and Modbus-enabled devices for centralized monitoring and device management.
- Navigate to the Devices module from the sidebar.
Step 2: Create a New Network
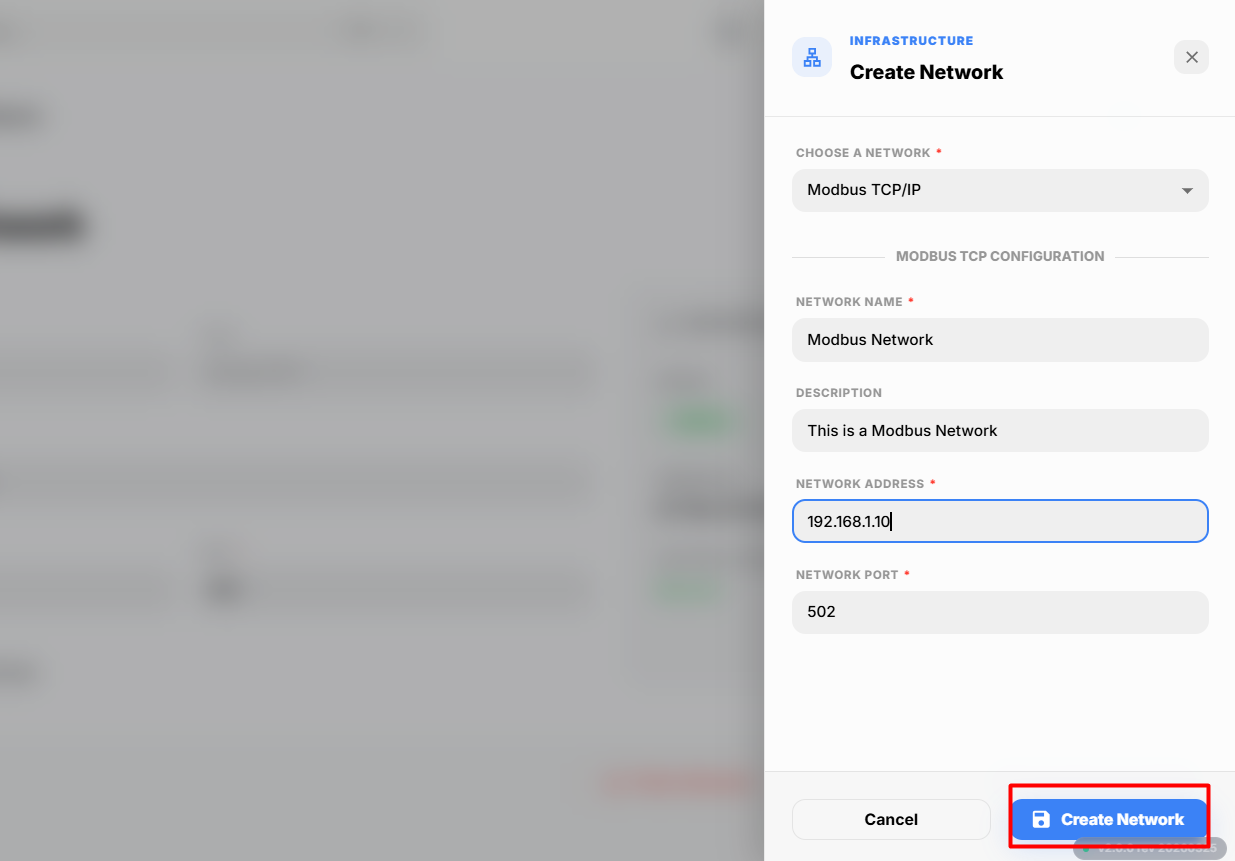
Click on the Create Network button available at the top-right corner of the page.
A popup window will appear where you can configure the network connection settings.
-
Select Modbus TCP/IP from the Choose a Network dropdown option.
Fill in the required network details:
Field Name Description Network Name Enter a unique name for the network Network Description Provide a short description of the network Network Address Enter the IP address of the Modbus TCP/IP network Network Port Enter the communication port used for the Modbus TCP/IP network After entering all the required details, click the Create Network button to successfully create the network.
-
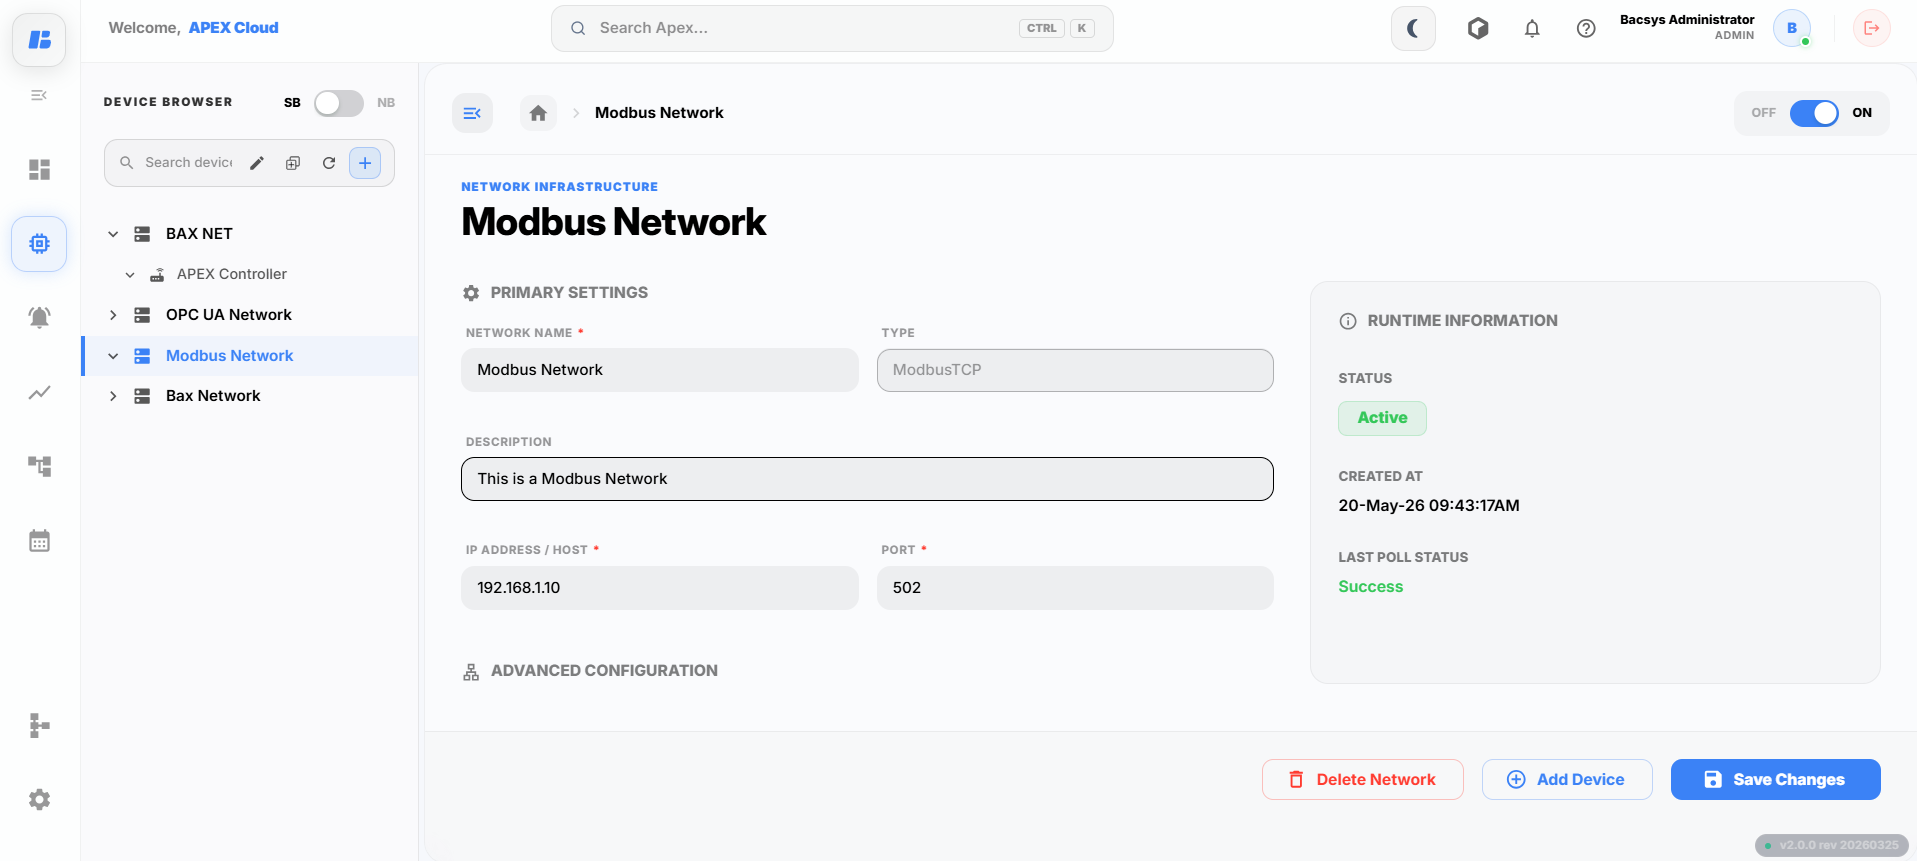
After successful creation, the network will be displayed as shown below.
Discovering and Adding Devices
After creating the BAX network, you can add devices to the network.
-
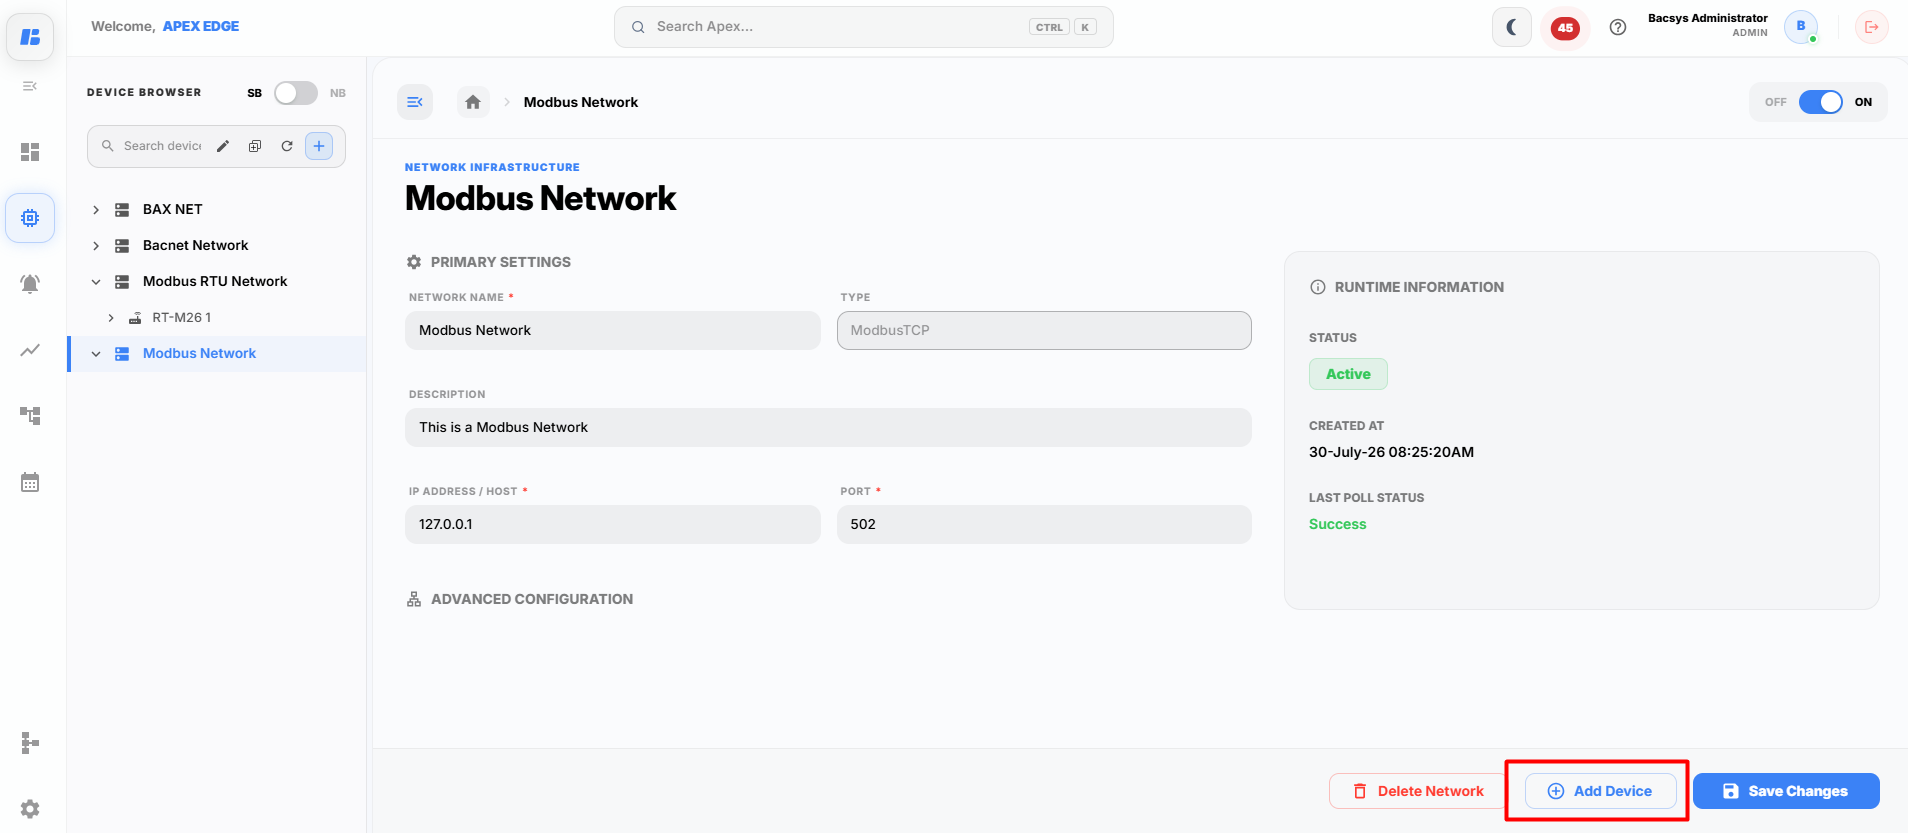
Open the BAX network that you created.
-
Click Add Device.
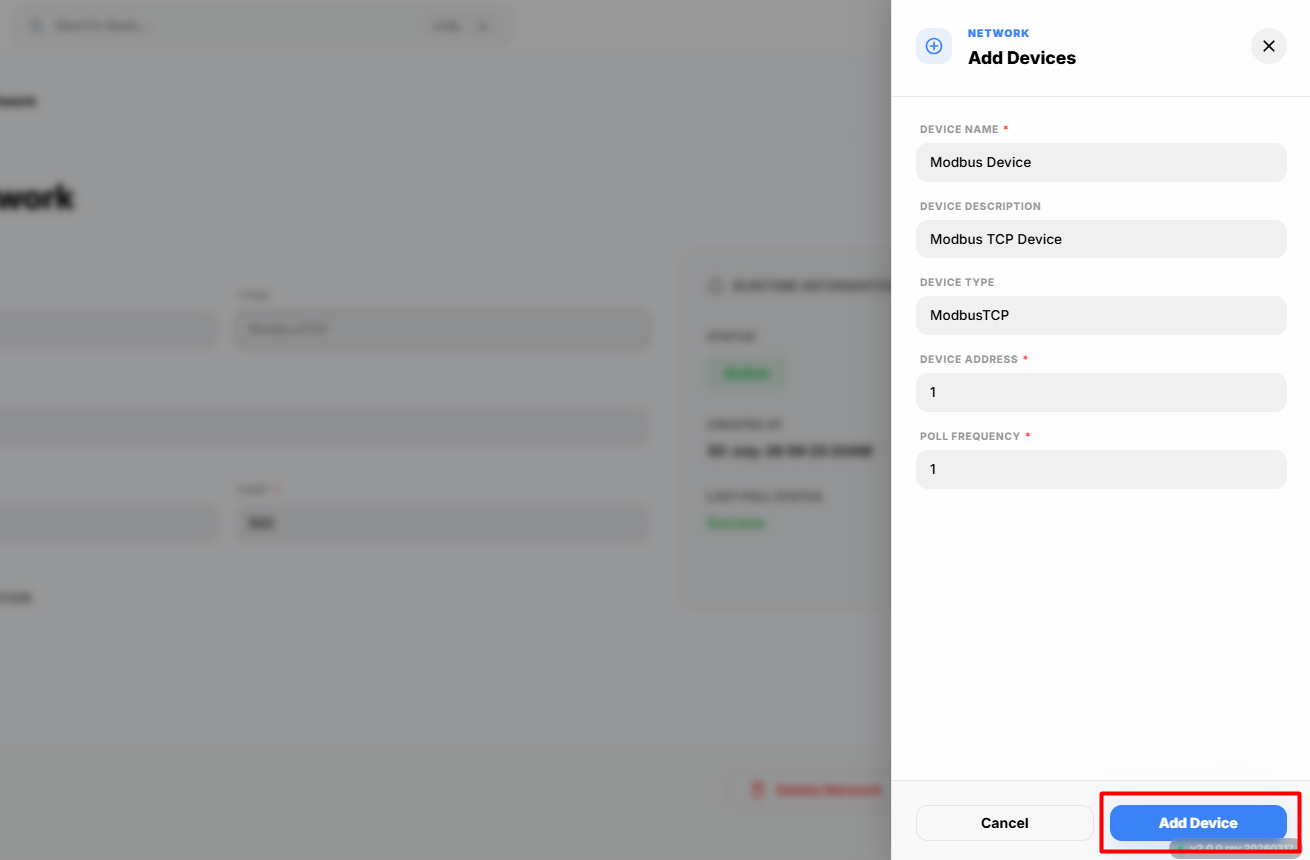
The Add Device popup appears.
Enter the following device details:
Field Description Device Name Enter a unique name to identify the BAX device. Device Description Enter a brief description of the device. Device Type Select the appropriate device type from the available options. Device Address Enter the address used to communicate with the device. Poll Frequency Specify how frequently the APEX application polls the device for updated data. -
After entering all the required details, click Add Device.
The device is added successfully and is displayed under the selected BAX network.
Discovering and Adding Points
After adding the required device, you can configure the points that need to be monitored.
Step 1: Open the Device
Open the device that you created.
Click Add Points.
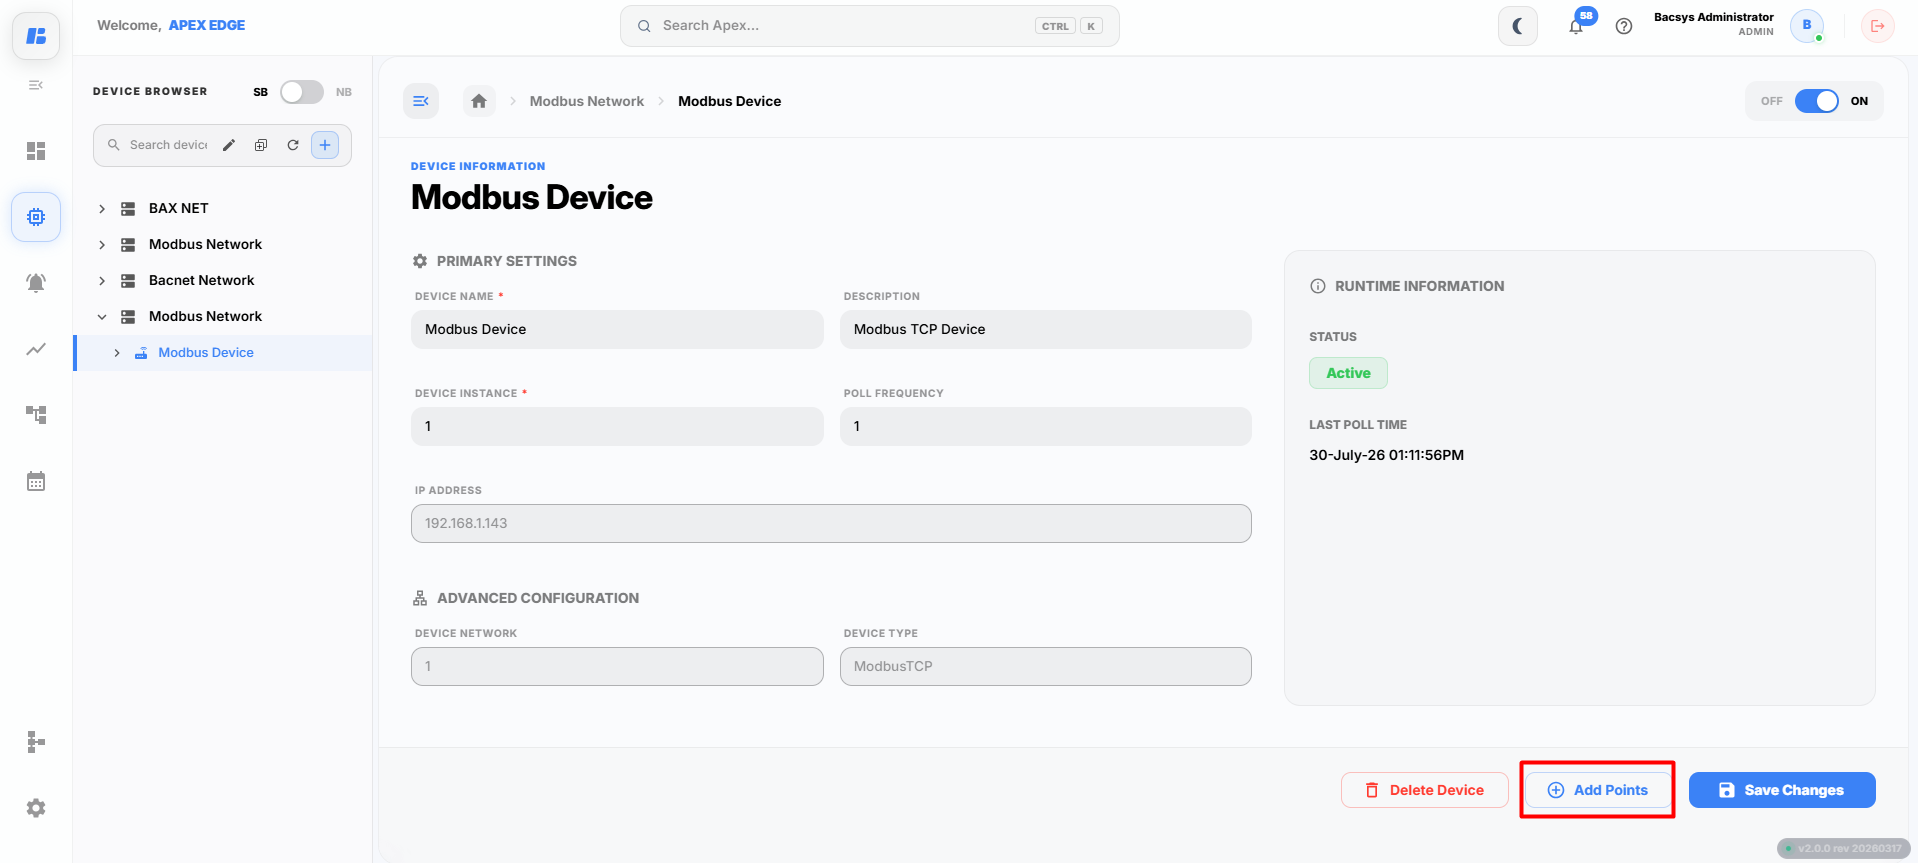
The Add Points window provides two options:
- Add Manually
- Import CSV
Option 1: Add Manually
Select the Add Manually tab to create individual points.
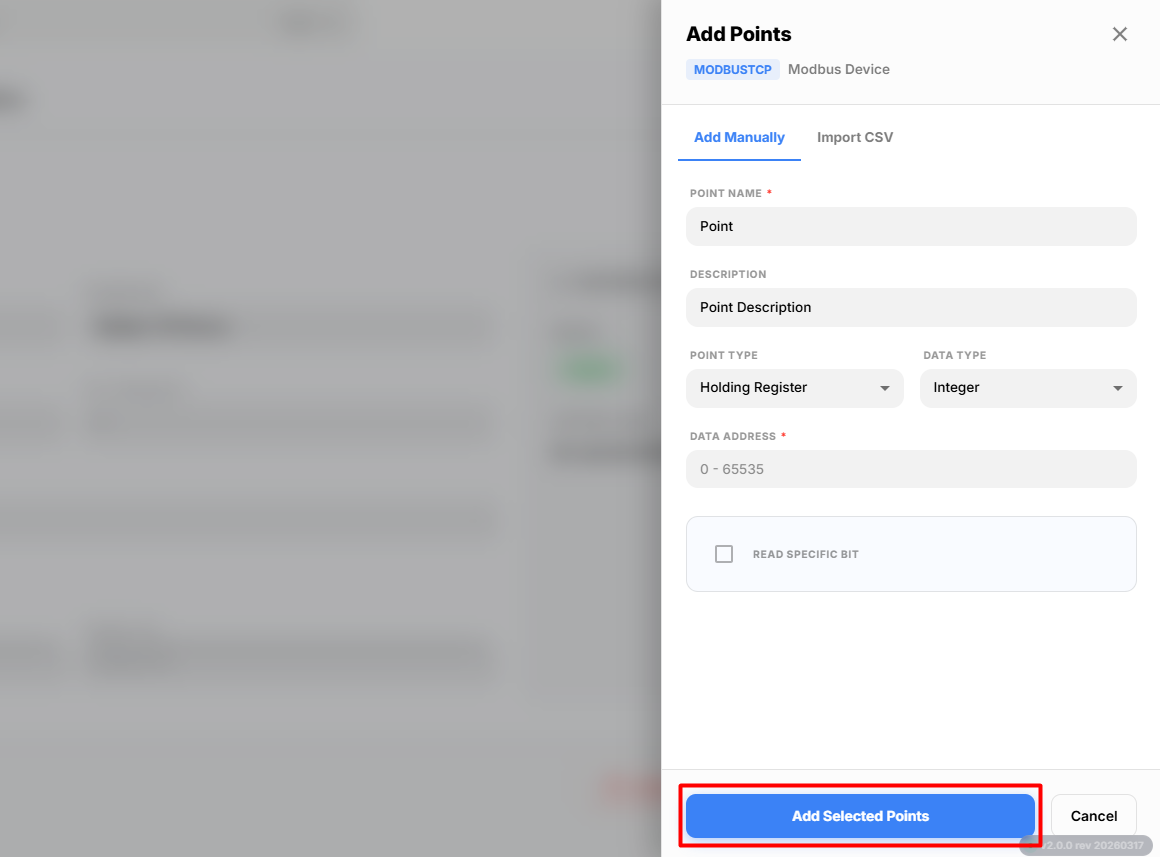
Enter the following point details:
| Field | Description |
|---|---|
| Point Name | Enter a unique name to identify the point. |
| Description | Enter a brief description of the point. |
| Point Type | Select the point type. Available options are Holding Register, Input Register, Coil Status, and Input Status. |
| Data Type | Select the data type. Available options are Integer, Long Integer, Float32, Hex, and Bit. |
| Data Address | Enter the register or address from which the value will be read. |
| Read Bit Specific | Enable this option if the point represents a specific bit within the register. |
| Bit Position | Enter the bit position to read when Read Bit Specific is enabled. |
After entering all the required details, click Add Selected Points.
The point is added to the device successfully.
Option 2: Import CSV
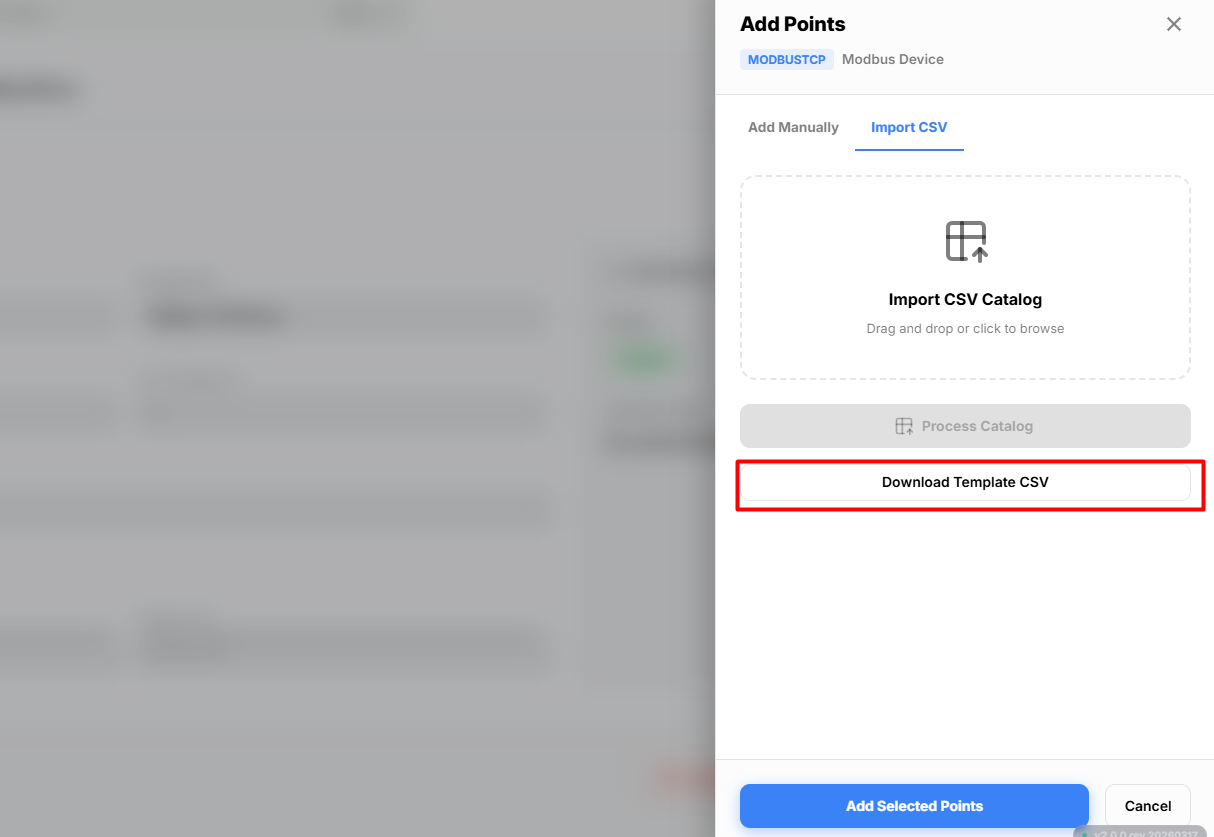
To add multiple points at once, use the Import CSV option.
- Click Download Template CSV.
-
Open the downloaded template and enter the required point details.
-
Save the CSV file.
-
Return to the Import CSV tab.
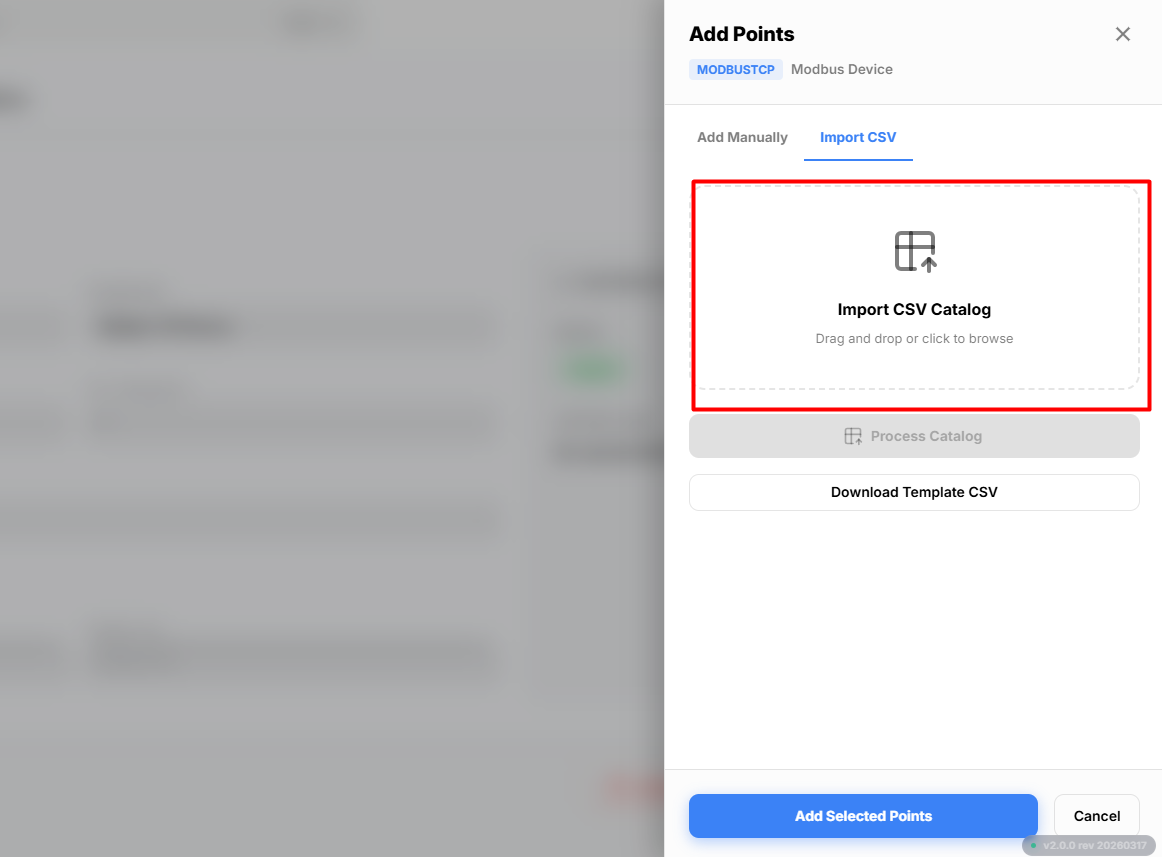
- Click Import CSV Catalog.
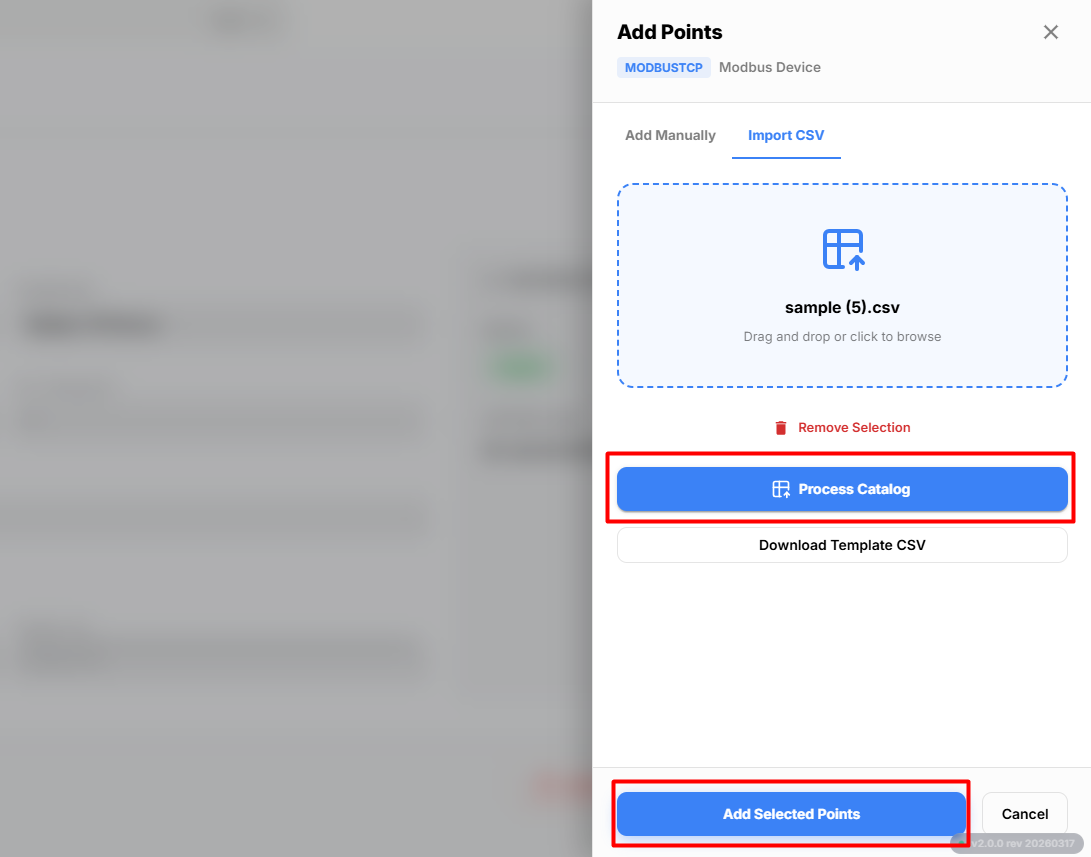
- Select the updated CSV file and upload it.
- Click Add Selected Points.
The points defined in the CSV file are imported and added to the device.
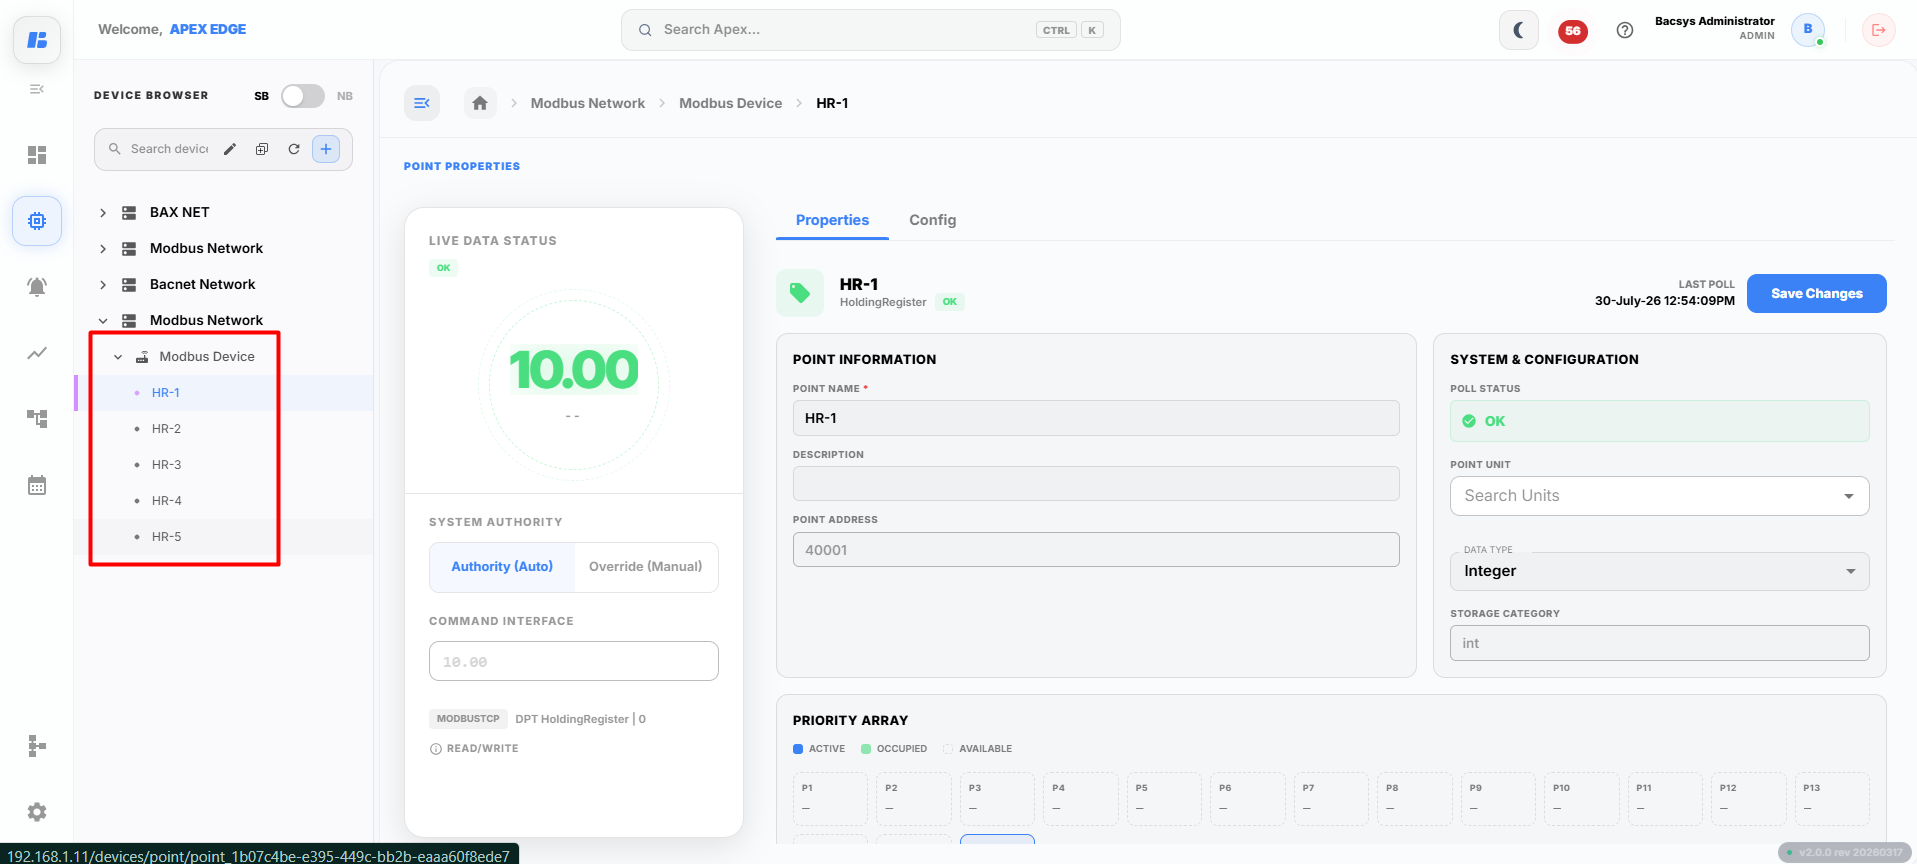
Step 2: View Added Points
After adding the points either manually or through a CSV import, the configured points are displayed in the device.
Configuring a Point
Each point added to a device can be configured to control its operational behavior, alarm settings, trend logging, and categorization. These configurations ensure that the point functions correctly within the system and can be effectively monitored and managed.
To configure a point:
Step 1
Navigate to the Devices module.
Step 2
Open the required Network.
Step 3
Select the required Device.
Step 4
Click the required Point from the point list.
Step 5
Select the Configuration tab.
The Point Configuration page opens and provides the following configuration sections:
General
The General tab allows you to configure the basic operating parameters of the selected point.
From this tab, you can:
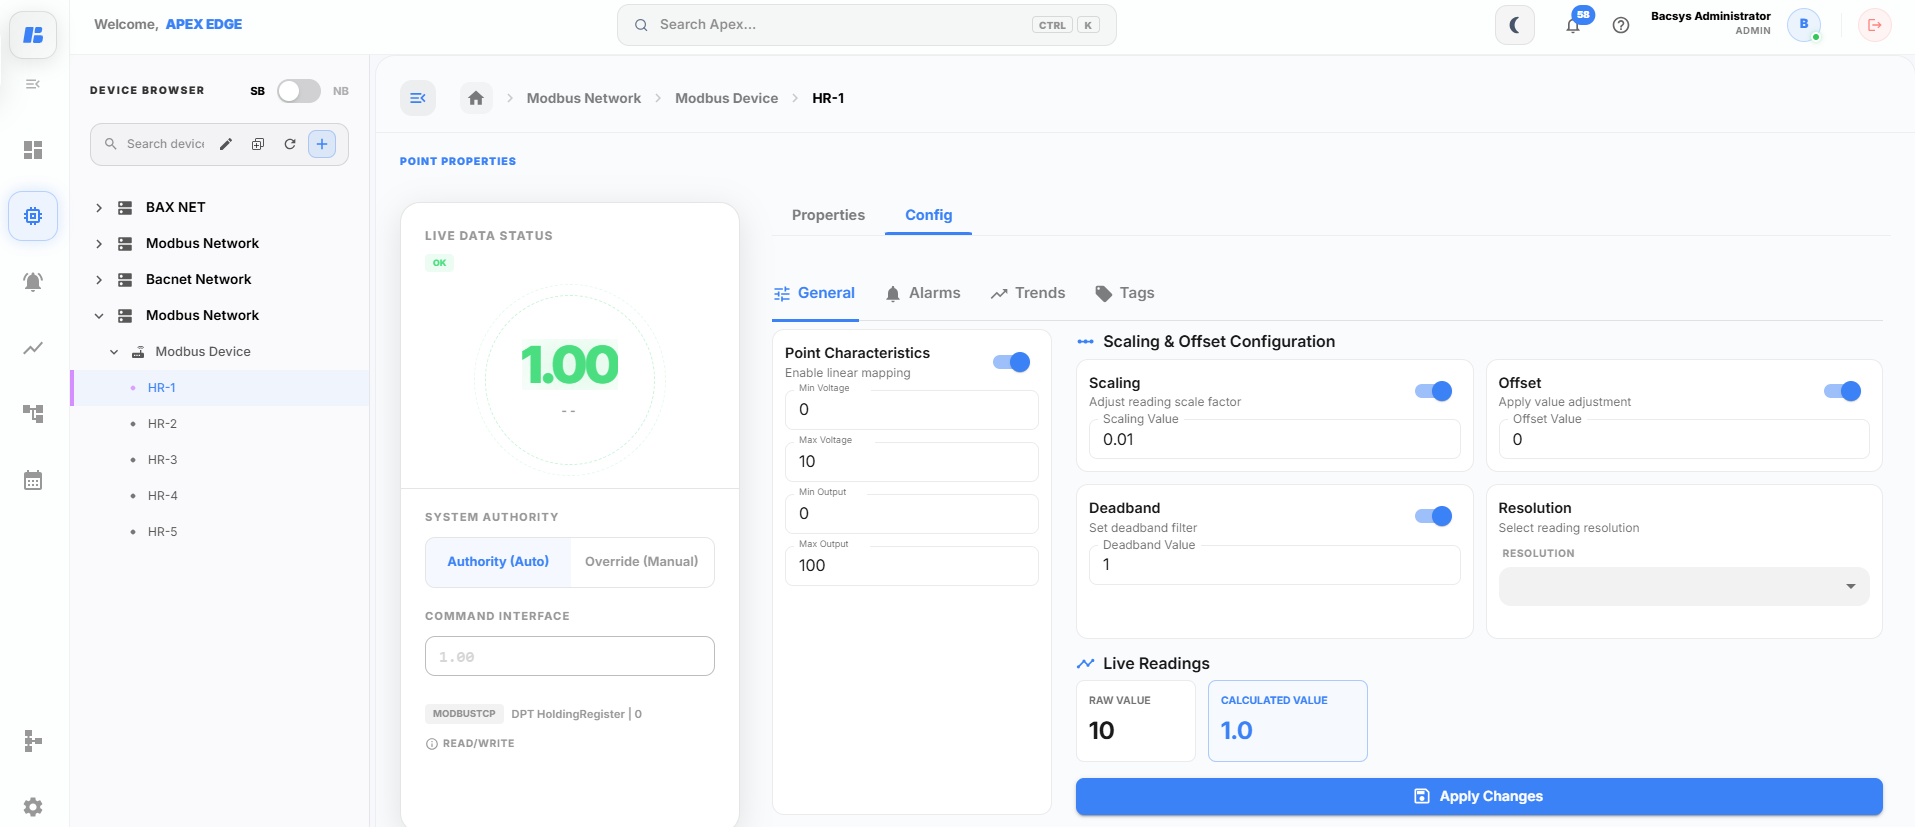
- Configure linear mapping.
- Configure scaling and offset values.
- View raw and calculated values.
- Modify point-specific operational settings.
Alarms
The Alarms tab allows you to configure alarm conditions for the selected point.
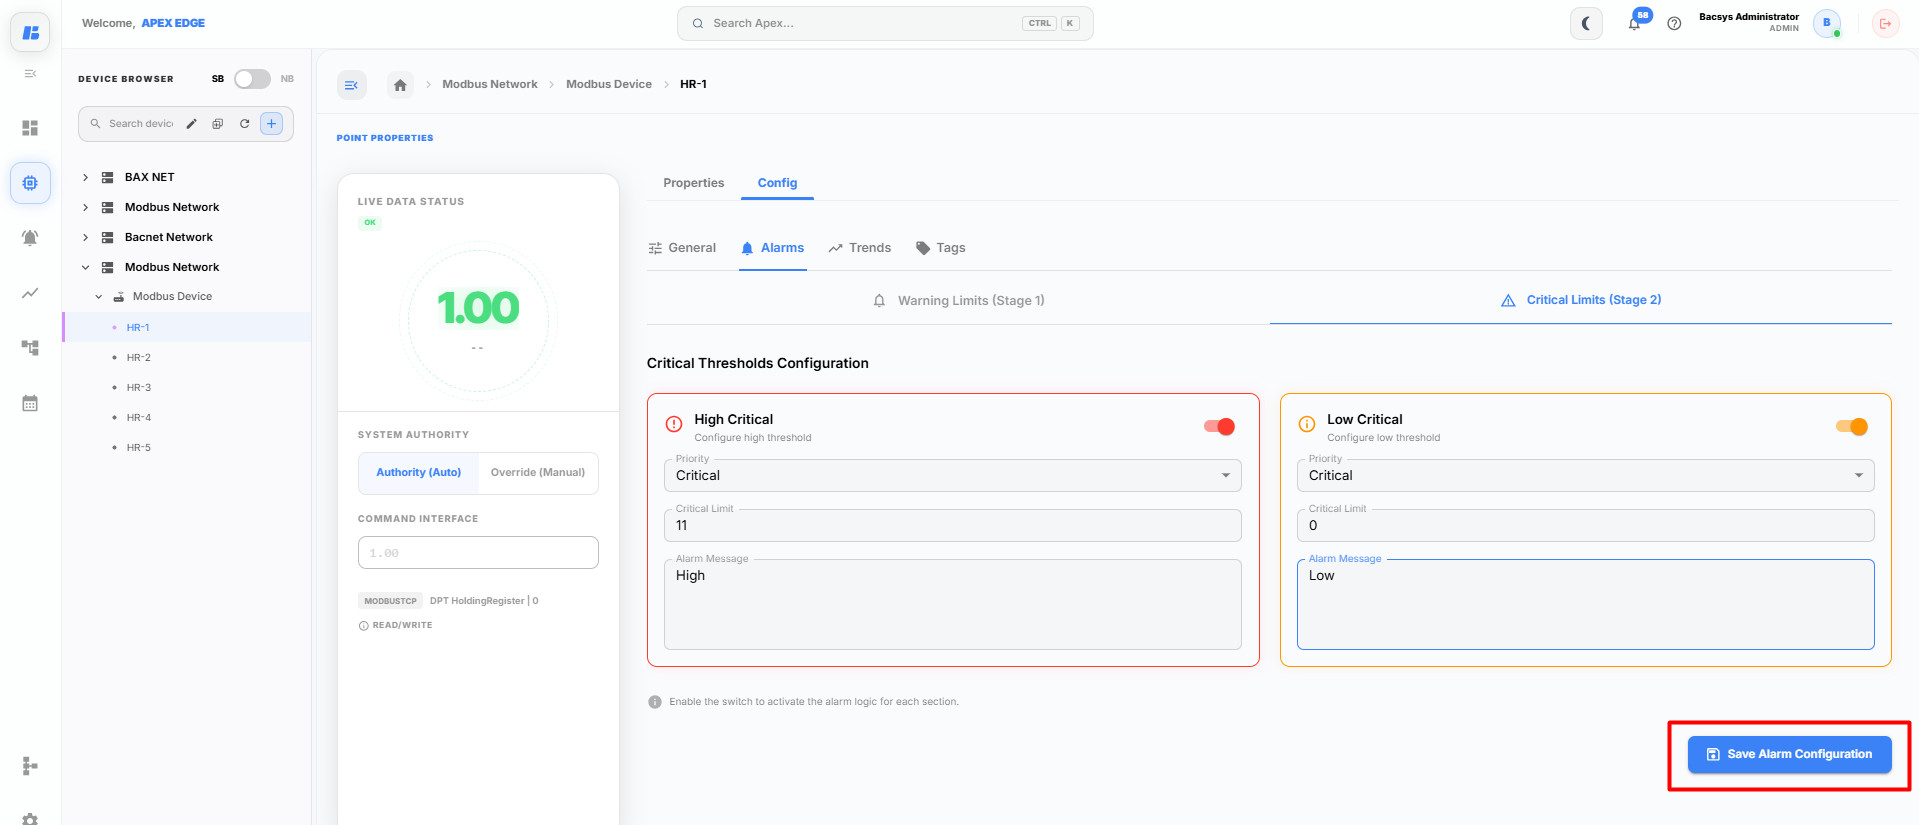
From this tab, you can:
- Configure warning limits.
- Configure critical limits.
- Assign alarm priorities.
- Define alarm messages.
- Enable alarm monitoring for the point.
Trends
The Trends tab allows you to configure and review historical data for the selected point.
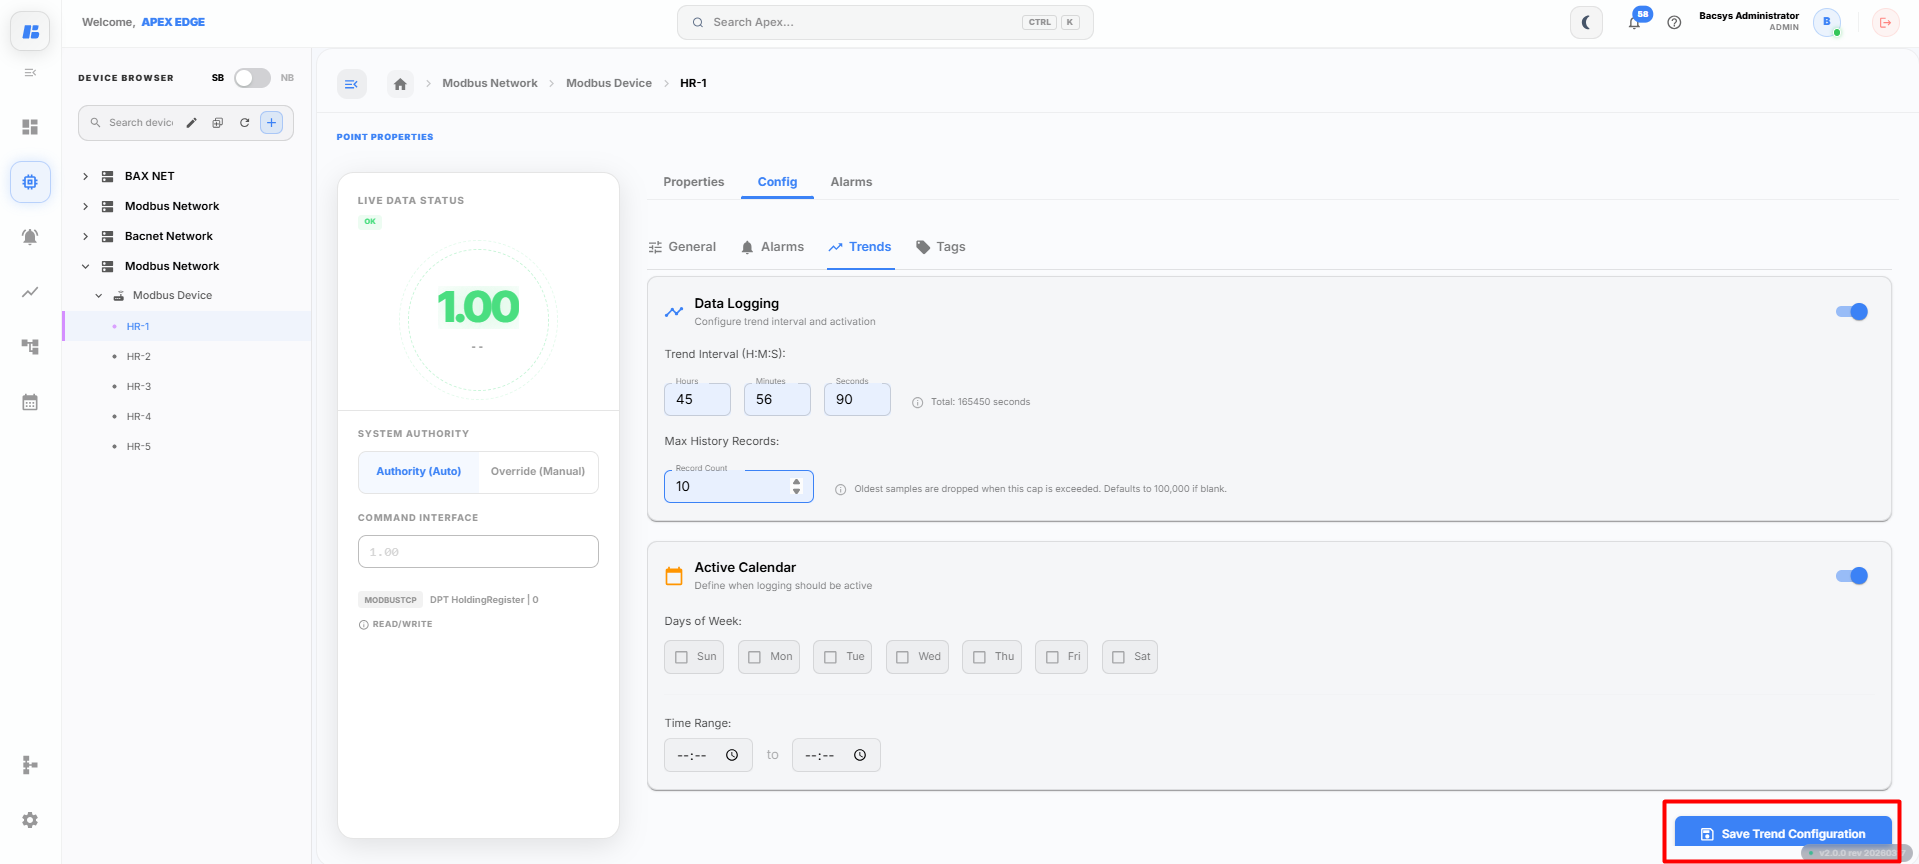
From this tab, you can:
- Enable trend logging.
- Configure logging intervals.
- Specify the maximum history records.
- Configure the active logging schedule.
- View the recorded trend history.
Tags
The Tags tab allows you to organize and categorize points using custom tags.
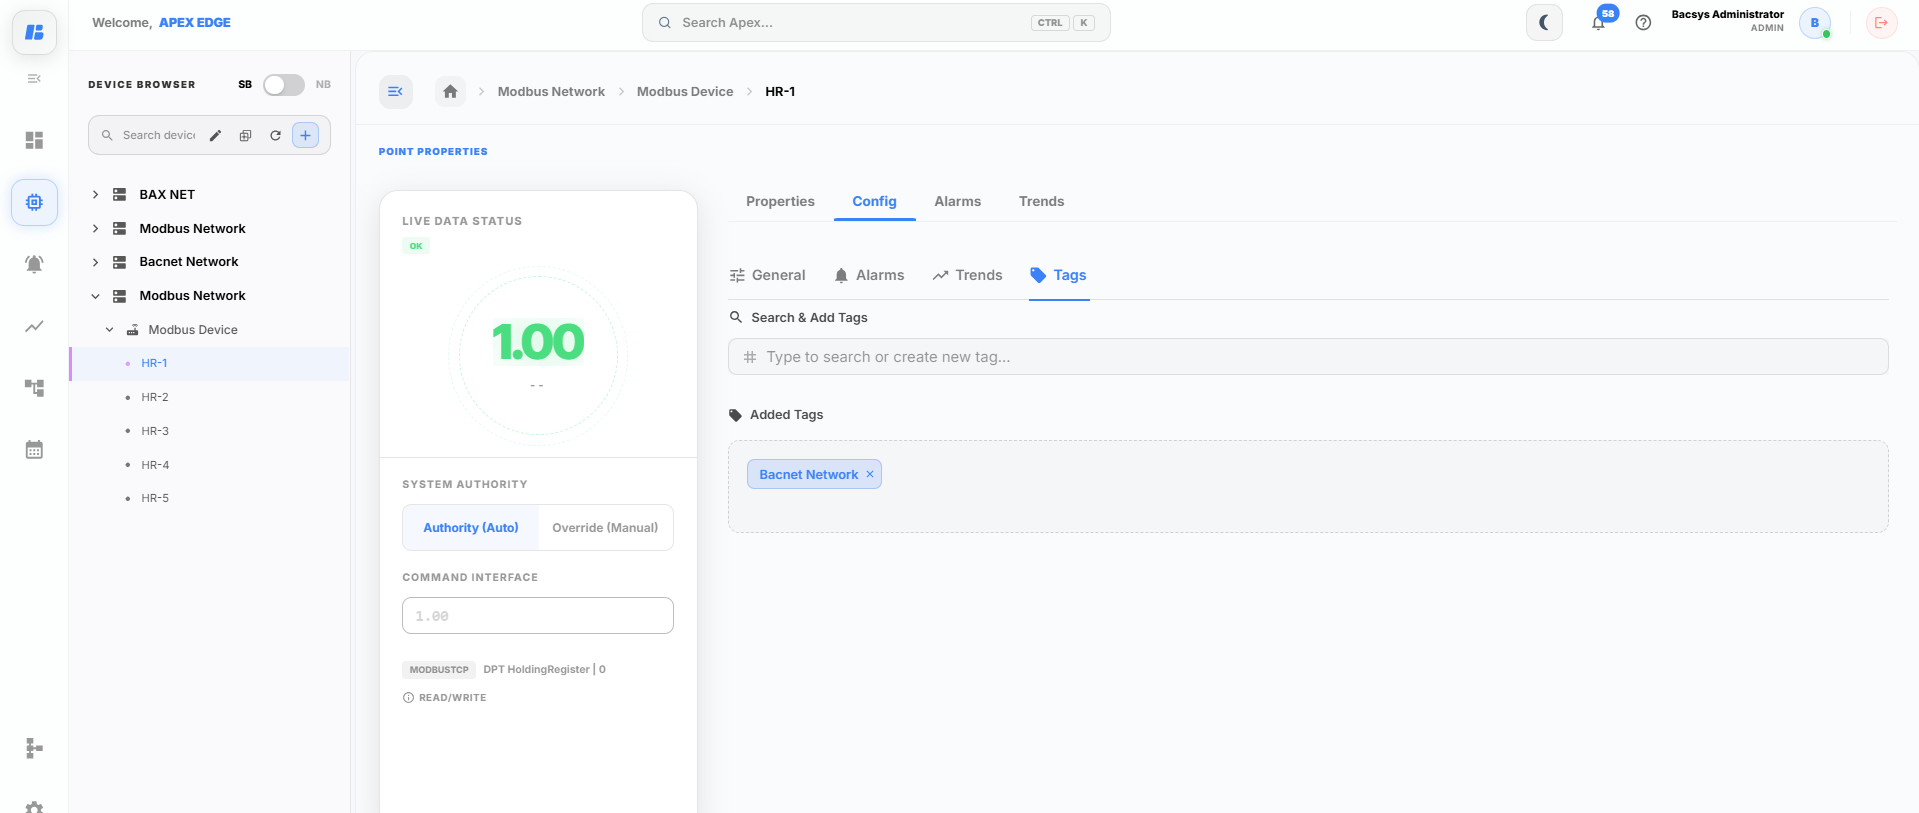
From this tab, you can:
- Add new tags.
- Assign existing tags.
- Remove assigned tags.
- Search and filter points using tags.
After completing the required configuration, click Apply Changes or Save to store the updated settings.
The configured point is immediately available for monitoring, alarming, trend analysis, and use within the Rules module.