

Configuring BAX
The BAX protocol allows you to export points from one APEX Controller and import them into another APEX Controller. This enables data sharing between two APEX controllers over the network.
Note: BAX communication is supported only between Bacsys APEX Controllers.
The BAX configuration consists of two parts:
- BAX Server (NB Controller) – Exports points from the source APEX controller.
- BAX Client (SB Controller) – Imports the exported points into another APEX controller.
Part 1: Configure the BAX Server (Source APEX)
The source APEX controller acts as the BAX Server and exports the selected points to another APEX controller.
Step 1: Switch to NB Mode
Before creating the BAX Server, switch the controller to NB (Northbound) mode.
- Open the Devices module.
- Click the NB toggle in the Device Browser.
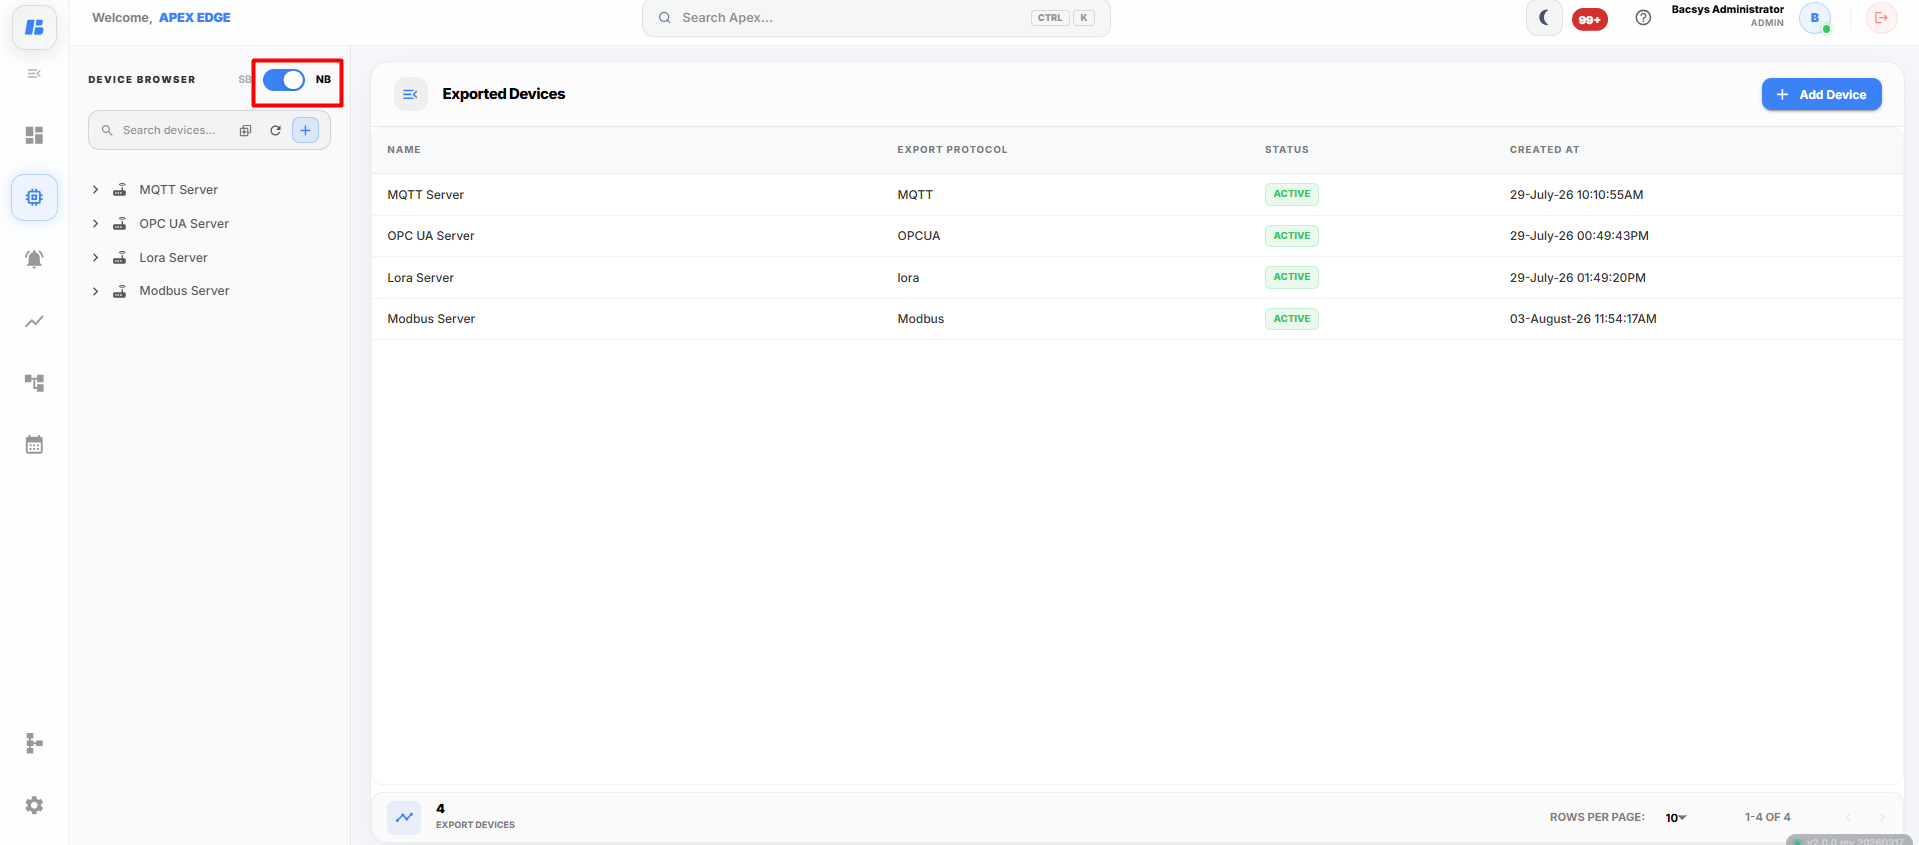
- Click the Create Network (+) button.
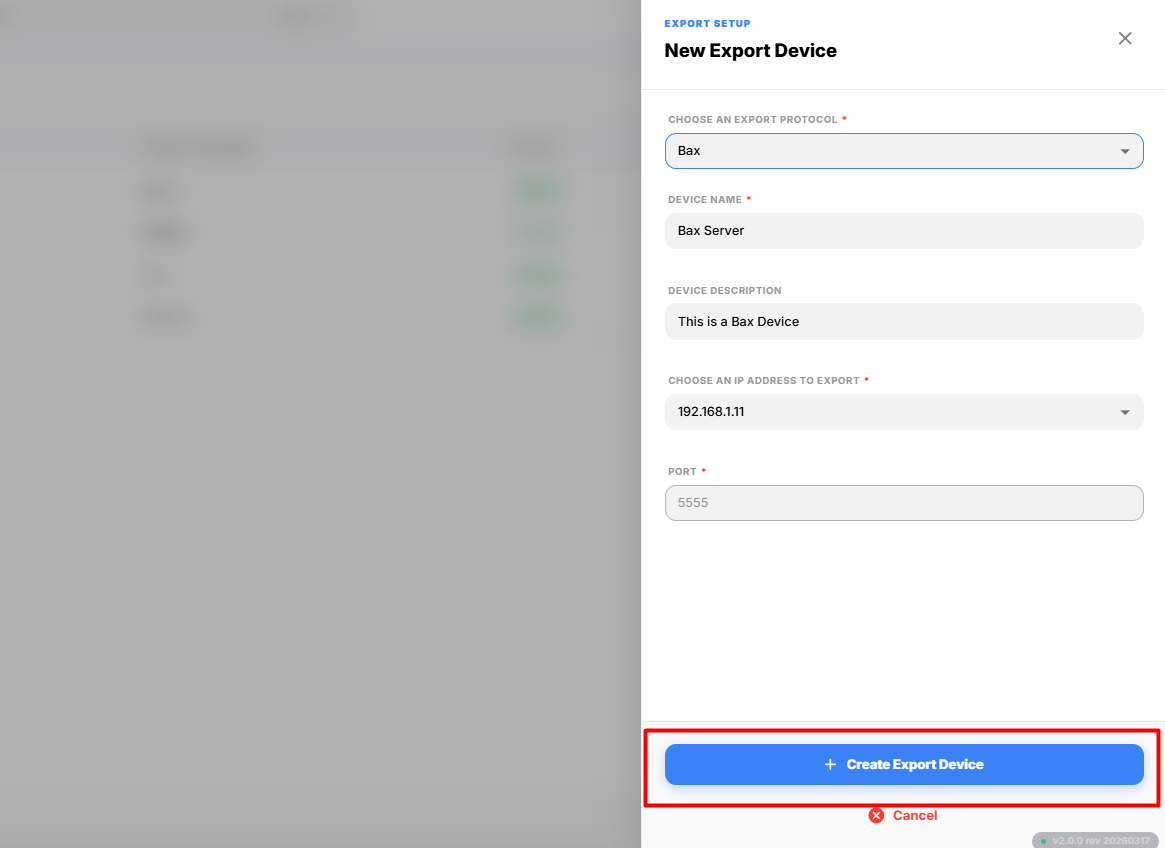
The Create Network dialog appears.
Step 2: Create a BAX Network
From the Choose Export Protocol dropdown, select BAX.
Enter the following details:
| Field | Description |
|---|---|
| Device Name | Enter a name for the BAX Server. |
| Device Description | Enter a brief description of the BAX Server. |
| Choose an IP Address to Export | Select the IP address through which the controller will export the points. |
| Port | Enter the communication port used for BAX communication. |
After entering all the required information, click Create Network.
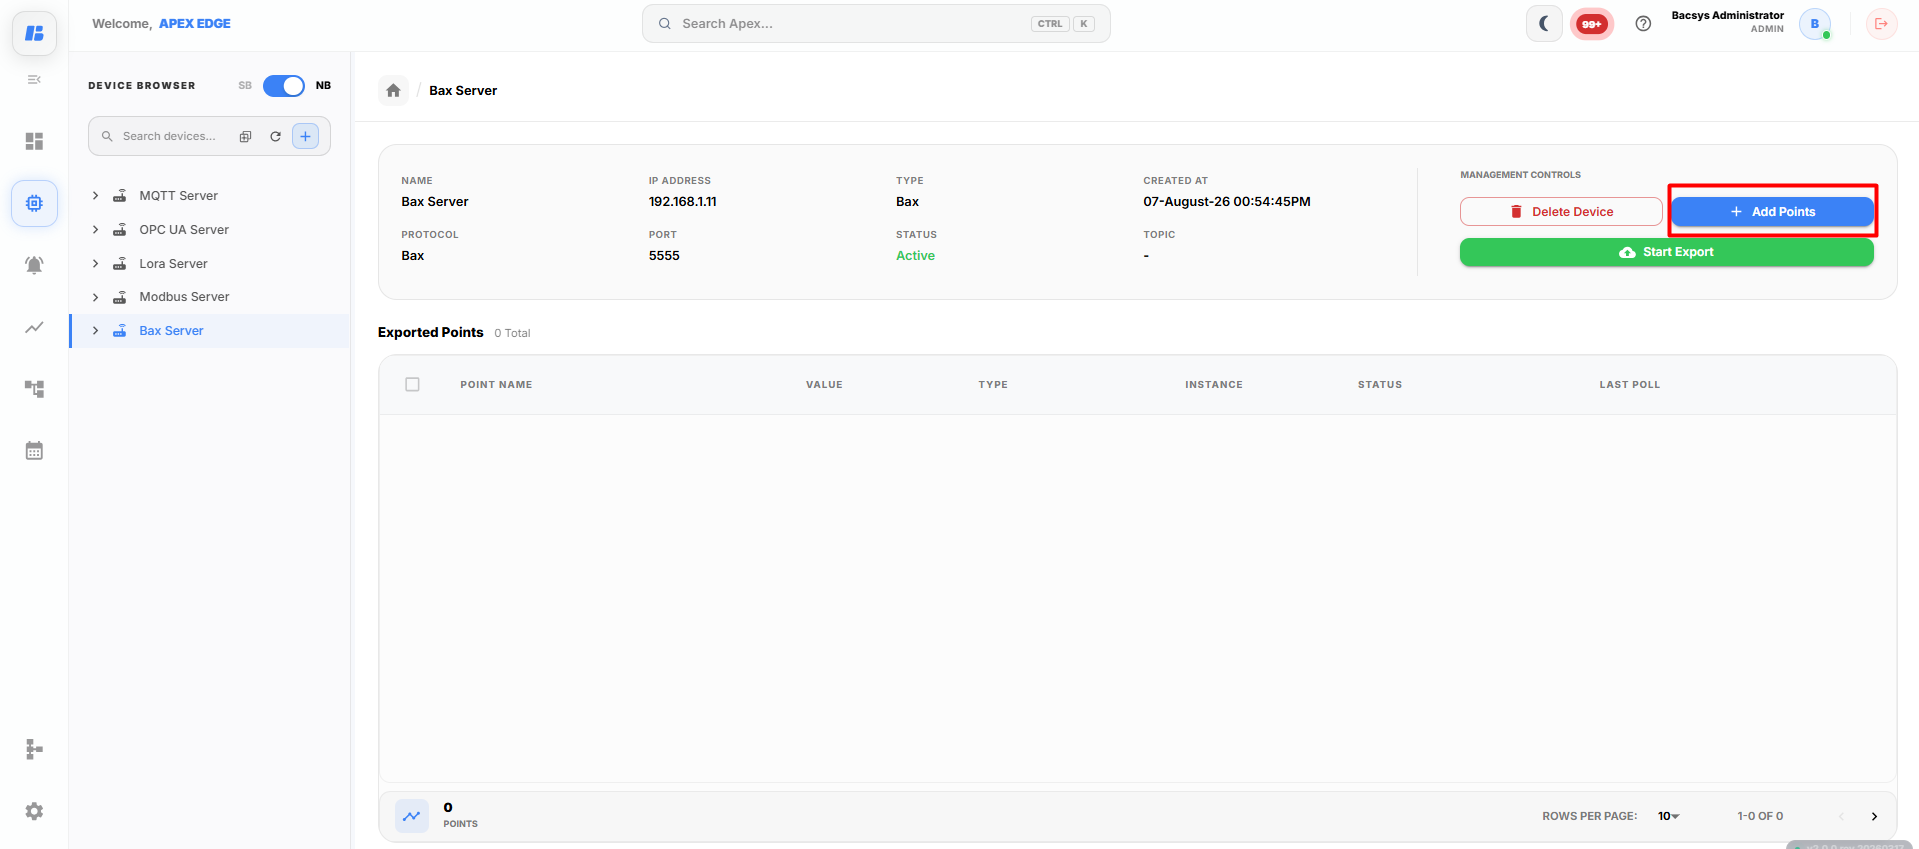
The BAX Server is created successfully and is displayed under the NB controller.
Step 2: Add Points
After creating the BAX Server:
- Open the newly created BAX Server.
- Click Add Points.
 3. Select the points you want to export.
4. Click Add Selected Points.
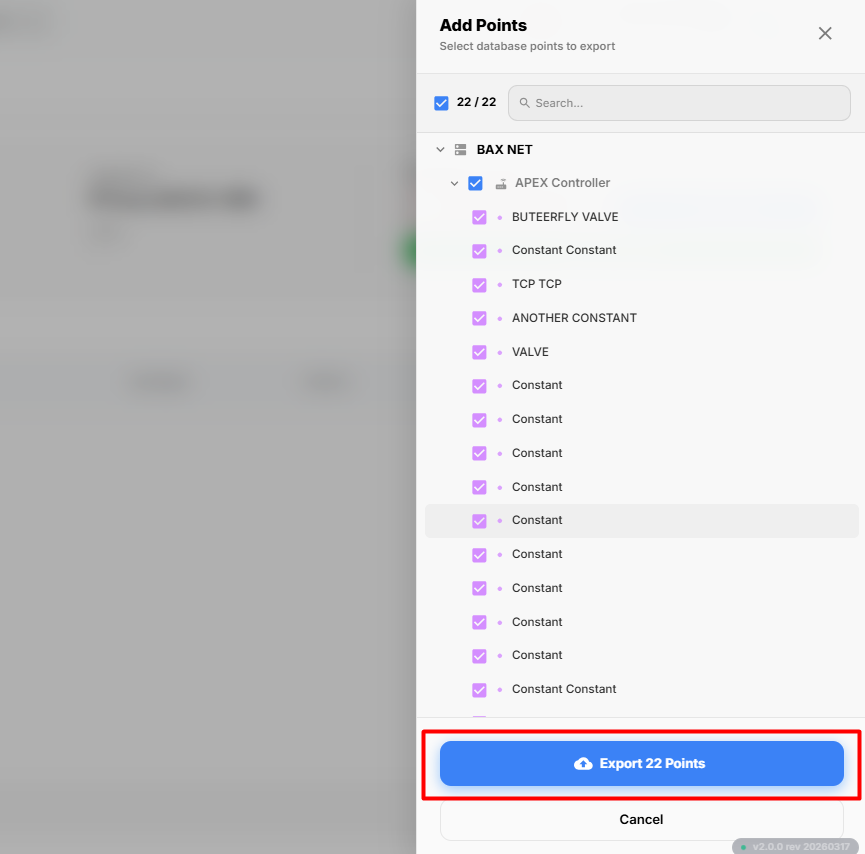
The selected points are added to the BAX Server.
Step 3: Export the Points
Once the required points have been added, the following actions are available.
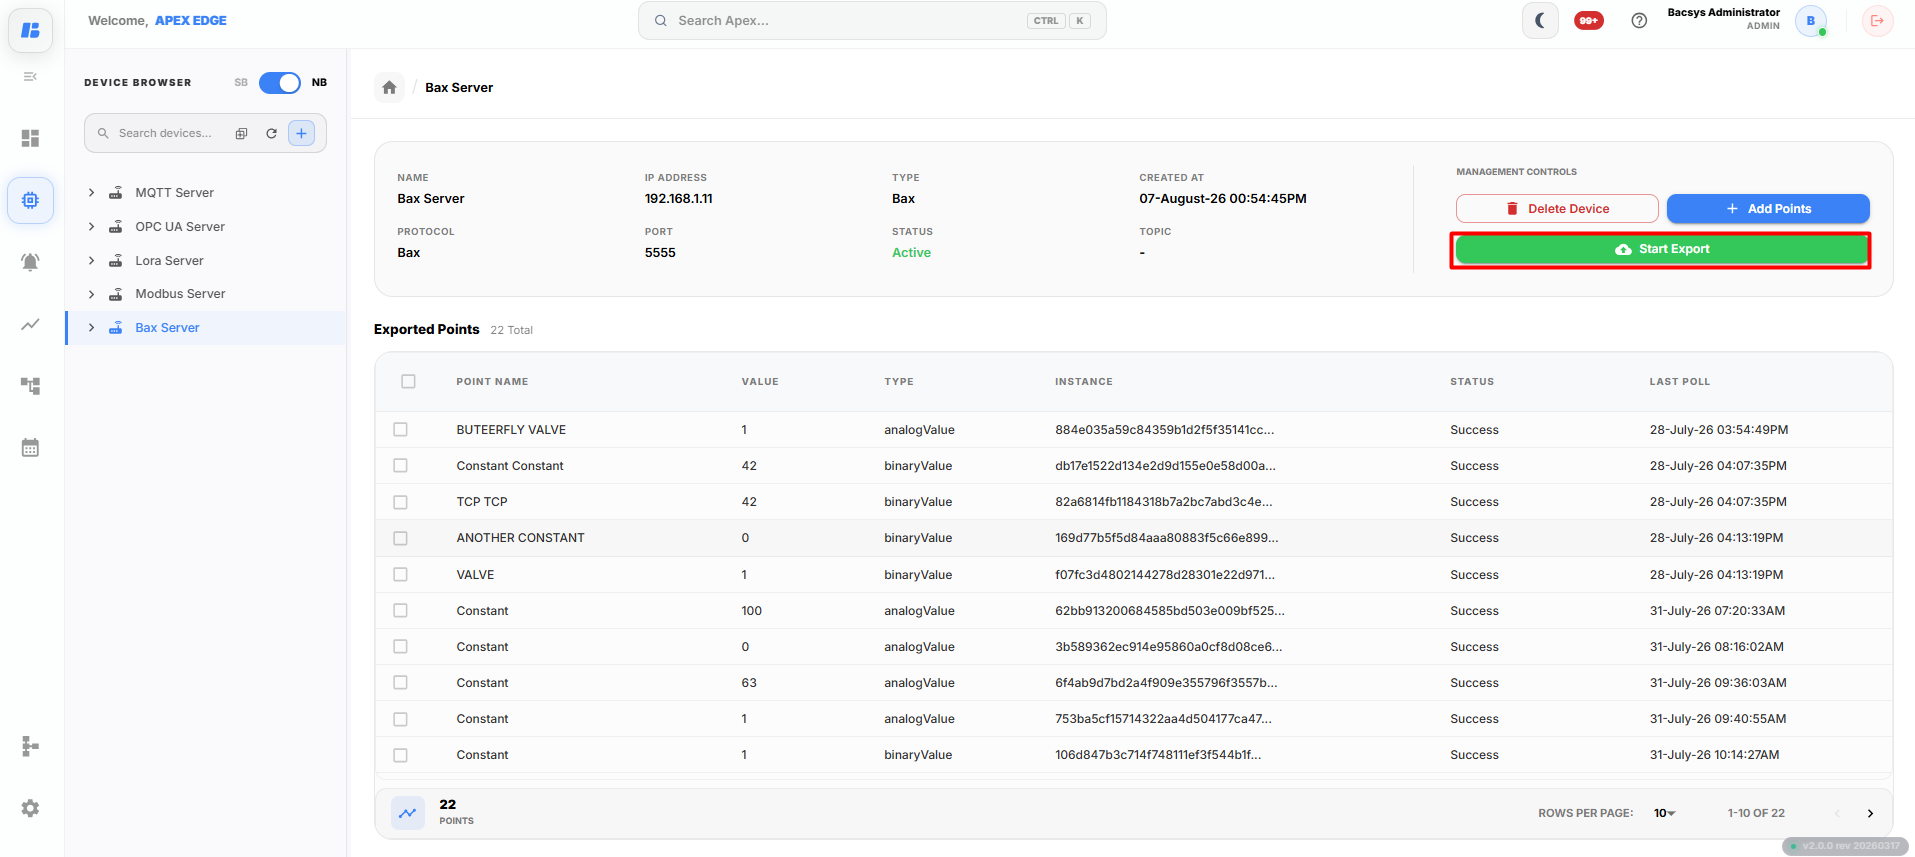
Start Export
Click Start Export to begin exporting the selected points.
When export starts:
- The BAX Server begins publishing the selected points.
- The exported points become available for other APEX controllers.
Stop Export
Click Stop Export to stop exporting the selected points.
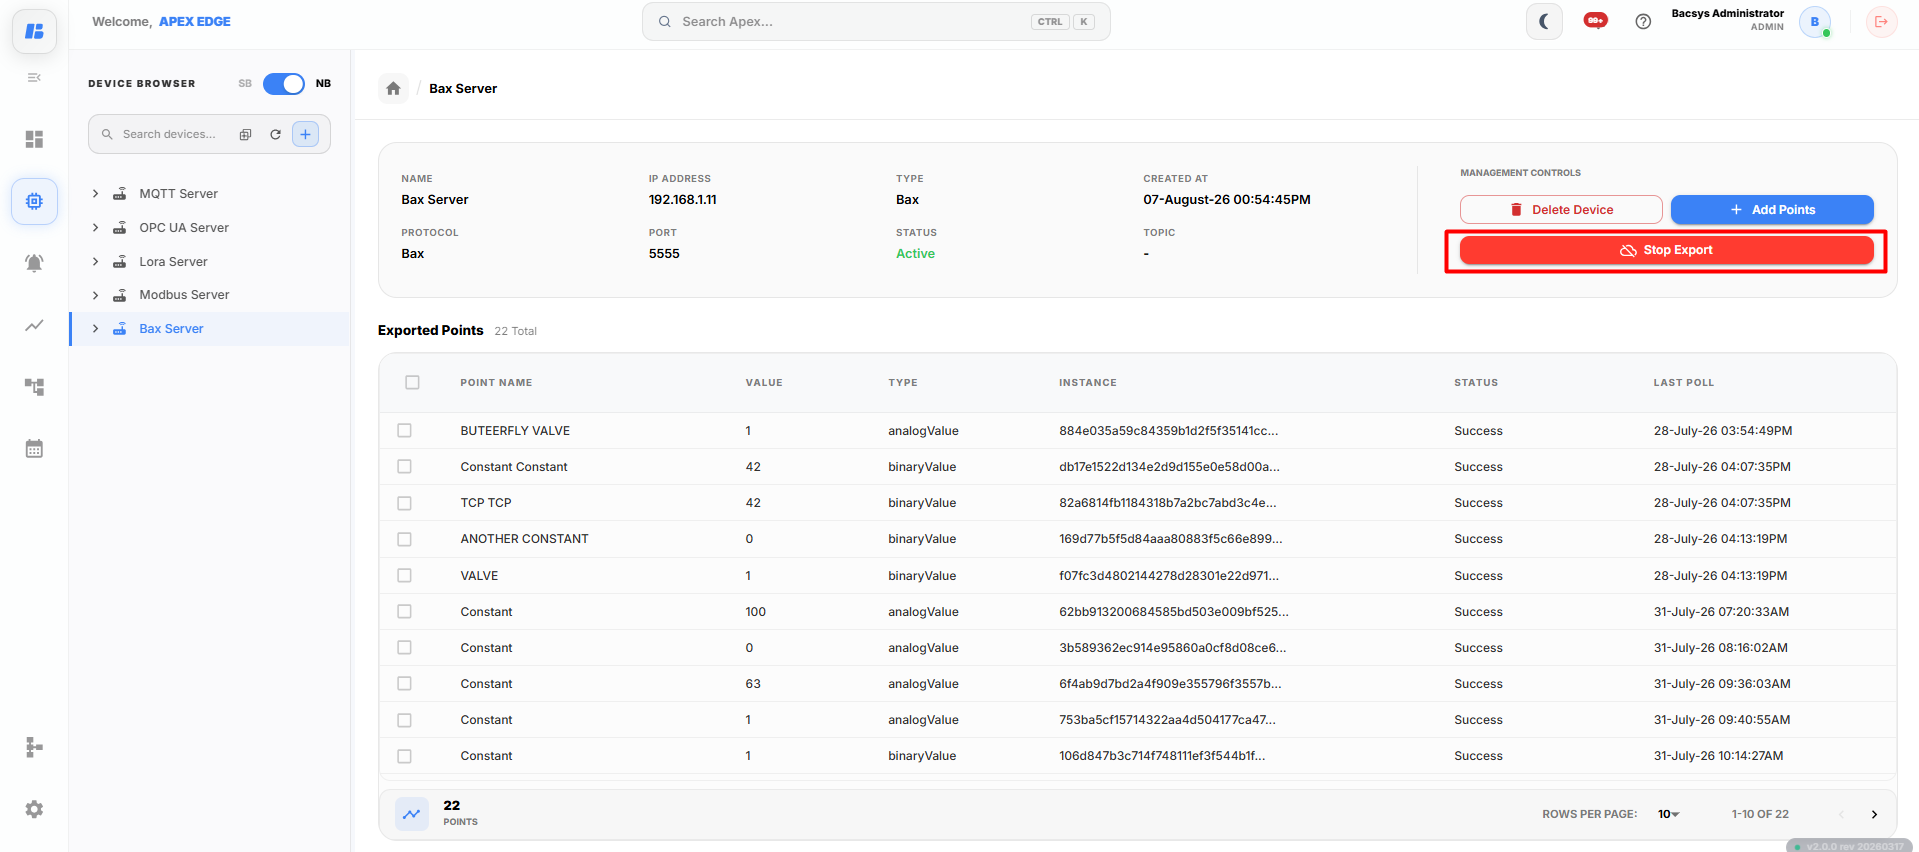
The points remain configured but are no longer available to remote controllers until export is started again.
Remove Point
Click Remove Point to remove a point from the export list.
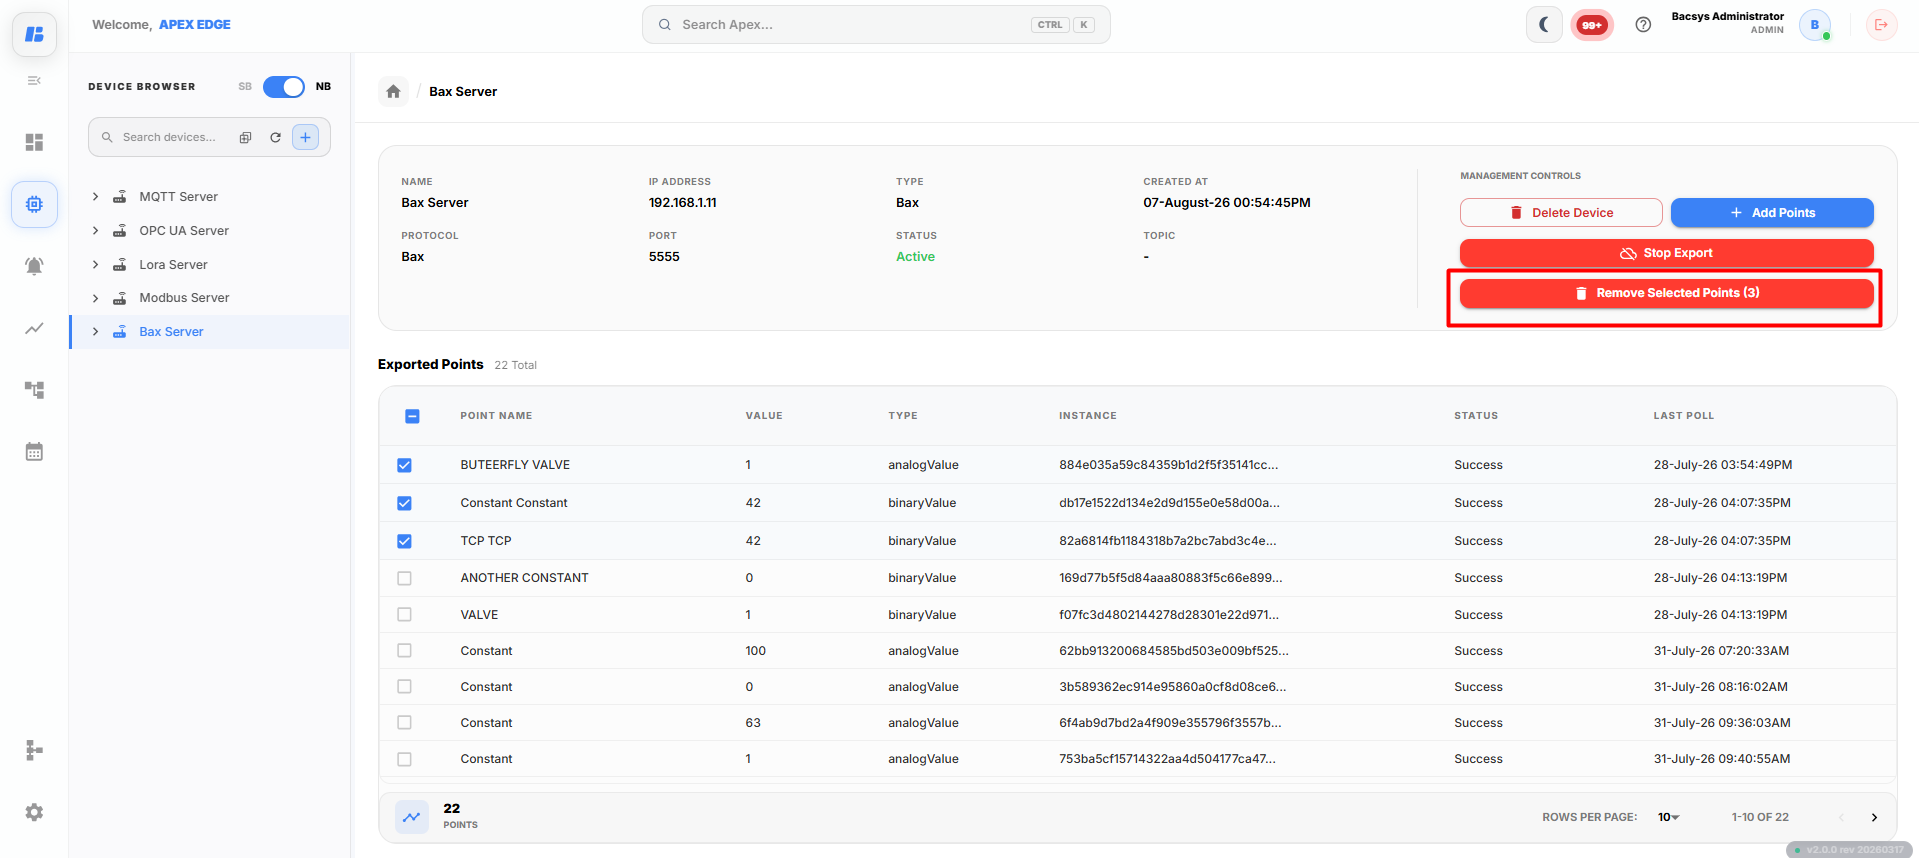
Only the selected point is removed.
Delete
Click Delete to delete the BAX Server configuration.
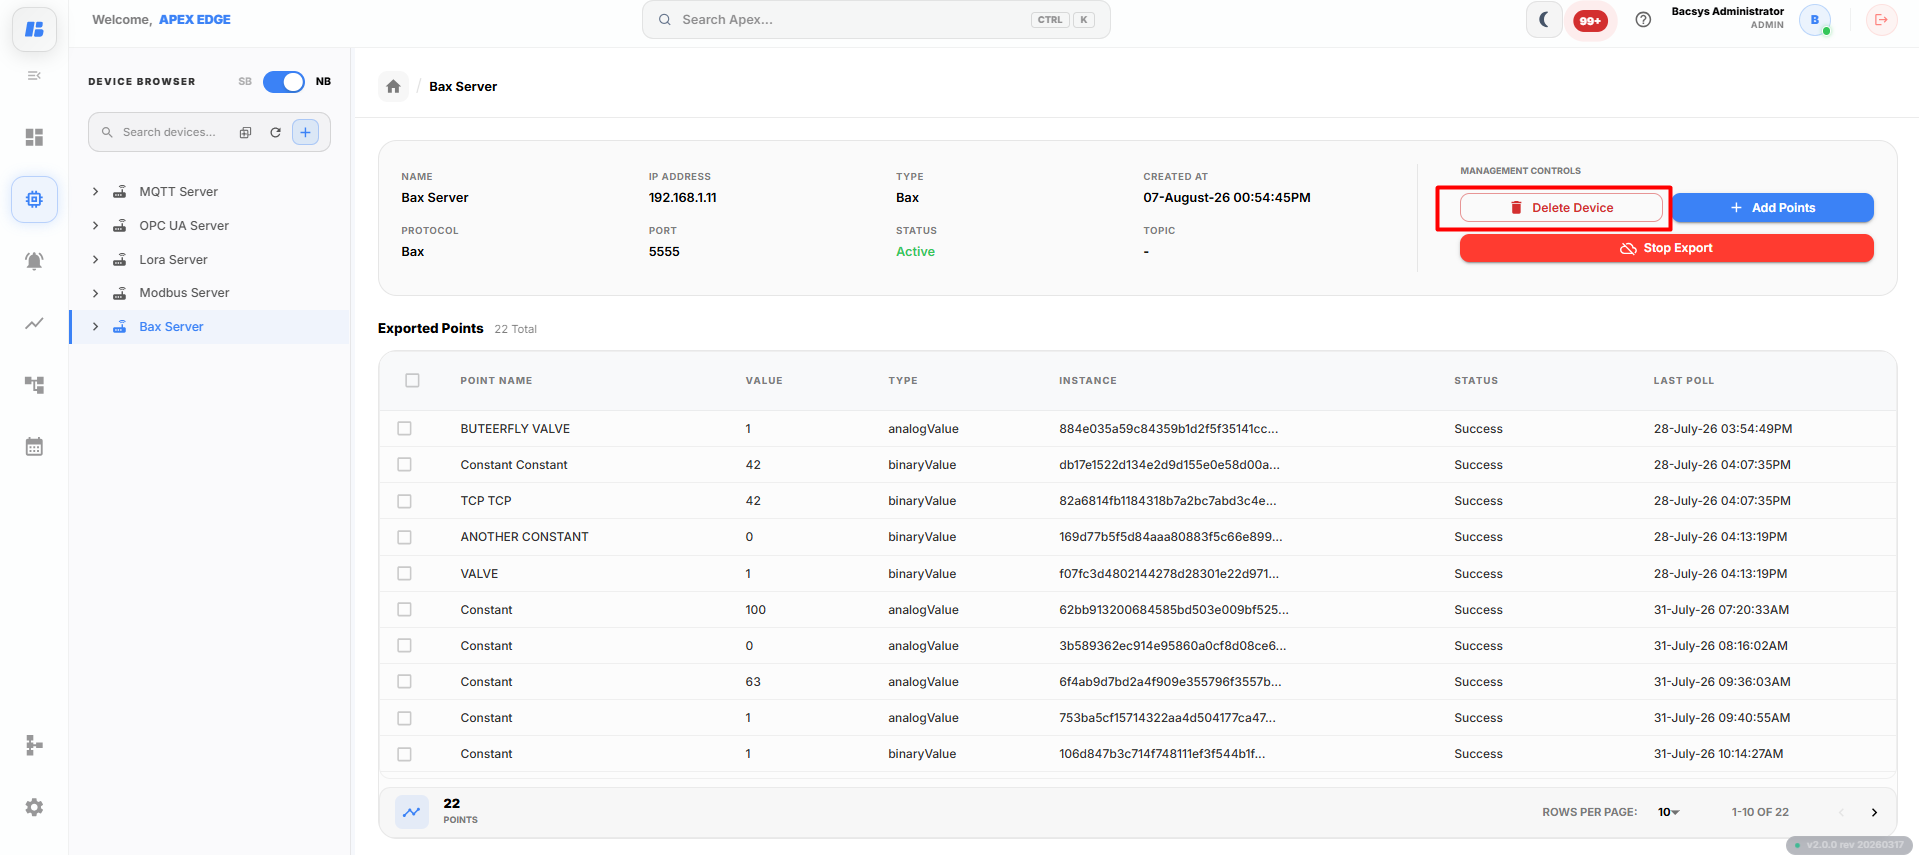
All exported point configurations associated with the server are removed.
Part 2: Configure the BAX Client (Destination APEX)
The destination APEX controller acts as the BAX Client and connects to the source BAX Server to receive the exported points.
Step 1: Switch to SB Mode
- Open the Devices module.
- Switch the controller to SB (Southbound) mode.
- Click the Create Network (+) button.
The Create Network dialog appears.
Step 2: Create a BAX Network
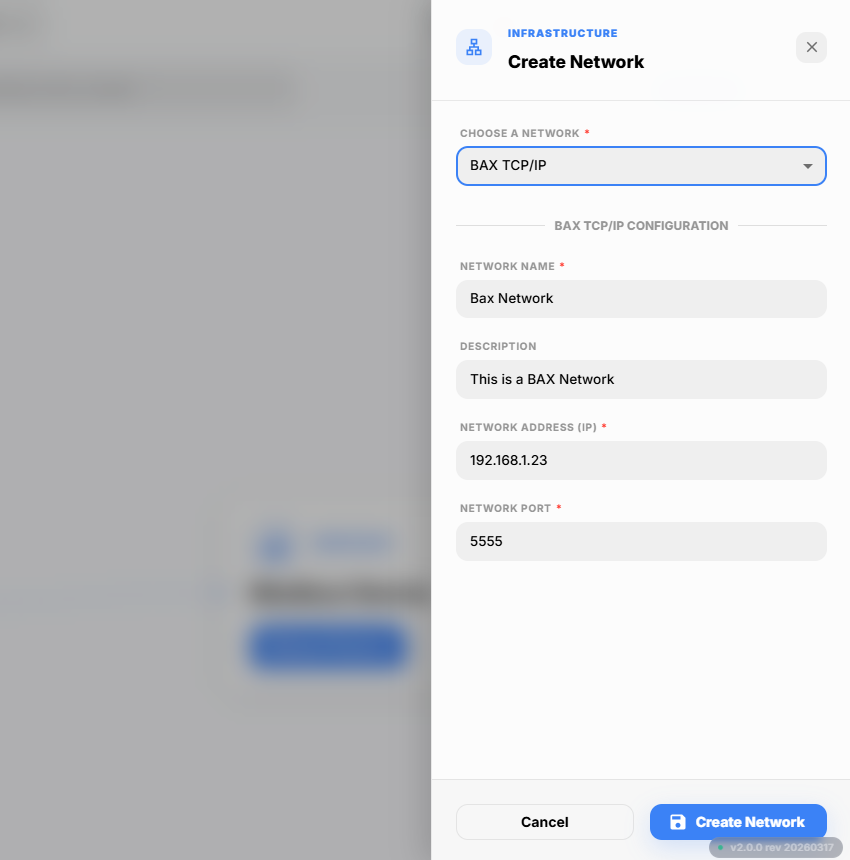
From the Choose a Network dropdown, select BAX TCP/IP.
Enter the following details:
| Field | Description |
|---|---|
| Network Name | Enter a unique name for the BAX Client network. |
| Description | Enter a brief description of the network. |
| Network Address (IP) | Enter the IP address of the source APEX controller where the BAX Server is running. |
| Network Port | Enter the port number configured on the source BAX Server. |
After entering all the required information, click Create Network.
The BAX Client network is created successfully and attempts to establish communication with the source BAX Server.
Discover and Add Exported Devices and Points
After the BAX Client successfully connects to the source BAX Server:
Step 1: Add the Exported Device
- Open the newly created BAX TCP/IP network.
- Click Add Device.
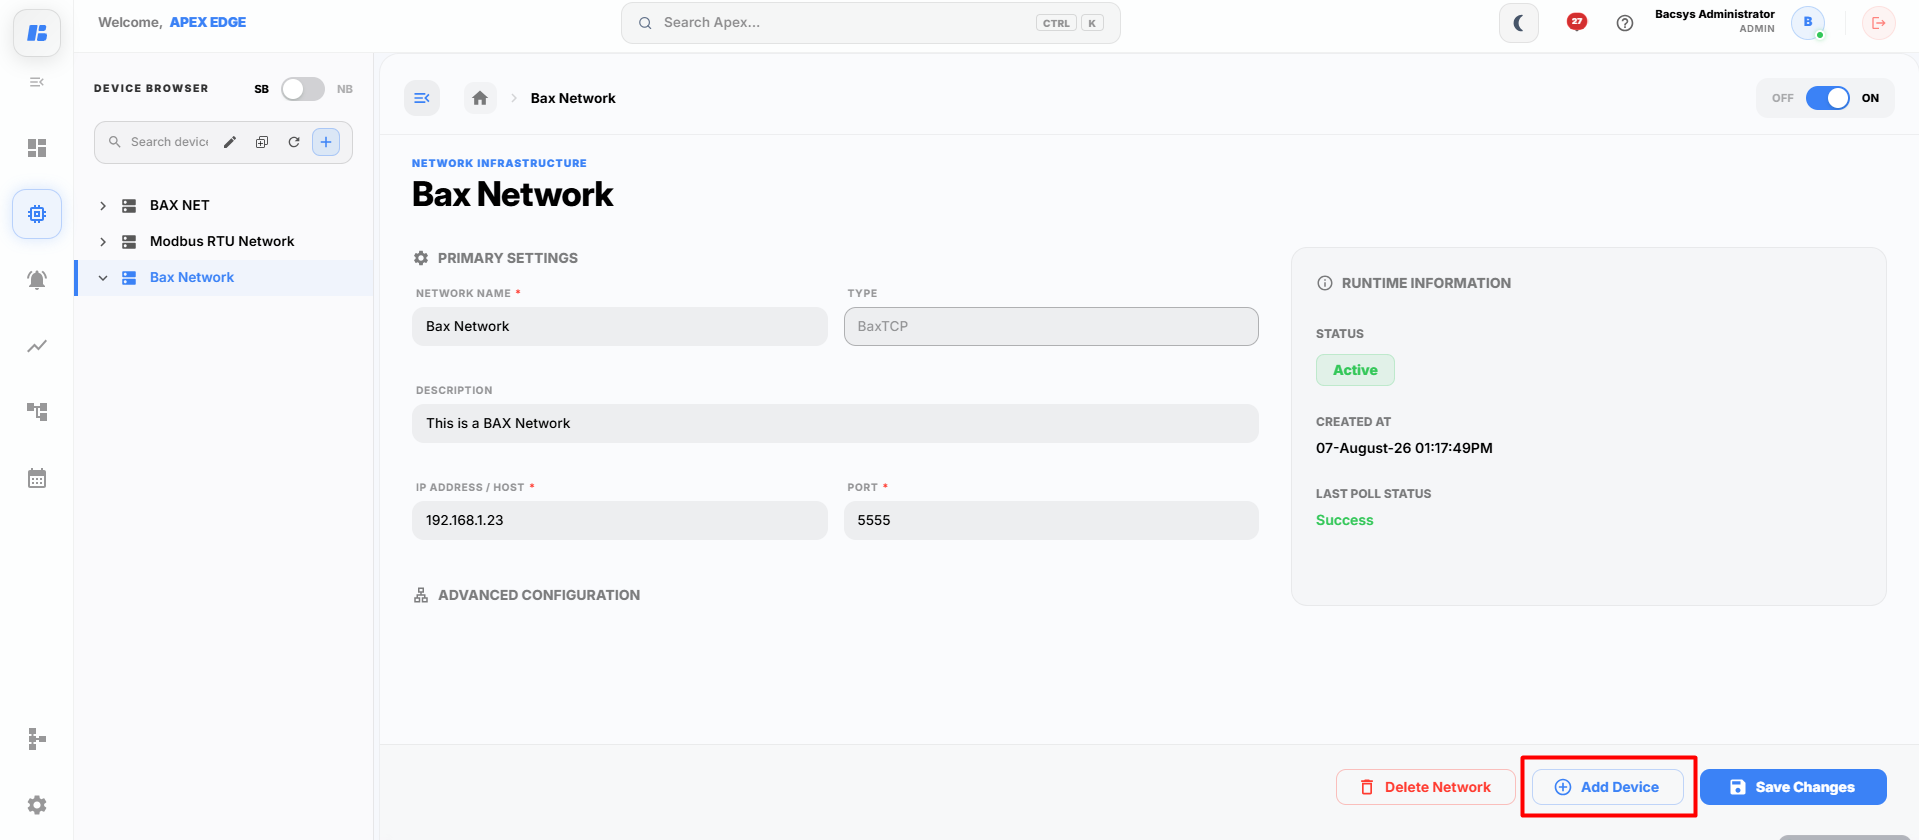
- The system discovers the devices available on the source BAX Server.
- Select the required device.
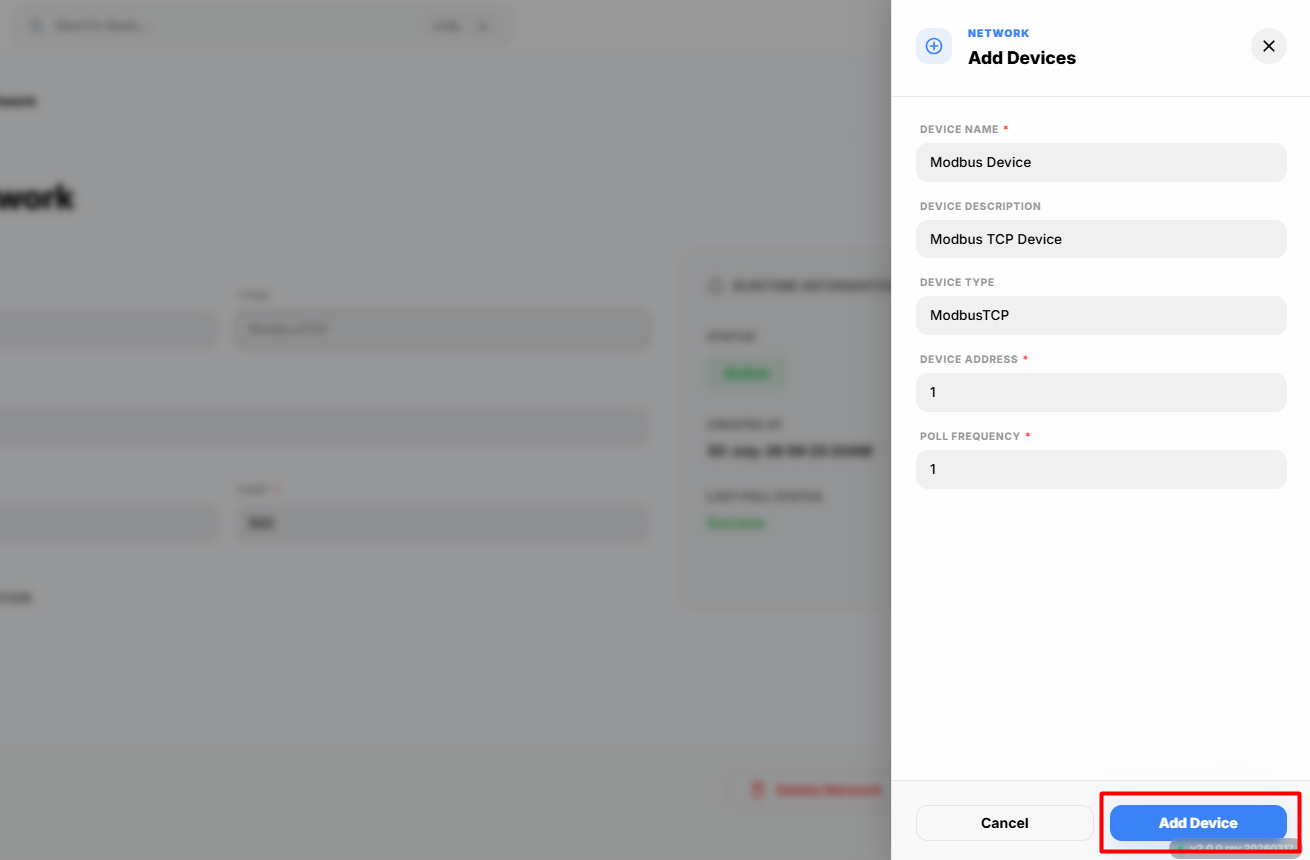
- Click Add Device.
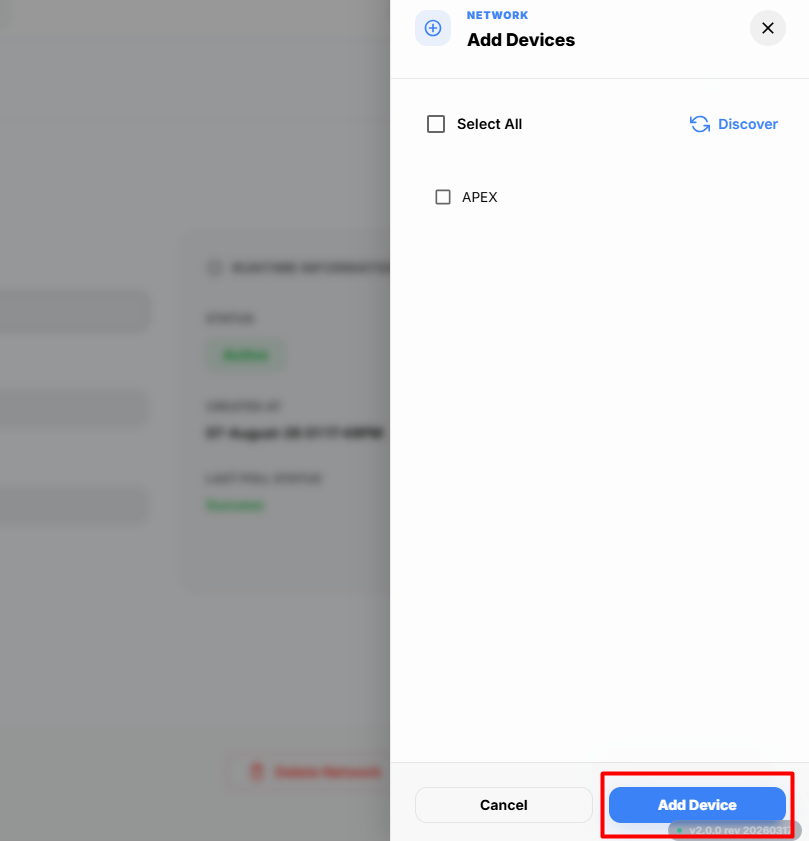
The selected device is added to the BAX Client.
Step 2: Add the Exported Points
- Open the added device.
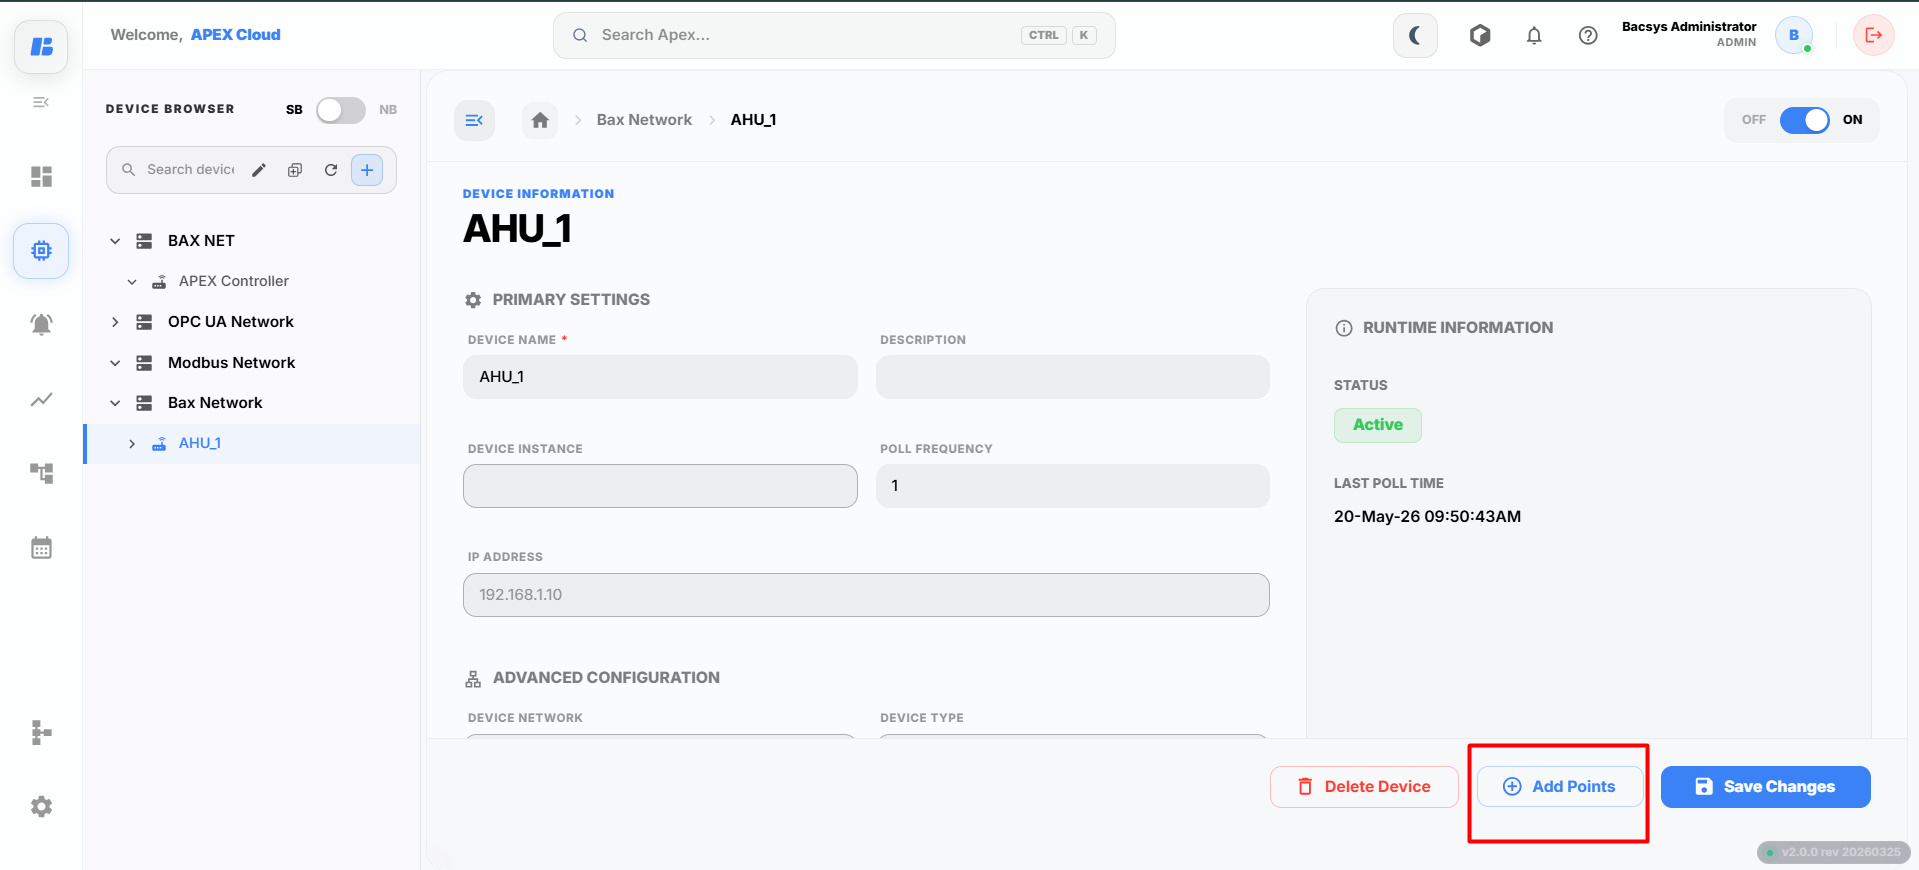
- Click Add Points.
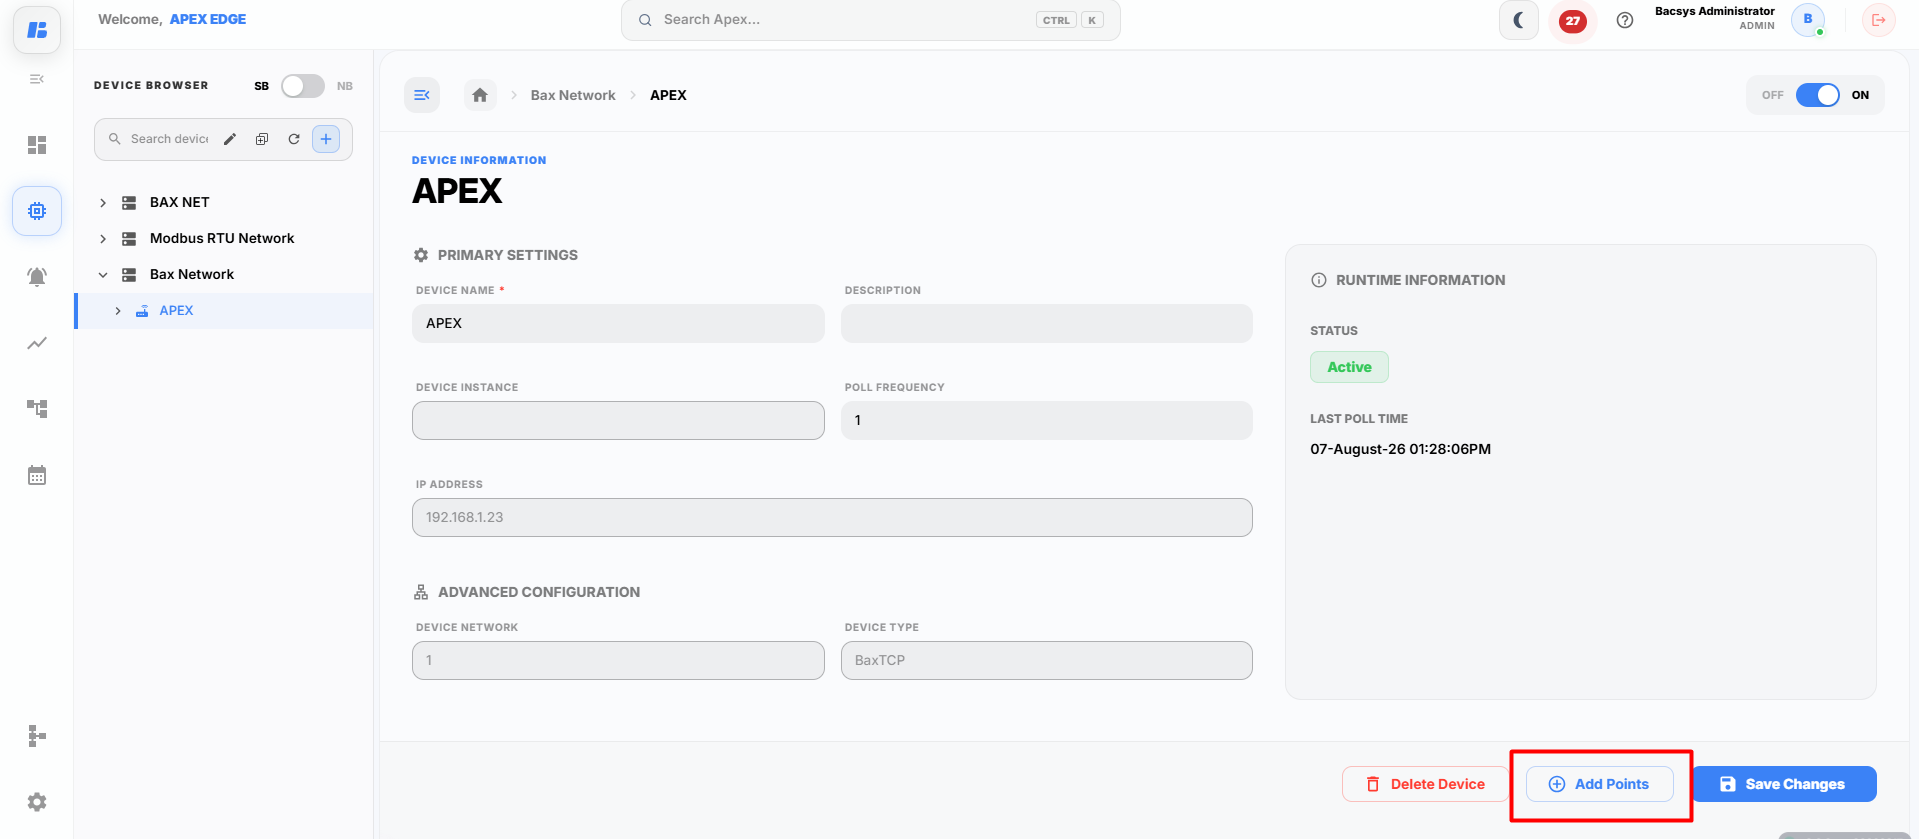
- The system displays all points exported from the source BAX Server.
- Select the required points or click Select All Points to add all available points.
- Click Add Selected Points.
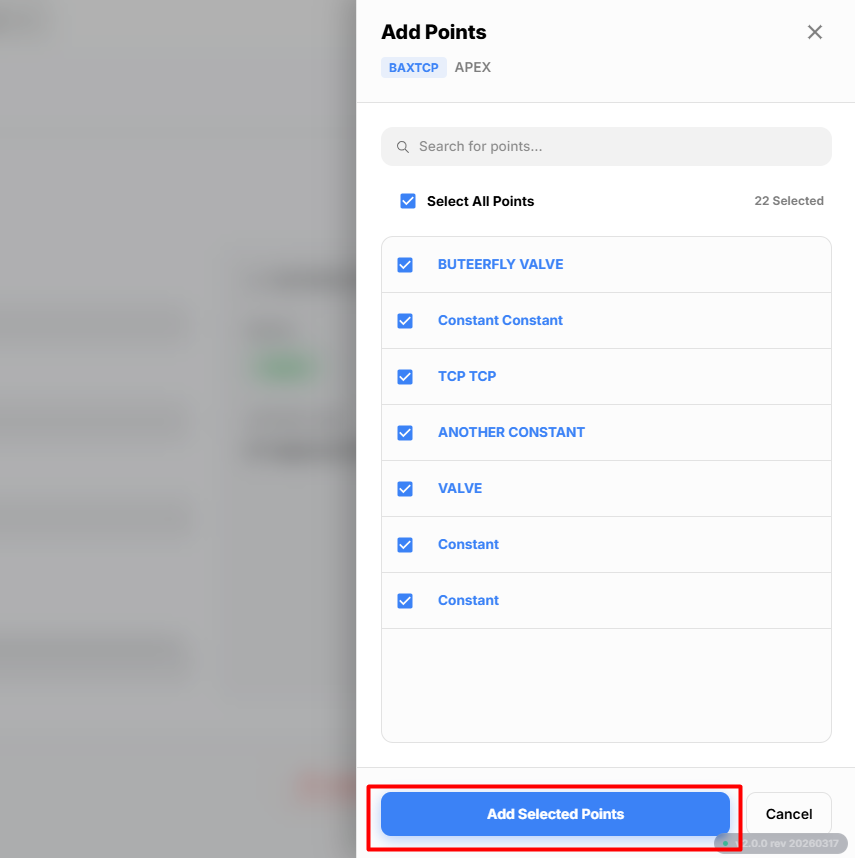
The selected points are added to the destination APEX controller and begin receiving live data from the source BAX Server.
Viewing Point Properties
Click any added point to view its real-time information.
The Properties tab displays:
Live Data Status
- Displays the current live value of the point.
- Shows whether communication is successful.
- Updates automatically whenever the value changes.
Point Information
The following information is available:
| Field | Description |
|---|---|
| Point Name | Displays the name of the selected point. |
| Description | Displays the point description. |
| Point Address | Displays the address associated with the point. |
System & Configuration
| Field | Description |
|---|---|
| Poll Status | Displays the communication status of the point. |
| Point Unit | Displays the engineering unit assigned to the point. |
| Data Type | Displays the point data type. |
| Storage Category | Displays the storage category of the point. |
System Authority
The System Authority section allows you to control the point manually or automatically.
Available options include:
- Authority (Auto) – The controller updates the point automatically.
- Override (Manual) – Allows manual control of the point.
- Command Interface – Used to write a value manually.
- Priority – Selects the write priority.
Priority Array
The Priority Array displays the priority levels currently controlling the point.
It shows:
- Active priorities
- Occupied priorities
- Available priorities
Configuring the Point
Select the point and open the Config tab.
The following configuration sections are available:
- General
- Alarms
- Trends
- Tags
These configuration options work the same as other supported protocols in APEX.
General
Configure:
- Linear Mapping
- Scaling
- Offset
- Live Readings
Click Apply Changes to save the configuration.
Alarms
Configure:
- High Alarm
- Low Alarm
- Alarm Priority
- Alarm Messages
After the alarm condition is triggered, open the Alarms tab to verify the generated alarm for the selected point.
Trends
The Trends tab allows you to monitor historical point data.
You can:
- View data in Table View
- View data in Chart View
- Filter data using From and To dates
- Export trend data
- Refresh trend records
- Enable Delta mode
- Edit trend values (if permitted)
Tags
Assign one or more tags to organize and group points.
Existing tags can be selected, or new tags can be created and assigned to the selected point.
Heyy
Configuring BAX TCP/IP
The BAX TCP/IP section allows users to configure BACnet networks, discover connected devices, and monitor real-time data through the BACnet TCP/IP protocol.
Using BAX TCP/IP, users can establish communication between the platform and BACnet-enabled devices for centralized monitoring and device management.
- Navigate to the Devices module from the sidebar.
Step 2: Create a New Network
Click on the Create Network button available at the top-right corner of the page.
A popup window will appear where you can configure the network connection settings.
-
Select BACnet TCP/IP from the Choose a Network dropdown option.
Fill in the required network details:
Field Name Description Network Name Enter a unique name for the network Network Description Provide a short description of the network Network Address Enter the IP address of the BACnet TCP/IP network Network Port Enter the communication port used for the BACnet TCP/IP network After entering all the required details, click the Create Network button to successfully create the network.
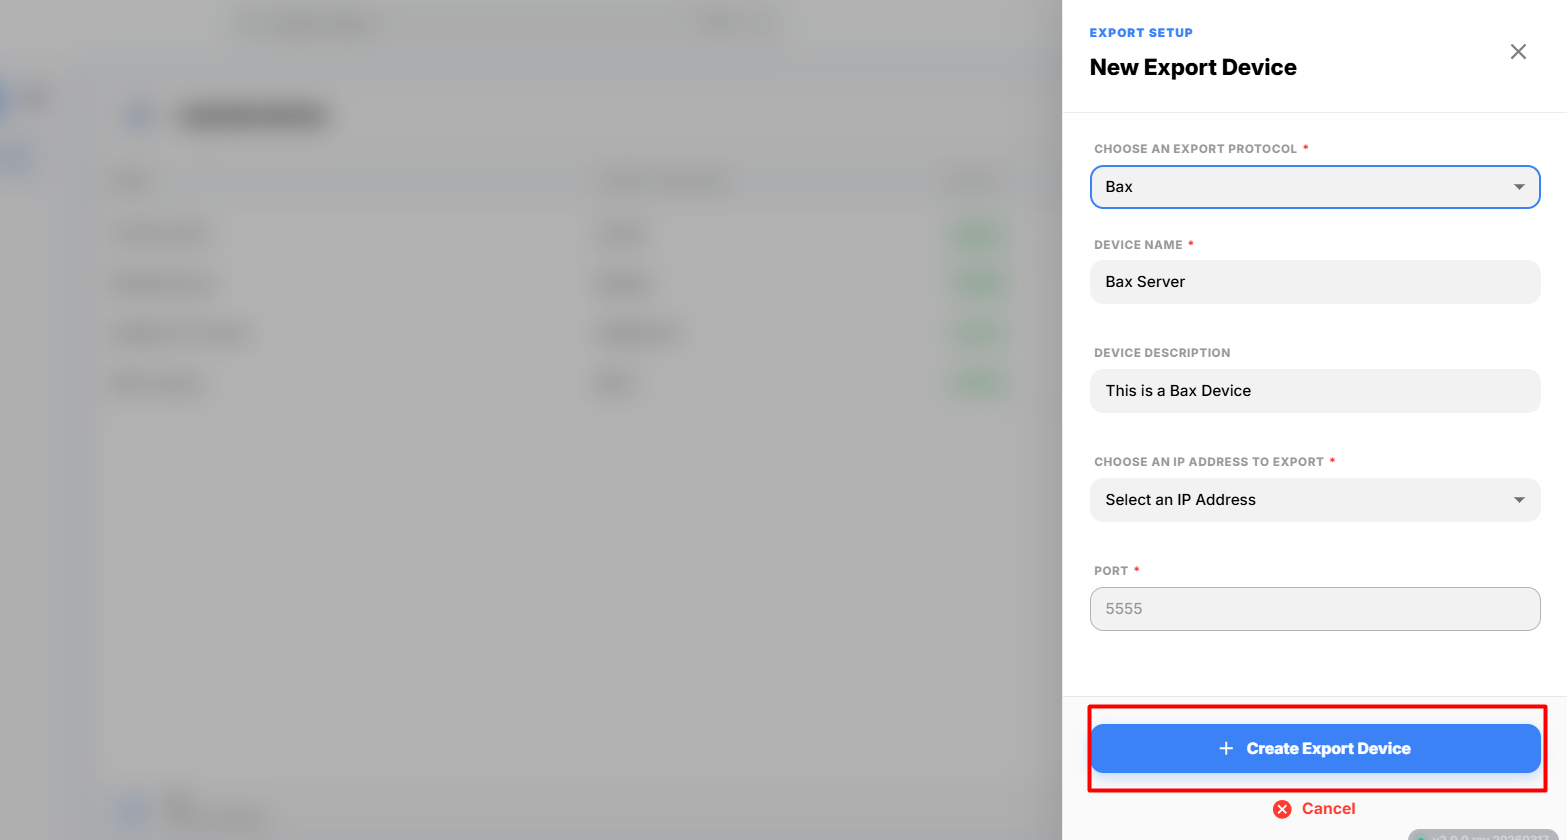
-
After successful creation, the network will be displayed as shown below.
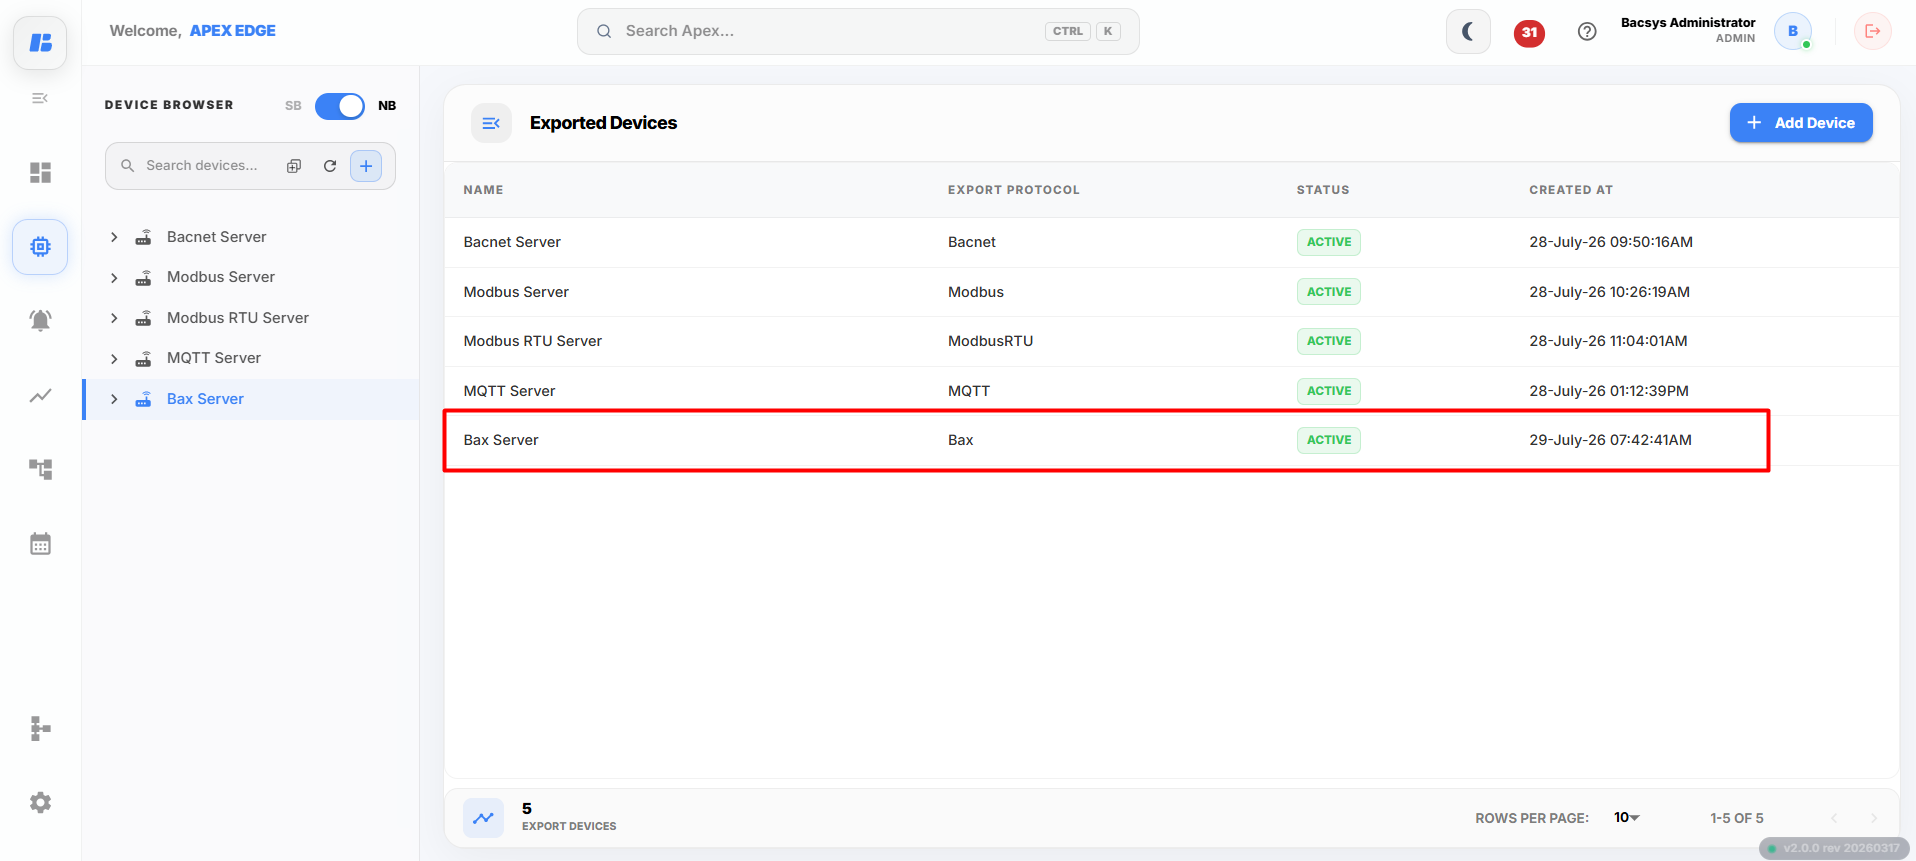
Discovering and Adding Devices
-
Click on the network you just created and then click the Add Device button.
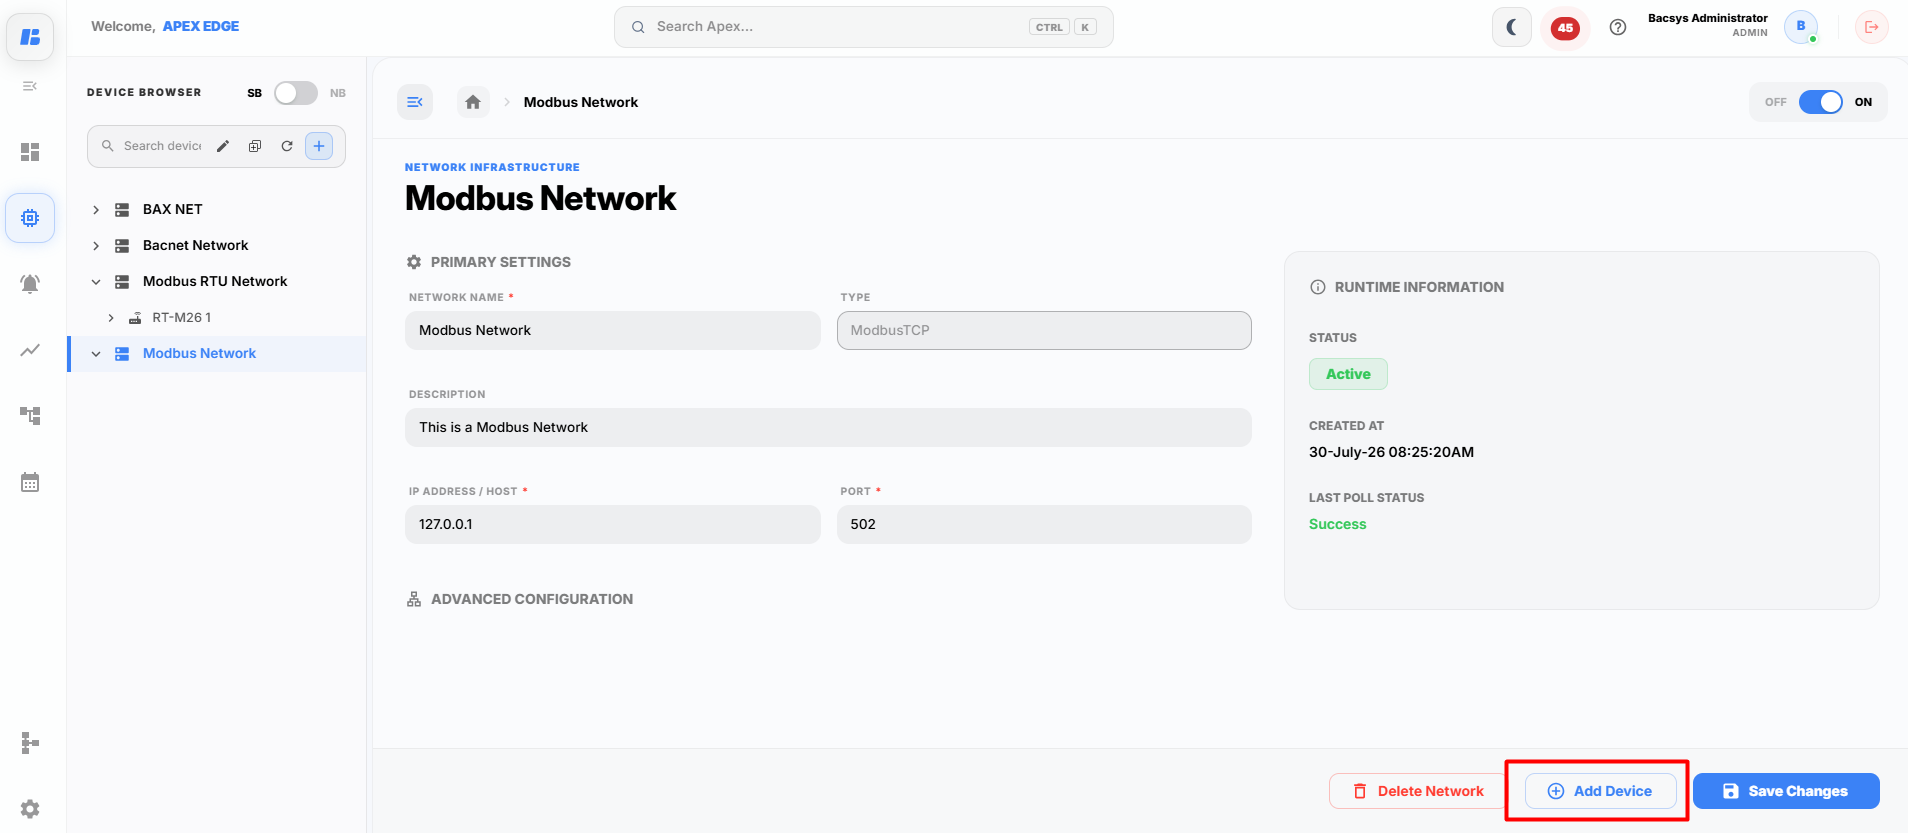
-
Open the device section and click the Discover Devices button to scan for available devices connected to the network.
Once the discovery process is completed:
- The available devices will be displayed in the discovery popup
- Select the devices you want to add
- Click the Add Device button to successfully add the selected devices to the platform
Discovering and Adding Points
-
Click on the created device and then click the Add Points button.
-
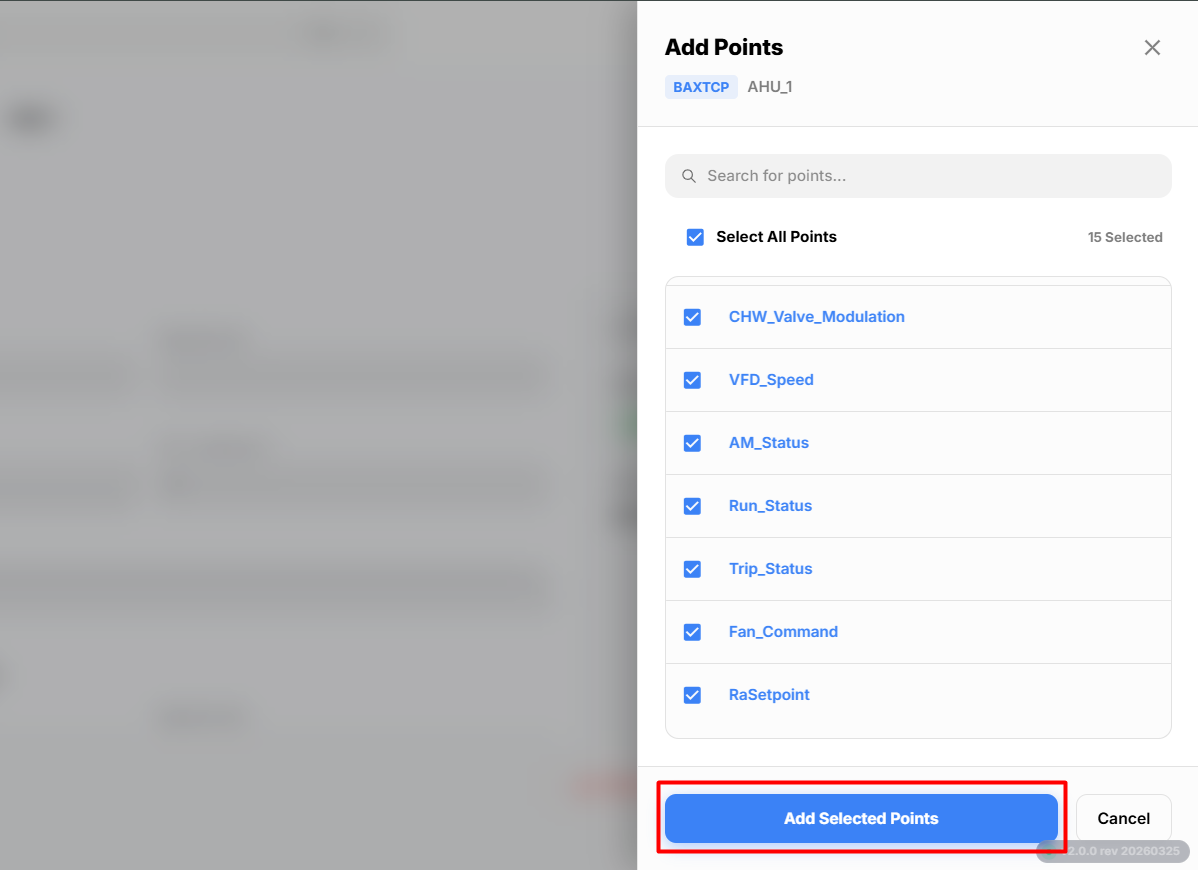
In the Points Discovery popup, select the points you want to add.
You can also click Select All Points to add all available points at once.
Finally, click the Add Selected Points button.
-
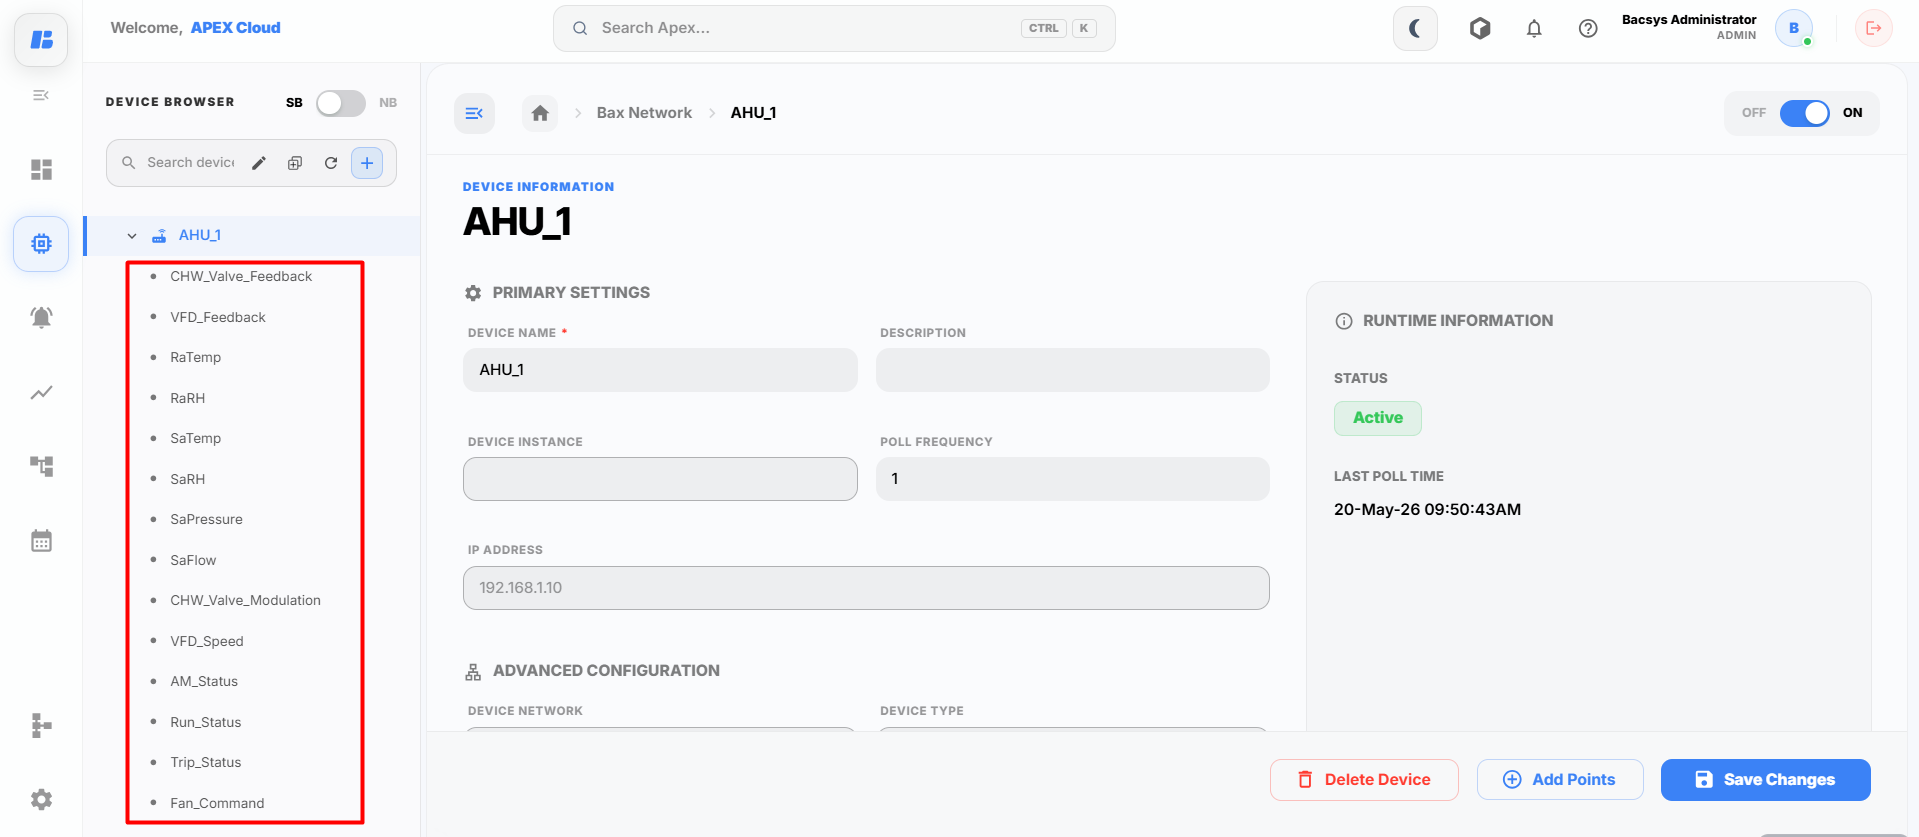
After adding, the points will be displayed as shown below.
Navigating Through Points
-
Click on any added point to view its properties and live values.
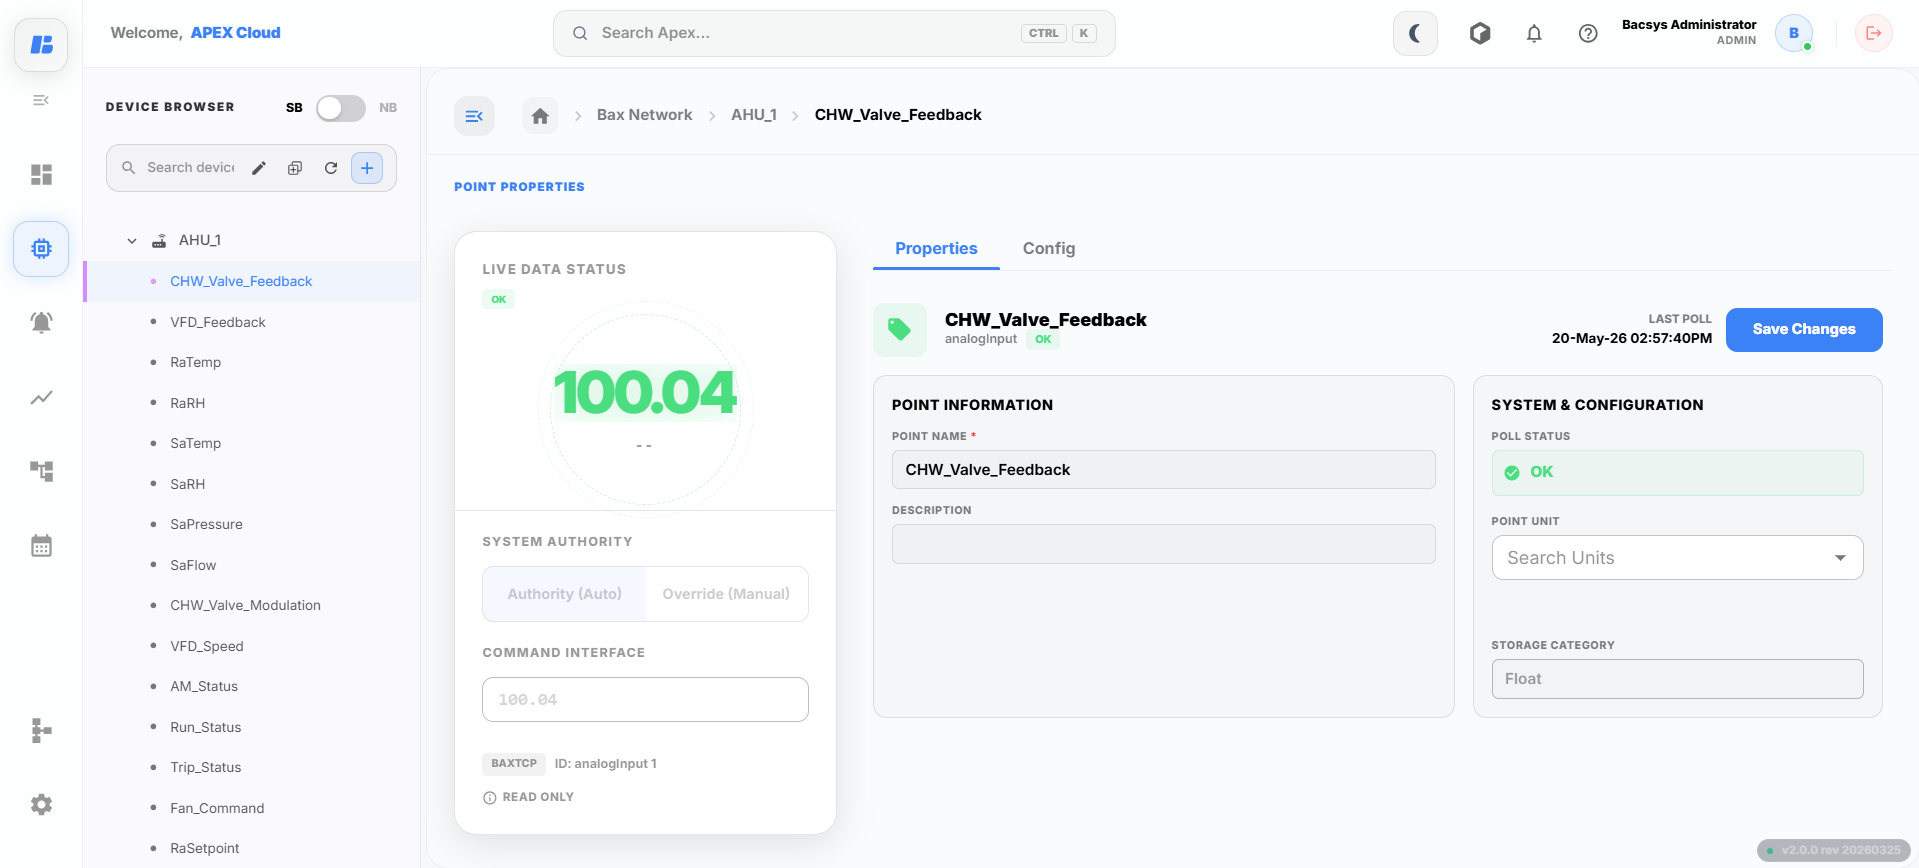
The point details page displays:
- Live value information
- Point properties
- Communication status
- Timestamp details
- Real-time monitoring data